


Small Business

Best UV Laser Engraver for Small Business: A Practical 2026 Buying Guide
A personalized-gift shop may already make excellent wooden signs and coated metal tags, yet struggle when a client requests fine lettering on a glass award or identification on a delicate plastic housing. Those jobs demand different material behavior and finish standards—and sometimes different equipment. The best UV laser engraver for a small business is the one whose documented capabilities match the products that business intends to sell. For a studio focused on fine, small-format marks, Monport's 6W UV configuration is worth evaluating. A workshop with more demanding, recurring marking work can compare the 10W configuration. A business offering dimensional artwork inside crystal needs to examine a dedicated 3D-capable configuration, such as the Monport UV Pro, rather than assume any UV marker will do the job. These are application-based starting points, not results of independent head-to-head testing. This guide explains the differences, the questions behind a viable business purchase, and the costs that rarely appear on a machine's headline price. Is a UV Laser Engraver Right for Your Small Business? Industrial UV marking commonly uses 355 nm light. On selected materials, its shorter wavelength can produce fine marks with less unwanted heat spread than some infrared processes. It does not make every material compatible or every marking job damage-free. The substrate, coating, equipment variant, and professionally validated process still determine the outcome. What Types of Businesses Benefit from UV Laser Marking? A studio decorating approved glass gift blanks, a parts supplier adding identification to specialty plastic housings, and a premium-awards company producing crystal keepsakes have different needs. What connects them is the value of controlled, detailed marking, rather than removing large volumes of material. Before allocating a budget, identify a product you cannot consistently offer through your existing supplier or equipment. That product—not a general claim about “engraving everything”—should drive your decision. See Monport's explanation of fiber laser versus UV laser applications for background on the distinction. Business need Technology direction Key limitation to assess Fine decoration on selected glass blanks Professionally validated UV surface marking Glass composition, stress, and desired finish Flat image inside an approved crystal blank Specifically documented 2D internal-marking configuration Blank compatibility and actual option supplied Volumetric artwork inside crystal Dedicated 3D subsurface system Verified 3D capability, supported blank dimensions Small codes on specialty plastic Suitable UV marking system Resin, additives, readability, and durability Large wood or acrylic sheet cutting Purpose-built CO2 cutting equipment Material type, bed size, and cut requirements Deep relief on metal Suitable fiber or MOPA metal-engraving process Required depth, metal grade, and finish When Is a UV Laser Not the Right Choice? If most orders involve large wooden signs or thick acrylic components, buying a compact-field UV marker will not replace a dedicated cutter. The same applies if your primary business is deep metal relief: a UV marker and a metal-engraving system solve different problems. There is a third option between buying UV equipment and turning down specialized jobs: outsourcing. If only a few customers request crystal awards each month, using a qualified production partner may allow a shop to validate demand and finished quality before committing to a dedicated professional laser facility. Best UV Laser Engravers for Small Businesses Compared The purchase decision starts with the kind of result you need: exterior marking, a flat image inside transparent material, or a dimensional internal design. Then compare the exact offered package. The Monport catalog provides three relevant product paths; they are not a scientifically ranked list of competing brands. Monport 6W UV: A Smaller-Output Professional Marking Option The Monport 6W UV Galvo Laser Engraver is an option to evaluate for small-format, fine-detail marking on compatible materials. Its current product description also discusses 2D internal engraving of approved transparent blanks. That function should be tied to the specific configuration being purchased, not generalized to all UV sources. This configuration may be relevant to a specialist studio working with personalized designs, identification text, or occasional approved crystal pieces. It is not automatically the least expensive installed system: its Class 4 status and facility needs still matter. Monport 10W UV: More Rated Output for Demanding Workflows The Monport 10W UV Galvo Laser Engraver has higher nominal laser output and a higher manufacturer-stated maximum scan speed than the 6W variant. Those specifications can justify a closer look for businesses with more recurring marking requests or broader process requirements, but do not establish faster completed orders or superior finish on a given blank without comparable testing. For customers requiring identification marks, the acceptance standard matters more than the highest scan-speed number. Contrast, placement, and durability must be documented against the actual component. Monport UV Pro: When the Product Requires 3D Crystal Engraving A dimensional portrait suspended inside a crystal block is not the same product as a frosted name on its outside. Monport markets its UV Pro configuration for 3D inner engraving in glass. This is the option to investigate when a business plans to sell verified 3D crystal artwork. The product page offers different model and accessory choices; the buyer needs confirmation that the quoted package includes the required 3D function. Monport UV Configuration Comparison Published specification or function Monport 6W UV Monport 10W UV Monport UV Pro UV wavelength 355 nm 355 nm 355 nm Output options 6W 10W 6W or 10W, depending on selection Manufacturer-stated maximum scan speed 10,000 mm/s 15,000 mm/s 10,000 or 15,000 mm/s by variant Commonly advertised nominal marking field 150 × 150 mm 150 × 150 mm Depends on supplied lens and selected internal-marking configuration Internal artwork positioning 2D features mentioned on the product page 2D configurations described Dedicated 3D capability advertised; confirm chosen option Best reason to investigate Suitable small-format marking and specific 2D needs Higher rated output for suitable recurring work Intended product is truly three-dimensional internal crystal artwork Important caveat Not a universal material guarantee Scan-speed claim is not an order time Confirm actual model, lens, included options, and approved blanks Source: Monport's published US product pages. This is a configuration comparison, not independently tested relative performance. Prices and included accessories change, so check the exact quote. Which Specifications Matter Most for Commercial Work? An advertised 150 × 150 mm marking field describes the optical region, not how many packaged products leave the workshop in an hour. Production also involves artwork approval, workpiece handling, inspection, and rejects. Likewise, an impressive maximum galvo speed says little about finished orders without a common material, design, and quality threshold. Compare offers using the same fields: complete configuration, intended mark type, lens and marking field, software entitlement, cooling requirements, safety provisions, warranty, and support. Ask vendors to document results on the specific blank your business intends to sell. What Can a UV Laser Engraver Mark for a Small Business? Two acrylic components can respond differently because of their formulations and finishes. Glassware can differ in stress and composition. Material names are useful for shortlisting technologies, but production acceptance is a question about a particular product and required result. Glass and Crystal Products For presentation pieces, the desired result may be readable exterior lettering or an intentional frosted-looking image. The acceptance criteria should include clean boundaries, consistent contrast, and a surface that meets the customer's appearance requirements. Internal crystal designs require separately verified equipment capabilities and suitable blanks. No shop should promise crack-free results on every glass object. Plastics and Acrylic Accessories A branded plastic housing might need a small code that stays readable after normal handling. A decorative acrylic accessory might instead be judged by color and visual finish. Additives, colorants, coatings, and exact resin chemistry can change outcomes; a sample on one product does not certify an entire material category. Monport's UV engraving materials guide provides application ideas, but not blanket approval for every formulation. Ceramics and Specialized Product Marking Decorative ceramic surfaces can vary in glaze and coating. For industrial identification, an attractive sample alone may be inadequate if labels must meet a customer's durability, readability, or traceability requirements. Such jobs call for documented professional quality assurance rather than appearance-based assumptions. Material Example commercial product Desired mark Acceptance question Main limitation Glass Personalized presentation glass Readable decorative exterior mark Is the finish uniform and structurally acceptable? Composition, condition, and internal stress Crystal Commemorative award Surface, 2D internal, or 3D internal effect Does the supplied system create the requested type of artwork? Optical and configuration-specific requirements Acrylic Small branded accessory Fine logo or lettering Are contrast and edge appearance acceptable? Acrylic formulation and coating Engineering plastic Product housing Small identification text or code Is it readable and suitably durable? Resin chemistry, fillers, and additives Ceramic Specialty gift or identification part Surface decoration or label Does the result meet the substrate's finish standard? Glaze and product-specific construction Original before-and-after photographs, identified by machine variant and actual blank, would be valuable evidence here. This article does not claim to report original Monport material tests. What Is the Difference Between 6W and 10W UV Lasers? UV wattage is an output specification, not a quality grade. The 6W and 10W Monport versions share a published 355 nm wavelength and a commonly listed 150 × 150 mm field, while the 10W version has higher rated output and a higher maximum stated scan speed. The official specification table describes manual focus and water cooling for these configurations. Question 6W UV 10W UV Business interpretation Rated laser output 6W 10W Output alone does not decide finish quality Claimed maximum scan speed 10,000 mm/s 15,000 mm/s Not comparable to time per fulfilled order Published marking field 150 × 150 mm 150 × 150 mm Check actual part dimensions and geometry Focus / cooling, per standard comparison Manual / water-cooled Manual / water-cooled Confirm installation and selected package Included software, per product specifications BslAppSimple BslAppSimple LightBurn requires a separate entitlement where compatible For a low-volume premium-gift studio, finish approval and sample consistency may matter more than maximum scanning speed. A professional identification supplier may value production repeatability, documented code readability, and service continuity. Neither business can choose confidently from wattage alone. What Is the Difference Between Surface Engraving and 3D Crystal Engraving? A UV system can be marketed for several visually distinct applications. The language can be confusing because the same manufacturer may offer surface marking, 2D internal artwork, and 3D internal engraving as separate functions or configurations. Result type Where the visible design appears Product example What to verify Surface UV marking On the outside of a compatible blank Logo on a glass keepsake Specific glass suitability and desired surface appearance 2D internal engraving Flat image located beneath the surface Flat internal image in approved crystal Explicit 2D internal support and compatible blanks 3D subsurface engraving Three-dimensional internal arrangement Volumetric figure inside crystal Dedicated 3D function, supported dimensions and materials Monport's standard 6W UV product listing includes 2D inner-engraving descriptions, while its UV Pro listing promotes 3D capability. Therefore, it would be inaccurate to describe every standard UV variant as surface-only—or to assume every package can produce volumetric images. For a crystal-awards business, the intended artwork should be specified before the equipment is selected. Which UV Laser Features Matter in a Professional Workshop? A commercial purchase must account for the complete environment, not only the marking head. The specifications that matter are those that allow a qualified professional operation to achieve the promised product quality and maintain service commitments. Work Area, Software, and Compatibility Published Monport specifications list BslAppSimple as included, while LightBurn is not included as standard in the cited comparison. The precise software entitlement and controller compatibility need confirmation for the actual version. LightBurn's laser-types documentation explains that Galvo support typically depends on a compatible controller and an appropriate license. A seller's generic statement that software is supported should not be mistaken for a guarantee about every firmware or model. Cooling, Maintenance, and Technical Support Request written information identifying what equipment is included in the quoted configuration, what periodic professional servicing is required, and how replacement parts and technical support are supplied. If the vendor lists a component service-life figure, it is not a promise of uninterrupted production. Warranty length, excluded parts, and responsibility for service also belong in the cost review. Professional Safety and Facility Requirements The Monport UV specifications classify the discussed systems as Class 4. The FDA's laser classification guidance and OSHA's workplace laser hazard information describe serious risks from direct and reflected exposure and potential fire hazards; OSHA also identifies the need to assess non-beam hazards in professional workplaces. Appropriate safeguarding, facility assessment, training, and qualified supervision are essential. A small desktop footprint does not remove those requirements, and “cold” marking does not mean the laser itself is harmless. What Products Can Small Businesses Create With UV Laser Technology? Material compatibility only matters commercially when it enables an order a workshop can reliably deliver. The three scenarios below are illustrative business models, not verified Monport customer case studies. Personalized Awards and Corporate Gifts A supplier of glass presentation pieces might offer a client's logo, recipient name, and event date across a small order. The challenge is consistent legibility and appearance from piece to piece. A shop expanding into volumetric crystal portraits is selling a different product and needs corresponding internal-engraving capability, not simply a more powerful conventional surface marker. Branded Consumer Accessories A creative studio may explore personalized phone-case components, small acrylic inserts, or other approved accessories. Here the hardest question is often material consistency between suppliers: an attractive initial proof cannot guarantee the same finish on every resin or coating. Project ideas can be developed with reference to Monport's custom phone-case guide, while exact compatibility and profit assumptions must be checked separately. Small-Format Professional Identification A supplier adding part numbers or codes to approved plastic enclosures needs to define readability and durability, not only appearance. Monport's UV marking guide for electronics and plastic components describes examples of this type of work; it is not a certification for every PCB or engineered plastic. In commercial production, acceptable quality is set by the customer's actual specification. How Much Does a UV Laser Engraving Business Really Cost? The machine's advertised price is only part of the investment. A serious comparison includes the professional facility, protective systems, extraction where applicable, cooling, software, qualified service, blank materials, inspection, potential rework, packaging, and the cost of unavailable production time. Initial Investment vs. Total Ownership Cost Cost category What a small business should budget or confirm Equipment and approved facility Complete professional installation rather than just machine price Software and licensing Included utilities, controller compatibility, separate licenses Cooling, ventilation, and protective systems Exact professional facility requirements and included accessories Maintenance and technical support Replacement components, service obligations, warranty exclusions Product preparation and inspection Blank stock, artwork review, reject allowance, quality checks Sales and fulfillment Packaging, transaction fees, delivery, returns Contribution per Order and Break-Even Thinking Contribution is the money remaining from a sale after variable costs, not net profit. Consider this simplified hypothetical gift order: Illustrative item Amount Selling price $40 Blank and packaging $13 Direct labor $9 Selling and payment fees $4 Contribution before fixed costs $14 This example is for arithmetic only; it is not Monport customer data or a measured production cost. If hypothetical monthly fixed expenses attributable to the service were $560, the business would need 40 orders at $14 contribution each merely to cover those fixed expenses. That still would not recover its initial capital expenditure. Real demand, quality failures, taxes, financing, and other costs must be considered. When Does Outsourcing Make More Sense? A shop with occasional specialized requests may be better served by a qualified subcontractor. Outsourcing helps evaluate real selling prices, customer feedback, and rejection rates without first building a dedicated Class 4 laser workplace. In-house equipment becomes easier to justify when recurring demand and its economic contribution can be documented against the full cost of professional ownership. This distinction between capability and a sustainable offer also appears in Monport's guide to laser-engraving business economics. A product's technical feasibility does not establish that enough paying customers exist to support the investment. Final UV Laser Purchasing Checklist Before approving an industrial system for a qualified workplace, a buyer should be able to answer these questions: Is the exact material and intended mark type documented for the proposed equipment configuration? Are surface marking, 2D internal artwork, and 3D subsurface functions clearly distinguished? Does the quoted system cover the real part dimensions, with the intended lens and accessories? What software is included, and which controller and license are required for the proposed workflow? Have professional laser safety, facility safeguards, service, and maintenance been evaluated? Do recurring orders justify ownership more convincingly than outsourcing? Unanswered questions are procurement tasks, not reasons to assume the advertised result will be achievable. Frequently Asked Questions About UV Laser Engravers for Small Businesses Is a UV Laser Engraver Worth It for a Small Business? It can be, when there is recurring demand for products that require its specialized capabilities and the business has access to an appropriately assessed professional facility. The case should be based on actual product quality, cost and demand rather than advertised wattage or theoretical speed. Can a UV Laser Engraver Mark Glass and Crystal? Specific professional UV systems can process compatible glass and crystal blanks, but outcomes vary with construction and the intended finish. A surface decoration, flat internal image, and volumetric internal design are separate applications. Are 6W and 10W UV Lasers Equally Precise? Rated output alone does not establish precision. Monport lists different maximum scanning speeds, but a fair finish-quality comparison would require documented results on the same material, artwork, and acceptance criteria. Can Every UV Laser Make 3D Crystal Art? No. A product description that mentions UV light or 2D internal images does not by itself establish volumetric 3D capability. Verify the exact machine variant and quoted options for the crystal product you intend to supply. Is UV Better Than Fiber for Metal Marking? Not categorically. Conventional fiber and MOPA fiber systems commonly serve metal engraving and identification needs, while UV is often evaluated for certain fine-feature or material-sensitive tasks. The correct choice depends on substrate, required result, and documented compatibility. Should a Small Business Outsource UV Marking First? If demand is infrequent or product requirements are still uncertain, outsourcing to an appropriately qualified supplier can clarify margins and quality expectations before a workshop undertakes the expense and responsibilities of specialized equipment. Final Thoughts: Choosing the Right UV Laser Engraver for Your Business For small-format, fine-detail work, the Monport 6W UV is a relevant configuration to assess. A business considering higher rated output can compare the 10W UV against its own validated jobs; it should not assume a fixed improvement in finished-product throughput. For actual dimensional crystal artwork, investigate a configuration explicitly documented for 3D internal engraving, such as the Monport UV Pro. Start with the product your customers expect, then confirm material evidence, exact equipment options, professional safety requirements, support, and total ownership cost. Businesses ready to compare published configurations can consult the Monport UV laser collection and request documentation appropriate to their intended professional application.
Read more
From Hobby to Business: How to Scale a Laser Engraving Business With a CO2 Laser
A laser engraver can turn an idea into a finished product. Building a business around it takes more: customers who want the product, prices that cover the work, and a production process you can repeat when orders grow. If you are moving from occasional projects to paid orders, start by testing one product and tracking what each order actually takes. Then use those records to decide whether to refine your workflow, add capacity, or move to a CO2 laser engraving machine that better fits your materials and order sizes. Start With a Product Customers Want Laser engravers can make personalized signs, gifts, event items, displays, and branded products. The range of possibilities is useful, but launching too many products at once makes it harder to manage materials, pricing, and production. Choose one or two products you can make consistently. Identify who is most likely to buy them, what problem or occasion they address, and where those customers shop. For product inspiration, see these CO2 laser product ideas. Before buying a large stock of blanks, make a small sample run. Record inquiries, paid orders, requested customizations, and production time. Compliments and social media reactions can be encouraging, but completed purchases provide stronger evidence of demand. Calculate the Cost of Each Order Material cost is only one part of an order. Include design and file preparation, setup, machine operation, hands-on finishing, packaging, selling fees, and expected waste or rework. The SBA startup cost guidance can help you separate one-time setup expenses from recurring business costs. A useful starting formula is: Order contribution = selling price − materials − labor − machine allocation − packaging − selling fees − expected rework Here is an illustrative example, not an industry benchmark: suppose a personalized item sells for $28. The blank costs $4.50, hands-on work takes seven minutes at an assumed labor rate of $20 per hour ($2.33), machine allocation is $2, packaging is $0.80, and selling fees are $1.20. The estimated variable cost is $10.83, leaving $17.17 before fixed overhead, advertising, taxes, and other expenses. Use your own costs and actual production records. To estimate a break-even point, divide fixed costs for the period by the contribution per item or order. The SBA break-even guide explains the basic calculation. For a custom order, state what the quote includes: design work, revisions, material, quantity, and turnaround. Repeat orders may require less design and setup time, but confirm the approved file and specifications before production. When Does a CO2 Laser Make Sense for Your Business? A CO2 laser may fit a shop that works with compatible materials such as wood and acrylic, or needs a different work area and workflow from its current machine. Compatibility depends on the material, machine, and process, so check the manufacturer’s documentation before production. Monport’s laser machine range includes different machine types and configurations to compare against your work. Do not choose a machine based on power or advertised speed alone. First identify what is limiting your current production: the work area, repeated positioning, file preparation, material handling, finishing, or the number of machine hours available. Also budget for the complete setup. Depending on the machine and workspace, expenses may include ventilation or filtration, cooling, air assist, software, electrical work, materials, maintenance, and safe operating space. Follow the equipment manual and review relevant OSHA laser safety guidance when planning a work area. Build a Production Workflow You Can Repeat A repeatable process makes it easier to quote orders, meet deadlines, and spot mistakes before they affect a whole batch. Confirm the order: Check spelling, artwork, material, dimensions, quantity, and delivery date. Prepare the file: Save the approved design and record the settings and material used. Test when needed: Run a sample before a large or unfamiliar job. Group compatible work: Batch items that share material and settings, while keeping each customer’s order clearly identified. Inspect and pack: Check placement, finish, and personalization against the approved order before shipping. Track the time spent on design, setup, machine operation, finishing, and packing. This shows whether a job is slow because of machine capacity or because another step in the process needs attention. Monport’s guide to batch engraving and small business production discusses one workflow approach for repeat jobs. Decide What to Fix Before You Buy More Capacity More capacity does not always mean another machine. Use your order log to connect the recurring problem with a practical response. Recurring signal What to check first Possible next step Jobs repeatedly do not fit the work area Product dimensions and layout Compare machines with a suitable work area or revise product sizes Setup and positioning consume too much time File preparation, jigs, and order grouping Standardize the workflow or evaluate camera and batch features Deadlines slip during busy periods Machine hours versus hands-on labor and finishing time Reorder the production queue, limit rush jobs, or plan additional capacity Occasional orders exceed your current setup How often these orders occur and their margins Consider outsourcing peak work before making a permanent investment Consider an upgrade when the same constraint appears across multiple orders and affects delivery, quality, or work you can accept. Compare workflow improvements, outsourced production, a more suitable machine, and an additional machine. For broader planning, use Monport’s laser engraving startup cost breakdown as a checklist, then replace any estimates with your own figures. What a 70W CO2 Laser Can Support in a Small Workshop A 70W CO2 laser is one option to evaluate when orders call for a larger work area or repeatable batch production. The Monport MEGAS 70W product page lists a 700 × 350 mm work area, an 8MP camera, autofocus, batch-fill capability, and conveyor compatibility. These features may suit certain layouts and production tasks, but actual output depends on the product, material, settings, file preparation, and finishing process. Review the current Monport MEGAS 70W CO2 laser specifications and included configuration against the jobs you expect to produce. You can also compare it with the Monport Reno 65W CO2 laser and other Reno Series machines if work area, controls, or setup needs differ. For setup and compatibility details, check the Monport download center for manuals and product resources. Before processing a new material, verify its suitability with the manufacturer and test it using the equipment instructions. Grow Sales Through Repeatable Offers Marketplaces can help you test product listings, while local businesses, event planners, schools, clubs, and retailers may be potential sources of repeat work. Start outreach with a few samples that match the customer’s needs and a clear description of materials, customization, quantities, and lead times. For each completed order, save the approved design, material, settings, quantity, and production notes. A simple reorder process makes repeat work easier to quote and prepare. If you are still comparing business models and product types, Monport’s home laser engraving business guide and laser engraving business overview offer related reading. Common Mistakes to Avoid Launching too many products: Begin with a manageable range and use paid orders to guide expansion. Pricing only the blank: Include labor, setup, fees, packaging, machine allocation, and rework. Confusing machine speed with order capacity: Account for preparation, loading, finishing, inspection, and packing. Accepting a large run without a process check: Confirm the file, material, and sample result before producing the full quantity. Upgrading without identifying the constraint: Choose equipment features that address a recurring production problem. Frequently Asked Questions Can you start a laser engraving business from home? Some operators work from home, but the space must suit the machine and local requirements. Check ventilation, electrical needs, workspace, fire safety, noise, and zoning rules before setting up. The laser material and machine guide can help with product research, but the manual for your exact machine should guide setup and use. How do I know if my laser engraving business is ready to scale? Look for repeat orders and a recurring constraint that affects delivery, quality, or the work you can accept. Track actual job time and costs first. If the same bottleneck continues across orders, compare process changes and equipment options before investing. How should I compare CO2 laser engravers for a small business? Compare compatible materials, work area, required accessories, software, setup needs, support resources, and the types of orders you plan to produce. Monport’s MEGAS 70W small business review provides another product-specific reference, but your own materials and workflow should determine the final choice. Turn Your Next Order Into Better Business Data Moving from hobby projects to a business starts with a focused product, tested customer interest, and pricing based on the work involved. Scaling means improving the parts of production that repeatedly limit orders—not automatically buying more equipment. Choose one product to test, record its full production time and costs, and review the results after each order. When a clear bottleneck remains, compare practical workflow changes with the capabilities of a machine such as the MEGAS 70W CO2 laser engraver.
Read more
How to Start a Sign Business: A Step-by-Step Guide for Beginners
Starting a sign business can be as simple as producing personalized wooden plaques from a home workshop or as complex as operating a commercial shop that designs, manufactures, and installs large exterior signs. The opportunity lies in the variety: businesses need logos and door signs, homeowners buy personalized décor, and weddings and events create steady demand for custom signage. Signs can be made with vinyl cutters, printers, CNC routers, hand tools, and laser engraving machines. For beginners working with wood and acrylic, a laser can be especially useful because it can cut detailed shapes, engrave text and logos, and reproduce a design consistently in small batches. This guide explains how to start a sign business step by step—from choosing a niche and estimating startup costs to selecting equipment, pricing orders, finding customers, and expanding production. 1. Choose Your Sign Business Niche “Custom signs” is too broad to be a useful starting offer. A focused niche makes it easier to choose equipment, buy materials, create samples, write product listings, and explain why a customer should hire you. Custom Business and Office Signs Small companies regularly need reception logos, office door signs, room labels, nameplates, opening-hours signs, QR-code displays, and branded wall décor. Acrylic is popular for polished, modern interiors, while engraved wood can suit cafés, boutiques, salons, and hospitality businesses. Business signage can lead to higher-value orders because one client may need a coordinated set rather than a single product. A reception logo can turn into door plates, desk signs, directional signs, and repeat orders for new employees. The tradeoff is that commercial buyers may expect proofs, exact brand colors, reliable deadlines, invoices, and installation guidance. Beginners should distinguish decorative indoor signs from regulated exterior, illuminated, structural, or accessibility signage. Those projects may involve permits, building codes, electrical work, engineering, licensed installation, or accessibility standards that vary by location. Personalized Wooden Signs Wooden signs are approachable for a home-based sign business. Popular products include family-name signs, nursery plaques, address markers, porch signs, recipe boards, welcome signs, and seasonal home décor. They also allow several production methods. A laser can engrave lettering directly, cut layered elements, or create stencils and decorative shapes. Paint, stain, raised lettering, frames, and hanging hardware make it possible to create distinct price tiers from the same basic design. Wood is not perfectly uniform, so grain, glue pockets, moisture, coatings, and plywood construction can affect engraving and cutting. A reliable sign maker tests each material batch and shows customers that natural variation is part of the finished product. Wedding and Event Signs Wedding welcome signs, table numbers, seating charts, bar menus, place names, cake toppers, and directional signs can be sold individually or as coordinated packages. Acrylic and painted wood are both widely used, and personalization gives customers a clear reason to pay more than they would for mass-produced décor. Event work can be profitable, but deadlines are firm. A delayed birthday sign is inconvenient; a delayed wedding seating chart can damage the client relationship. Before accepting large packages, confirm proof-approval dates, material availability, revision limits, production time, delivery, and what happens if the guest list changes. Which Sign Business Niche Should Beginners Choose? Start with one customer group and one repeatable product family. Indoor wooden name signs, small acrylic business signs, or wedding table décor are easier to standardize than a catalog that includes everything from metal plaques to illuminated storefront signs. Compare each niche using four questions: Is there visible demand? Search local businesses, online marketplaces, wedding vendors, and community groups. Can you produce it consistently? Consider artwork complexity, finishing, assembly, packaging, and installation—not only laser time. Does it fit your equipment? Measure the largest normal sign and confirm material compatibility before buying a machine. Can you reach the customer? A strong local network favors office signs; good product photography and shipping skills favor online personalized signs. For most beginners, the best niche is not the one with the highest advertised selling price. It is the one that can be produced repeatedly with manageable materials, equipment, and customer service. 2. Research Your Market and Target Customers Market research keeps you from building a catalog around products people admire but do not buy. Identify Your Ideal Customers Choose a primary customer before designing the first collection: Local businesses may need logos, office signs, menu boards, door signs, and recurring nameplates. Homeowners often buy family signs, address plaques, nursery décor, and seasonal pieces. Wedding planners and event professionals value coordinated packages, dependable deadlines, and trade-friendly ordering. Online personalized-gift buyers search by recipient, occasion, material, style, and delivery date. Talk to potential buyers rather than relying only on search volume. Ask local shop owners what they currently order, what frustrates them, how often signs change, and whether installation matters. For online products, review customer questions and complaints. Repeated concerns about difficult mounting, poor packaging, inaccurate colors, or slow proofs can reveal a better offer. Analyze Your Local Competitors Create a simple spreadsheet for ten nearby and online competitors. Record their product range, sizes, materials, prices, turnaround times, review themes, customization options, and visual style. The goal is not to undercut every price. Look for gaps such as: Faster local pickup for small business signs Better proofing and brand-file support Coordinated wedding sign packages More size or mounting options Clearer material and installation information Small minimum quantities for office nameplates A narrow, well-explained service often competes better than a large catalog with unclear quality. 3. How Much Does It Cost to Start a Sign Business? The cost to start a sign business depends on what you make and what production you keep in-house. A home-based laser sign business can begin with a few thousand dollars, while a commercial shop with printing, routing, fabrication, vehicles, and installation equipment may require tens of thousands. Essential Startup Expenses Plan for more than the main machine. A realistic budget may include: Sign-making equipment and accessories Wood, acrylic, blanks, adhesives, paint, and mounting hardware Design and machine-control software Ventilation, cooling, electrical work, and safety equipment Worktables, storage, measuring, and finishing tools Business registration, insurance, bookkeeping, and applicable permits Website, photography, samples, packaging, and initial marketing Cash for rework, replacement materials, and slow early months Starting Small vs. Opening a Full Sign Shop Business model Illustrative startup range Typical approach Main limitation Lean home-based test setup 2, 000–5,000 Narrow wood or acrylic range; online or local sales Limited size and production capacity Versatile home or small workshop 5, 000–12,000 Better laser, extraction, materials, finishing, and inventory Space, utilities, and staffing Small commercial sign shop 15, 000–50,000+ Multiple processes, walk-in clients, larger jobs Higher rent, insurance, equipment, and compliance costs These are planning ranges, not quotations. A basic vinyl business may start for less, while a shop producing large outdoor or illuminated signs can cost much more. How to Start a Sign Business on a Budget Begin with a limited product range that uses the same materials and workflow. Five strong products are more useful than fifty untested listings. Use standard sizes, offer a controlled set of fonts and colors, and charge separately for extensive custom design. Outsource work that requires expensive equipment or certification. A beginner might design and sell a large printed banner but use a trade printer for production. The same approach can work for powder coating, metal fabrication, electrical components, or oversized cutting. Add capacity only after orders reveal a bottleneck. If customers keep asking for larger acrylic logos, a bigger laser may be justified. If most time is spent answering messages and preparing proofs, another machine will not solve the actual problem. 4. Choose the Right Equipment for Your Sign Business Equipment should follow the product plan. Buying a machine first and searching for something to sell afterward often leads to unused features or products that do not fit the working area. Essential Sign-Making Tools Vinyl cutter: Useful for window lettering, vehicle graphics, decals, stencils, and applying text to sign blanks. Laser engraving machine: Cuts and engraves detailed wood and acrylic components and supports repeatable personalization. CNC router: Suited to larger or thicker wood, plastics, composites, and dimensional sign work, depending on the machine and tooling. Design software: Used for vector artwork, typography, layouts, cut paths, and production files. Finishing tools: Sanding equipment, clamps, squares, calipers, paint supplies, adhesives, drills, cleaning tools, and mounting templates. You do not need every process in-house at launch. Choose the tool that produces the core offer, then build supplier relationships for the rest. Why Use a Laser Engraving Machine for Sign Making? A laser is valuable for custom sign making because one digital file can control both detailed engraving and precise cutting. It can reproduce a logo, name, border, or set of table numbers with less manual variation than hand cutting. That makes lasers particularly useful for: Engraved wooden signs and plaques Layered wood or acrylic lettering Acrylic business logos and room signs Wedding table numbers and place names Small-batch office nameplates Templates, jigs, and alignment aids used in assembly The business advantage is repeatability. Once a design, material, settings, and fixture are tested, a shop can produce later orders with less setup and a more predictable result. Which Laser Engraving Machine Is Best for Sign Making? Laser type Best-matched sign materials Good applications Important limitation CO2 laser Wood, acrylic, paper, leather, glass, and selected coated materials Wooden signs, clear or colored acrylic signs, layered lettering, event décor Not designed for direct deep engraving of bare metal Diode laser Wood, leather, coated surfaces, and some opaque acrylics Small wooden signs, light engraving, entry-level product testing Common blue diodes struggle with clear and many light-colored acrylics; cutting is generally slower Fiber laser Stainless steel, aluminum, brass, and other compatible metals Metal nameplates, asset tags, durable metal marking Generally unsuitable for wood signs or clear acrylic cutting For a beginner focused on wood and acrylic signs, a CO2 laser is usually the most versatile choice. The required power and bed size depend on material thickness, the largest sign component, and daily order volume. A compact 40W machine can be enough for small plaques and proof-of-concept products. A desktop model such as the Monport Reno65 Pro 65W CO2 laser, with a 24 × 16-inch work area, is better suited to larger components and a broader small-business catalog. For shops that value camera placement, autofocus, and batch workflow, the Monport MEGAS 70W CO2 laser offers a 700 × 350 mm work area and production-oriented automation. Do not choose by wattage alone. Compare usable working area, pass-through or conveyor capability, cooling, exhaust, focus method, camera accuracy, controller and software compatibility, delivery requirements, support, and replacement parts. The laser cutter for signage buying guide provides a deeper equipment checklist. Other Equipment and Safety Essentials Laser work produces heat, smoke, particles, and fumes. Use effective ventilation or fume extraction, follow the manufacturer’s cooling and electrical requirements, keep the machine supervised, and maintain suitable fire-safety equipment. Air assist can improve cut quality and reduce charring or flare-ups on many materials. Only process materials confirmed as laser-compatible. Never laser-cut PVC or vinyl, and do not assume an unfamiliar plastic is safe because it resembles acrylic. Check the supplier’s documentation and safety data before testing. Plan for finishing as carefully as cutting. Clean edges, accurate assembly, polished surfaces, secure mounting hardware, and protective packaging are part of the product customers judge. 5. Set Up Your Sign Business Register Your Business and Check Local Requirements Choose a business structure, register the business and any trade name as required, obtain the appropriate tax identification, and check local licenses, permits, insurance, sales-tax, and zoning obligations. Requirements depend on your location, business activities, and whether customers visit the property. The U.S. Small Business Administration’s launch guidance notes that zoning rules can still apply to home-based businesses and that many businesses need tax IDs, licenses, or permits. Confirm requirements with state, county, and city authorities rather than copying another seller’s setup. Projects involving exterior installation, illuminated signs, structural mounting, road visibility, or accessibility may bring additional rules. Know where your responsibility ends if a client or licensed installer handles installation. Set Up a Safe and Efficient Workspace A home workshop can reduce overhead, but it still needs adequate space, ventilation, electrical capacity, material storage, fire safety, and separation from children or pets. Check rental, homeowners association, insurance, and zoning restrictions before installation. Organize the shop around the order flow: Material receiving and storage Design and proofing Cutting or engraving Cleaning, painting, and assembly Quality control Photography and packaging Keeping raw materials away from finished products reduces scratches, dust, and packing mistakes. Find Reliable Material Suppliers Do not choose materials only by the lowest sheet price. Compare flatness, consistency, protective masking, color accuracy, thickness tolerance, and availability. Cast acrylic is popular for engraved signs because it can produce a frosted engraving effect, while laser-compatible plywoods are made with construction and adhesives more suitable for laser processing. Order samples before committing to volume. Record the supplier, product code, batch, thickness, tested settings, finish, and waste rate. Also source adhesives, standoffs, hanging hardware, spacers, LED bases, paints, and packaging that match the final product—not just the laser step. 6. Create Your First Custom Signs with a Laser Engraving Machine Step 1 – Design Your Sign Create the text and artwork as clean vector paths. Confirm spelling, dates, logo proportions, dimensions, hole positions, kerning, minimum feature size, and mounting method. Convert fonts to paths only after saving an editable master file. Send a proof that shows size, material, color, and personalization. Require written approval before production, and state how many revisions are included. A good proofing process prevents more waste than a faster machine can recover. Step 2 – Choose the Right Material Choose material according to appearance, location, cleaning needs, mounting, and laser compatibility. Wood creates a warm, handmade look but varies naturally and may require sanding, masking, sealing, staining, or painting. Acrylic gives a clean, modern finish and supports layered construction, color combinations, stand-offs, and edge-lit designs. Coated or anodized metal can be marked by compatible machines, while direct engraving of bare metal generally requires a fiber laser rather than a standard CO2 system. Ask whether the sign is for indoor or outdoor use. Weather exposure, UV light, moisture, temperature, and mounting conditions affect material and adhesive selection. Step 3 – Prepare Your Laser Engraving Settings Start with manufacturer guidance, then test the actual material. Create a labeled test grid for speed, power, frequency or interval where applicable, focus, and air assist. Check the front, edge, and back—not only the most attractive surface. Save approved settings by exact material and thickness, but test a new batch before a customer order. A file labeled simply “3 mm plywood” is not enough if two suppliers use different veneers or adhesives. Step 4 – Engrave, Cut, and Finish the Sign Secure the material, confirm focus and origin, check exhaust and cooling, and run the job under supervision. Afterward, inspect for incomplete cuts, excessive charring, haze, scratches, dimensional errors, or missing details. Remove masking, clean the surface, sand or polish where appropriate, apply paint or fill, assemble layers, and install the hardware. Compare the finished sign with the approved proof and photograph it before packaging. Process photographs—design, material test, cutting, assembly, and final inspection—also provide strong evidence of craftsmanship for product pages and social media. 7. How to Price Your Signs and Make a Profit Calculate Your Production Costs Price the complete order, not just the blank material. Total job cost = materials and waste + design and proofing + production labor + machine time + finishing and assembly + packaging and selling costs + overhead allocation Labor includes customer messages, file cleanup, testing, loading, cleaning, painting, assembly, packing, and problem solving. Machine time should help fund maintenance and eventual replacement, even if the machine is fully paid for. Set Profitable Selling Prices Suppose an 18-inch personalized wooden sign has the following estimated cost: Cost item Example amount Wood blank and expected waste $12.00 Paint, masking, and hanging hardware $6.00 45 minutes of labor at $24/hour $18.00 20 minutes of machine time at $12/hour $4.00 Packaging, payment fees, and overhead allocation $10.00 Estimated total cost $50.00 At an $85 selling price, the order contributes $35 before income taxes and any costs not included in the estimate. That is not automatically take-home profit. Charge for value that adds work: original logo cleanup, complex layouts, rush production, extra proofs, premium material, installation templates, and individual personalization. For bulk orders, apply discounts only after setup is spread across multiple units and the lower price still protects margin. Estimate Your Break-Even Point Use this formula: Break-even orders = monthly fixed costs ÷ average contribution per order If fixed monthly costs are $600 and the average contribution after variable order costs is $35, the business needs about 18 comparable orders to cover those fixed costs. Owner wages, taxes, debt payments, and savings for future equipment should be planned separately if they are not already included. Track estimates against real orders. If every “20-minute sign” actually takes 55 minutes after proofing and finishing, update the price rather than hoping volume will repair a weak margin. For more detail, see this guide to pricing products in a home laser engraving business. 8. How to Find Customers for Your Sign Business Sell Custom Signs Online Etsy can provide marketplace demand, while Shopify or another owned website gives more control over branding, content, customer data, and product bundles. Listings should explain material, size, personalization, proofing, mounting, production time, shipping, and what natural variation may occur. Use specific titles and descriptions built around buyer intent: “custom acrylic office door sign,” “personalized wooden family name sign,” or “wedding table number set” is more useful than “beautiful handmade sign.” Show scale, close-up finish, mounting, color choices, and at least one real installed example. Use Social Media to Showcase Your Signs Instagram, Pinterest, and TikTok suit visual products, but finished glamour shots are only one content type. Show design decisions, material tests, engraving, paint filling, peeling masking, layer assembly, packaging, and before-and-after installations. Short laser videos attract attention; clear product information earns the order. Include dimensions, material, use case, personalization process, and a direct path to buy or request a quote. Reach Local Businesses Create a small sample kit for cafés, restaurants, salons, offices, retailers, real-estate professionals, and event planners. Tailor the examples: a café may care about counter signs and QR displays, while an office manager may need door plates that can be reordered when staff changes. Avoid sending a generic catalog. Offer a specific solution, such as a reception logo plus matching room signs, or a wedding planner package with welcome sign, table numbers, and place names. Local photographers, interior designers, print shops, and event vendors can also become referral partners. Build Repeat Customers and Referrals Make reordering easy. Save approved artwork, material, color, dimensions, mounting details, and customer preferences. Ask for reviews after successful delivery, photograph projects with permission, and provide a simple reorder code for business clients. Repeat-order discounts work best when the new order reuses approved files and setup. Business branding packages can raise order value without requiring a completely different production process. 9. Grow and Scale Your Sign Business Expand Your Product Range Expand around proven demand. A wooden sign seller might add layered lettering, matching door plaques, or seasonal inserts. An acrylic business-sign shop might add desk signs, nameplates, QR displays, and branded wall sets. Engraved metal nameplates can become a new category, but they may require a fiber laser or an outsourced partner. Treat each new material as a separate production system with its own tests, suppliers, finishing, and pricing. Upgrade Your Laser Engraving Equipment Upgrade when the current machine prevents profitable work or creates a measurable bottleneck. A larger working area can reduce tiling and allow bigger sign components. Camera alignment may help with irregular blanks. Autofocus and reusable settings can reduce setup, while higher power can improve cutting capacity in suitable materials. For wood and acrylic production, compare the current Monport CO2 laser engraver collection by work area, power, cooling, workflow, and support. If bare-metal marking becomes a regular revenue source, compare a fiber laser rather than forcing a CO2 machine into the wrong application. Improve Efficiency and Order Management Growth usually comes from fewer decisions per order. Build reusable templates, parameter libraries, proof forms, quotation sheets, packaging standards, and quality-control checklists. Use fixtures for repeat placement and group compatible jobs into batches. Track inquiry source, quote value, conversion rate, material cost, labor time, rework, delivery time, and contribution per order. Revenue can rise while profit falls if customization, rush jobs, or errors consume the extra capacity. Frequently Asked Questions How much money do you need to start a sign business? A lean home-based custom sign business may require roughly 2, 000–5,000, while a more versatile laser workshop may require 5, 000–12,000. A commercial sign shop can cost 15, 000–50,000 or considerably more. The right budget depends on materials, sign size, production methods, workspace, and which services are outsourced. Can I start a sign business from home? Yes, many beginners start with online or local orders from a home workshop. Check zoning, lease or homeowners association rules, insurance, ventilation, electrical capacity, business licensing, and whether customer visits or commercial deliveries are allowed. Is a sign-making business profitable? It can be profitable when prices cover materials, waste, labor, machine time, overhead, selling costs, and rework. Profit depends on the niche, order volume, average selling price, efficiency, marketing cost, and demand. Buying equipment does not guarantee sales. What equipment do I need to start a sign business? The answer depends on the product. A wood and acrylic sign business may need a CO2 laser, ventilation, cooling, design software, measuring tools, finishing equipment, materials, and packaging. Vinyl signs need a cutter and application tools; large dimensional signs may require a CNC router or outsourced fabrication. Can you make signs with a laser engraving machine? Yes. A suitable laser can engrave lettering and logos, cut sign shapes and layered elements, create table numbers, and produce repeatable batches. Always match the laser type to the material and confirm that the material is safe to process. What type of laser engraver is best for wood and acrylic signs? A CO2 laser is generally the most versatile choice for businesses that want to cut and engrave both wood and acrylic, including clear acrylic. Choose power and working area according to material thickness, the largest component, and production volume—not wattage alone. Conclusion Learning how to start a sign business begins with a focused decision: choose a customer, a material range, and a small group of products you can make consistently. Research real demand, calculate the full startup cost, build a safe workspace, test materials, and price every step from proofing to packaging. A laser engraving machine can support detailed wooden and acrylic signs, personalized short runs, and repeat orders, but the equipment must fit the products rather than define them. Start with manageable sizes and a repeatable workflow. Outsource jobs beyond your current capability, then upgrade when sales data—not enthusiasm alone—shows what capacity the business needs next. Beginners who want to compare work areas, power levels, cooling, and production features can explore Monport CO2 laser engravers or review the 2026 beginner’s guide to laser engraving before choosing a machine.
Read moreHow to

How to Use Software for Laser Engraving to Create Unique Outdoor Christmas Decorations
This guide shows how to use laser engraving software to create personalized outdoor Christmas decorations with the Monport 80W CO2 Laser Engraver. From choosing designs to weatherproofing, we cover everything you need to know to make durable, festive decorations that brighten any space.
Read more
Transform Your Coffee Table with a CO2 Laser Engraver and Holiday Decor
Creating unique and festive coffee table Christmas decor is easier than ever with a CO2 laser engraver.
Read more
How to Create Unique Christmas Decorations with Etsy Laser Engraving
Discover how to make one-of-a-kind Christmas decorations with the Monport 40W Pro CO2 Laser Engraver. From wooden ornaments to acrylic snowflakes, this guide walks you through choosing materials, setting up, and designing personalized, Etsy-worthy laser engraving projects perfect for the holiday season.
Read moreSafety Guideline
A Safety operation guide to avoid laser hazards in engraving work
This article aims to shed light on the dangers associated with laser use and how to protect against them. Lasers are not inherently dangerous; with the right precautions, they can be used safely. Whether you're a hobbyist or a professional, it's crucial to understand the risks and learn how to protect yourself from laser hazards.
Read more
Preventing Fire Hazards in CO2 Laser Engraving: Essential Safety Measures and Precautions
This article will describe how to effectively prevent a CO2 engraver from catching fire while working and provide some key considerations.
Read more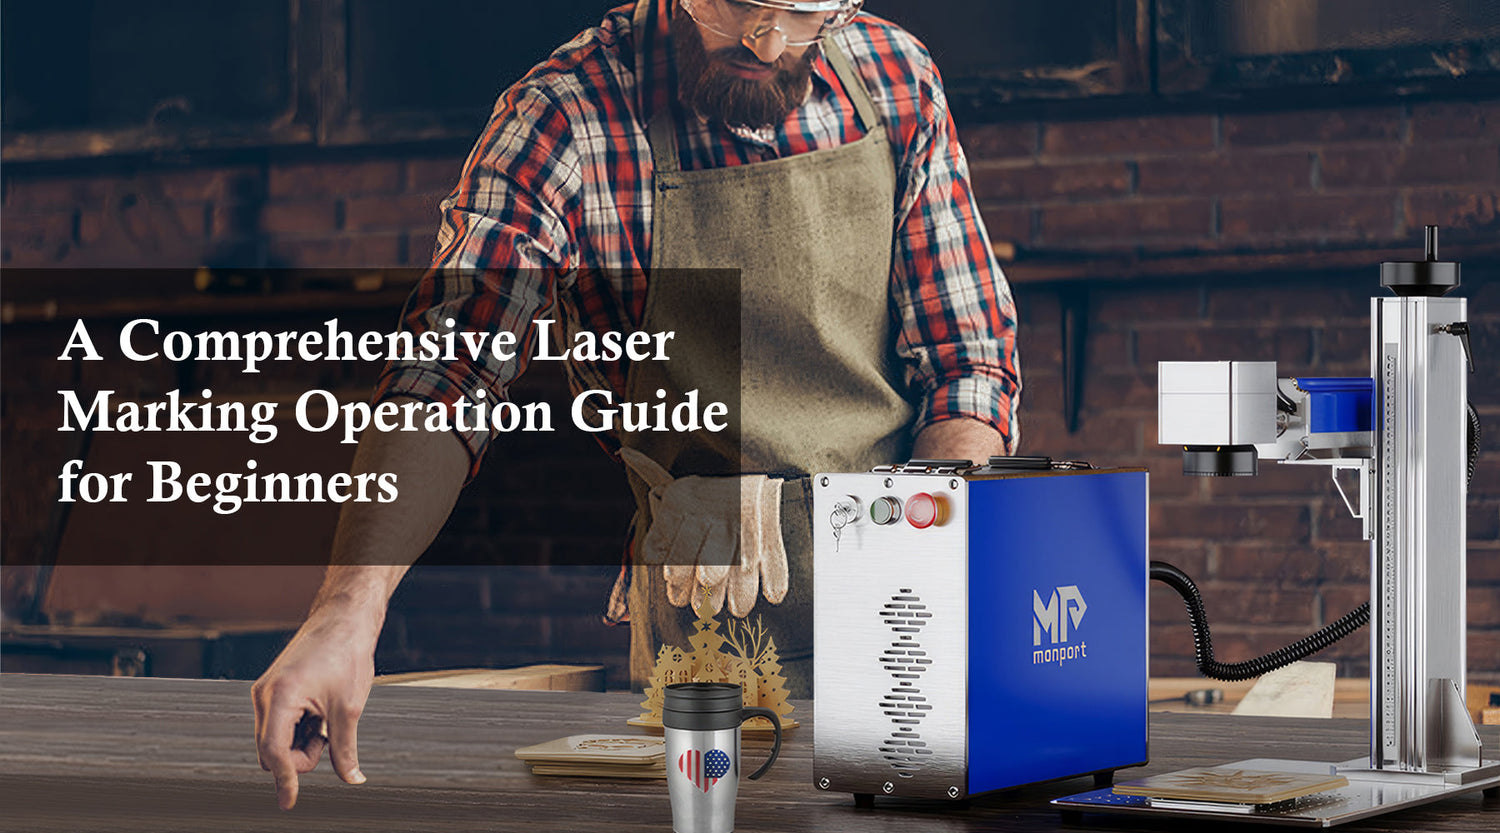
A Comprehensive Laser Marking Operation Guide for Beginners
Are you ready to take your creative projects to the next level with the new Monport Mega Desktop Laser? The Monport Mega Desktop Laser offers unparalleled power, precision, and ease of use, making it the ideal choice for both hobbyists and professionals. With its advanced features and superior performance, the Monport Mega desktop laser engraver can help you bring your ideas to life with stunning results. Discover the transformative power of the Monport Mega desktop laser engraver and unlock your creative potential. In this comprehensive guide, we'll delve into the key advantages of this exceptional laser engraving machines, comparing it to the xTool P2 Laser. Learn how the Monport Mega can help you achieve faster processing times, higher-quality engravings, and a more enjoyable creative experience with the precision and efficiency of the laser engraving machines. Monport Mega: The World's Premier 70W Intelligent Desktop Laser Engraving Machine Laser Output and Speed One of the most critical factors to consider is laser output and speed. The Monport Mega boasts a powerful 70W laser, while the xTool P2 is equipped with a 55W laser. This extra power in the Monport Mega translates to higher cutting efficiency, allowing you to tackle thicker materials with ease. When comparing CO2 laser vs diode laser, the Monport Mega stands out as one of the top desktop laser engraver machines, offering enhanced performance for all your engraving and cutting needs. Additionally, the Monport Mega's cutting speed of 1000mm/s surpasses the xTool P2's 600mm/s. This means faster processing times, saving you valuable time on your projects when using laser engraving machines. User Interface and Control The user interface and control system are essential for a seamless engraving experience. The Monport Mega features an intelligent touch screen, providing a modern and intuitive way to interact with the desktop laser engraver. In contrast, the xTool P2 relies on Segment Sode Screen, which can be less responsive and prone to wear and tear when using laser engraving machines. Dimming and Camera Quality Both machines offer dimming capabilities, but the Monport Mega's visual dimming method provides a more user-friendly experience. The xTool P2's method of dimming by firing the laser onto textured paper is cumbersome and can be less precise. The Monport Mega, as one of the best desktop laser engraver machines, delivers a smoother and more efficient operation, making it easier to control and adjust for accurate results. The camera quality also plays a significant role in alignment and precision. The Monport Mega is equipped with one 8MP non-fisheye camera, offering high-quality images without distortion. This ensures accurate alignment and precise engravings. The xTool P2, on the other hand, has two 16MP fisheye cameras, which can introduce distortion and make alignment more challenging. When comparing CO2 laser vs diode laser, factors like camera accuracy and precision play a crucial role in achieving high-quality results with a desktop laser engraver. Noise Levels Noise levels are another important consideration, especially for those working in shared spaces. The Monport Mega desktop laser engraver operates at a quieter 68db, while the xTool P2 generates 70db of noise. This can make the Monport Mega a more comfortable option for extended use. Monport Mega Desktop Laser vs. xTool P2 Laser: A Comparative Table Feature Monport Mega Desktop Laser xTool P2 Laser Laser Output 70W 55W Cutting Speed 1000mm/s 600mm/s User Interface Intelligent touch screen Physical buttons Dimming Method Visual dimming Firing laser onto textured paper Camera 1 non-fisheye cameras (8MP *1) 2 fisheye cameras (16MP *2) Noise Level 68db 70db Why Choose the Monport Mega? Based on a comprehensive comparison, the Monport Mega Desktop Laser offers several key advantages over the xTool P2 Laser: Higher cutting efficiency: The more powerful 70W laser allows for cutting thicker materials. Shorter processing times: The faster cutting speed reduces project turnaround time. User-friendly interface: The intelligent touch screen provides a modern and intuitive experience. Easy optical path adjustment: The visual dimming method simplifies alignment and precision. High-precision vision: The non-fisheye cameras ensure accurate alignment and engravings. Lower noise levels: A quieter operation makes working with the Monport Mega more comfortable. If you're seeking a reliable, efficient, and user-friendly desktop laser engraver, the Monport Mega is the clear choice. Its superior performance, intuitive interface, and advanced features make it an ideal investment for both hobbyists and professionals alike, standing out against competitors like the xTool P2. Monport Mega Desktop Laser vs. xTool P2 Laser Q: Which laser engraver is better for beginners, the Monport Mega or the xTool P2? A: The Monport Mega Desktop Laser is generally considered more beginner-friendly due to its intuitive touch screen interface and user-friendly features. However, both machines can be learned with practice. Q: Can I cut thicker materials with the Monport Mega compared to the xTool P2? A: Yes, the Monport Mega's more powerful 70W laser allows it to cut thicker materials with greater efficiency. Q: Which machine has a quieter operation? A: The Monport Mega Desktop Laser operates at a quieter 68db compared to the xTool P2's 70db. Q: Are there any additional features to consider when choosing between these two machines? A: The Monport Mega Desktop Laser offers features like high-precision vision and easy optical path adjustment, which can be beneficial for achieving accurate and precise engravings. Q: Can I upgrade the laser power on either machine? A: While it's possible to upgrade the laser power on some models, it's generally more cost-effective to purchase a machine with the desired power output from the beginning. Q: Can I use these machines for commercial purposes? A: Yes, both the Monport Mega Desktop Laser and the xTool P2 can be used for commercial applications. However, it's important to consult with the manufacturer or local regulations to ensure compliance. Q: What are the maintenance requirements for these machines? A: Regular maintenance, such as cleaning the lens and replacing consumables like laser tubes, is essential for optimal performance and longevity. Refer to the manufacturer's guidelines for specific maintenance recommendations. Q: Can I engrave on different materials besides acrylic? A: Yes, both machines can engrave on a variety of materials, including wood, leather, glass, and more. The specific materials you can engrave on may depend on the laser power and type of material. Revolutionize Your Metal Engraving with Monport Black Laser Marking Spray Transform your metal engraving experience with the Monport black laser marking spray—the perfect solution for achieving crisp, high-contrast, and permanent marks on a variety of metal surfaces. Engineered for use with CO2 laser engraving machines of 25 watts and above, this innovative spray simplifies the marking process with its aerosol convenience and precision performance. Each 14 oz aluminum can delivers a powerful and even coat, thanks to its anti-clog nozzle and fine-grained nanoparticle formula. Whether you’re personalizing jewelry, labeling tools, or customizing glassware, the black laser marking spray ensures consistent, durable results. Designed for metals like aluminum, stainless steel, and brass, it penetrates deeply to create heat-resistant black markings that last. Simply clean your surface with alcohol, shake the can for two minutes, spray from 6 to 8 inches away, and let it air dry for just five minutes. Once the laser has done its job, a quick rinse reveals your permanent masterpiece. Alcohol-free and easy to use, the Monport black laser marking spray is your go-to companion for effortless, professional-grade laser engraving. Don’t settle for anything less—choose black laser marking spray for sharp detail, quick results, and top-tier durability every time. Conclusion Based on the comprehensive comparison above, the Monport Mega desktop laser engraver offers several key advantages over the xTool P2 Laser. Its superior performance, intuitive interface, and advanced features make it an ideal investment for both hobbyists and professionals alike. Ready to experience the power and precision of the Monport Mega desktop laser engraver? Contact us today to learn more and place your order. Our team of experts is available to answer your questions and provide personalized guidance, ensuring you get the best machine for your needs compared to options like the xTool P2.
Read moreProjects and Ideas

Creative Laser Engraver Designs for Christmas Decorations
With the right laser engraver designs, you can transform Christmas decorations on sale into beautiful, personalized pieces that add joy and warmth to your holiday season.
Read more
Create Unique Christmas Decorations Using a Laser Cup Engraver
Discover how to make custom Christmas decorations with the Monport 80W CO2 laser cup engraver. This guide covers festive project ideas, step-by-step instructions, and FAQs to help you create unique holiday decor. Perfect for selling or adding a personal touch to your holiday celebrations!
Read more
Christmas Door Decorating Contest Ideas with Laser-Engraved Photos
Incorporating laser engraving photos into your Christmas door decorating contest entry is a fantastic way to create personalized, detailed decorations that captivate and impress
Read moreSoftware

Best Laser Engraving Software for Outdoor Christmas Decorations
Creating classy outdoor Christmas decorations with a laser engraver adds a personalized touch to any holiday display. By using the best laser engraving software, such as LightBurn, Adobe Illustrator, and CorelDRAW, you can craft intricate, professional-quality designs.
Read more
How Does LightBurn Compare to Other Laser Engraving Software for Beginners?
Choosing your first laser engraving software can be surprisingly confusing. LightBurn offers extensive design and machine-control features, LaserGRBL is free, and programs like xTool Studio, RDWorks, and EZCAD are designed around particular machines or controllers. So which one should a beginner actually use? LightBurn is one of the best all-around options for beginners with compatible laser engravers. It combines design editing, job preparation, and laser control in one application. However, beginners working with basic GRBL machines may find LaserGRBL sufficient, while manufacturer-specific software can offer a simpler starting point. The right decision comes down to three things: your laser engraver's controller, the projects you want to create, and how much flexibility you need. This guide compares LightBurn vs other laser engraving software through real-world workflow considerations, pricing, compatibility, and ease of learning. It also explains how different software options work with Monport laser engraving machines. LightBurn vs Other Laser Engraving Software: Quick Comparison Before comparing features, it's important to understand that these programs aren't all designed for the same equipment. LightBurn supports multiple controller families, depending on the license. LaserGRBL focuses on compatible GRBL machines, while RDWorks and EZCAD serve particular industrial laser-controller ecosystems. xTool Studio and Monport M-Design Hub focus on their manufacturers' supported equipment. Software Price Beginner Learning Curve Design Tools Compatible Lasers Operating Systems Best For LightBurn Core $99 / Pro $199; 30-day trial Moderate Extensive vector and layout tools Supported GCode, DSP, and Galvo controllers Windows 10+; macOS 11+ Beginners wanting flexibility and room to grow LaserGRBL Free Easy for simple jobs Basic image processing; limited vector editing Compatible GRBL machines Windows Budget-conscious GRBL users xTool Studio Free software Generally easy on supported devices Integrated design and device tools Supported xTool devices Windows, macOS; mobile support varies xTool beginners RDWorks Generally supplied with equipment Moderate Basic drawing and job tools Compatible Ruida DSP controllers Primarily Windows Ruida-based CO₂ lasers EZCAD Generally supplied with equipment Moderate to advanced Marking-focused tools Matching Galvo controllers Primarily Windows Fiber laser marking Monport M-Design Hub Free software for supported machines Beginner-oriented Integrated design and smart workflow tools Supported Monport MEGA/MEGAS models Windows; selected macOS versions Monport MEGAS users Pricing and software support are based on published information available in October 2026. Device compatibility, supported features, and operating-system requirements may change. Quick Recommendations Best overall for supported machines: LightBurn Best free option for GRBL users: LaserGRBL Best integrated option for xTool machines: xTool Studio Best included option for compatible Ruida CO₂ lasers: RDWorks Best for supported Galvo fiber systems: EZCAD Best for Monport MEGAS smart workflows: M-Design Hub The most important distinction is that software compatibility depends on the machine's controller, not simply whether the laser is described as CO₂, diode, fiber, or MOPA. What Is LightBurn and Why Is It Popular Among Beginners? LightBurn is laser engraving software that combines artwork preparation, design editing, and control of compatible laser machines. Instead of creating a design in one application and managing the engraving job in another, users can handle much of the workflow in one interface. What Can You Do with LightBurn? LightBurn includes tools for creating basic vector designs, editing text and shapes, and importing common image and vector formats such as SVG, DXF, and PNG. It also provides layer-based job organization. Different elements can be assigned separate engraving or cutting operations, making it easier to organize projects that combine text, graphics, and outlines. Other useful features include job previews, layout controls, material-testing tools, and support for compatible rotary attachments and camera systems. These features become especially valuable when a workshop starts producing personalized gifts, signage, or recurring customer orders. Is LightBurn Easy to Learn? LightBurn is approachable, but it isn't completely automatic. A beginner can usually understand basic artwork placement and layer organization before learning every advanced feature. The interface becomes more familiar as users work with additional design types. However, the initial learning process involves understanding machine compatibility, coordinate systems, material requirements, and the difference between engraving and cutting operations. For someone planning to use laser engraving regularly, that learning time can be worthwhile. What Are the Limitations of LightBurn? The most obvious drawback is cost. Unlike LaserGRBL, LightBurn requires a paid license after its trial period. Compatibility is another limitation. Not every laser engraver supports LightBurn, and machines using proprietary software may depend on manufacturer-specific features. Advanced settings and production tools can also feel overwhelming to someone who only needs occasional basic engraving. LightBurn is most valuable when its additional flexibility solves a real workflow problem, rather than simply because it offers more features. LightBurn vs LaserGRBL: Which Is Better for Beginners? For beginners comparing paid and free software, LightBurn vs LaserGRBL is often the first decision. Both can work with compatible GRBL machines, but they approach laser engraving differently. Ease of Use and Interface LaserGRBL uses a relatively focused interface centered on machine control and image engraving. For simple projects, this can feel less complicated than learning a larger design environment. LightBurn offers more tools within the same workspace. Beginners may need additional time to understand its panels and layer controls, but those tools can reduce the need to switch between applications. Design and Engraving Features LaserGRBL supports image preparation, grayscale conversion, dithering, vectorization, and job previews. However, its native SVG workflow has limitations. Complex vector editing, text handling, and separate operations for different colors or layers are better managed with dedicated design tools or more capable software. LightBurn provides stronger integrated vector editing, multi-layer job organization, and layout management. This makes it especially useful for projects combining multiple design elements or recurring personalized products. Price and Compatibility LaserGRBL is free and open-source, with native support focused on Windows and compatible GRBL firmware. LightBurn Core costs $99 and supports appropriate GCode-based controllers. It also runs on supported Windows and macOS systems. Neither program should be assumed compatible with a machine until its controller has been checked. LightBurn or LaserGRBL: Which Should You Choose? Choose LaserGRBL if you have a compatible Windows-based GRBL engraver, mainly work with simple designs, and want to avoid software costs. Choose LightBurn if you regularly create customized products, need multiple engraving layers, or want more control over artwork preparation and layout. For many beginners, LaserGRBL is a reasonable starting point. LightBurn becomes more attractive as design complexity and production needs increase. LightBurn vs xTool Studio: Which Is Easier to Use? The comparison between LightBurn and xTool Studio is different because xTool Studio is developed specifically for xTool's supported machines. Beginner-Friendly Interface and Workflow xTool Studio combines design editing, device management, and manufacturer-specific functions. For supported equipment, it can simplify initial setup and provide access to features such as material presets, camera-assisted positioning, and integrated workflows. LightBurn offers a broader controller-oriented environment, but users must confirm whether their particular machine and its special features are supported. Design Flexibility and Advanced Features LightBurn is attractive to users who want flexible vector editing, reusable projects, and consistent workflows across multiple supported machines. xTool Studio is particularly useful when a device has proprietary capabilities that are closely integrated with the manufacturer's software. For example, device-specific positioning tools or automated features may work differently from their equivalents in third-party applications. Neither program is automatically better in every situation. Machine Compatibility and Limitations Not every xTool engraver supports LightBurn. For example, xTool officially states that the F2 does not support LightBurn and is intended to use xTool Studio. Other models have different requirements, so buyers should check the current official compatibility documentation instead of assuming that support extends across the entire brand. Recommendation: For a newer xTool machine, start with its officially supported software. Consider LightBurn only when the exact model and required features are confirmed compatible. LightBurn vs RDWorks: Which Is Better for CO₂ Laser Engraving? RDWorks is commonly associated with CO₂ laser machines using compatible Ruida controllers. For workshops choosing between LightBurn vs RDWorks, the decision is usually about convenience, design flexibility, and production workflow. RDWorks Features and Compatible Controllers RDWorks provides laser job preparation, basic editing, and control functions for compatible Ruida-based equipment. Because it is often supplied with a machine, users can begin with the manufacturer's established software without purchasing a separate license. However, the interface and editing workflow may feel less convenient for users accustomed to modern graphics applications. LightBurn's Advantages for CO₂ Laser Projects LightBurn offers integrated design editing, layer-based operation management, layout tools, and previews. These features are useful when a project combines engraved text, raster graphics, and cut outlines. For example, a small signage business producing personalized wooden plaques may find it easier to prepare different customer names within a reusable LightBurn project. RDWorks remains a valid option when the supplied software already meets production needs. Is LightBurn Worth Upgrading to from RDWorks? The upgrade is easier to justify when users frequently prepare complex designs, handle multiple operations, or want a more streamlined editing workflow. A practical example is the Monport 60W CO₂ Laser Engraver & Cutter, which officially supports both LightBurn and RDWorks. Its 24 × 16-inch working area and autofocus feature make it relevant to workshops producing signs, decorative products, and customized gifts. Because the machine supports both software options, buyers can compare workflows rather than choosing hardware solely around one application. Explore the Monport 60W CO₂ Laser Engraver → LightBurn vs EZCAD: Which Is Better for Fiber Laser Engraving? Fiber laser users face a different software decision. Many Galvo-based marking systems use EZCAD or another controller-specific program, while supported machines can also work with LightBurn Pro. What Is EZCAD Used For? EZCAD is widely used with compatible Galvo laser-marking controllers. Its applications include metal marking, logos, serial numbers, QR codes, and industrial identification. The software may also provide functions for variable text, repeated marking jobs, and specialized machine settings, depending on the installed version and controller. Because it is often supplied with the laser, EZCAD is a practical starting point for many fiber laser owners. LightBurn Pro for Compatible Galvo Lasers LightBurn Pro supports selected DSP and Galvo controllers, including specified EZCAD2, EZCAD3, and BSL-based systems. Its integrated design tools may be more convenient for users who already work with LightBurn on other compatible machines. However, Galvo devices require appropriate configuration and calibration information. Manufacturer-supplied device files should be preserved, and compatibility must be checked before changing software or drivers. Which Software Is Better for MOPA Fiber Lasers? MOPA fiber lasers can provide additional control over pulse characteristics, including frequency and pulse width. These capabilities are useful in specialized metal marking applications, but their availability depends on the laser source, controller, and software integration. LightBurn Pro supports relevant controls on certain compatible Galvo MOPA systems. EZCAD may remain preferable when it is the manufacturer's designated application or supports functions not available through the alternative setup. For example, metal color marking requires more than selecting a color in the design software. Results depend on the material and a qualified, machine-specific process. The conclusion is straightforward: a machine being labeled "fiber" or "MOPA" does not automatically make it LightBurn-compatible. Beginner Workflow Comparison: Creating Your First Laser Engraving Project Software specifications are useful, but beginners often care more about what happens between opening a design file and preparing a finished job. The following comparison uses a simple example: a small wooden nameplate with a short word and rectangular border. This is an illustrative software-workflow comparison based on documented features, not a claim that all six programs were physically tested on identical machines. The actual laser operation should follow the manufacturer's instructions and be performed by a trained operator using appropriate enclosure, extraction, and safety controls. Step 1 – Import a Simple SVG Design In LightBurn, users can import SVG artwork and adjust text, dimensions, and layout using built-in design tools. LaserGRBL can handle compatible SVG files, but editing capabilities are more limited. Complex artwork may need to be prepared in another program, such as Inkscape. xTool Studio offers integrated artwork editing for supported machines. RDWorks can import suitable artwork for Ruida-based workflows, while EZCAD provides an environment focused on marking applications. M-Design Hub offers design preparation within the supported Monport workflow. Step 2 – Review Engraving Settings LightBurn organizes different operations through layers, which can help users distinguish between engraving and cutting elements. LaserGRBL provides controls for compatible GRBL jobs but has a less extensive multi-layer design environment. Manufacturer software may offer material libraries or device-specific presets. Regardless of the application, actual processing parameters must be appropriate for the material, equipment, and approved operating procedure. Software presets should not be treated as universal guarantees. Step 3 – Preview and Position the Design LightBurn provides job previews and supports positioning features on compatible equipment. LaserGRBL offers job visualization for GRBL workflows. xTool Studio and M-Design Hub may provide more integrated camera positioning on supported machines. For repeat personalization work, seeing the relationship between the artwork and the actual workpiece can reduce layout uncertainty. Step 4 – Review the Final Output After a properly supervised machine trial, evaluate the final engraving against the original design. Useful observations include text readability, placement, line consistency, and whether the intended detail has been reproduced. When comparing software, record the number of applications required, whether artwork edits were convenient, and whether the workflow was easy to repeat. Which Software Offers the Smoothest Beginner Experience? Beginner Task Software With a Practical Advantage Basic GRBL image engraving without software cost LaserGRBL Integrated vector editing and layer management LightBurn Manufacturer-specific xTool workflows xTool Studio Included Ruida CO₂ workflow RDWorks Controller-specific fiber marking EZCAD MEGAS camera-assisted batch workflows M-Design Hub The smoothest experience depends on the actual machine and project. It cannot be determined by interface appearance alone. Which Laser Engraving Software Works Best with Monport Machines? Monport offers different laser technologies for different applications, so there is no single software recommendation for every machine. Choosing the appropriate program begins with the equipment model and supported controller. Monport 60W CO₂ Laser: LightBurn vs RDWorks The Monport 60W CO₂ laser officially supports both LightBurn and RDWorks. RDWorks is a practical option for users who prefer to begin with the software supplied for a compatible Ruida-based system. LightBurn may be more attractive for users who want integrated artwork editing, layer management, and a consistent design-to-production workflow. This flexibility is useful for businesses making wooden signs, acrylic products, personalized decorations, and other compatible nonmetal items. View the Monport 60W CO₂ Laser Engraver → Monport MEGAS 70W: LightBurn vs M-Design Hub The Monport MEGAS 70W CO₂ Laser Engraver offers two relevant software workflows: LightBurn and Monport's M-Design Hub. MEGAS includes a built-in 8MP camera, autofocus, and a 700 × 350 mm working area. M-Design Hub is developed around Monport's supported machines and provides features such as camera-assisted positioning, smart batch filling, and design organization. These capabilities can be particularly convenient for beginners producing repeated personalized items. For example, a workshop handling multiple wooden tags or small gifts may benefit from a workflow that recognizes and organizes multiple objects. LightBurn provides another option for users who prefer its design tools, material libraries, and familiar layout environment. Monport also documents LightBurn integration for features such as camera positioning and autofocus on supported MEGAS configurations. However, feature availability can depend on the installed software, firmware, and machine configuration. Buyers should verify the current supported setup before assuming identical functionality in both programs. Which should beginners choose? Start with M-Design Hub if you want to explore MEGAS-specific camera and smart batch features through Monport's integrated workflow. Consider LightBurn if you already use it, prefer its editing tools, or want to maintain a consistent workflow across other supported laser systems. You can explore the software on the official Monport M-Design Hub page. Discover the Monport MEGAS 70W → Monport Fiber and MOPA Laser Engravers: LightBurn vs EZCAD For Monport fiber and MOPA machines, software selection depends on the specific Galvo controller and model configuration. EZCAD is commonly used for supported fiber laser marking systems. LightBurn Pro can provide an alternative when the controller, driver, and machine configuration are compatible. MOPA users should also verify support for the required pulse-control functions and any manufacturer-specific marking features. Monport's Fiber Laser Engraver collection includes models designed for metal marking and engraving applications. Before purchasing, confirm which software is supplied and whether your preferred alternative is officially supported. Explore Monport Fiber Laser Engravers → How Much Does LightBurn Cost? Is It Worth Paying for? One of the most common beginner questions is simple: Is LightBurn worth it? That depends on whether its additional tools will improve your workflow enough to justify the license. LightBurn Core vs LightBurn Pro As of October 2026, LightBurn officially lists two main license options. License Price Main Compatibility Best For LightBurn Core $99 Supported GCode-based controllers Compatible entry-level lasers LightBurn Pro $199 Core features plus supported DSP and Galvo controllers Ruida CO₂ and compatible Galvo users Both are one-time purchases that include one year of software updates. After that update period, users can continue using software versions covered by their licenses. Access to newer releases may require purchasing another update period. LightBurn also provides a 30-day trial, allowing users to evaluate compatible features before buying. Free Software vs Paid Software Free software can be sufficient for occasional projects, especially when supplied by the machine manufacturer. Paid software becomes more appealing when design preparation takes too much time or users regularly manage complex layouts. The value is not simply the number of available features. It is whether those features make everyday work more convenient. When Should Beginners Upgrade to LightBurn? For occasional hobby engraving on a compatible GRBL machine, LaserGRBL may be enough. For frequent personalized gifts, LightBurn's design and layer tools may reduce repetitive editing work. For a small business producing multiple customer orders, reusable layouts and consistent job preparation may justify the investment. Before purchasing, use the official LightBurn trial and verify the required license for your specific controller. How to Choose the Best Laser Engraving Software for Your Needs The best laser engraving software for beginners is not necessarily the program with the most features. Start with the equipment you own, then consider the applications and workflow you actually need. Check Your Laser Controller First GRBL, DSP, and Galvo controllers have different software requirements. A compatible GRBL engraver may support LaserGRBL or LightBurn Core. A Ruida-based CO₂ machine may work with RDWorks or LightBurn Pro. A Galvo fiber system may require EZCAD or another designated application. Always check the exact controller model before purchasing software. Consider Your Computer's Operating System LightBurn 2.0 and later officially support Windows 10 or newer and macOS 11 or newer. Linux is no longer supported in current 2.x releases. LaserGRBL is designed for Windows. xTool Studio supports Windows and macOS on compatible configurations, while EZCAD and RDWorks are primarily associated with Windows workflows. Monport M-Design Hub has Windows support, with macOS compatibility dependent on the specific version. Evaluate Your Engraving Projects Basic text engraving needs different software capabilities from multi-layer signs or industrial marking. Personalized gifts may benefit from convenient editing tools. Batch production may call for object positioning and repeated-job features. For metal marking, controller compatibility and reliable access to machine-specific settings become more important. Compare Your Budget and Future Needs Your Situation Recommended Starting Point Compatible GRBL machine and no software budget LaserGRBL Compatible machine with varied creative projects LightBurn Supported xTool equipment xTool Studio Ruida CO₂ machine with included software RDWorks Galvo fiber system with supplied marking software EZCAD Monport MEGAS with camera-assisted workflows M-Design Hub The practical rule is to choose a supported program that handles your regular projects comfortably, rather than paying for capabilities you may never need. Common Problems Beginners Face with Laser Engraving Software Many software problems come from compatibility, artwork preparation, or machine configuration rather than a defect in the application itself. Problem Possible Cause Recommended Next Step LightBurn cannot find the laser Unsupported controller, driver, or connection configuration Confirm compatibility and consult the manufacturer's connection guide Engraving design is misaligned Incorrect workspace dimensions, origin, or positioning information Review the approved device profile and positioning documentation Settings produce unexpected results Material or machine configuration mismatch Stop the job and review manufacturer-approved material guidance SVG imports incorrectly Unsupported SVG elements, fonts, or effects Simplify artwork and check the imported design Software features are missing Unsupported firmware, license, or machine model Verify feature requirements with the software and machine manufacturers Switching programs causes problems Different machine profiles or competing connections Preserve original configurations and use the documented software-switching procedure Can I Switch Between Different Laser Software Programs? Sometimes, yes. For example, a compatible Ruida CO₂ machine may support both RDWorks and LightBurn. However, switching is not the same as using both applications to control the machine simultaneously. Machine settings, driver requirements, and supported features must remain consistent. For Monport-specific software resources, visit the Monport Download Center. Frequently Asked Questions About LightBurn Is LightBurn the Best Laser Engraving Software for Beginners? LightBurn is one of the strongest options for beginners using compatible machines because it combines useful design tools with laser control. However, users with proprietary equipment may have an easier experience using the manufacturer's own software. The best choice depends on compatibility, project complexity, and individual learning preferences. Is LightBurn Better Than LaserGRBL? LightBurn offers more extensive design editing, layer management, and production-oriented tools. LaserGRBL is free and well suited to simpler projects on compatible Windows-based GRBL machines. LightBurn is generally more flexible, but LaserGRBL may provide everything a beginner needs for basic engraving tasks. Is LightBurn Free to Use? LightBurn is not permanently free. It provides a 30-day trial, after which users need an appropriate paid license. LightBurn Core currently costs $99, while LightBurn Pro costs $199. The correct option depends on the controller rather than simply the type of laser source. Can Beginners Learn LightBurn Without Experience? Yes. Beginners can learn basic artwork importing, layout editing, and layer organization without previous professional design experience. However, using the software successfully with physical equipment also requires understanding the machine's instructions, material limitations, and safety requirements. Learning gradually is more practical than attempting every advanced feature immediately. Does LightBurn Work with All Laser Engravers? No. LightBurn supports many controller families, but not every laser engraving machine. Some manufacturers use proprietary systems, while others support only particular software versions or functions. Always confirm the exact machine and controller using official compatibility documentation before purchasing a LightBurn license. Can LightBurn Be Used with a Fiber Laser? Yes, LightBurn Pro supports selected Galvo fiber laser controllers, including compatible EZCAD-based systems. However, support is not universal. A fiber laser may require specific drivers, configuration files, and calibration data. Buyers should verify these requirements with both the software developer and machine manufacturer. What Is the Difference Between LightBurn Core and Pro? LightBurn Core supports compatible GCode-based machines and includes a broad set of design tools. LightBurn Pro adds support for specified DSP and Galvo controllers, including compatible Ruida and EZCAD systems. Choosing Pro does not guarantee compatibility with every industrial or fiber laser. Is LightBurn Worth the Money for a Small Business? LightBurn can be worthwhile for businesses that regularly produce customized artwork, combine engraving operations, or prepare repeat orders. Its layout and editing features may simplify those workflows. However, a business already using suitable manufacturer software may not need to pay for an alternative. Final Verdict: Which Laser Engraving Software Should Beginners Choose? When comparing LightBurn vs other laser engraving software, no single program is the best choice for every beginner. LightBurn is a strong all-around option for compatible machines, particularly when users want flexible design tools and a workflow that can grow with their experience. LaserGRBL is a practical free alternative for simple GRBL engraving on Windows. xTool Studio is an appropriate starting point for supported xTool machines, while RDWorks remains useful for compatible Ruida CO₂ systems. EZCAD serves matching Galvo fiber marking equipment, and Monport M-Design Hub offers an integrated option for supported Monport MEGAS machines. Ultimately, the best laser engraving software is the one that works reliably with your equipment and supports the projects you plan to create. Find a Monport Laser Engraver That Fits Your Workflow Choosing the right machine is just as important as choosing the right software. Explore Monport's CO₂ and fiber laser engraving equipment, compare available configurations, and review supported software options before making your decision. Shop Monport Laser Engravers →
Read more
What Free Laser Engraving Software for Windows Can Do for Your Father's Day Gifts
With free laser engraving software for Windows, you can design your own Father's Day gifts with free software that are practical, personal, and unforgettable. Pairing this software with the Monport GA 60W Upgraded Integrated MOPA Fiber Laser Engraver opens up creative possibilities that are fast, precise, and professional.
Read moreLaser Engraving & Cutting Materials

How to Cut Acrylic Sheets with a Laser: The Complete Guide to Smooth, Flame-Polished Edges
Few machining methods rival a laser's ability to produce crystal-clear, glass-smooth acrylic edges in a single pass—free of mechanical saw marks, chatter ridges, or tedious manual buffing. Yet for many makers and workshop operators, the reality often falls short. Uncalibrated setups frequently result in cloudy frosted cut walls, wavy heat striations, gummy welded seams, or underside surfaces scarred with metal grid flashback pockmarks. Achieving showroom-quality results when learning how to cut acrylic sheets with a laser does not come down to luck or endless trial and error. It relies on a repeatable physical process governed by five core variables: selecting the right acrylic manufacturing method, matching the laser wavelength to the material's absorption profile, dialing air assist down to a gentle whisper, elevating the stock off reflective surfaces, and executing clean single-pass cuts. Quick Summary: The 5 Golden Rules of Laser Cutting Acrylic Material Selection: Choose Cell-Cast Acrylic (GS) for glass-like, flame-polished edges and frosty engravings; reserve Extruded Acrylic (XT) strictly for tight, dimensionally uniform slot-and-tab assemblies. Laser Wavelength: Use a 10.6 µm CO2 laser. Standard 450nm blue diode lasers pass straight through clear acrylic without cutting. Air Assist Pressure: Keep air assist at a gentle whisper (5–8 PSI). High-pressure air quenches molten acrylic into a cloudy, frosted edge. Bed Support: Elevate sheets 5mm–10mm off metal tables using aluminum knife blade slats or metal standoff pins to eliminate underside reflection burns. Cut Strategy: Always execute single-pass cuts. For materials thicker than 6mm (~1/4"), drop your focal point 1/3 into the sheet to balance edge perpendicularity. Whether you are cutting 2mm architectural model parts or slicing through 12mm display stands, this guide covers everything required to master acrylic processing—from raw material chemistry and machine optics to LightBurn vector setup, verified power and speed matrices, and critical post-cut stress relief. 1. Understanding Acrylic: Cast vs. Extruded (And Why It Matters) Before turning on your chiller or importing a vector file, you must identify the exact type of poly(methyl methacrylate) (PMMA) on your workbench. Acrylic is manufactured using two fundamentally different industrial methods—cell casting and continuous extrusion. While both materials look identical in their raw sheet form, they react completely differently under a concentrated laser beam. Feature / Property Cast Acrylic (GS) Extruded Acrylic (XT) Cut Edge Quality High-gloss, flame-polished glass sheen Smooth, but gummy and prone to bead buildup Engraving Contrast Crisp, bright, frosted paper-white finish Clear to pale grayish, shallow relief Melting Behavior Depolymerizes cleanly into vapor (MMA) Melts readily; tends to re-weld behind cut path Thickness Consistency Up to ±10% variation across a sheet Highly uniform and consistent (±1%–3%) Ideal Applications Signage, awards, art fabrication, edge-lit displays Dimensionally critical finger joints, sliding lids, puzzle tabs Cast Acrylic (GS): The Gold Standard for Polished Edges and Frost Engraving Cast acrylic—designated internationally as GS (Gegossenes Acrylglas)—is manufactured by pouring liquid methyl methacrylate monomer between two precision glass plates, followed by batch polymerization in an autoclave. This process yields exceptionally long polymer chains and a high molecular weight. When struck by a concentrated CO2 laser beam, cast acrylic does not break down into a runny liquid puddle; it undergoes depolymerization, vaporizing directly into gaseous methyl methacrylate monomer (MMA). As the beam passes, the thin boundary layer of residual melt self-levels under surface tension before solidifying, creating a natural, crystal-clear, flame-polished edge. Cast acrylic is also the mandatory choice for laser engraving. When rastered, the material fractures into a bright, velvety, frosty-white finish that catches ambient illumination, making it the industry standard for edge-lit acrylic signs, trophies, and architectural lettering. Extruded Acrylic (XT): Budget-Friendly, Dimensionally Uniform, but Melts Fast Extruded acrylic—designated as XT (Extrudiertes Acrylglas)—is produced continuously by feeding acrylic pellets through an extruder screw and rolling the softened mass between mechanical rollers. Because of this continuous processing, extruded sheet features shorter polymer chains and a lower molecular weight. Under a laser beam, extruded acrylic has a narrower temperature window between solid and liquid states. Instead of cleanly vaporizing, it melts readily and flows into a gummy liquid trench. If your cutting speed is even slightly too slow, or if the kerf width is narrow, the molten sides can re-fuse (weld together) immediately behind the trailing laser head. However, extruded acrylic has one major structural advantage: thickness uniformity. While a nominal 3mm cast sheet might fluctuate between 2.7mm and 3.3mm depending on where you measure, an extruded sheet rarely deviates by more than a few tenths of a millimeter. When you are engineering slotted finger joints, press-fit puzzle pieces, or friction-fit tabbed enclosures where slot tolerances make or break the assembly, extruded acrylic often provides the mechanical consistency cast cannot—provided you tune your speed fast enough to prevent re-welding. Workshop Hack: How to Identify Unmarked Scrap Acrylic If you have an unlabelled scrap sheet stripped of its factory protective paper, you can determine its type in 5 seconds before cutting: The Scrape Test: Run a sharp utility blade or deburring tool firmly along the corner of the sheet at a 90° angle. Cast acrylic produces a fine, powdery, chalk-like swarf that blows away cleanly. Extruded acrylic produces a continuous, curled, pliable ribbon or shaving. The Test Burn / Scent Test: Hit a tiny corner with a quick 0.5-second laser test pulse. Cast acrylic emits a sweet, distinctive, fruity-floral odor (pure methyl methacrylate). Extruded acrylic smells harsher, sharper, and slightly chemical-acrid. 2. Choosing the Right Laser: CO2 vs. Diode vs. Fiber Acrylic processing lives or dies by optical absorption physics across the electromagnetic spectrum. Selecting the correct laser source will save you hundreds of dollars in scrap material and prevent weeks of equipment frustration. 450 nm (Visible Blue Diode): Passes straight through clear acrylic without absorption (>90% transmission). 1064 nm (Near-IR Fiber): Causes internal thermal scattering and micro-cracking; unsuitable for sheet cutting. 10,600 nm / 10.6 µm (Far-IR CO2): 100% surface absorption; instantly vaporizes PMMA into smooth cut walls. Why CO2 Lasers (10.6 µm) Are Unbeatable for Acrylic Cutting Sealed-tube and RF-excited CO2 lasers emit radiation in the far-infrared spectrum, specifically at a wavelength of 10.6 micrometers (10,600 nm). Acrylic is optically opaque to this wavelength. The moment a 10.6 µm infrared beam touches the top surface of an acrylic sheet, virtually 100% of the photonic energy is absorbed in an ultra-shallow layer. The photon energy instantly breaks the polymer backbone, converting solid PMMA directly into vapor with minimal lateral thermal diffusion into surrounding material. Because the heat affected zone (HAZ) remains microscopic, you get vertical cut walls, clean kerfs, and mirror-grade edge gloss. For anyone serious about cutting acrylic sheets across clear, tinted, mirrored, and opaque colors, exploring dedicated CO2 laser engravers is the logical starting point. The Diode Laser Dilemma: Can 450nm Blue Lasers Cut Clear Acrylic? Standard desktop diode lasers operate in the visible blue spectrum, typically at 450 nanometers. By definition, clear acrylic is engineered for high optical transmission in the visible spectrum, allowing roughly 92% of visible light to pass straight through unhindered. When you fire a 450nm diode laser at a sheet of clear, transparent blue, or pure white acrylic, the beam passes through the sheet and hits whatever lies underneath—your metal waste plate or spoilboard—without depositing significant thermal energy into the plastic. While some makers use makeshift workarounds like black dry-erase markers, black tempera paint, or dark laser masking vinyl on the surface to initiate a burn, the resulting cut edges on diode machines are universally charred, rough, and jagged. Even on solid black or dark opaque sheets, a 20W to 40W diode laser is strictly limited to thin stock (≤3mm) at agonizingly slow feed rates (1–2 mm/s), and the cut edges will remain matte and melted rather than flame-polished. Fiber Lasers & UV Lasers: Specialty Roles Galvo-driven fiber lasers emit around 1064 nm (near-infrared). This wavelength is optimized for surface absorption in metals, engineering plastics (such as ABS or Delrin), and carbon-doped substrates. On clear or translucent acrylic sheets, a 1064nm fiber beam either passes through or causes internal thermal scattering, leading to bubbling and micro-fractures rather than a clean cut. Similarly, 355nm UV (ultraviolet) "cold lasers" excel at microscopic surface marking, micro-engraving, and cutting thin plastic films without thermal distortion, but they lack the continuous photonic power required to slice through structural acrylic sheet stock. For acrylic sheet fabrication, the CO2 laser remains the uncontested industry benchmark. 3. Essential Pre-Cut Preparations: Bed Setup, Masking, and Safety Achieving pristine cut quality starts well before you hit "Start" in your laser control software. The physical environment inside your machine enclosure dictates whether your sheet comes out crystal clear or burned on the reverse side. Eliminating Flashback Marks: Slat Blades vs. Honeycomb Beds Few defects ruin a pristine acrylic part faster than "flashback"—the telltale pattern of melted craters and frosted scars stamped across the bottom face. Flashback occurs because a laser beam that has penetrated completely through a sheet does not immediately vanish. The focused beam strikes the metal surface of your cutting table (especially common on galvanized or aluminum honeycomb grids) and reflects back into the bottom surface of the acrylic while the plastic is still hot and soft. To eliminate flashback completely, follow these two proven shop practices: Use Knife Blade Slats: Replace dense honeycomb grids with aluminum or anodized blade slat tables. Slat tables minimize surface contact points, providing wide open air gaps beneath the cut line where the penetrating beam can dissipate harmlessly into the lower exhaust plenum. Elevate with Standoff Pins: If you must use a honeycomb bed, elevate your acrylic sheet 5mm to 10mm above the grid using brass standoff pins, magnetic risers, or small scrap pieces of cast acrylic. Elevating the material ensures that the expanding laser beam drops out of its focal waist and loses power density before reflecting back up, leaving the underside pristine. Safety Warning: Material Selection for Standoff Pins Standoff pins or bed risers must be made of solid aluminum, brass, or scrap acrylic. Never use 3D-printed PLA, PETG, or ABS risers. The penetrating laser beam will instantly melt and ignite low-temperature 3D printing filaments, creating a severe fire hazard and releasing toxic fumes inside the machine cabinet. For production workshops cutting heavy acrylic daily, operating industrial CO2 laser engravers equipped with factory-installed knife blade worktables eliminates the need for temporary standoff rigs. Paper Masking vs. Plastic Film: The Melted Goo Trap Raw acrylic sheets arrive from plastics suppliers wrapped in one of two protective coverings: brown adhesive kraft paper or thin, clear/blue polyethylene stretch film. Kraft Paper Masking: Leave this on for cutting whenever possible. The heavy paper absorbs stray laser scatter, protects the top and bottom faces from smoke smudge deposition, and catches hot spatters. It cuts crisply with laser heat, providing a clean mask boundary. Plastic Stretch Film: Always peel this off prior to cutting. Polyethylene plastic film does not vaporize; it shrinks, curls away from the cut line, and melts into a sticky, gummy residue along the top edge of your cut. Even worse, bubbling plastic film traps flammable MMA vapors, dramatically increasing the risk of open flare-ups. If your sheet arrives with plastic cling film, peel it completely and re-mask the surface with low-tack paper transfer tape if smoke protection is required. Thick Sheet Anti-Charring Trick (Dampening Technique) When cutting 6mm to 12mm thick acrylic at slow travel speeds, the extended thermal exposure can scorch dry kraft paper along the cut line, leaving amber smoke halos. To prevent this, use a spray bottle to lightly mist the top paper surface with water just before cutting. The damp paper remains cool and fire-resistant, ensuring razor-sharp mask edges with zero scorched paper residue. Alternatively, peel the top paper completely and leave only the bottom paper intact to guard against table reflection. Critical Ventilation and Fire Safety Laser cutting acrylic is safe when managed properly, but requires strict adherence to workshop safety rules: Methyl Methacrylate Vapor: Acrylic depolymerizes into MMA vapor. While not acutely toxic like the deadly chlorine gas generated by cutting PVC, MMA has a sharp, sickly-sweet odor that causes headaches, dizziness, and eye irritation upon extended exposure. Your laser enclosure must be hooked up to an inline exhaust fan rated for the cubic volume of your cabinet, venting directly outdoors, or routed through a multi-stage industrial fume extractor with activated carbon filtration. Open Flame Hazards: Acrylic is a thermoplastic resin with high fuel value. When vaporized, it burns vigorously. If your cutting speed is set too slow or your air assist fails, the concentrated vapor jet can ignite into a sustained candle-like flame that follows the laser nozzle. The Non-Negotiable Rule: Never leave a laser cutter unattended while cutting acrylic. Always have a designated CO2 fire extinguisher within arm's reach of your cutting station. Never use water on electrical laser cabinets, and avoid chemical dry-powder extinguishers on optical equipment unless facing an uncontrollable structure fire, as powder residue permanently destroys optical mirrors and linear rails. 4. Step-by-Step Guide: How to Laser Cut Acrylic Sheets Follow this systematic five-step workflow to move smoothly from a digital vector design to an assembled, mirror-edged acrylic component. Step 1: Prepare Design Vectors and Kerf Offsets in LightBurn In your vector editing suite or laser control software (such as LightBurn), organize your cut paths by color layer: Order of Operations: Place all interior cutouts, holes, and registration slots on a dedicated first-priority layer, and set the outer perimeter contour to the final layer. If you cut the outside perimeter first, the part may drop slightly onto the bed or shift due to air currents, throwing subsequent interior holes out of concentric alignment. Hairline Line Weight: Ensure all cut vectors are set to pure single-line strokes with zero fill. Lead-in Vectors: On visible outer surfaces, add a 1mm to 2mm straight lead-in path starting in the scrap area. This ensures the initial high-energy piercing blast occurs outside your finished part boundary, preventing a tiny notch or dimple on the visible contour. Specialty Note: Mirror Acrylic Placement If you are cutting single-sided mirror acrylic, always place the sheet reflective face down (gray/white backing face up), and horizontally mirror (flip) your artwork in LightBurn prior to cutting. Cutting into the reflective mirror face causes the laser beam to bounce directly upward into the nozzle, which can crack or burn the delicate ZnSe focus lens within seconds. Step 2: Level the Sheet and Set Precise Focal Height Lay your acrylic flat on your slat table. Because cast acrylic sheets can have slight bows, verify that the material is resting flat across the entire cutting area. Use low-profile hold-down pins or edge clamps if necessary. Focus accuracy dictates your cut quality: For sheets 3mm (1/8") or thinner: Set your focal distance so the laser's waist (the narrowest beam point) sits precisely on the top surface of the sheet. For sheets 6mm (1/4") or thicker: Set your focus slightly below the top surface (detailed further in the Pro Techniques section) to equalize cut taper. Step 3: Run Framing and Optics Inspection Before pressing Start, complete these two essential checks: Optics Check: Inspect your focus lens through the nozzle view or bottom opening. Condensed MMA vapor on a dirty lens will absorb laser heat and crack during thick acrylic cutting. Keep optics spotless with lens wipes and pure isopropanol (used on glass/optics only, never on acrylic parts). Boundary Framing: With the laser lid closed and the laser firing disabled (Red Dot pointer active), run a perimeter Frame test. Observe the travel path to verify the head clears any hold-down weights, edge clamps, or bed frame borders. Framing also confirms your raw sheet offers adequate edge margins—maintain at least a 5mm border from the edge of the sheet to prevent edge-warp curling. Step 4: Execute the Cut with Low Air Assist Close the lid, verify that your auxiliary exhaust fan is running at full volume, and turn on your air assist compressor. Ensure your inline air regulator is throttled back to a low-pressure setting (approximately 5 to 8 PSI). Press Start. Maintain visual supervision on the machine through the protective window throughout the entire cut duration. A tiny, steady blue-tipped jet of vapor flame trailing the nozzle is normal; a dancing orange flame climbing above the nozzle indicates an under-speed or air assist failure that requires immediate pause. Step 5: Post-Cut Cool-Down and Safe Masking Removal When the cut cycle finishes, resist the urge to throw the machine lid open instantly. Allow the exhaust fan to draw air through the cabinet for 30 to 45 seconds to pull lingering MMA fumes out through the ducting. Once unloaded, place the parts on a clean, soft felt or microfiber surface. To remove paper masking from complex, delicate fretwork without using fingernails or metal scraper tools (which permanently scratch the soft PMMA surface), press a strip of high-tack duct tape or Gorilla tape firmly across the cut face and peel it back smoothly at an acute angle. The paper masking pieces will lift away cleanly in seconds. 5. Laser Cutting Acrylic Settings: Recommended Power, Speed, and Frequency Chart Dialing in acrylic parameters requires striking a balance between energy density and thermal dwell time. Moving too fast causes partial penetration; moving too slow dumps excessive heat into the substrate, boiling the plastic and causing warped edges. The 10W per 1mm Rule of Thumb As an empirical benchmark for sealed CO2 laser tubes, plan on approximately 10 Watts of continuous laser power for every 1 millimeter of cast acrylic thickness to achieve a reliable single-pass cut at productive speeds: Required Minimum Power (Watts) ≈ Thickness (mm) × 10 For example, cleanly cutting through 3mm (~1/8") acrylic requires a baseline 30W to 40W laser. Cutting 6mm (~1/4") acrylic demands a genuine 60W or higher. While a 40W laser can cut 6mm acrylic, it must travel so slowly (2–3 mm/s) that excess conductive heat builds up in the cut zone, rounding top corners and increasing fire risk. Recommended Settings Table by Machine Wattage and Thickness The following baseline parameters are tested for Cast Acrylic (GS) using a standard 2.0-inch focal length lens and a gentle air assist setting (5–8 PSI). Sheet Thickness Machine Wattage Cutting Speed (mm/s) Power Range (%) Controller Frequency / PPI Setting Air Assist Level 2mm (~1/16") Cast 40W – 60W 18 – 25 mm/s 50% – 60% Continuous / Default DSP Pulse Low (5 PSI) 3mm (~1/8") Cast 50W – 60W 12 – 18 mm/s 60% – 70% Continuous / Default DSP Pulse Low (5 PSI) 3mm (~1/8") Cast 80W – 100W 20 – 30 mm/s 55% – 65% Continuous / Default DSP Pulse Low (5 PSI) 6mm (~1/4") Cast 60W – 80W 6 – 10 mm/s 75% – 80% Continuous / Default DSP Pulse Low (5–8 PSI) 6mm (~1/4") Cast 100W 12 – 16 mm/s 65% – 75% Continuous / Default DSP Pulse Low (5–8 PSI) 10mm (~3/8") Cast 100W – 130W 4 – 7 mm/s 75% – 80% Continuous / Default DSP Pulse Low (8 PSI) 12mm (~1/2") Cast 130W – 150W 2.5 – 5 mm/s 75% – 85% Continuous / Default DSP Pulse Low (8–10 PSI) Technical Note on Frequency / PPI Settings If you are operating a standard glass-tube DC CO2 laser (such as machines driven by Ruida or TopWisdom controllers), the laser fires continuously during vector cuts, or the pulse timing is governed automatically by the controller firmware. You do not need to search for a PPI slider in LightBurn. Frequency / PPI adjustments (typically 10,000–20,000 Hz) apply primarily to metal RF-excited CO2 laser tubes or specialized galvo systems. For glass-tube systems, focus strictly on balancing Speed and Min/Max Power. Always run a 20mm × 20mm test square in the corner of your stock before launching a major project. If the square does not drop freely under light finger pressure, reduce travel speed by 10% rather than cranking laser power. Why You Should Never Run Glass CO2 Tubes at 100% Power When setting your cut layers in LightBurn or Ruida controllers, cap your software power between 75% and 80%. Glass CO2 laser tubes are energized by high-voltage direct current that excites a gas mixture of helium, nitrogen, and carbon dioxide. Running a tube at 100% software output drives current above the manufacturer's recommended milliampere (mA) ceiling, causing the gas mixture to overheat and accelerating the degradation of internal catalyst coatings. Operating continuously at maximum power can cut your tube's functional lifespan from 3,000 hours down to fewer than 500 hours. If your job fails to cut at 80% power, the correct solution is to lower your feed rate or step up to a higher-capacity machine. Systems like the Monport Effi10S 100W CO2 Laser Cutter are engineered with integrated water chillers and high-headroom power supplies, providing the optical output required to slice 1/4" to 1/2" acrylic in rapid single passes while keeping tube current safely within its long-life envelope. The Golden Rule of Acrylic Fabrication: Single Pass Only Never attempt multi-pass cutting on acrylic sheets. On wood, multiple light passes can prevent charring. On acrylic, Pass 1 creates a deep trench that traps vapor and unfocuses subsequent beams. Pass 2 simply overheats the molten sides, producing heavy burrs, bubbling, and severely stepped, ruined edge walls. If it doesn't cut in one pass, your speed is too fast or your tube is underpowered for that thickness. 6. Pro Techniques for Showroom-Quality Results Standard settings will get a part cut out of a sheet, but advanced techniques elevate your edge quality from acceptable to industrial-grade perfection. The Air Assist Secret: Why "Low Air" Produces Mirror-Smooth Edges Air assist strategy is the biggest conceptual shift when transitioning from wood to acrylic processing. When cutting plywood or MDF, you blast high-pressure air (25 to 35 PSI) straight down the nozzle to suppress combustion and blow carbon char out of the kerf. If you blast high-pressure air into molten acrylic, you will ruin your edge. When acrylic cuts, the boundary layer melts before it vaporizes. If cold, turbulent, high-pressure air strikes that liquid film, it rapidly chills (quenches) the polymer into microscopic turbulent waves, leaving the cut face looking milky, ribbed, and frosted. By throttling your compressor down to a gentle whisper (5 to 8 PSI)—just enough positive pressure to prevent smoke and blowback debris from entering the nozzle cone and fouling the focus lens—you allow the molten boundary layer to stay warm for a split second longer. Surface tension naturally draws the liquid flat, cooling into a glass-clear, flame-polished sheen directly out of the machine. Thick Acrylic Optimization: Dropping the Focal Point into the Material When working with thin materials (≤3mm), setting your focal point on the top surface produces minimal taper because the beam's depth of focus (the Rayleigh length) spans the thickness of the sheet. However, as a laser beam converges through a focusing lens and diverges beneath the focal waist, it forms an hourglass profile. If you focus strictly on the top surface of a 10mm or 12mm sheet, the beam waist rests at the very top, while the bottom of the cut is formed by the wide, diverging skirt of the hourglass. This results in an angled, V-shaped cut face where your finished parts have a noticeable bevel. To cut thick acrylic with square, perpendicular edges: Drop your focal waist: Set your Z-height so the beam waist sits one-third (1/3) to one-half (1/2) into the depth of the material. For a 6mm sheet, focus 2mm to 3mm below the top surface; for a 12mm sheet, drop the focus 4mm to 5mm inside. This balances beam divergence evenly across both the top and bottom faces, producing flat, 90-degree vertical edges. Use a Longer Focal Length Lens: While a standard 1.5" or 2.0" lens produces a tiny spot size ideal for fine engraving, its depth of focus is short. For stock 6mm and thicker, switch to a 2.5" or 4.0" focal length lens. Longer lenses produce a taller, narrower beam waist cylinder, keeping kerf walls parallel through thick plastic. Corner Power Scaling: Using Min/Max Power to Stop Corner Melt A common defect on square acrylic boxes and letters is rounded, over-melted 90° corners. This happens because the heavy gantry motors must decelerate to a stop before pivoting into a turn, then accelerate back to speed. If your cut layer has Min Power set equal to Max Power (for example, both at 75%), the laser fires at 100% of its programmed cutting energy while the head is moving at nearly zero speed in the corner. This dumps massive excess thermal energy into the apex, melting sharp corners into bulbous blobs. To maintain razor-sharp corners in LightBurn: Always enable dynamic power scaling by setting Min Power 8% to 12% lower than Max Power (e.g., Max Power: 72%, Min Power: 62%). The DSP controller automatically throttles laser wattage down in real time as the gantry slows for sharp turns, maintaining an exact, uniform energy density per millimeter across straightaways and corners alike. Dialing in Kerf Offset for Precision Snug Joints and Inlays The laser beam is not a physical blade with zero thickness; it is an optical cone that vaporizes a finite slit of material known as the kerf. On a properly focused CO2 laser cutting 3mm acrylic, the kerf typically measures between 0.15mm and 0.25mm wide. Calculating Kerf: 1. Cut a 50mm x 50mm square from your sheet. 2. Measure the physical cut cutout with a digital caliper: e.g., 49.80mm. 3. Total Material Removed = 50.00mm - 49.80mm = 0.20mm. 4. Kerf Offset Value = Total Width / 2 = 0.10mm. If you design a 10.0mm tab to slot into a 10.0mm mortise without compensating for kerf, the tab will measure 9.8mm and the slot will measure 10.2mm, resulting in a loose, wobbly joint. In LightBurn, open your cut layer settings and locate the Kerf Offset parameter (for detailed reference, consult the official LightBurn documentation on Kerf Offset): For External Outlines: Set an Outward Kerf (e.g., +0.10mm). The software automatically offsets the laser toolpath outward by half the beam width, returning your cut part to its exact nominal 10.0mm dimension. For Internal Holes and Inlays: When building two-color acrylic signage where black letters press-fit flush into a white baseplate, apply an outward offset to the inner letter cutouts until you achieve an interference friction fit that clicks together seamlessly without glue. Lead-ins and Lead-outs: Eliminating Piercing Dents on Visible Edges When a laser tube fires its initial piercing pulse, it dumps a concentrated spike of thermal energy into the material before the gantry motors reach their programmed travel speed. This instantaneous dwell time leaves a tiny, distinct circular indentation or dimple at the path's starting point. To eliminate this mark on your finished work, enable Lead-in in your software. Set a 1.5mm to 3mm lead-in angle (either smooth arc or 45-degree angle). The laser will pierce the acrylic in the waste scrap area, transition up to steady cutting speed, and glide onto the final contour smoothly, leaving the visible edge pristine. 7. Troubleshooting Common Acrylic Cutting Defects When cuts show flaws, use this diagnostic matrix to trace the root cause and apply the correct adjustment: Symptom / Defect Probable Root Cause Actionable Correction Cloudy, frosted, or ribbed cut face (lack of gloss) Air assist pressure too high; or pulse frequency set too low on RF tube. Reduce air regulator to a gentle whisper (5–8 PSI); increase frequency to 10k–20k Hz on RF systems. Material fails to sever completely (hanging on bottom) Travel speed too fast; dirty optical mirrors/lens; incorrect focal height; weak tube output. Lower feed rate by 15%–20%; inspect and clean optical mirrors and ZnSe lens; re-check focal distance. Underside covered in white pits and melted scars (flashback) Laser beam punching through and reflecting off metal honeycomb grid. Switch to an aluminum knife blade bed or elevate sheet 5mm–10mm on metal standoff pins. Rounded top corners and melted, bulging edge contours Feed rate too slow; excessive thermal dwelling in corners; Min Power set equal to Max Power. Increase travel speed; set Min Power 8%–12% lower than Max Power in LightBurn layer settings. Vertical wavy striations or ripple lines along the cut edge Mechanical backlash; loose X/Y gantry belts; dry linear guide rails; air hose whipping during movement. Tension loose drive belts; lubricate linear guide blocks with light oil; secure air tubing to the cable drag chain. Beveled, V-shaped angled cut edge on sheets >6mm Natural laser beam divergence; focal waist positioned strictly on top surface. Drop focus height 1/3 into material depth; switch from a 2.0" lens to a longer focal length 2.5" or 4.0" lens. Part welds back together behind the traveling laser head Cutting extruded acrylic too slowly; molten plastic re-fusing before cooling. Increase travel speed; switch to cast acrylic (GS); apply minimal air assist to blow vapor out of kerf. For broader guidance on managing different sheet grades and finishes, consult our companion guide to acrylic laser processing. 8. Post-Processing & Care: How to Prevent Chemical Crazing You have cut a flawless acrylic component with glass-smooth edges, peeled the protective paper, and need to wipe away fingerprint smudges before final assembly. You reach for a spray bottle of rubbing alcohol, wipe the edge—and watch in horror as thousands of tiny, spiderweb-like cracks shatter the cut face within seconds. This catastrophic failure mode is known as chemical crazing. The Golden Warning: Never Clean Laser-Cut Edges with Isopropyl Alcohol (IPA) Laser cutting relies on intense, concentrated heat. As the beam vaporizes the plastic and moves on, the outer edge cools and re-solidifies much faster than the surrounding bulk material. This leaves high residual tensile stress frozen into the molecular matrix along the perimeter. When you expose this high-stress polymer interface to aggressive solvents—most notably Isopropyl Alcohol (IPA), ethyl alcohol, or acetone—the solvent penetrates between the strained polymer chains, accelerating micro-crack propagation. The surface instantly crazes, turning cloudy and structurally brittle. Once crazing occurs, the damage cannot be polished out; the component is permanently ruined. Flame Polishing with a Torch: Quick Fixes and Residual Stress Risks If minor parameter variations leave your cut edge with a slightly hazy or frosted sheen, professional fabricators sometimes salvage the part using an oxy-hydrogen generator or micro-butane torch: The Technique: With the protective paper removed, pass the needle-point flame briskly along the acrylic edge in a single, fluid stroke (traveling roughly 100mm per second). The 2800°C micro-flame instantly melts surface microscopic roughness without heating the bulk plastic, snapping the edge into high-gloss clarity. The Critical Caveat: Flame torching injects intense secondary thermal stress into the material. Never attempt to solvent-bond or apply vinyl transfer tapes immediately after torch polishing. If the component will be exposed to outdoor weather or chemical cleaners, it must undergo oven annealing first to prevent spontaneous delayed crazing. How to Safely Clean Residue: Novus Polish and Mild Soapy Water To clean laser-cut acrylic safely without inducing stress cracks: The Safest Workshop Method: Use lukewarm water mixed with a single drop of mild dishwashing liquid (such as Dawn) and a clean, edge-less microfiber cloth. Lightly wipe the surface without applying heavy localized pressure. Specialized Plastic Polishes: Use an engineered plastic cleaner such as Novus No. 1 Plastic Clean & Protect or Brillianize. These cleaners lift static charges (preventing dust accumulation) and clean fingerprint oils without attacking stressed PMMA bonds. Thermal Annealing (Mandatory for Critical Structural Parts): If your acrylic parts must withstand aggressive environments, heavy clamping pressure, or outdoor exposure, anneal them in a convection oven. Soak the parts at 80°C (176°F)—just below the glass transition temperature—for one hour per millimeter of thickness, followed by slow, passive cooling inside the closed oven. This relaxes internal thermal stress, making the edge impervious to future stress cracking. Chemical Solvent Welding (Weld-On) vs. Superglue Risks When joining laser-cut acrylic components, selecting the wrong adhesive will cause hazing and bond failure: Avoid Cyanoacrylate (Superglue): Standard superglues emit cyanoacrylate vapors as they cure. These vapors react with ambient moisture and settle across the surrounding acrylic, creating a permanent, chalky-white haze known as "blooming" or "frosting." Superglue also induces localized chemical crazing along cut edges. Use Solvent Cements: Assemble acrylic using dedicated acrylic solvent cements, such as Weld-On 3 (water-thin, fast-set) or Weld-On 4. These are not surface glues; they are water-clear solvents that chemically melt and weld the joining PMMA faces together via capillary action. Applied with a fine hypodermic needle bottle along the seam, solvent cements fuse the parts into a single monolithic, optically transparent structure within minutes. Frequently Asked Questions (FAQ) Can a 40W CO2 laser cut 1/4 inch (6mm) acrylic? Yes. A 40W CO2 laser can cleanly cut 1/4" (6mm) cast acrylic in a single pass at a travel speed of approximately 3 to 5 mm/s at 75% to 80% power. However, cutting at this low speed dumps significant heat into the surrounding material, increasing the risk of edge melting and flare-ups. For regular 1/4" production work, an 80W or 100W laser is recommended to maintain higher travel speeds (12–16 mm/s) and cleaner edges. Should air assist be on or off when cutting acrylic? Air assist should be ON, but dialed to low pressure (5 to 8 PSI). Completely turning air assist off allows flammable vapor to settle and catch fire, while also letting smoke foul your focal lens. Conversely, running standard high-pressure air (25+ PSI) rapidly cools the molten plastic kerf, leaving a rough, cloudy, frosted edge. A gentle whisper of air provides lens safety and fire suppression while allowing the edge to self-level into a flame-polished finish. Why did my acrylic crack after I wiped it with alcohol? Your acrylic experienced chemical crazing. The laser cutting process freezes high tensile thermal stress into the perimeter of the cut. When exposed to harsh solvents like isopropyl alcohol (IPA) or acetone, the solvent attacks the stressed molecular chains, causing immediate micro-fracturing throughout the cut face. Always clean laser-cut acrylic with lukewarm water and mild dish soap, or dedicated plastic cleaners like Novus No. 1. Is cutting acrylic with a laser toxic? Cutting acrylic (PMMA) does not produce chlorine gas, making it entirely laser-safe for your machine mechanics (unlike PVC or vinyl, which emit corrosive hydrochloric acid). However, acrylic vaporizes into Methyl Methacrylate (MMA), an irritating, strong-smelling vapor that causes headaches, nausea, and respiratory discomfort upon repeated inhalation. You must vent the cabinet outdoors using a high-CFM exhaust fan or run emissions through an activated carbon filter. Why is my diode laser not cutting through clear acrylic? Standard desktop diode lasers emit visible blue light at a 450nm wavelength. Clear acrylic is engineered to transmit over 90% of visible light, meaning the blue laser beam passes straight through the sheet without depositing thermal energy. To cut clear, transparent, or white acrylic, you need a 10.6 µm CO2 laser, whose infrared energy is completely absorbed at the acrylic surface. What is the maximum acrylic thickness a CO2 laser can cut? With high-wattage CO2 systems (100W to 150W) paired with a 4.0-inch long-focal-length lens, skilled operators can sever thick acrylic blocks up to 25mm–30mm (~1 inch) in a single slow pass. However, for commercial-grade, distortion-free production with glass-smooth perpendicular edges, the practical working ceiling is 12mm to 15mm (~1/2"). Beyond 15mm, laser beam waist divergence creates noticeable edge taper, and internal heat retention makes bubble-free processing challenging. Conclusion: Achieving Perfection in Every Cut Consistent, showroom-grade acrylic fabrication comes down to strict process repeatability: pairing cell-cast sheet with a 10.6 µm beam, keeping air assist minimal, and isolating the material from reflective metal beds. By understanding how poly(methyl methacrylate) depolymerizes under focused infrared energy, you can pull mirror-edged, dimensionally accurate parts from your machine bed on the very first try. As your production needs scale from occasional hobby badges to thick signage, architectural displays, and nested commercial batches, hardware reliability becomes paramount. Investing in capable industrial CO2 laser cutters with knife blade tables equipped with digital autofocus and dedicated closed-loop water chillers removes the guesswork from your workflow—allowing you to produce glass-smooth acrylic components with speed and precision.
Read more
Laser Engraving Aluminum: Techniques, Settings, and Tips for Better Results
Successful laser engraving aluminum starts with understanding the material, testing settings, and choosing equipment that matches your actual projects. A well-configured metal laser machine can help you produce clear identification marks, personalized products, and consistent designs. If you're comparing equipment, Monport's GT 30W, 50W, 60W MOPA, 100W MOPA, and 200W MOPA models offer different capabilities for different workloads. Before choosing a metal laser machine, consider your required marking depth, production speed, work area, and whether colour marking matters to your business. For dependable results, treat laser engraving aluminum as a process to refine rather than a setting to guess. With careful testing and the right metal laser machine, you can improve consistency, reduce material waste, and develop products that meet your customers' expectations.
Read more
Different Methods of Aluminum Engraving: Techniques, Benefits & Applications
Aluminum Engraving offers several methods, including mechanical engraving, chemical etching, rotary engraving, and fiber laser engraving. Each technique has different advantages depending on the required depth, finish, precision, and production volume. A mopa fiber laser stands out for its adjustable pulse width, which allows greater control over metal-marking effects and supports color marking on certain compatible surfaces. Monport's GT series offers 30W, 50W, 60W, 100W, and 200W options for different project requirements, from personalized aluminum products to higher-volume industrial marking. Choosing the right machine depends on the aluminum type, desired finish, marking depth, and production needs. Testing sample materials before production helps ensure consistent, high-quality results.
Read moreApplication Scenarios

Laser Engraving Stone: How to Choose Materials, Test Settings, and Get Better Results
The result depends on the stone as much as the machine. Color, mineral grain, finish, moisture, focus, image preparation, and extraction can all change the mark. Even two blanks sold under the same material name may require different settings. This guide shows you how to select a stone, choose a laser, prepare the artwork, create a controlled settings test, improve contrast, and diagnose failed engravings without relying on a universal power-and-speed recipe. Important: The settings method below is designed to help you find a safe, repeatable starting point. It is not a substitute for the operating limits and material guidance in your laser manual. Never process an unidentified stone, coating, resin, adhesive, or backing. Can You Laser Engrave Stone? Yes. A laser can mark many stone surfaces by heating a very small area rapidly. Depending on the material, this may create microscopic fractures, change the texture or color of the surface, or remove a small amount of material. On dark stone, the treated area often appears pale because it scatters light differently from the surrounding surface. This distinction matters: a darker-looking or more visible mark is not necessarily a deeper engraving. If a project requires recessed lettering, sculptural relief, or cut stone shapes, sandblasting, CNC carving, diamond tooling, or waterjet cutting may be more appropriate. What controls the result? Color: Pale marks are generally easier to see on dark slate or black granite than on light stone. Grain and inclusions: Large crystals and mixed minerals can interrupt fine lines and photo details. Surface finish: Polished, honed, cleft, and rough surfaces reflect light differently. Porosity: Porous stone can trap residue and soften the appearance of small details. Moisture and fractures: Damp material and existing cracks increase the chance of chipping or breakage. Coatings and binders: Sealers, paints, adhesives, and resins may behave differently from the stone and can introduce hazardous emissions. For that reason, treat every new stone type and every new batch as an untested material until it passes a small sample engraving. Best Stones for Laser Engraving A flat, dry, dark, fine-grained blank is the easiest place to start. The table below helps match common stones to realistic projects. Stone Typical result Best uses Main limitations Slate Pale gray mark with strong contrast on dark blanks Coasters, signs, ornaments, table numbers Layered edges may chip; thickness and surface texture vary Dark granite Light, crisp mark with good photo potential on fine grain Portraits, plaques, memorial tiles, awards Mineral flecks can interrupt detail; polished surfaces reflect glare Marble Frosted or pale mark; contrast varies with color and veining Decorative tiles, names, line art Veins and internal fractures may react unevenly Basalt Subtle light mark on a dense dark surface Whiskey stones, gifts, small decor Curved pieces are difficult to level and focus River rock Highly variable but attractive on a flat, dark face Garden markers, keepsakes, simple icons Unknown composition, hidden cracks, and curvature require testing Limestone or sandstone Rustic, lower-detail mark Bold lettering and simple signs Porosity can trap residue and reduce edge definition Travertine Textured, interrupted mark Large decorative graphics Natural pits are unsuitable for fine text and photographs Engineered stone Unpredictable because binders, pigments, and coatings vary Only after composition and process safety are confirmed Do not laser unidentified resin-bound or coated products Choose the stone around the design Use smooth, fine-grained slate or granite for photographs, small text, and detailed logos. Use thicker strokes and simpler graphics on rough slate, sandstone, travertine, or curved rocks. If a vein, pit, or mineral fleck crosses an important face or letter, move the design or choose another blank. Reject the blank before it wastes a job Do not commit finished artwork to stone that is damp, crumbling, visibly cracked, badly warped, or covered with an unidentified treatment. Inspect adhesive backings and decorative coatings as carefully as the front surface. When a supplier cannot identify the product, use a known laser-compatible blank instead. Which Laser Is Best for Stone Engraving? Laser type Best fit Advantages Limitations CO2 laser Regular work on slate, granite, marble, and mixed nonmetal products Versatile for text, logos, raster images, and batch fixtures Requires suitable clearance, extraction, optics maintenance, and cooling Diode laser Occasional slate and selected dark-stone projects Accessible for owners who already use a diode machine Results on pale or reflective stone may be weak or slow Fiber laser Metal-focused shops testing selected dense stones Fast marking on materials suited to its wavelength Not the default general-purpose choice for common stone blanks Why a CO2 laser is the usual all-round choice For recurring decorative-stone work, a CO2 system is generally the most flexible option. Compare the machines in the Monport CO2 laser engraver collection by usable work area, bed clearance, focusing method, extraction, controller, and workflow rather than wattage alone. A taller machine is not automatically better if the bed cannot safely support the stone. Likewise, more rated power does not correct poor focus, unstable fixturing, contaminated optics, or unsuitable artwork. When another process is better Choose sandblasting for deeper, bold lettering across larger stone areas. Choose CNC or diamond tooling for pockets, relief carving, and controlled depth. Choose waterjet or professional stone cutting for through-cuts and shaped slabs. Choose a different substrate if the stone is unknown, unstable, or unsafe to process. What You Need Before You Start A known, dry stone blank and a scrap from the same batch A laser with adequate work area, vertical clearance, and bed load capacity Source extraction or filtration appropriate for the material and workplace A stable, nonflammable fixture that stays outside the beam path Lens-safe cleaning supplies and a soft brush or damp cloth for the stone Compatible design and control software A labeled test-grid file and a settings record Required personal protective equipment specified by the manufacturer and risk assessment Review the documentation for your exact machine before loading a heavy workpiece. The Monport Laser Wiki is a useful starting point for machine guidance, while the Monport documentation index can help you locate updated support material. Never assume a honeycomb bed, lifting platform, or pass-through can carry a stone simply because the stone fits within the X and Y dimensions. How to Laser Engrave Stone: Step by Step 1. Identify and inspect the material Confirm the stone type and ask whether it has a sealer, resin, paint, adhesive backing, or protective coating. Check the face, back, and edges for cracks, loose layers, pits, and weak corners. If you cannot identify the base material and treatments, stop and obtain the information before laser processing. 2. Clean and dry the surface Remove loose debris with a soft brush or damp lint-free cloth, then allow the stone to dry fully. Dust can make the mark uneven, while trapped moisture and existing fractures may contribute to chipping during rapid heating. Do not apply a mystery spray, varnish, or marking compound in an attempt to improve contrast. 3. Prepare artwork for the surface Use vector artwork for names, borders, logos, and line illustrations. Make strokes heavier on coarse stone, and check that the enclosed spaces in small letters will remain open. For photographs, crop tightly, separate the subject from the background, convert to grayscale, and preserve facial features through the full tonal range. On many dark stones, the laser creates the light areas. That can require an inverted image compared with printing on white paper. Test both normal and inverted versions on a small detail instead of assuming one is correct. 4. Secure and level the stone Use stops, clamps, or a stable support that cannot enter the laser path. Keep the engraving face as level as practical. A rotary attachment is intended for objects that rotate predictably around an axis; it is not a universal solution for irregular river rocks. 5. Focus on the engraving plane Focus according to the machine and lens instructions. On an uneven piece, prioritize the most important part of the design and keep the height change within the usable depth of focus. If frequent height changes are part of the workflow, compare available autofocus laser options. If focus quality has degraded, inspect the optical path and confirm that the installed component is suitable before replacing a CO2 laser focal lens. 6. Frame the job Run the machine's frame or boundary function using the approved procedure. Confirm that the design fits the usable face, clears every fixture, and does not cross a deep pit, edge, or visible fracture. Framing is a positioning check, not proof that the material is safe. 7. Run a test matrix Engrave a small labeled grid before the finished design. Test power against speed first. Then use a second, narrower test to refine line interval, image mode, or passes. The next section provides a repeatable method. 8. Engrave while supervising the machine Close the enclosure and operate the laser according to its safety instructions. Never leave an active laser unattended. Watch the beginning from the approved viewing area and stop if the stone moves, the exhaust is ineffective, or the surface reacts unexpectedly. LightBurn's official laser safety guidance also emphasizes following the device manufacturer's instructions and supervising operation. 9. Clean, inspect, and finish After the machine's safe-access procedure is complete, remove residue without sending dust into the air. Judge the engraving under the lighting and viewing distance of the final use. If contrast remains weak, test a compatible post-engraving color fill or stone finish on scrap before treating the finished piece. Stone Laser Engraving Settings: Use a Two-Stage Test There is no universal setting for “stone.” A displayed power percentage is not an absolute amount of delivered energy, and the same speed can produce different results on machines with different rated output, beam condition, optics, controllers, acceleration, and maintenance. For example, a 40W CO2 laser tube and a 150W CO2 laser tube do not make the same output at the same percentage. Tube condition and the correct matching laser power supply also matter. Copying a percentage without matching the machine, material, and method is therefore unreliable. Stage 1: Find a workable energy range Start with conservative guidance from the manufacturer of your exact machine. Create a grid of small squares, icons, or short text samples. Assign speed to one axis and power to the other. Use a scrap piece from the same supplier, color, finish, thickness, and batch. Label each cell in the file or map its location before running. Reject cells with spreading fractures, heavy flaking, muddy edges, or no useful contrast. Select two or three promising cells for a finer second test. Stage 2: Refine the variable that limits quality Keep the best speed-and-power region and change only one additional variable at a time. Variable What it changes What to watch for Power Energy delivered while other variables remain constant Faint marks at one end; chipping or lost detail at the other Speed Exposure time over the surface Slower is not always better; excess exposure may damage brittle stone Line interval Spacing between raster scan lines Visible gaps when too wide; overlapping, muddy detail when too tight Focus Spot size and edge sharpness Wide lines, soft edges, and uneven results across a tilted surface Pass count Repeated exposure over the same design Misregistration, extra chipping, and little contrast improvement Image mode How grayscale is translated into laser dots Blocked shadows, lost highlights, repetitive texture, or noisy faces Scan direction and offset Edge alignment during bidirectional rastering Ghosted vertical edges or speed-dependent banding If raster edges appear offset, use the machine-specific procedure rather than guessing. LightBurn documents scanning offset adjustment, while Monport owners can also consult the Monport troubleshooting resources. How to choose the winning cell Do not select the cell that merely looks deepest. Score the candidates against the requirements of the actual product: Readable contrast at the intended viewing distance Clean edges and open counters in small text Consistent fill across changes in grain Minimal chipping, flaking, or spreading fractures Acceptable cycle time for one item or a production batch A finish that remains consistent after cleaning Record a repeatable material profile Field What to record Material Supplier, product name, color, finish, thickness, and batch Machine Model, laser type, rated output, controller, and maintenance condition Optics and focus Lens, focal length, focus method, and relevant Z position File Vector or raster, physical size, image mode, orientation, and source resolution Process Speed, power, interval or DPI, passes, scan direction, and air setting Result Contrast, edge quality, chipping, cycle time, cleaning, and finish Evidence Photograph of the labeled grid and final sample under consistent light If you use a GRBL-based workflow, confirm that the hardware and software are compatible before transferring profiles between systems. The Monport GRBL control board page is one reference for understanding the controller side of a K40-style upgrade, while the LightBurn basic-use documentation explains the general artwork and job workflow. How to Prepare Photos for Stone Engraving Photo engraving often fails because the source image asks the stone to reproduce detail it cannot hold. Better preparation usually improves a portrait more than simply adding power. Choose an image with usable tonal structure Select a sharp photograph with one clear subject, directional light, visible midtones, and separation between the subject and background. Avoid low-resolution screenshots, tiny group photos, busy foliage, and portraits with important facial features hidden in deep shadow. Edit for the physical material Crop away background that does not support the subject. Convert the image to grayscale. Adjust highlights and shadows so eyes, hair, clothing, and facial contours remain distinct. Use local contrast carefully; excessive sharpening can create halos that engrave as outlines. Compare normal and inverted versions on a small test strip. Test the chosen dithering mode at the final physical size. Do not confuse more DPI with more detail If raster lines are closer together than the effective spot and stone grain can reproduce, neighboring marks overlap and the photo becomes muddy. Test several line intervals and judge them at the final viewing distance. A larger, cleaner portrait often reads better than a small image packed with nominal resolution. How to Improve Contrast Without Hiding a Process Problem Improve the engraving before adding a finish: Clean the stone and confirm it is dry. Inspect and clean optics according to the machine manual. Refocus and verify that the face is level. Run a finer test around the best speed-and-power cells. Adjust line interval, stroke weight, or image preparation. Simplify artwork that is finer than the surface can reproduce. Paint fill Paint fill can make text and bold graphics more visible on light stone. The lowest-risk workflow is often to engrave a known bare stone, clean it, then apply a compatible color after engraving. If a mask is used, confirm that its material and adhesive are approved for the laser process. Test cleanup and adhesion on scrap. Sealers and oils A finish may deepen the base color, change gloss, and increase or reduce apparent contrast. Match the product to the final use, such as indoor decor, outdoor signage, or an item that may contact food. Follow the finish manufacturer's application, cure, and safety instructions. A product that is safe to apply afterward is not automatically safe to place in the laser beforehand. Troubleshooting Common Stone Engraving Problems Problem Likely causes First controlled test Mark is too faint Low-contrast stone, unsuitable energy range, or incorrect image polarity Run a finer speed-power grid and compare normal with inverted artwork Edges are blurry Poor focus, tilted stone, overly tight interval, or motion issue Refocus, level the face, and engrave a simple line-and-square test Fine details disappear Thin artwork, coarse grain, excess exposure, or overlapping raster lines Increase line weight and test a wider interval on smoother stone Surface chips or flakes Excess localized energy, brittle layers, moisture, or an existing crack Stop, inspect the blank, and reduce energy per pass on sound scrap Result is uneven Mixed minerals, residue, height change, or inconsistent coating Clean the surface and compare a flat, known blank from the same batch Photo looks muddy Compressed midtones, excessive DPI, wrong dithering mode, or no inversion test Increase tonal separation and compare small image-mode samples Horizontal banding or ghosted edges Dirty optics, scan offset, mechanical motion, interval, or image artifact Run a uniform-fill test, then follow machine-specific maintenance and offset guidance Stone moved Weak fixture, contact with the head, or unsuitable support Rebuild the fixture and repeat the frame check before engraving Readable up close but not at distance Design is too fine or contrast is too low for the viewing condition Increase text size and stroke weight before adding a finish When the first diagnostic test does not isolate the cause, document the symptom, machine state, file, and settings before changing anything else. This makes a support request more useful and prevents several simultaneous adjustments from hiding the real problem. Stone Engraving Safety: Dust, Ventilation, Fire, and Unknown Coatings Stone engraving can generate airborne particulate, and natural or engineered stone may contain crystalline silica. In the United States, businesses should review the applicable OSHA respirable crystalline silica standard and obtain qualified occupational-safety guidance where required. Use a hierarchy of controls: Identify the stone, binder, adhesive, backing, sealer, and coating before processing. Operate an enclosed laser as an enclosed system when the manufacturer requires it. Capture contaminants at the source with suitable exhaust or filtration. Discharge or filter air in accordance with equipment instructions and local rules. Avoid dry sweeping or compressed-air cleaning that returns settled dust to the air. Maintain optics, filters, ducts, rails, cooling, and the work area on schedule. Use required protective equipment for operation, handling, and cleanup. If your risk assessment calls for wavelength-specific eyewear, review compatible CO2 laser protective glasses and follow the machine manufacturer's enclosure and eyewear instructions. Keep the machine supervised and follow its fire-response procedure. A disposable dust mask does not replace material identification and source control. If a product's composition cannot be confirmed, do not laser it. From One Good Sample to Repeatable Production For batch work, consistency matters more than maximum depth. Keep a retained approval sample and compare each batch under similar lighting. Use a fixture with repeatable stops, save the exact production file, record the material batch, and schedule lens and extraction checks before quality begins to drift. Calculate price from the full workflow Do not price a stone product from laser time alone. Include: The blank and inbound shipping Design, proofing, and customer revisions Test pieces and expected breakage Fixture setup and machine time Cleaning, paint fill, sealing, and cure time Packaging, selling fees, labor, overhead, and profit A hand-filled memorial plaque should not be priced like a text-only coaster that leaves the machine complete. The material log and timing record created during testing provide the evidence needed for more reliable quoting. Frequently Asked Questions What is the best stone for a beginner? Flat dark slate is usually the easiest starting material because it is simple to fixture and often develops clear natural contrast. Smooth, dark, fine-grain granite is a strong next choice for detailed text and photographs. What is the best laser for stone engraving? A CO2 laser is generally the most versatile choice for recurring work on slate, granite, marble, and other common stone blanks. A diode laser may handle selected dark stones at a smaller scale. A fiber laser is usually chosen for metal work first and stone experiments second. Can a laser cut stone? A desktop or workshop laser should normally be treated as a surface-marking or shallow-engraving tool for stone, not a stone-cutting machine. Use professional waterjet, diamond-tool, or other appropriate processes for through-cuts. How deep can a laser engrave stone? There is no dependable universal depth because the result varies by material and machine. Many useful decorative engravings are surface textures or shallow marks rather than measurable relief. Use sandblasting or CNC carving when substantial depth is a functional requirement. Can you laser engrave marble? Yes, but color, finish, veins, and internal fractures affect both contrast and consistency. Test conservatively on the actual tile, especially when it is thin or visibly fractured. Should stone be coated before laser engraving? Not by default. Unknown paints, varnishes, sealers, resins, and adhesives may create unsafe emissions or unpredictable marks. Process known bare stone where possible, and use a mask or coating only after its composition and laser compatibility have been confirmed. Is laser-engraved stone permanent? The laser changes the surface rather than applying a peelable decal. However, abrasion, outdoor weather, freeze-thaw cycles, and the durability of any paint fill or sealer can change the finished appearance over time. Can I reuse settings from another machine or stone? Use them only as context, not as a production recipe. Machine output, optics, focus, software, stone color, grain, finish, and batch all affect the result. Validate the material with a labeled test grid and save a profile only after the actual sample passes. Final Takeaway Reliable stone laser engraving comes from controlling variables, not chasing a single magic setting. Start with a known, dry, flat blank. Match the laser and fixture to the stone's size and weight. Prepare artwork for the material's real texture and contrast, run a two-stage test, and record the winning process with photographic evidence. For regular slate, granite, marble, and mixed nonmetal work, a CO2 laser is usually the most flexible starting point. Compare workspace, clearance, focusing, extraction, controls, and support alongside power. You can use the Monport Laser website to compare current machine categories and then validate the exact stone before committing the final design.
Read more
Best CO2 Laser Engraver Projects: What Can a CO2 Laser Engraver Create?
Understanding what can a co2 laser engraver produce helps you choose the right tools for your business goals. From wooden gifts to commercial signs, these tools deliver incredible flexibility and profit potential. Investing in a reliable setup like a Monport machine ensures you get the power, speed, and safety needed for daily production. Ready to start building profitable co2 laser engraver projects in your own shop? Shop Now to find the right laser for engraving machine setups, explore current promotions, and start creating today. Don't forget to enter code BESTMP10 at checkout for your exclusive discount.
Read more
10 Profitable Laser Engraving Business Ideas You Can Start in 2026
Thinking about starting a laser engraving business in 2026? Discover 10 profitable business ideas, the best products to sell, expert startup tips, and how to choose the best CO₂ laser machine to increase productivity and grow your custom engraving business.
Read moreLaser Engraving & Festivals

Craft Love in Metal: Jewelry Engraving Machine Guide for Mother’s Day Engraved Necklace Gifts
There’s something different when a gift is made, not just bought. A jewelry engraving machine turns simple metal into something personal, something that stays. For this season, a mother's day engraved necklace isn’t just another present, it’s a message she can wear every day. Using a jewelry engraving machine, you can create a mother's day engraved necklace that carries names, dates, or even small handwritten notes that feel real, not mass-produced. If you’re thinking of crafting instead of buying generic gifts, this guide walks you through ideas, tools, and real ways to make a mother's day engraved necklace using a jewelry engraving machine without overcomplicating things. Monport GA 60W MOPA Fiber Laser Integrated Engraver & Color Marking Machine with AutoFocus Why Engraved Jewelry Still Matters A mother's day engraved necklace works because it tells a story. It’s not loud, not flashy, but it stays. When you use a jewelry engraving machine, you’re not just decorating metal, you’re putting meaning into it. People still choose a mother's day engraved necklace over other gifts because it lasts longer than flowers and feels more thoughtful than ready-made items. With a jewelry engraving machine, even a small pendant becomes something unique. Getting Started with a Jewelry Engraving Machine Starting doesn’t need to feel technical. A good jewelry engraving machine is designed so beginners can still get clean results. You don’t need years of experience to produce a beautiful mother's day engraved necklace. Here’s what you typically need A reliable jewelry engraving machine Metal blanks like stainless steel or silver Simple design software A clear idea of what message goes on the mother's day engraved necklace When you begin, keep designs simple. Names, initials, or short phrases look better and engrave cleaner using a jewelry engraving machine. Project Ideas for Mother’s Day Engraved Necklace Gifts Name and Birthdate Pendant This is one of the easiest ways to use a jewelry engraving machine. A mother's day engraved necklace with a child’s name and birthdate feels personal right away. You can place the name in the center, date below it. Clean, readable, and meaningful. Handwriting Engraving If you can scan a handwritten note, your jewelry engraving machine can turn it into a mother's day engraved necklace. This one hits different because it feels more human, less digital. Coordinates Design Engrave the location of a meaningful place. A mother's day engraved necklace with coordinates of a home or birthplace adds a subtle but deep message, made precise using a jewelry engraving machine. Minimalist Heart or Symbol Not everything needs words. A mother's day engraved necklace with a tiny heart, infinity sign, or line art works well, especially when done cleanly with a jewelry engraving machine. Why Monport Stands Out for Jewelry Engraving When choosing a jewelry engraving machine, build quality and precision matter. This is where Monport gets attention, especially for creators who want consistent results. The Monport GA 60W MOPA Fiber Laser is built for serious engraving without making things complicated. It handles a mother's day engraved necklace project with speed and accuracy, even if you’re still learning. What Makes It Different The machine isn’t just powerful, it’s practical. 60W laser power gives strong engraving depth High speed up to 10000mm/s keeps production fast Auto-focus makes setup easier for any jewelry engraving machine user Long lifespan means you’re not replacing it anytime soon Easy Setup for Beginners A lot of machines look good but take forever to set up. This one doesn’t. You can start your first mother's day engraved necklace project quickly because the jewelry engraving machine is designed for simple installation. Precision That Shows in Every Piece When engraving jewelry, small mistakes are obvious. The Monport system keeps lines sharp, which is exactly what you want for a mother's day engraved necklace made using a jewelry engraving machine. Tips to Make Your Engraved Necklace Look Premium Even with a good jewelry engraving machine, design choices matter. Keep It Simple A mother's day engraved necklace doesn’t need too much detail. Clean layouts look better and last longer. Choose the Right Material Stainless steel and anodized aluminum respond well to a jewelry engraving machine, especially for a mother's day engraved necklace that needs durability. Test Before Final Engraving Always run a sample before engraving the final piece. A quick test with your jewelry engraving machine helps avoid mistakes on the actual mother's day engraved necklace. Make It a Gift That Sells If you’re not just making for personal use, a jewelry engraving machine can turn into a small business tool. A mother's day engraved necklace is one of the easiest products to sell because it already has emotional value. Use clear product photos, show close-up engraving details, and highlight customization options. People buying a mother's day engraved necklace want to feel that it’s made just for them, and your jewelry engraving machine helps deliver that. Limited-Time Offer If you’re ready to start, this is a good time. Use code BESTMP10 to get 8% off your machine. A solid jewelry engraving machine is an investment, but it pays off fast when you start creating products like a mother's day engraved necklace that people actually want. Shop Now and start crafting pieces that feel personal, not generic. Discover More designs you can create with your own jewelry engraving machine. Key Takeaways A jewelry engraving machine lets you create meaningful, custom jewelry at home or in a small shop A mother's day engraved necklace stands out because it’s personal and emotional Choosing the right machine affects quality, speed, and finish Monport machines offer strong performance for beginners and pros Simple designs often feel more meaningful than complex ones Conclusion A gift becomes memorable when it carries meaning. That’s exactly what a mother's day engraved necklace does. With the help of a jewelry engraving machine, you can turn simple ideas into something lasting and personal. Whether you’re creating for family or building something bigger, starting with a jewelry engraving machine opens a lot of possibilities. And when your first mother's day engraved necklace is done, you’ll see why people keep choosing engraved gifts over everything else. FAQs What materials work best with a jewelry engraving machine? Stainless steel, silver, and anodized aluminum are great choices for a jewelry engraving machine, especially for a mother's day engraved necklace. Is it hard to learn how to use a jewelry engraving machine? Not really. Most modern systems are beginner-friendly, so making a mother's day engraved necklace is easier than expected. How long does it take to engrave a necklace? With a good jewelry engraving machine, a simple mother's day engraved necklace can take just a few minutes. Can I start a business with a jewelry engraving machine? Yes. Many people begin by selling a mother's day engraved necklace and expand from there using their jewelry engraving machine. What makes engraved necklaces special? A mother's day engraved necklace feels personal because it carries a message, and a jewelry engraving machine helps make that message permanent.
Read more
CO2 Laser Engraver for Wood: Easy Mother’s Day Gift Ideas That Feel More Personal
Discover thoughtful Mother’s Day gift ideas made with a CO2 laser engraver for wood. Learn how personalized wooden signs, recipe boards, and keepsakes can feel more meaningful while exploring the helpful features of the Monport 90W laser engraver for home projects or small businesses.
Read more
Mopa Fiber Laser Engraver Halloween Deals That Save You Big This Season
A mopa fiber laser engraver from Monport is more than a purchase—it’s a tool that transforms ideas into precise, beautiful creations. Combined with Monport’s generous Halloween deals, now is absolutely the right time to buy. Use the comparison table to pick the model that fits your needs, claim those hidden discounts, and start engraving your future. Secure Your Monport Halloween Deal Now.
Read moreMachine Guide

Autofocus vs. Manual Focus Laser Engravers: Which Is Better for Small Businesses?
Choosing between autofocus and manual focus can affect how much time you spend preparing jobs, switching between products, and training operators. For a small laser engraving business, autofocus is worth considering when material thickness changes frequently. Manual focus can be sufficient when jobs use a stable, repeatable setup and operators can establish the correct focus consistently. Neither method automatically produces better engraving quality or faster processing. The decision comes down to your machine's focusing system, the materials you process, your order mix, and the actual cost difference between suitable machines. This guide focuses mainly on desktop CO2 laser engravers. Other laser systems may use different focusing mechanisms, so always check the specifications and operating instructions for the exact model you are considering. Quick Answer: Which Focusing Method Fits Your Business? Your production situation What to prioritize Frequent changes in material thickness Autofocus, provided its sensing system is compatible with your materials Repeated jobs using the same material and fixture Consistent setup and whether manual refocusing is actually necessary Curved, uneven, or difficult-to-detect surfaces Sensor limitations, workpiece positioning, and approved focusing procedures Several operators sharing a machine A repeatable procedure that staff can follow and verify Tight equipment budget Total machine cost, measured setup time, and realistic financial benefits Autofocus is most useful when it removes a recurring preparation task. Manual focus remains a reasonable option when the existing workflow is already consistent. Neither should take priority over essential requirements such as material compatibility, working area, laser power, and the machine's overall configuration. Autofocus vs. Manual Focus: The Key Differences Laser focusing establishes the relationship between the material and the focal plane of the installed lens. The correct position depends on the lens, material, and intended operation. The focusing method determines how that position is established; it does not determine laser power or processing speed. How Autofocus Works An autofocus system uses a sensing mechanism and machine controls to establish the appropriate focus position. Depending on the design, the system may adjust the laser head, the worktable, or another part of the focusing mechanism. The detection method matters. Some systems depend on a suitable surface or detection point, and not every sensor can handle every material or workpiece shape. Monport describes the MEGAS 70W desktop CO2 laser engraver as featuring smart thickness sensing. Its MEGAS beginner's guide describes the integrated system as LiDAR autofocus. Check the current product configuration and the corresponding manual for the exact operating procedure. Autofocus can reduce manual height adjustments on compatible jobs. It does not automatically select the correct power and speed settings, position artwork, flatten a warped sheet, or compensate for every change in workpiece height. How Manual Focus Works Manual focus uses a manufacturer-approved procedure to establish the working distance. On many CO2 laser engravers, this involves a focus gauge or another reference designed for the machine and installed lens. The operator checks the material height, follows the specified procedure, and adjusts the relevant component when required. With practice, this process can be straightforward, especially when the same setup is used repeatedly. Manual focus is not synonymous with manually moving the Z-axis, nor does every machine with autofocus support an alternative manual procedure. If you intend to use a different focusing method, confirm that the manufacturer permits it for your model. How the Two Methods Compare Comparison factor Autofocus Manual focus Setup process Uses the machine's automatic sensing and adjustment mechanism Requires the approved manual focusing procedure Frequent thickness changes Can simplify focus adjustments on compatible materials Requires the operator to reset or verify focus as needed Repeated production Useful when focus must be established frequently Practical when material height and fixtures remain consistent Operator training Can reduce the number of manual adjustment steps Requires familiarity with the focusing tool and procedure Irregular surfaces Depends on the sensor, detection conditions, and machine configuration May be suitable when an approved manual method accommodates the workpiece Maintenance Sensors and associated mechanisms may need inspection Focus gauges and other references must be kept in good condition Finished quality Depends on correct focus and processing conditions Can also produce good results with a correct setup Neither column guarantees a particular result. Focusing systems differ by machine, and the same method can behave differently with different lenses, materials, and workpiece arrangements. When Does Autofocus Make More Sense for a Small Business? Autofocus has the clearest practical value when your production workflow requires frequent focus adjustments. The benefit depends on how often those adjustments occur and how much preparation time the automatic process actually removes. Switching Between Products of Different Thicknesses Consider a workshop that engraves thin wooden coasters in the morning and thicker wooden signs in the afternoon. Changing the material or its position can change the distance between the lens and the work surface. A compatible autofocus system can simplify the adjustment between jobs. This may help businesses producing personalized gifts, nameplates, signs, and other products with different thicknesses. However, thickness is only part of the setup. A raised fixture or holder can change the height of the actual engraving surface. The operator still needs to position the workpiece correctly and confirm that the autofocus system can detect the relevant surface. Handling Personalized and Short-Run Orders Custom-product businesses often switch between designs, materials, and product sizes throughout the day. Each change may involve artwork preparation, material loading, workpiece positioning, focus adjustment, and processing-setting checks. Autofocus addresses only the focusing part of this process. Its value is greater when focus adjustment is a recurring task rather than an occasional step. If loading, securing, and aligning each item take substantially more time than focusing, autofocus alone may make only a modest difference to the complete order workflow. Training a Growing Team When several operators share a machine, a repeatable focusing process can make training easier. Autofocus may reduce reliance on manual adjustments, but operators still need to understand material compatibility, verify the setup, and recognize when the automatic process is unsuitable. For an experienced operator producing identical items all day, the difference may be less significant. Working area, power, software compatibility, ventilation, and service support may have a greater influence on the purchase decision. When Is Manual Focus the Better Choice? Manual focus can be a sensible choice when the production process is stable, operators are familiar with the equipment, and focus adjustments are infrequent. Repeating the Same Product Setup Suppose a workshop produces a batch of identical wooden products using the same material thickness and fixture. Once the setup has been verified, the operator may not need to make substantial focus adjustments between pieces. In this situation, autofocus may save little preparation time between items. Both methods still require attention to material placement and any changes that could affect the working distance. A previously verified setting should not be assumed to remain correct after changing the lens, material height, fixture, or relevant machine configuration. Working With Irregular or Difficult-to-Sense Surfaces Some autofocus systems have difficulty detecting particular surfaces or workpiece shapes. Openings, transparent surfaces, soft materials, and uneven objects can present challenges, depending on the sensing mechanism. Manual focusing is an option only when the machine's approved procedure accommodates the workpiece. It does not solve every problem caused by a curved or warped surface: focusing at one point cannot ensure that all other points remain at the same distance from the lens. Before purchasing a machine for unusual products, ask the manufacturer to confirm the supported focusing method and any workholding requirements. Do not improvise a sensor target or bypass a safety function. Keeping Equipment Costs Under Control A limited budget makes it especially important to compare complete machine configurations rather than individual features. Consider the working area, laser power, material compatibility, software, safety provisions, ventilation requirements, support, and focusing method together. A machine with manual focus may cost less in one comparison, but that is not guaranteed across all brands and configurations. If two suitable machines have different prices, identify the actual source of the difference. Then decide whether the time saved by autofocus would provide enough practical value to justify the additional investment. Does Autofocus Improve Laser Engraving Accuracy? Autofocus can help establish the correct focus position, but it does not automatically make an engraving sharper or more precise than one produced with manual focus. The position of the focal plane is a process variable. In a 2025 study of CO2 laser engraving on birch plywood, researchers examined different focal-plane positions alongside different laser power and scanning-speed settings, measuring changes in the plywood's surface color. The findings illustrate why focus should be evaluated together with the material and processing conditions, rather than treated as a universal setting. (Gochev and Vichev, Drvna industrija) A separate review of CO2 laser cutting of polymeric materials also discusses how focal-point position influences cutting quality. Its findings concern specific cutting processes and materials; they do not establish that autofocus is inherently more accurate than manual focus. (Review of CO2 laser cutting of polymeric materials) What Autofocus Cannot Fix An automatic focusing system does not correct every cause of poor engraving or cutting results. Material warping, an unsuitable lens, contamination, alignment problems, unstable fixtures, and incorrect processing parameters can all affect the finished work. Camera positioning is another separate function. A camera can help an operator preview artwork placement, while autofocus establishes the working focus position. Neither function should be assumed to perform the other's job. How to Test Autofocus and Manual Focus for Your Own Jobs Use a representative material and product before deciding whether one focusing method works better for your business. Select a typical workpiece and a second sample with a different thickness, if relevant to your orders. Follow the approved focusing procedure for each method, using the appropriate lens and fixture. Record the full setup time, including verification and necessary handling—not just the time spent adjusting focus. Run the same design with comparable, verified processing conditions. Inspect fine details, edge definition, cutting completeness, and repeatability across multiple samples. Record material flatness, lens condition, alignment, and any other differences that could affect the result. If you compare different machines, remember that their lenses, mechanics, controls, and other hardware may differ too. Without controlling those variables, you cannot attribute every difference in the finished work to autofocus or manual focus alone. Is Autofocus Worth the Cost? A Practical Calculation The most useful way to evaluate autofocus is to measure how much preparation time it saves in your own workflow. Record the time required to establish focus using the current method, then measure the alternative method on comparable jobs. Include the necessary checks and handling steps. 1. Time saved per setup: Manual setup time − Autofocus setup time. 2. Estimated annual hours saved: Annual hours saved = (Minutes saved per setup × Setups per week × Working weeks per year) ÷ 60 3. Estimated annual labor-time value: Annual labor-time value = Annual hours saved × Hourly labor cost These formulas estimate the value of time saved; they do not guarantee additional revenue or an equivalent reduction in cash expenses. Information to record Why it matters Number of focus setups per week Establishes how frequently the feature could be used Average time for each method Measures the actual preparation-time difference Working weeks per year Reflects your operating schedule Hourly labor cost Estimates the value of the saved labor time Difference in equipment cost Identifies the additional investment, if any Additional operating costs Accounts for relevant extra expenses You can then estimate whether the investment could pay for itself. Estimated monthly net benefit: (Realizable annual labor-time value ÷ 12) − Additional monthly operating costs. Payback period in months: Additional equipment cost ÷ Estimated monthly net benefit. Use the payback formula only when the estimated monthly net benefit is positive. If the saved time cannot be put to productive use, the theoretical labor-time value should not be treated as a guaranteed financial return. Also compare the actual prices of the machines you are considering. If autofocus is included in the standard configuration, use the difference in total purchase cost rather than assuming the feature has a separate price. What Should You Check Before Buying a Laser Engraver? Before choosing a machine, test its focusing workflow against the products you expect to make. A short demonstration can reveal limitations that a feature list cannot. Confirm the focusing method. Ask which sensing or manual procedure the machine uses, and whether it supports an alternative focusing method. Test typical product heights. Try a standard item and another with a different thickness, including the holder or fixture used in normal production. Check material compatibility. Confirm whether the sensing system can detect your intended surface reliably. Do not assume every transparent, soft, curved, or uneven material is supported. Review maintenance and support. Ask how to verify focus, address sensor problems, and handle changes to the lens or focusing assembly. Separate the automation features. Evaluate autofocus, camera positioning, and batch processing independently because they solve different problems. Compare the complete configuration. Consider the working area, power, compatible materials, software, safety provisions, and support alongside the focusing method. For example, Monport's MEGAS 70W desktop CO2 laser engraver lists autofocus, an 8MP camera, and batch-production capabilities. These features address different parts of a production workflow: establishing focus, previewing or positioning designs, and processing multiple items. Monport's MEGAS setup and beginner's guide provides further information about the machine and its operation. Check the current US product configuration and the relevant manual before relying on a specific procedure or compatibility claim. Frequently Asked Questions Is autofocus worth it for a small laser engraving business? It may be worth considering if you frequently change product thicknesses or repeatedly need to establish focus. If you mainly produce identical items with a stable, verified setup, manual focus may be sufficient. Measure your setup time and compare the actual equipment costs before deciding. Is manual focus accurate enough for commercial laser engraving? Manual focus can produce consistent results when the operator follows the correct procedure for the installed lens and machine. Material condition, processing settings, and machine setup also affect quality. Test samples should meet your requirements before you begin a production batch. Does autofocus make a laser engraver faster? Autofocus can reduce some focus-setting work, but it does not automatically increase the laser's processing speed. The total time saved depends on how often focus must be established and how much of the overall workflow that step occupies. Can I use manual focus on a machine with autofocus? That depends on the machine and its approved focusing procedures. Some machines support alternative manual methods; others require a specific procedure. Check the manufacturer's instructions before attempting to change the focusing method. What matters more for a small business: autofocus or laser power? They address different requirements. Laser power influences processing capability, while autofocus changes how the focus position is established. Compare both alongside the working area, material compatibility, software, safety provisions, and your expected order mix. Choose the Focusing Method That Fits Your Production Workflow Autofocus is most valuable when frequent product changes make focusing a recurring preparation task and the sensing system suits your materials. Manual focus remains practical for businesses that use stable setups and can establish focus consistently. Measure your actual setup time, compare the complete machine configurations, and consider whether saved time can be used productively. For broader planning around equipment, applications, and production needs, explore Monport's laser engraving resources for small businesses.
Read more
What Are the Best Tools for Designing Mandala Laser Cut Patterns?
The best workflow for mandala laser cut patterns depends on whether you want to generate symmetrical artwork, edit vector paths, or prepare a file for a specific laser. You can start with a pattern generator or a licensed SVG/DXF, refine the geometry in a vector editor, and then check the file in compatible laser-control software. This guide compares tools for creating and preparing mandala patterns, explains what to check in an SVG or DXF, and outlines a practical file-preparation workflow. Before using a downloaded design, confirm its export format, commercial-use terms, and compatibility with your intended machine. Which Type of Software Do You Need? These tool categories solve different problems. Choosing the job first helps you avoid expecting a drawing application to control a laser or assuming every exported vector file is production-ready. 1. GENERATEExplore radial symmetryand pattern variations2. EDITRefine paths, spacing,and connections3. PREPAREImport and preview incompatible control software Mandala projects usually involve three different tasks: generating the design, refining vector geometry, and preparing the job in software supported by the intended laser controller. Tool type Main job Best for What it does not guarantee Mandala generator Repeats or mirrors elements around a center Exploring radial layouts, rings, petals, and variations quickly Generated artwork may need geometry cleanup Vector editor Creates and edits scalable paths, nodes, and curves Custom shapes, precise spacing, connected details, and lettering It does not necessarily control a laser Raster illustration app Creates pixel-based artwork and sketches Drawing concepts and experimenting with painted symmetry A raster image is not automatically a vector cut file Laser-control software Imports artwork, organizes operations, previews jobs, and communicates with supported controllers Preparing a file for a compatible machine Support depends on controller, software version, and license Units, fonts, effects, groups, and paths may not transfer identically between applications. Always check the file in the software that will receive it. Best Tools for Designing Mandala Laser Cut Patterns 1. Mandala.cafe: Best for Editable Symmetry and Vector Export Mandala.cafe focuses on creating and revising symmetrical artwork. Its website describes vector-based drawing and SVG export, making it a useful starting point when you want to sketch a motif, repeat it symmetrically, and continue editing instead of duplicating every element by hand. After exporting, inspect the geometry in a vector editor or compatible control application. Vector output does not automatically remove duplicate contours or guarantee that narrow connections will remain intact. Review the current plan and license terms before using designs in products for sale or redistributing files. 2. OpenMandala: Best for Fast Browser-Based Exploration OpenMandala is a browser-based mandala generator with controls for symmetry, layers, detail, and style. It can help you compare visual directions quickly at the concept stage. OpenMandala states that its generated mandalas are licensed under Creative Commons Attribution 4.0 International (CC BY 4.0). This license permits sharing and adaptation, including commercial use, provided its conditions are followed. Attribution, a link to the license, and an indication of changes are required. Review the license deed and the generator’s current terms before using an output in a product or redistributing a digital file. 3. Inkscape: Best Free Vector Editor Inkscape is a free, open-source vector graphics editor that uses SVG as its main format. It is useful when a generated mandala needs precise editing: simplifying a dense center, adjusting curves, removing duplicate contours, or checking whether small shapes remain connected to the larger design. Review the center, small openings, and narrow connections at close zoom and at the planned finished size. Inkscape edits artwork; it does not universally control lasers. Save an editable source file, export a format supported by the receiving application, and inspect the file again after import. 4. Adobe Illustrator: Best for Controlled Radial Repeats Adobe Illustrator is useful when you need control over repeated shapes, typography, and complex vector artwork. Its Radial Repeat feature duplicates an object around a central point. Begin with one petal, leaf, or geometric motif, adjust the repeat, and build additional rings for a more intricate mandala. Inspect repeated geometry, export a supported format, and verify dimensions and paths after import. Text may need accessible fonts or conversion to paths, depending on the receiving workflow. Illustrator is a design tool, not a universal laser controller; choose it when its vector controls justify the cost. 5. LightBurn: Best for Preparing Jobs on Supported Laser Systems LightBurn’s official file-management guide lists vector imports such as AI, SVG, DXF, and PDF, along with common raster formats. LightBurn can help arrange artwork, inspect layout, organize operations, and preview a job for a supported device. Compatibility depends on the laser’s controller and configuration, not simply on whether the machine is a CO₂, diode, or fiber laser. Its laser identification guide explains controller categories and license compatibility. Check the exact machine and controller before buying a license or committing to a workflow. 6. Adobe Photoshop: Best for Raster Concepts, Not Final Vector Geometry Photoshop includes Radial and Mandala symmetry modes for painting. Adobe’s symmetry guide explains how strokes can be reflected and repeated around symmetry guides. This can help you sketch a concept before rebuilding it as vector artwork. A raster image may suit some engraving workflows, but it does not automatically contain vector contours for cutting outlines and internal openings. If you need cut geometry, trace or recreate the artwork as vectors and inspect the paths. Which Mandala Design Workflow Fits Your Project? Your situation Starting point Next step Main caveat Explore radial symmetry quickly Mandala.cafe or OpenMandala Compare variations and inspect the export Verify current export formats and license terms Edit paths or custom lettering Inkscape or Illustrator Refine curves, connections, and dimensions A separate compatible control workflow may be needed Start with a raster sketch Photoshop Recreate or trace as vectors if cut contours are needed Raster symmetry alone does not create clean cut paths Prepare an existing design for a machine LightBurn or the machine’s supported software Import, check dimensions and paths, and preview Verify the exact controller and license Make one one-off project Licensed ready-made SVG or DXF Inspect the file and license A “laser cut” label does not guarantee suitability for every size or machine This is a decision guide rather than a universal ranking. The right workflow depends on whether your main challenge is creating the pattern, editing its geometry, or preparing a file for a particular machine. What Makes a Mandala SVG or DXF Cut-Ready? A vector file can be scalable and still contain problems that matter during fabrication. Before using a mandala pattern, check the following: Clean vector geometryConsistent paths and connectionsNeeds cleanupCheck overlaps, gaps, isolated shapes This schematic highlights common file issues. Inspect the actual SVG or DXF for duplicate contours, unintended gaps, and detached pieces at the intended finished size. Paths: Check that contours are complete where the intended operation requires them. Duplicate contours: Remove overlapping lines that could repeat an operation unintentionally. Connected details: For a one-piece ornament or stencil, check that parts intended to remain attached are connected. Stencils may need bridges. Small openings and narrow connections: Review at the intended physical size. Suitable detail depends on material, thickness, dimensions, and process; there is no universal minimum bridge width. Scale and units: Compare imported width and height with the planned dimensions. Fonts and effects: Check support in the receiving application. Convert text to paths when appropriate and keep an editable source copy. License: Confirm commercial-use permission, attribution requirements, and any limits on redistribution. SVG and DXF are common in vector workflows, but neither guarantees that dimensions, text, effects, or paths will transfer exactly. Choose a format supported by both applications, then inspect the imported file. How to Create a Mandala Laser Cut Pattern from Start to Finish The most useful checks happen at the handoff between applications. The example below is an illustrative digital workflow, not a claim that a physical cut test has been performed. 1. DesignCreate or choosea licensed pattern2. ExportSave a supportedSVG or DXF file3. ImportOpen it in softwarefor your controller4. VerifyCheck scale, paths,and job preview Use the file handoff as a checkpoint: export settings, imported dimensions, path structure, and controller compatibility all need to be verified in the receiving software. 1. Decide What the Finished Design Needs to Be Identify the intended result: a one-piece ornament, layered mandala, stencil, decorative panel, or engraved illustration. A stencil may need bridges; a layered design needs separate parts and an assembly plan; an engraved illustration may not need cut-through contours. 2. Generate or Draw the Symmetry Use a generator for quick variations or a vector editor for precise control. Start with a simple motif and add detail only when it improves the design. Dense rings and tiny openings may become fragile or hard to distinguish at a smaller finished size. 3. Inspect the Vector Geometry Look for duplicate lines, stray endpoints, unintended gaps, and small islands that may detach. Check that negative spaces are intentional and required connections remain. Verify how the receiving software handles fonts. 4. Export and Check the File Handoff Choose a format supported by both the design application and the control software. After import, confirm physical width and height, path structure, text, and operation assignments. Inspect the imported file rather than relying only on the original preview. 5. Validate the File for Its Intended Use Review narrow connections, small openings, the outer perimeter, and areas that need to remain connected. Suitability depends on finished size, material, thickness, and production process. A digital preview does not prove physical performance. Machine-related work should be performed by a trained, authorized operator following equipment documentation and safety requirements. Inspect small openings and connecting bridges at the intended finished size; a digital preview alone cannot guarantee the physical result. Worked Example: Preparing a One-Piece Mandala Ornament Imagine a circular ornament with repeated petals and small openings. Generate several variations and choose one that remains readable at the intended size. Export a supported vector file, then open it in Inkscape to inspect the center and outer ring for overlapping contours, isolated pieces, and incorrect dimensions. Check lettering, import the file only into software that supports the intended controller, and verify scale and paths in the preview before proceeding. This example explains file preparation only. Whether a design can be produced successfully depends on the material and equipment involved. Free vs. Paid Tools: Which Workflow Is Worth It? Priority Option to evaluate Cost and limitation to check Explore radial ideas quickly Browser-based generator Export formats, account requirements, and license terms Edit SVG without a paid graphics suite Inkscape Free and open source; separate machine-control software may be needed Detailed vector design and typography Adobe Illustrator Subscription cost and file handoff Prepare jobs on supported machines LightBurn License type and controller support must match the machine Use a Monport machine Officially supported software for the specific model Confirm model, controller, operating system, and version requirements For occasional projects, a free generator or Inkscape may be enough. A generator can speed up variation work, while a professional vector editor may suit detailed paths, typography, or a consistent product style. Machine-control software is a separate decision. Before paying for another application, check its license, supported formats, and compatibility with your exact machine. For a one-off project, a licensed ready-made file may be simpler. “Free” does not mean unrestricted. Confirm commercial-use permission, attribution requirements, and limits on redistributing the digital file. Selling a physical product and sharing its source file are separate uses. Copyright and Licensing Note This article provides general information, not legal advice. Copyright rules and license terms can vary by jurisdiction. Before using or selling a design, review the creator’s current license and the laws that apply to your situation. For a specific legal question, consult a qualified professional. Choosing the Right Workflow for Your Monport Laser Monport offers different software options for different machine configurations. Start with the exact machine name and controller, then check the Monport software overview and Download Center. For supported MEGA and MEGAS workflows, consult the M-Design Hub page for software and model-specific setup guidance. Confirm current requirements for your model and software package. For LightBurn, verify controller and license support with both LightBurn and the machine documentation. This guide compares design and file-preparation tools; it does not replace manufacturer operating and safety instructions. Frequently Asked Questions What is the best free software for designing mandala laser cut patterns? Inkscape is a strong free option when you need editable vector paths. A dedicated generator may be faster for exploring radial symmetry. If you own a laser, also confirm that you have compatible machine-control software; a vector editor alone does not control every device. Can LightBurn create mandala patterns? LightBurn can import vector artwork and includes layout and editing features, but it is not a dedicated mandala generator. For intricate radial patterns, create the artwork in a generator or vector editor first, then use LightBurn only if your machine and controller are supported. Should I use SVG or DXF for a mandala design? Use the format supported by both the design application and receiving software. SVG is common in vector-graphics workflows; DXF is also used by many design and fabrication applications. Neither format guarantees that paths, units, text, or effects will transfer exactly, so check the imported file. Why does my mandala SVG look right but import incorrectly? The file may use unexpected document units, contain duplicate contours, reference unavailable fonts, or include effects the receiving application handles differently. Compare imported dimensions with the intended size, inspect paths, and check the preview before relying on the file. Can I sell products made from free mandala SVG files? Only if the applicable license allows the intended use. Check commercial-use permission, attribution requirements, restrictions on redistributing the digital file, and separate terms supplied by the creator or platform. Do not rely on the word “free” alone. Conclusion Choose a mandala generator for fast symmetry, a vector editor for precise path control, and compatible control software for preparing a machine job. If you only need one design, a licensed ready-made file may be simplest. Before using any SVG or DXF, confirm its dimensions, paths, license, and compatibility with the software and equipment involved.
Read more
Laser Engraver Prices: Compare Costs by Brand, Store, and Laser Type
Two laser engravers can look similar in a product listing and still differ by hundreds or thousands of dollars. One may include an enclosure, camera, cooling system, or rotary attachment, while another requires separate purchases. Laser type, working area, and intended workload can change the price just as much as the brand name. There is no single “average” price that meaningfully covers every laser engraver. Entry-level diode machines may cost a few hundred dollars, desktop CO2 laser engravers span several price tiers, and fiber/MOPA or UV systems can cost several thousand dollars depending on their capabilities and configuration. This guide uses dated price snapshots, explains why listings differ, and provides a practical way to compare brands, stores, and complete setups. How Much Do Laser Engravers Cost by Type? These are dated snapshots, not a representative US market survey. Monport catalog prices were checked on October 22, 2026; some options are marked pre-sale, and product pages may show a different final promotional price. The third-party directory says its data was last updated June 4, 2026, so its entries are not live seller quotes. Laser type Example price snapshots What the examples tell you Diode Laser A third-party catalog listed the ACMER K1 7W at $230 and K1 12W at $270. Small, lower-power machines can start in the low hundreds, but work area, enclosure, optical output, and accessories affect the real comparison. CO2 Laser Monport’s US catalog listed the Reno 45W at $1,149.99, Reno 65W at $1,599.99, and MEGAS 70W at $2,899.99. Bed size, power, enclosure, cooling, camera, focusing features, and production workflow can create large price differences within one technology. Fiber Laser / MOPA Fiber Laser The third-party catalog listed ACMER fiber examples at $1,099 for a 20W model and $1,799 for a 50W model. Monport’s GM Pro collection listed a 20W option at $1,410, while the GT 200W MOPA product page listed the machine option at $8,100. These are not equivalent machines: source power, working field, integrated versus split-frame construction, and MOPA features all matter. UV Laser Monport’s UV collection listed a 2D inner-glass UV system at $2,719.99 and a 3D inner-glass UV Pro system at $3,190. UV systems are specialized; power option, glass-marking method, included cooling, and package contents affect price. This is not a market-wide ranking: diode entries come from a small third-party directory, while the others are Monport listings. Verify the exact seller listing before buying. Diode Laser Engraver Prices Diode laser engravers are often a lower-cost entry point for wood, leather, paper, and selected coated materials. Small models may suit labels, ornaments, signs, and personalized gifts, but they are not universal material-processing systems. Prices rise with larger work areas, enclosures, cameras, autofocus, motion features, and bundled accessories. Check whether advertised wattage means optical output or electrical input. Standard visible-light diode systems are not universal bare-metal engravers; coated or anodized surfaces depend on the machine and material. Clear acrylic is unsuitable for many common blue-diode systems. CO2 Laser Engraver Prices CO2 laser engravers are commonly used for suitable nonmetallic materials such as wood, acrylic, leather, paper, and some plastics. A CO2 laser engraver price depends on more than power: bed size, cooling, exhaust, enclosure, focusing features, camera positioning, pass-through access, and controls all affect the package. A compact desktop model may suit occasional craft work; larger jobs may justify a bigger bed. In the October 22, 2026 catalog snapshot, Monport listed the Reno 45W at $1,149.99, the Reno 65W at $1,599.99, and the MEGAS 70W at $2,899.99. These are listing prices for different machines, not a controlled performance comparison. See the Monport CO2 laser engraver collection and the MEGAS 70W product page for current configurations. Fiber Laser and MOPA Fiber Laser Engraver Prices Fiber laser engravers are commonly chosen for metal marking and engraving. Price varies with source power, working field, focusing system, integrated versus split-frame construction, and included features. A 20W integrated marker and a 200W split-frame MOPA system are not direct substitutes. MOPA systems offer more control over pulse parameters, which can matter for some specialized metal-marking jobs. Results depend on the metal, surface finish, and processing settings; a higher price does not guarantee a particular color or finish. For a current Monport example, the catalog snapshot listed the GM Pro 20W option at $1,410 and the GT 200W MOPA at $8,100. These are very different configurations, so the figures illustrate the breadth of a product category rather than a like-for-like value comparison. Browse the Monport GM Pro collection and the GT 200W MOPA product page to check exact variants and included accessories. UV Laser Engraver Prices UV laser engravers are a specialized purchase for fine marking on selected plastics, glass, ceramics, and other suitable materials. Price depends on power, optical configuration, work area, cooling, and application. Monport’s catalog snapshot listed a 2D inner-glass UV system at $2,719.99 and a 3D inner-glass UV Pro system at $3,190. Those listings refer to different product configurations, and selected power options or bundles can change the price. See the Monport UV laser collection for current options. Do not assume that every UV machine can achieve the same marking effect on every material. Why Do Laser Engraver Prices Vary Between Brands? Two machines with similar advertised wattage can differ in work area, frame construction, controls, enclosure, accessories, software, and support. Laser source, power, and intended work Start with the material and task, not the wattage in the title. Diode, CO2, fiber/MOPA, and UV systems are not interchangeable. Power matters within a category, but optical design, material properties, work area, and the difference between engraving and cutting also affect capability. Check that power ratings use the same measurement: optical output and electrical input are different quantities. Work area, construction, and production capacity A larger work area can fit bigger pieces or more designs in one layout, but it does not guarantee higher output if loading, finishing, or design time is the bottleneck. Frame, motion components, cooling, and focusing features also affect suitability. Enclosure, camera, autofocus, and workflow features An enclosure, camera, autofocus, pass-through access, integrated cooling, and rotary compatibility can add cost. A camera can help position artwork, a rotary supports suitable cylindrical objects, and a larger bed can fit multiple pieces. Do not pay for features you will not use, but do not compare a fully equipped bundle with a bare-machine listing as if they were identical. Software, warranty, parts, and customer support Software, replacement parts, warranty, returns, and technical support also affect value. A bundle is useful only if you need its extras. Compare published terms for the exact model and seller; independent guides such as TechRadar’s 2026 roundup also group machines by use case, not just price. Why Can the Same Laser Engraver Cost Different Amounts at Different Stores? A list price, sale price, bundle price, and final checkout total are different things. The snapshot below records the source type and key limitations so readers can distinguish seller listings from third-party catalog entries. Prices were reviewed on October 22, 2026; they are not guaranteed checkout totals. Brand / model Store or source Observed price snapshot Price type and configuration What to verify Monport Reno 45W CO2 Laser Engraver Monport product page $1,149.99 category listing; a product-page result also showed “Final Price” $1,069 Base machine / pre-sale option; page labels differed in the indexed snapshot Confirm selected version and final cart price; shipping/tax at checkout Monport MEGAS 70W CO2 Laser Engraver Monport product page $2,899.99 machine option; page result also showed “Final Price” $2,779.99 LightBurn package $2,999.98; conveyor package $3,399.98 Compare exact package contents, not just the headline price ACMER K1 7W diode Third-party catalog $230 Directory entry; underlying data last updated June 4, 2026 Not a seller checkout quote; verify exact seller, output, shipping, and warranty ACMER Fiber PM 20W Third-party catalog $1,099 Directory entry; not a direct seller quote Confirm exact configuration and seller terms ACMER Fiber PM 50W Third-party catalog $1,799 Directory entry; not a direct seller quote Confirm exact configuration and seller terms Glowforge Pro TechRadar’s 2026 buying guide The guide displayed a $5,995 offer link when reviewed Third-party editorial snapshot, not a fresh checkout capture Recheck the current offer and package before buying The third-party directory is a small sample, and TechRadar’s price link is an editorial snapshot. These sources help illustrate how prices differ across technologies and brands, but they do not establish a universal price ranking. For a fair comparison, confirm the seller, exact configuration, included accessories, shipping, tax, and warranty terms for each current offer. List price versus sale price A category page may show a listed price while a product page presents a different “Final Price” or variant-specific amount. That does not automatically mean either number is wrong: the pages may be showing different variants, pre-sale offers, or package choices. Record the price label and selected option, then check the cart before comparing. Machine-only listings versus bundles A bundle may include software, a rotary attachment, cooling equipment, lenses, materials, or other accessories. It can cost more upfront and still be a better fit if it includes items you would otherwise purchase separately. The MEGAS examples above show why the machine-only option and accessory packages should be compared separately. Official stores, marketplaces, and dealers Offers can differ in condition, package contents, warranty, returns, and support. Verify whether a marketplace listing comes from the manufacturer, a dealer, or a third-party seller. For refurbished, open-box, or used machines, check condition, accessories, returns, and warranty for that exact unit. Shipping, taxes, and final checkout cost Shipping may be calculated at checkout, and sales tax depends on the order and destination. For larger machines, check delivery arrangements and whether setup or installation is included. Review the warranty and return terms for the exact product and seller, since general policy pages may contain exclusions. What Extra Costs Should You Check Before Buying? The machine price is only one part of a complete setup. Which extras matter depends on the laser type, materials, workspace, and intended projects. Separate items needed for your setup from optional upgrades. Cost item When it may apply What to verify Fume extraction and ventilation Depends on the machine, materials, and workspace. A peer-reviewed study available through CDC’s NIOSH Stacks found that emissions from desktop laser cutting and engraving varied by material and that ventilation reduced emissions. Follow the machine maker’s requirements and confirm whether suitable extraction is included. Read the NIOSH study on emissions from desktop laser cutters and engravers. Cooling Some CO2 laser engravers require separate cooling; other machines include it. Confirm whether the required cooling equipment is built in or sold separately. Rotary attachment and workholding Useful for suitable cylindrical objects or projects needing repeatable positioning. Check compatibility with the exact model and whether the attachment is included. Software and accessories A license, lens, camera, air assist, or other accessory may be needed for a specific workflow. Check the package contents and software/controller compatibility. Materials, maintenance, and replacement parts Ongoing costs for regular production. Review consumables, maintenance guidance, and replacement-part availability. Freight, taxes, and delivery Depends on the seller, order, and destination. Confirm the final checkout total and delivery arrangements. Mark each item as required for the setup, needed for a specific project, or optional. Not every buyer needs every accessory, but the base price may not include everything required for the intended work. Compare safety features by their documented specifications, not appearance. The FDA’s laser products guidance explains hazard classes and labeling. Check the machine documentation for classification, enclosure, interlocks, and required controls; price alone does not establish compliance. The FDA and NIOSH resources cited here provide US-focused guidance; buyers and workplaces outside the United States should also follow the laser-product, occupational-safety, ventilation, and worker-protection rules that apply in their own jurisdiction. For a deeper discussion of purchase price versus longer-term ownership costs, see Monport’s guide to the real cost of owning a laser engraver. How to Compare Laser Engraver Prices Fairly Use the same checklist for every offer so a low headline price or large discount does not hide important differences. Define the job. List the materials, maximum workpiece size, desired finish, and approximate workload. Match the laser type. Compare machines suited to the same material and task. Check the configuration. Record power, working area, enclosure, focusing features, and other specifications relevant to the job. List included items. Separate machine-only pricing from bundles that include software, a rotary, cooling, or other accessories. Review seller terms. Confirm whether the seller is the manufacturer, a dealer, or a marketplace seller. Check the warranty, return policy, and parts support for the exact offer. Calculate the realistic total. Add applicable shipping, tax, and required setup items that are not included. Record the date. Save the exact product URL, selected variant, displayed price, package contents, and date checked. Worked example: machine-only price versus a bundle In the reviewed MEGAS 70W listing, the selected machine option was shown at $2,899.99, a LightBurn package at $2,999.98, and a conveyor package at $3,399.98. Based on those displayed figures, the LightBurn option was $99.99 above the machine-only option, while the conveyor option was $499.99 above it. These are arithmetic differences between listed package prices, not proof that either accessory is worth the difference for every buyer. MEGAS 70W option Displayed price in the snapshot Difference from machine-only option What to check Machine $2,899.99 — Exact selected version and current checkout price Machine + LightBurn $2,999.98 +$99.99 License/version included and software compatibility Machine + conveyor $3,399.98 +$499.99 Conveyor contents, compatibility, and whether the workflow needs it For a blank comparison worksheet, record: Comparison field Offer A Offer B Brand, model, seller, and exact variant Laser type, power, and working area Included accessories and software Displayed price and price type Shipping, tax, delivery, warranty, and returns Additional setup items and estimated total Which Laser Engraver Configuration Fits Your Needs? Your budget should follow your workflow. A hobbyist making occasional wooden gifts may not need the working area or production features required by a business fulfilling repeat orders. A buyer marking bare metal should first look at suitable fiber systems rather than choose a cheaper machine intended for a different material. Buyer profile What to prioritize Common mistake Hobbyist or DIY maker Material compatibility, manageable workspace, included essentials, and ease of setup. Buying before confirming that the machine supports the intended material. Serious maker or small business Repeatable setup, work area, workflow features, parts support, and accessory costs. Comparing a machine-only price with a fully equipped bundle. Production-focused workshop Throughput, workpiece size, uptime, parts availability, and the cost of interruptions. Assuming advertised wattage alone guarantees better production results. A more expensive machine can be a poor fit if its features go unused; a lower-priced machine can be a false economy if it cannot handle the required material, size, or workload. Confirm the application first, then compare within a suitable category. For buyers comparing CO2 laser engraver power and working area, Monport’s CO2 laser engraver buying guide by power provides a related selection resource. Frequently Asked Questions Which factors most affect a small-business laser engraver budget? The biggest factors are laser type, working area, output power, production volume, included accessories, and the material you need to process. Start by defining the job, then compare complete configurations and include any setup items the manufacturer requires. Is it cheaper to buy a laser engraver directly from the manufacturer? Not always. A manufacturer may offer a promotion, while another seller may bundle accessories or provide different delivery and service terms. Compare the exact model, package contents, shipping, warranty, and final checkout price before deciding. What costs should I include besides the machine? Check whether your setup needs separate ventilation or extraction, cooling, a rotary attachment, software, workholding, materials, maintenance, or replacement parts. Some machines include certain items, so verify the package rather than assuming every extra must be purchased. Are discounted or refurbished laser engravers worth considering? They can be worth evaluating, but the discount alone is not enough. Confirm the machine’s condition, exact configuration, return eligibility, warranty coverage, included accessories, and seller identity. Make sure the savings justify any limitations. Should I choose a laser engraver based on wattage or price? Neither is enough on its own. Start with material compatibility and the job you need to complete. Then compare relevant power, work area, features, bundle contents, and support among machines designed for similar applications. Conclusion A meaningful laser engraver price comparison starts with the right technology and continues through the full configuration. Compare similar machines where possible, check what is included, account for setup costs that apply to your workflow, and verify the seller’s terms and final checkout price. Public price listings are snapshots, not guarantees. Once your material, workspace, and workload are clear, explore the Monport CO2 collection, fiber collection, or diode collection if one of those categories fits the work you plan to do.
Read moreMonport VS Competitors

Monport MEGAS vs OMTech Polar 2: Which 70W CO2 Laser Machine Is the Best Choice in 2026?
Compare Monport MEGAS vs OMTech Polar 2 70W CO2 laser machines. Explore differences in speed, cutting power, automation, software, airflow, and price to find the best desktop CO2 laser for your workshop, small business, and production needs. See why MEGAS offers advanced features and better value.
Read more
Monport Mega S vs xTool P2 55W: Which Desktop CO2 Laser Cutter Is Better?
Compare Monport Mega S vs xTool P2 55W to see which desktop CO2 laser cutter better fits your workflow. Explore 70W vs 55W power, work area, speed, autofocus, camera features, and production-ready workflow tools.
Read more
Monport Mega S vs xTool P2: A Comparative Analysis
Explore a detailed comparison of Monport Mega S and xTool P2 CO2 lasers. Learn how differences in laser power, workspace, workflow features, and productivity impact engraving and cutting performance for creators, small businesses, and production-focused users.
Read moreLaser Engraving and Industry

Metal Tag Engraving Machine Guide: How to Choose the Right Laser
Choosing a metal tag engraving machine starts with the mark you need to deliver, not with laser wattage alone. A small pet tag, an anodized aluminum asset label, a stainless-steel QR code plate, and a deep industrial nameplate may all be called “metal tags,” but they place very different demands on a machine. For most businesses that need fine text, logos, serial numbers, barcodes, QR codes, or repeatable marks on metal, a fiber laser is the most practical starting point. CNC engraving remains useful when deep, tactile material removal is the priority, while dot peen is often better for functional identification on harsh or uneven industrial parts. This guide explains the differences, shows how to match a machine to your materials and workflow, and outlines a repeatable process for producing accurate tags. For a technical introduction to the laser source itself, see Monport’s fiber laser guide. Quick Answer: What Is the Best Machine for Metal Tags? For most stainless-steel, aluminum, brass, and titanium tags, choose a fiber laser engraver. It can create precise, permanent marks without a cutting tool, handle variable data, and process batches of different designs from digital files. The best technology changes when your priority changes: Your primary requirement Best starting option Why Fine text, logos, serial numbers, QR codes Fiber laser Small focused spot and repeatable digital marking Personalized pet tags and small nameplates 20W–30W fiber laser Good detail with a relatively simple workflow High-volume variable-data tags 30W–50W fiber laser Supports fixtures, repeat jobs, and faster processing Color effects on stainless steel MOPA fiber laser More pulse control for specialized surface effects Deep grooves that can be felt CNC or higher-power fiber laser Designed for material removal rather than surface contrast alone Functional marks on large or uneven parts Dot peen or portable marker Works well where mobility or impact marking matters Mostly wood, acrylic, leather, or paper CO2 laser Better matched to non-metal materials If you are buying one machine for a metal-tag business, define the typical material, tag size, required depth, daily volume, and code-verification needs before comparing models. You can review current Monport laser machine options after defining those requirements. What Is a Metal Tag Engraving Machine? A metal tag engraving machine adds identification, instructions, branding, or decoration to a metal tag, plate, or part. The term covers several technologies that create marks in different ways: Fiber laser: changes or removes material with a focused laser beam. CNC or rotary engraver: cuts into the surface with a mechanical tool. Dot peen marker: creates a dot-matrix indentation through repeated impact. Scribing marker: scratches a continuous line with a hard stylus. The correct choice depends on whether you need a high-contrast surface mark, a deep tactile groove, a machine-readable code, a mark on an uneven part, or a combination of these requirements. Marking, Etching, Engraving, and Annealing: What Is the Difference? These terms are often used interchangeably in product listings, but they describe different surface effects. Marking changes the appearance of the surface, often through oxidation, controlled heating, or coating removal, with little material removed. Etching removes or melts a small amount of material to create a slightly recessed mark. Engraving removes more material and creates a physical depth that may be felt by touch. Annealing heats certain metals, especially stainless steel, to create a dark mark while keeping the surface relatively smooth. Many asset tags only need a clean, permanent mark. Deep engraving is useful when the tag will face abrasion or when a tactile groove is part of the product, but it normally takes more time and may require multiple passes. What Information Can Be Added to a Metal Tag? Depending on the application, a tag can include a company name, logo, serial number, asset ID, safety instruction, model information, batch code, QR code, Data Matrix code, barcode, date, contact detail, or decorative pattern. A fiber laser is particularly useful when every tag in a batch carries different variable data. Fiber Laser vs. CNC vs. Dot Peen for Metal Tags All three technologies can create durable identification marks, but they solve different production problems. Compare the way each machine creates the mark before comparing brands or wattage. Factor Fiber laser CNC / rotary engraving Dot peen How the mark is made Focused, non-contact laser energy Cutting tool removes material Pin repeatedly impacts the surface Fine text and logos Excellent for small details Good when the tool can reach the detail Limited for decorative graphics QR and Data Matrix codes Strong choice when contrast and size are verified Possible, but setup is often slower Suitable mainly for functional identification Deep tactile grooves Possible with power and multiple passes Natural strength of the process Creates impact indentations rather than smooth grooves Variable data Easy to generate from design or data files Possible, but may require more setup Common in industrial marking systems Debris No cutting chips, but fumes may require extraction Creates chips and cutting debris Usually little loose debris Tool wear No engraving bit, but optics and ventilation need care Cutting tools wear and need replacement Marking pins wear over time Best fit Detailed, repeatable metal marking Deep material removal Durable industrial traceability Choose a Fiber Laser When Detail and Repeatability Matter A fiber laser is usually the strongest general-purpose option for stainless-steel tags, aluminum nameplates, QR-code labels, serial plates, and personalized metal products. It does not require a cutting bit, and the same digital setup can produce a batch of identical tags or a sequence of unique serial numbers. Choose CNC When Physical Depth Is the Main Requirement CNC engraving makes sense when the customer needs a deep groove, a clearly tactile letter, a traditional machined finish, or substantial material removal. The trade-off is more mechanical setup, cutting noise, chips, and tool wear. Choose Dot Peen When Functional Durability Comes First Dot peen is commonly used for industrial traceability on components that may be dirty, uneven, or exposed to demanding conditions. Its marks are functional rather than decorative, so it is less suitable when the appearance of a fine logo or personalized gift is important. Why Fiber Lasers Work Well for Metal Tags Direct processing of common metals Fiber lasers are designed around metal processing and can mark common materials such as stainless steel, anodized aluminum, brass, copper, and titanium when the source, lens, and parameters are appropriate. Unlike a CO2 laser, a fiber system is normally selected for direct bare-metal marking rather than for wood and acrylic work. If your workshop also handles non-metal products, compare the CO2 and fiber laser categories before choosing one platform. Fine marks on a small surface Metal tags often have limited space but need a serial number, logo, code, or short instruction. A focused fiber-laser spot can produce small characters and fine linework, provided the artwork, focus, contrast, and tag surface are suitable. Non-contact production Because the laser does not press a tool against the tag, there is no engraving bit to flex or dull during a repeat order. This can make fine alignment and consistent batches easier. The process is not maintenance-free: protective lenses, extraction, fixtures, and the work area still require inspection. A damaged or contaminated lens can affect mark quality, so review compatible fiber-laser lenses and parts when planning maintenance. Variable data and batch work Many tags are not identical. A supplier may need a different asset ID on every plate, or a custom seller may need a different name on every order. A fiber-laser workflow can use sequential numbering, imported data, QR codes, Data Matrix codes, or customer-specific files without changing a physical cutting tool. Permanent identification A laser mark is created on the material or its coating rather than printed on a removable sticker. The correct mark still depends on the environment. An indoor label may only need a clear surface mark, while a tag exposed to abrasion, chemicals, weather, or high temperature should be tested under representative conditions. What Metals Can a Fiber Laser Mark? Material names alone do not predict the result. Alloy, surface finish, coating thickness, reflectivity, flatness, and the intended mark all affect the process. Test the actual tag stock before starting a production order. Material Common result Typical uses Important consideration Stainless steel Dark marking, annealing, etching, or deeper engraving Asset tags, equipment plates, safety labels Choose the mark for the abrasion and corrosion environment Anodized aluminum High-contrast coating removal Asset labels, control panels, nameplates Coating thickness and color affect contrast Bare aluminum Surface modification or engraving Equipment labels and custom products Alloy and finish can change the result substantially Brass Decorative marking or engraving Nameplates, gifts, awards Reflectivity and alloy composition require testing Copper Marking or engraving under suitable settings Electrical identification and specialty parts High thermal conductivity and reflectivity can make processing harder Titanium Dark marks, engraving, and selected color effects Specialty tags, components, jewelry Surface condition and pulse settings strongly influence the result Stainless Steel Tags Stainless steel is popular for industrial tags because it resists corrosion and handling wear. A fiber laser can create a dark high-contrast mark, a smooth annealed mark, or a deeper engraved area. Select the finish based on the environment rather than choosing the darkest-looking test cell automatically. Anodized and Bare Aluminum Anodized aluminum often produces a clear contrast when the laser removes or changes the anodized layer. Bare aluminum is less predictable because alloy and surface condition have a greater influence on the visual result. Run a test grid on the actual stock, especially when tags come from different suppliers. Brass, Copper, and Titanium Brass is often selected for its appearance, while copper can require more careful control because it reflects laser energy and conducts heat efficiently. Titanium can produce dark or specialized effects, but color results are parameter-sensitive. These materials are good candidates for sample approval before a full order. Coated, Painted, or Plated Metals Fiber lasers can sometimes remove or modify a coating to expose the layer underneath. Identify the coating whenever possible. Unknown paints, platings, and surface treatments can produce unexpected fumes or an inconsistent finish, so ventilation and material-safety procedures should be reviewed before production. How to Choose the Right Metal Tag Engraving Machine? Use the following six questions to narrow your options. They are more useful than choosing a machine by wattage alone. 1. What metal will you process most often? List the actual tag stock you expect to buy: stainless steel, anodized aluminum, bare aluminum, brass, copper, titanium, or coated material. If the material is unknown or changes often, prioritize a machine and software workflow that make test grids easy to create and save. 2. Do you need a surface mark or real depth? High-contrast identification and QR codes usually need controlled surface marking or shallow engraving. A tactile groove, recessed lettering, or substantial material removal requires more processing time and may justify higher power or a CNC comparison. 3. How much variable data is involved? If each tag has a different serial number, name, QR code, or asset ID, check how the software imports data and manages sequential production. A machine that can mark accurately but requires manual editing for every tag may not be efficient for repeat orders. 4. How large are the tags and the designs? Confirm the usable marking area, not only the headline work-area size. Smaller lenses can support fine detail over a smaller field, while larger fields can reduce repositioning for bigger plates. If you plan to mark cylindrical tags, rings, or curved parts, check rotary compatibility before buying. 5. What production volume do you expect? For occasional custom products, setup time and ease of use may matter most. For hundreds of identical tags, a fixture, batch layout, data import, and faster marking speed become more important. Include loading, unloading, cleaning, and inspection time in your capacity estimate; laser-on time is only one part of the cycle. 6. What safety and workspace equipment is required? Plan for an appropriate enclosure or guarded work area, ventilation or filtration, eye protection where applicable, electrical requirements, and safe handling of coated materials. Review the manufacturer’s safety documentation and applicable workplace guidance, including the OSHA laser-hazard overview. A machine that fits the budget but cannot be operated safely in the intended workspace is not a suitable production solution. Practical power guide Typical business need Starting range to investigate What to verify before purchase Pet tags, small gifts, occasional nameplates 20W–30W fiber Detail quality, small-field lens options, rotary support Regular stainless-steel and aluminum tags 30W fiber Batch layout, data workflow, fixture space, cooling and duty cycle MOPA effects or a wider range of finishes 30W MOPA or higher Pulse-width range, material testing, software controls Frequent deeper engraving and larger orders 50W–60W fiber or MOPA Pass count, heat management, marking area, production throughput Very deep tactile work or heavy material removal Higher-power fiber and/or CNC comparison Required depth, cycle time, edge quality, and tooling cost These ranges are a starting point, not a universal performance guarantee. The final choice should be confirmed with a sample on the exact material and design you plan to sell. For additional process examples, Monport’s laser how-to resources provide a useful starting point, but your own material test remains the final reference. How to Engrave Metal Tags With a Fiber Laser? A repeatable workflow reduces wrong names, unreadable codes, misaligned batches, and wasted tag stock. Use the following process for both custom and industrial orders. Step 1: Identify the metal and surface finish Record the metal type, alloy if known, thickness, coating, polish or brush direction, and whether the surface is flat. Do not assume that two suppliers’ “stainless steel” or “aluminum” will mark identically. Step 2: Define the required mark Decide whether the order needs a dark surface mark, coating removal, annealing, shallow engraving, or deeper engraving. Note whether the tag will be indoors, outdoors, exposed to chemicals, or handled frequently. Step 3: Prepare artwork and variable data Use clean vector artwork where possible. Check text, outlines, line thickness, serial-number fields, CSV data, QR codes, Data Matrix codes, and barcodes before loading the job. Convert fonts to outlines when the workflow requires it, but keep an editable source file for corrections. If you are unsure how vector files affect laser paths, see this laser software and vector-file overview. Never approve a machine-readable code based only on appearance. Scan a sample using the equipment and distance expected in real use. Step 4: Build or select a positioning fixture A fixture keeps tags in the same position and plane. Options include an acrylic plate, aluminum jig, pin stops, recessed tray, or grid holder. For repeat orders, design the fixture around loading speed as well as alignment. Step 5: Set and verify focus Place the tag surface at the correct height and confirm that every tag in a batch sits on the same plane. Autofocus can simplify setup, but it should not replace a visual check when thickness or fixture height changes. Step 6: Run a material test grid Test the variables that affect the intended finish, such as power, speed, frequency, pulse width on MOPA systems, hatch spacing, number of passes, and scan angle. Change variables systematically and record the material, lens, settings, result, and date. There is no single parameter set that works for every metal tag. Step 7: Run a small pilot batch Before committing the full order, mark a small number of tags. Inspect the first and last pieces, especially when the order involves long run times or many unique data fields. Confirm that the tags do not move and that smoke or residue is being handled correctly. Step 8: Inspect and verify Check spelling, serial sequence, alignment, contrast, depth, edge quality, surface damage, and code readability. For QR and Data Matrix tags, scan multiple samples under the working conditions expected by the customer. For broader barcode-quality terminology and verification guidance, consult GS1 barcode verification resources. Step 9: Clean and package Use a cleaning method suitable for the material and finish. Avoid abrasives that could scratch a decorative surface. Inspect deep-engraved edges for burrs or sharp corners, then match each personalized tag to the order record before packaging. Popular Metal Tag Applications The application determines the required balance between contrast, depth, durability, size, and production speed. Industrial asset tags: asset IDs, maintenance records, QR codes, and department information. Equipment nameplates: model numbers, serial numbers, ratings, warnings, and manufacturer details. Control-panel labels: component references, circuit information, and warning symbols. Tool and rental tags: ownership details, inspection references, and tracking codes. Pet ID tags: names, contact details, icons, and decorative patterns with smooth edges. Jewelry and memorial tags: fine details and small personalized designs. Luggage and key tags: names, contact information, logos, and gift personalization. Industrial applications should follow the relevant customer, regulatory, and traceability requirements. A laser mark by itself does not guarantee compliance with a particular industry standard. For general barcode and identification workflows, use the customer’s specification and verify the finished code rather than relying on visual appearance alone. Recommended Fiber Laser Configurations for Metal Tags Product recommendations should be based on verified specifications and a sample test. As a general buying framework, compare the following configurations: Configuration Good fit Strength Limit to consider 20W–30W standard fiber Pet tags, small nameplates, basic asset tags Lower entry cost and precise surface marking Less efficient for frequent deep engraving 30W MOPA fiber Flexible stainless-steel and anodized-aluminum work More control over pulse-related surface effects Requires more testing and parameter discipline 50W–60W fiber or MOPA Industrial tags, deeper marks, larger batches More processing capacity and fewer passes for some jobs Higher investment and greater need for production planning When evaluating a specific model, confirm the actual laser source, marking field, lens options, enclosure, extraction requirements, software features, rotary compatibility, warranty, training, and support. Monport’s laser accessories collection can also help you identify fixtures, rotary equipment, and replacement components that may affect the final workflow. Product names and advertised wattage are not enough to determine whether a machine fits your workflow. Common Mistakes When Engraving Metal Tags Using one setting for every metal Stainless steel, anodized aluminum, brass, and copper respond differently. Keep a material record and test the actual supplier stock instead of copying a setting from an unrelated sample. Confusing a dark mark with deep engraving A dark surface mark may be durable and appropriate for an asset tag, but it does not necessarily create physical depth. If a customer expects a tactile groove, test depth and cycle time specifically. Ignoring the fixture Manual placement may work for one tag. Dozens of tags without stops or a tray can produce inconsistent margins, slower loading, and avoidable waste. Making QR codes too small Code size, module size, contrast, reflection, scanning distance, and error correction all matter. Always verify the code with the real scanner and not just a phone under ideal lighting. Skipping a pilot batch A test piece can reveal poor contrast, coating problems, heat effects, or data errors before they affect an entire order. Approve the first and last samples of a long batch. Processing unknown coatings without a safety review Paints, platings, and treatments can release unexpected fumes. Identify the coating where possible, use suitable extraction, and follow the machine and material safety guidance. Choosing power by price alone Power matters, but so do pulse control, lens options, software, work area, enclosure, support, fixture compatibility, and the type of mark you sell. The highest-power machine is not automatically the best business choice. FAQ About Metal Tag Engraving Machines Can a fiber laser engrave stainless-steel tags? Yes. Fiber lasers are commonly used to mark and engrave stainless steel. The appropriate process depends on whether you need a dark annealed mark, surface engraving, or deeper material removal. What laser power is needed for metal tags? Many small and medium metal-tag applications can begin in the 20W–30W range. Higher power may be more suitable for frequent deep engraving, larger parts, or higher throughput. Confirm the choice with a test on the actual tag material and design. Is a MOPA fiber laser worth it? MOPA can be worthwhile when you need more control over pulse behavior, specialized stainless-steel effects, or a wider range of finishes. If your work is limited to straightforward black marking, a standard fiber laser may be sufficient. Can a diode laser engrave metal tags? Some diode systems can mark coated or treated metal, but they are generally not the first choice for direct, professional bare-metal tag production. Check the manufacturer’s material guidance and do not assume that a visible mark will have the durability required for an industrial tag. Can a CO2 laser engrave metal tags? CO2 lasers are primarily selected for wood, acrylic, leather, and similar materials. They may work with coated metals or marking compounds, but a fiber laser is normally the more direct option for bare-metal tags. Can a fiber laser cut metal tags? Fiber marking systems are usually purchased for marking and engraving rather than sheet-metal cutting. If you need to cut tag blanks, confirm that the specific machine is designed and rated for that process; otherwise, use pre-cut blanks or equipment intended for metal cutting. How do I know whether a QR code is good enough? Scan multiple samples with the intended scanner, distance, and lighting. Check contrast, module definition, quiet zone, surface reflection, and code size. Visual inspection alone is not a reliable acceptance test. What is the best machine for deep metal tag engraving? Compare a higher-power fiber laser with a CNC engraver. Fiber can achieve depth through multiple passes, while CNC naturally removes material with a cutting tool. The better choice depends on the required depth, edge finish, volume, noise, and tooling preference. Final Takeaway For most businesses making detailed metal tags, a fiber laser offers the best balance of precision, permanent marking, variable-data capability, and repeatability. A 20W–30W system can be a sensible starting point for personalized tags and general identification work, while MOPA or higher-power options become more relevant when you need specialized finishes, deeper engraving, or greater throughput. Before purchasing, test the exact material, define the required mark, confirm the working area and data workflow, plan the fixture and ventilation, and verify a pilot batch. If you need deep tactile grooves, compare CNC. If your parts are large, uneven, or marked on site, consider dot peen or a portable solution. The best metal tag engraving machine is the one that matches the products you actually sell and the quality standard your customers expect.
Read more
Why GM 10W UV Laser Marking Is Ideal for Electronics, PCBs, and Plastic Components
Discover why the GM 10W UV Laser is ideal for marking electronics, PCBs, plastic enclosures, connectors, and heat-sensitive materials. Learn how UV technology delivers fine details, high contrast, minimal thermal damage, and reliable identification for industrial applications.
Read more
How Fiber Laser Engraving Helps Industrial Businesses Create Durable Equipment Nameplates
Industrial equipment identification demands absolute permanence, precise legibility, and high resistance to wear. Upgrading your production facility with a high-performance fiber laser engraver for metal ensures every machinery plate, serial tag, and rating badge stands up to the toughest workplace environments. Integrating a unit like the GM 60Pro Fiber Laser gives your business the exact precision and speed required to produce compliant nameplates and custom metal markings in-house. By combining a reliable fiber laser engraver for metal with optimized optics, long-term asset tracking becomes straightforward and hassle-free.
Read moreMakerspace
Smart Ways People Use Laser Engraved Acrylic LED Signs at Home
Creating a laser engraved acrylic LED sign at home has never been easier. Whether for décor, gifts, or business, the key is using the right machine. The Monport ONYX 55W Desktop CO2 Laser Engraver is a top-tier tool for those who want to laser engrave acrylic with precision, reliability, and style.
Read more
How to Choose the Right Laser Engraver for Metal Fabrication
When it comes to choosing the best fiber laser engraver for serious metal fabrication, the Monport GA 30W MOPA is the ultimate choice. It combines raw power, pinpoint accuracy, durability, and ease of use into one elegant machine.
Read more
Metal Laser Engraving in Technical Colleges: Curriculum Ideas and Career Prep
Integrating a metal laser engraver into technical college programs prepares students for the challenges of tomorrow. The Monport GPro 100W Split MOPA Fiber Laser Engraver & Marking Machine delivers unmatched value, speed, precision, and safety for both educators and learners.
Read moreConsideration Before Buying

Reno 45 Pro vs. Reno 65 Pro: The Ultimate Laser Cutter Comparison Guide
After comparing the reno 45 pro vs reno 65 pro, it's clear that both machines offer outstanding value. The Reno 45 Pro is a dependable choice for beginners and small businesses looking for a compact, capable laser cutter. The Reno 65 Pro takes things further with more power, a larger workspace, faster engraving speeds, smarter controls, and features that support long-term business growth.
Read more
CO2 Laser Engraver Buying Guide by Power (40W vs 70W vs 100W vs 150W)
Choosing the right CO2 laser engraver power can make or break your workflow. Compare 40W, 70W, 100W, and 150W laser machines to find the best option for your projects, budget, and production needs.
Read more
Looking Beyond the Price Tag: The Real Cost of Owning a Laser Engraver
Looking beyond the purchase price is essential when buying a laser engraver. Learn how maintenance, productivity, downtime, and support affect the total cost of ownership, and discover why investing in a reliable machine can help your laser engraving business save money and grow.
Read moreSchool
Laser Engraving and Cutting Machines for Schools and Universities
Monport back-to-school marketing campaign, bridging the Monport 40w laser engraver with the Lightburn-Compatible Control Motherboard, takes laser engraving education to new heights.
Read more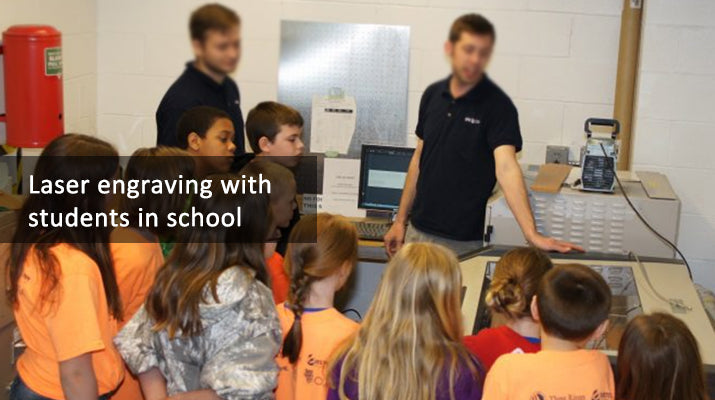
Laser Engraving with Students in School
How do we do laser engraving with students in school? Lasers are incredibly versatile and can be incorporated into a variety of courses. We also find that Monport laser etcher machine are exceptionally popular in schools outside the classroom setting, as they can also be used for creating student or teacher awards, cutting classroom signage in-house, creating promotional products for school fundraisers, and using black laser marking spray, etc.)Depending on the class subject and curriculum, we’ve seen lasers used in all kinds of courses including Woodshop/Woodworking Industrial arts Fashion courses & labs (for cutting patterns and fabric, and other Substrates to create accessories such as pendants and earrings. Technology classes Art/design/photography courses Startup sequence Focusing the laser and positioning your material Corel Draw steps Job Control steps Cleaning up after your lesson From smart boards to tablets, 3D printers to laser etch cutters, more and more schools are bringing hands-on, interactive technology to the classroom. Whether it is an industrial technology course or an art lab, schools and universities incorporating new technology in the classroom are engaging more students and creating active learners. Laser etch cutting/engraving systems are fast becoming one of the most in-demand tools to add to the classroom, or in some cases, build an entire curriculum around. Laser etcher machine cutters are versatile, easy to use, and safe. Not to mention incredibly fun to use a laser etcher machine with black laser marking spray. Why do we start Laser cutting & engraving projects with students in school? What is education? Education is to help our students find a way that connects them and the world. We aren’t lack of the person who works no any changes only copy the work day by day. If so, machines can do that. We lack a person who can do creation in every industry. How do we nourish the children like this, That is the duty of every teacher, the hope of every parent. Owning a Monport Laser CO2 machine can help your students connect themselves and the world. Here are two main categories in which we see educational facilities adding laser etch technology: specific classes for tailored applications, First, we’ll take a look at different types of courses using lasers. From industrial shop classes to art to architectural design, schools are discovering what a powerful tool a laser etch can be in engaging, inspiring, and educating students. Lasers in the classroom can build critical thinking and problem-solving skills, foster creativity, encourage peer collaboration, and create more engaged and successful teachers. The versatility of the laser etcher machine means that there are naturally some hidden benefits to incorporating this type of equipment in your school. It’s up to your discretion if you want to share all of these money-saving ways to use the laser etcher machine outside the classroom, or if you want to keep them to yourself! Awards and Plaques There are numerous awards that your school gives out every year - why not create your own custom awards and trophies with the laser? Creating and producing custom awards can be expensive. Bringing these services in-house can have a positive impact on school budgets. School Signage Schools need signage throughout their campuses. Classroom signs can be customized for the teacher and room number in just a few quick steps. Directional signs can be created to direct students and visitors through the campus, and architectural signage even be made to showcase your school mascot. Fundraising Campaigns When your school is planning their next fundraising campaign, how about something involving the laser machine? You can custom etch laptops for a donation, or create a commemorative laser-cut holiday ornament to sell? Or create special etched keychains with your school logo. The ideas are endless! Booster Gifts Are you looking for a special gift to give to boosters of your school? How about a cozy fleece with the booster’s name and school logo engraved? Or personalized travel coffee mugs or water bottles? Even the simplest gifts can mean so much more when customized with the laser. Club Use Does your school have clubs that could utilize a laser? Imagine what projects an engineering club or art club could create with access to a laser system. The laser may even spark the idea for a new club, such as an architecture club, that could use the laser for architectural modeling projects! Events From sporting events to dances to science fairs, the laser can add a great benefit to your school. Students can use the laser to create signage for the event, create custom giveaways, and add laser cutting to a science project. Which laser basic knowledge we can design for our students? Innovation is inseparable from the accumulation of basic knowledge, if we want to use a laser etcher machine to create, it needs our students who have some basic knowledge, such as computer knowledge, and software knowledge-CorelDraw, if there is no any, only ideas, You can go on the lessons. when you change your ideas to fact products, Your students will have a great sense of achievement, this kind of achievement will inspire them to create more ideas. Which lessons we can design with our students by the Monport laser etcher machine, These lessons as below we advised, you also design different lessons based on the different students. Customized Games Assembly Instruction Designers Noticing Patterns Mindful Patterns for Peace Tiny Homes Challenge Spinning Tops Mirror Light Reflection Illuminated Cuff Bracelet Fairy Light Illuminated Banner Illuminated Solar System Classroom Flair Wooden and Acrylic Puzzle with your Monport Balance Scale Animated Servo Motor Robot Gear-Spun Art Penny Drop Game Step-By-Step Tracker Basic Circuitry with Monport Tracing with Mirrors Every project can improve students' hands-on ability, already understanding of existing objects in life. Inspiring them to create different products with their hands and brains, creation from life and higher than life. However, it is great that you changed these creations into fact products and the things in life. Make our students to come true the goal that from research-create-design-connect them with the world using black laser marking spray. Final Thoughts Monport back-to-school marketing campaign, bridging the Monport 40w laser engraver with the Lightburn-Compatible Control Motherboard, takes laser engraving education to new heights. Schools can empower their students with cutting-edge technology and promote a dynamic and interactive learning experience. The upgrade not only enhances creativity, critical thinking, and problem-solving skills but also provides students with an opportunity to explore entrepreneurship and fundraising opportunities with the use of a black laser marking spray laser etcher machine.
Read more