The result depends on the stone as much as the machine. Color, mineral grain, finish, moisture, focus, image preparation, and extraction can all change the mark. Even two blanks sold under the same material name may require different settings.
This guide shows you how to select a stone, choose a laser, prepare the artwork, create a controlled settings test, improve contrast, and diagnose failed engravings without relying on a universal power-and-speed recipe.
Important: The settings method below is designed to help you find a safe, repeatable starting point. It is not a substitute for the operating limits and material guidance in your laser manual. Never process an unidentified stone, coating, resin, adhesive, or backing.

Can You Laser Engrave Stone?
Yes. A laser can mark many stone surfaces by heating a very small area rapidly. Depending on the material, this may create microscopic fractures, change the texture or color of the surface, or remove a small amount of material. On dark stone, the treated area often appears pale because it scatters light differently from the surrounding surface.
This distinction matters: a darker-looking or more visible mark is not necessarily a deeper engraving. If a project requires recessed lettering, sculptural relief, or cut stone shapes, sandblasting, CNC carving, diamond tooling, or waterjet cutting may be more appropriate.
What controls the result?
- Color: Pale marks are generally easier to see on dark slate or black granite than on light stone.
- Grain and inclusions: Large crystals and mixed minerals can interrupt fine lines and photo details.
- Surface finish: Polished, honed, cleft, and rough surfaces reflect light differently.
- Porosity: Porous stone can trap residue and soften the appearance of small details.
- Moisture and fractures: Damp material and existing cracks increase the chance of chipping or breakage.
- Coatings and binders: Sealers, paints, adhesives, and resins may behave differently from the stone and can introduce hazardous emissions.
For that reason, treat every new stone type and every new batch as an untested material until it passes a small sample engraving.
Best Stones for Laser Engraving
A flat, dry, dark, fine-grained blank is the easiest place to start. The table below helps match common stones to realistic projects.

| Stone | Typical result | Best uses | Main limitations |
|---|---|---|---|
| Slate | Pale gray mark with strong contrast on dark blanks | Coasters, signs, ornaments, table numbers | Layered edges may chip; thickness and surface texture vary |
| Dark granite | Light, crisp mark with good photo potential on fine grain | Portraits, plaques, memorial tiles, awards | Mineral flecks can interrupt detail; polished surfaces reflect glare |
| Marble | Frosted or pale mark; contrast varies with color and veining | Decorative tiles, names, line art | Veins and internal fractures may react unevenly |
| Basalt | Subtle light mark on a dense dark surface | Whiskey stones, gifts, small decor | Curved pieces are difficult to level and focus |
| River rock | Highly variable but attractive on a flat, dark face | Garden markers, keepsakes, simple icons | Unknown composition, hidden cracks, and curvature require testing |
| Limestone or sandstone | Rustic, lower-detail mark | Bold lettering and simple signs | Porosity can trap residue and reduce edge definition |
| Travertine | Textured, interrupted mark | Large decorative graphics | Natural pits are unsuitable for fine text and photographs |
| Engineered stone | Unpredictable because binders, pigments, and coatings vary | Only after composition and process safety are confirmed | Do not laser unidentified resin-bound or coated products |
Choose the stone around the design
Use smooth, fine-grained slate or granite for photographs, small text, and detailed logos. Use thicker strokes and simpler graphics on rough slate, sandstone, travertine, or curved rocks. If a vein, pit, or mineral fleck crosses an important face or letter, move the design or choose another blank.
Reject the blank before it wastes a job
Do not commit finished artwork to stone that is damp, crumbling, visibly cracked, badly warped, or covered with an unidentified treatment. Inspect adhesive backings and decorative coatings as carefully as the front surface. When a supplier cannot identify the product, use a known laser-compatible blank instead.
Which Laser Is Best for Stone Engraving?
| Laser type | Best fit | Advantages | Limitations |
|---|---|---|---|
| CO2 laser | Regular work on slate, granite, marble, and mixed nonmetal products | Versatile for text, logos, raster images, and batch fixtures | Requires suitable clearance, extraction, optics maintenance, and cooling |
| Diode laser | Occasional slate and selected dark-stone projects | Accessible for owners who already use a diode machine | Results on pale or reflective stone may be weak or slow |
| Fiber laser | Metal-focused shops testing selected dense stones | Fast marking on materials suited to its wavelength | Not the default general-purpose choice for common stone blanks |
Why a CO2 laser is the usual all-round choice
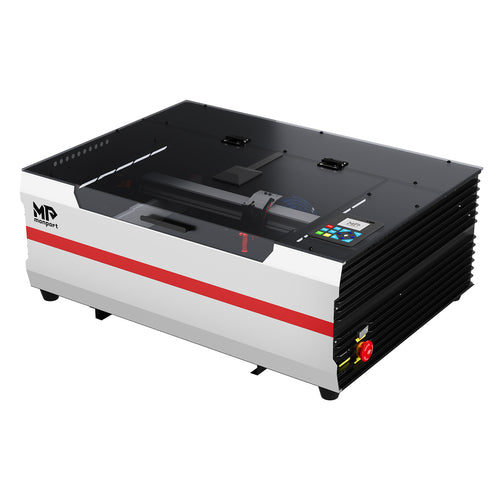
For recurring decorative-stone work, a CO2 system is generally the most flexible option. Compare the machines in the Monport CO2 laser engraver collection by usable work area, bed clearance, focusing method, extraction, controller, and workflow rather than wattage alone.
A taller machine is not automatically better if the bed cannot safely support the stone. Likewise, more rated power does not correct poor focus, unstable fixturing, contaminated optics, or unsuitable artwork.
When another process is better
- Choose sandblasting for deeper, bold lettering across larger stone areas.
- Choose CNC or diamond tooling for pockets, relief carving, and controlled depth.
- Choose waterjet or professional stone cutting for through-cuts and shaped slabs.
- Choose a different substrate if the stone is unknown, unstable, or unsafe to process.
What You Need Before You Start
- A known, dry stone blank and a scrap from the same batch
- A laser with adequate work area, vertical clearance, and bed load capacity
- Source extraction or filtration appropriate for the material and workplace
- A stable, nonflammable fixture that stays outside the beam path
- Lens-safe cleaning supplies and a soft brush or damp cloth for the stone
- Compatible design and control software
- A labeled test-grid file and a settings record
- Required personal protective equipment specified by the manufacturer and risk assessment
Review the documentation for your exact machine before loading a heavy workpiece. The Monport Laser Wiki is a useful starting point for machine guidance, while the Monport documentation index can help you locate updated support material. Never assume a honeycomb bed, lifting platform, or pass-through can carry a stone simply because the stone fits within the X and Y dimensions.
How to Laser Engrave Stone: Step by Step

1. Identify and inspect the material
Confirm the stone type and ask whether it has a sealer, resin, paint, adhesive backing, or protective coating. Check the face, back, and edges for cracks, loose layers, pits, and weak corners. If you cannot identify the base material and treatments, stop and obtain the information before laser processing.
2. Clean and dry the surface
Remove loose debris with a soft brush or damp lint-free cloth, then allow the stone to dry fully. Dust can make the mark uneven, while trapped moisture and existing fractures may contribute to chipping during rapid heating. Do not apply a mystery spray, varnish, or marking compound in an attempt to improve contrast.
3. Prepare artwork for the surface
Use vector artwork for names, borders, logos, and line illustrations. Make strokes heavier on coarse stone, and check that the enclosed spaces in small letters will remain open. For photographs, crop tightly, separate the subject from the background, convert to grayscale, and preserve facial features through the full tonal range.
On many dark stones, the laser creates the light areas. That can require an inverted image compared with printing on white paper. Test both normal and inverted versions on a small detail instead of assuming one is correct.
4. Secure and level the stone
Use stops, clamps, or a stable support that cannot enter the laser path. Keep the engraving face as level as practical. A rotary attachment is intended for objects that rotate predictably around an axis; it is not a universal solution for irregular river rocks.
5. Focus on the engraving plane
Focus according to the machine and lens instructions. On an uneven piece, prioritize the most important part of the design and keep the height change within the usable depth of focus. If frequent height changes are part of the workflow, compare available autofocus laser options. If focus quality has degraded, inspect the optical path and confirm that the installed component is suitable before replacing a CO2 laser focal lens.
6. Frame the job
Run the machine's frame or boundary function using the approved procedure. Confirm that the design fits the usable face, clears every fixture, and does not cross a deep pit, edge, or visible fracture. Framing is a positioning check, not proof that the material is safe.
7. Run a test matrix
Engrave a small labeled grid before the finished design. Test power against speed first. Then use a second, narrower test to refine line interval, image mode, or passes. The next section provides a repeatable method.
8. Engrave while supervising the machine
Close the enclosure and operate the laser according to its safety instructions. Never leave an active laser unattended. Watch the beginning from the approved viewing area and stop if the stone moves, the exhaust is ineffective, or the surface reacts unexpectedly. LightBurn's official laser safety guidance also emphasizes following the device manufacturer's instructions and supervising operation.
9. Clean, inspect, and finish
After the machine's safe-access procedure is complete, remove residue without sending dust into the air. Judge the engraving under the lighting and viewing distance of the final use. If contrast remains weak, test a compatible post-engraving color fill or stone finish on scrap before treating the finished piece.
Stone Laser Engraving Settings: Use a Two-Stage Test
There is no universal setting for “stone.” A displayed power percentage is not an absolute amount of delivered energy, and the same speed can produce different results on machines with different rated output, beam condition, optics, controllers, acceleration, and maintenance.

For example, a 40W CO2 laser tube and a 150W CO2 laser tube do not make the same output at the same percentage. Tube condition and the correct matching laser power supply also matter. Copying a percentage without matching the machine, material, and method is therefore unreliable.
Stage 1: Find a workable energy range
- Start with conservative guidance from the manufacturer of your exact machine.
- Create a grid of small squares, icons, or short text samples.
- Assign speed to one axis and power to the other.
- Use a scrap piece from the same supplier, color, finish, thickness, and batch.
- Label each cell in the file or map its location before running.
- Reject cells with spreading fractures, heavy flaking, muddy edges, or no useful contrast.
- Select two or three promising cells for a finer second test.
Stage 2: Refine the variable that limits quality
Keep the best speed-and-power region and change only one additional variable at a time.
| Variable | What it changes | What to watch for |
|---|---|---|
| Power | Energy delivered while other variables remain constant | Faint marks at one end; chipping or lost detail at the other |
| Speed | Exposure time over the surface | Slower is not always better; excess exposure may damage brittle stone |
| Line interval | Spacing between raster scan lines | Visible gaps when too wide; overlapping, muddy detail when too tight |
| Focus | Spot size and edge sharpness | Wide lines, soft edges, and uneven results across a tilted surface |
| Pass count | Repeated exposure over the same design | Misregistration, extra chipping, and little contrast improvement |
| Image mode | How grayscale is translated into laser dots | Blocked shadows, lost highlights, repetitive texture, or noisy faces |
| Scan direction and offset | Edge alignment during bidirectional rastering | Ghosted vertical edges or speed-dependent banding |
If raster edges appear offset, use the machine-specific procedure rather than guessing. LightBurn documents scanning offset adjustment, while Monport owners can also consult the Monport troubleshooting resources.
How to choose the winning cell
Do not select the cell that merely looks deepest. Score the candidates against the requirements of the actual product:
- Readable contrast at the intended viewing distance
- Clean edges and open counters in small text
- Consistent fill across changes in grain
- Minimal chipping, flaking, or spreading fractures
- Acceptable cycle time for one item or a production batch
- A finish that remains consistent after cleaning
Record a repeatable material profile
| Field | What to record |
|---|---|
| Material | Supplier, product name, color, finish, thickness, and batch |
| Machine | Model, laser type, rated output, controller, and maintenance condition |
| Optics and focus | Lens, focal length, focus method, and relevant Z position |
| File | Vector or raster, physical size, image mode, orientation, and source resolution |
| Process | Speed, power, interval or DPI, passes, scan direction, and air setting |
| Result | Contrast, edge quality, chipping, cycle time, cleaning, and finish |
| Evidence | Photograph of the labeled grid and final sample under consistent light |
If you use a GRBL-based workflow, confirm that the hardware and software are compatible before transferring profiles between systems. The Monport GRBL control board page is one reference for understanding the controller side of a K40-style upgrade, while the LightBurn basic-use documentation explains the general artwork and job workflow.
How to Prepare Photos for Stone Engraving
Photo engraving often fails because the source image asks the stone to reproduce detail it cannot hold. Better preparation usually improves a portrait more than simply adding power.

Choose an image with usable tonal structure
Select a sharp photograph with one clear subject, directional light, visible midtones, and separation between the subject and background. Avoid low-resolution screenshots, tiny group photos, busy foliage, and portraits with important facial features hidden in deep shadow.
Edit for the physical material
- Crop away background that does not support the subject.
- Convert the image to grayscale.
- Adjust highlights and shadows so eyes, hair, clothing, and facial contours remain distinct.
- Use local contrast carefully; excessive sharpening can create halos that engrave as outlines.
- Compare normal and inverted versions on a small test strip.
- Test the chosen dithering mode at the final physical size.
Do not confuse more DPI with more detail
If raster lines are closer together than the effective spot and stone grain can reproduce, neighboring marks overlap and the photo becomes muddy. Test several line intervals and judge them at the final viewing distance. A larger, cleaner portrait often reads better than a small image packed with nominal resolution.
How to Improve Contrast Without Hiding a Process Problem
Improve the engraving before adding a finish:
- Clean the stone and confirm it is dry.
- Inspect and clean optics according to the machine manual.
- Refocus and verify that the face is level.
- Run a finer test around the best speed-and-power cells.
- Adjust line interval, stroke weight, or image preparation.
- Simplify artwork that is finer than the surface can reproduce.
Paint fill
Paint fill can make text and bold graphics more visible on light stone. The lowest-risk workflow is often to engrave a known bare stone, clean it, then apply a compatible color after engraving. If a mask is used, confirm that its material and adhesive are approved for the laser process. Test cleanup and adhesion on scrap.
Sealers and oils
A finish may deepen the base color, change gloss, and increase or reduce apparent contrast. Match the product to the final use, such as indoor decor, outdoor signage, or an item that may contact food. Follow the finish manufacturer's application, cure, and safety instructions. A product that is safe to apply afterward is not automatically safe to place in the laser beforehand.
Troubleshooting Common Stone Engraving Problems
| Problem | Likely causes | First controlled test |
|---|---|---|
| Mark is too faint | Low-contrast stone, unsuitable energy range, or incorrect image polarity | Run a finer speed-power grid and compare normal with inverted artwork |
| Edges are blurry | Poor focus, tilted stone, overly tight interval, or motion issue | Refocus, level the face, and engrave a simple line-and-square test |
| Fine details disappear | Thin artwork, coarse grain, excess exposure, or overlapping raster lines | Increase line weight and test a wider interval on smoother stone |
| Surface chips or flakes | Excess localized energy, brittle layers, moisture, or an existing crack | Stop, inspect the blank, and reduce energy per pass on sound scrap |
| Result is uneven | Mixed minerals, residue, height change, or inconsistent coating | Clean the surface and compare a flat, known blank from the same batch |
| Photo looks muddy | Compressed midtones, excessive DPI, wrong dithering mode, or no inversion test | Increase tonal separation and compare small image-mode samples |
| Horizontal banding or ghosted edges | Dirty optics, scan offset, mechanical motion, interval, or image artifact | Run a uniform-fill test, then follow machine-specific maintenance and offset guidance |
| Stone moved | Weak fixture, contact with the head, or unsuitable support | Rebuild the fixture and repeat the frame check before engraving |
| Readable up close but not at distance | Design is too fine or contrast is too low for the viewing condition | Increase text size and stroke weight before adding a finish |
When the first diagnostic test does not isolate the cause, document the symptom, machine state, file, and settings before changing anything else. This makes a support request more useful and prevents several simultaneous adjustments from hiding the real problem.
Stone Engraving Safety: Dust, Ventilation, Fire, and Unknown Coatings
Stone engraving can generate airborne particulate, and natural or engineered stone may contain crystalline silica. In the United States, businesses should review the applicable OSHA respirable crystalline silica standard and obtain qualified occupational-safety guidance where required.
Use a hierarchy of controls:
- Identify the stone, binder, adhesive, backing, sealer, and coating before processing.
- Operate an enclosed laser as an enclosed system when the manufacturer requires it.
- Capture contaminants at the source with suitable exhaust or filtration.
- Discharge or filter air in accordance with equipment instructions and local rules.
- Avoid dry sweeping or compressed-air cleaning that returns settled dust to the air.
- Maintain optics, filters, ducts, rails, cooling, and the work area on schedule.
- Use required protective equipment for operation, handling, and cleanup. If your risk assessment calls for wavelength-specific eyewear, review compatible CO2 laser protective glasses and follow the machine manufacturer's enclosure and eyewear instructions.
- Keep the machine supervised and follow its fire-response procedure.
A disposable dust mask does not replace material identification and source control. If a product's composition cannot be confirmed, do not laser it.
From One Good Sample to Repeatable Production
For batch work, consistency matters more than maximum depth. Keep a retained approval sample and compare each batch under similar lighting. Use a fixture with repeatable stops, save the exact production file, record the material batch, and schedule lens and extraction checks before quality begins to drift.
Calculate price from the full workflow
Do not price a stone product from laser time alone. Include:
- The blank and inbound shipping
- Design, proofing, and customer revisions
- Test pieces and expected breakage
- Fixture setup and machine time
- Cleaning, paint fill, sealing, and cure time
- Packaging, selling fees, labor, overhead, and profit
A hand-filled memorial plaque should not be priced like a text-only coaster that leaves the machine complete. The material log and timing record created during testing provide the evidence needed for more reliable quoting.
Frequently Asked Questions
What is the best stone for a beginner?
Flat dark slate is usually the easiest starting material because it is simple to fixture and often develops clear natural contrast. Smooth, dark, fine-grain granite is a strong next choice for detailed text and photographs.
What is the best laser for stone engraving?
A CO2 laser is generally the most versatile choice for recurring work on slate, granite, marble, and other common stone blanks. A diode laser may handle selected dark stones at a smaller scale. A fiber laser is usually chosen for metal work first and stone experiments second.
Can a laser cut stone?
A desktop or workshop laser should normally be treated as a surface-marking or shallow-engraving tool for stone, not a stone-cutting machine. Use professional waterjet, diamond-tool, or other appropriate processes for through-cuts.
How deep can a laser engrave stone?
There is no dependable universal depth because the result varies by material and machine. Many useful decorative engravings are surface textures or shallow marks rather than measurable relief. Use sandblasting or CNC carving when substantial depth is a functional requirement.
Can you laser engrave marble?
Yes, but color, finish, veins, and internal fractures affect both contrast and consistency. Test conservatively on the actual tile, especially when it is thin or visibly fractured.
Should stone be coated before laser engraving?
Not by default. Unknown paints, varnishes, sealers, resins, and adhesives may create unsafe emissions or unpredictable marks. Process known bare stone where possible, and use a mask or coating only after its composition and laser compatibility have been confirmed.
Is laser-engraved stone permanent?
The laser changes the surface rather than applying a peelable decal. However, abrasion, outdoor weather, freeze-thaw cycles, and the durability of any paint fill or sealer can change the finished appearance over time.
Can I reuse settings from another machine or stone?
Use them only as context, not as a production recipe. Machine output, optics, focus, software, stone color, grain, finish, and batch all affect the result. Validate the material with a labeled test grid and save a profile only after the actual sample passes.
Final Takeaway
Reliable stone laser engraving comes from controlling variables, not chasing a single magic setting. Start with a known, dry, flat blank. Match the laser and fixture to the stone's size and weight. Prepare artwork for the material's real texture and contrast, run a two-stage test, and record the winning process with photographic evidence.
For regular slate, granite, marble, and mixed nonmetal work, a CO2 laser is usually the most flexible starting point. Compare workspace, clearance, focusing, extraction, controls, and support alongside power. You can use the Monport Laser website to compare current machine categories and then validate the exact stone before committing the final design.