Last updated: September 20, 2026
Laser Machine Softwares
1. LightBurn: Unlocking Intuitive Design and Control
LightBurn tutorial stands out as a popular choice for creating laser cut files for OMTech machines. This intuitive software offers a seamless interface for designing, editing, and controlling laser cutting and engraving projects. With features such as node editing, image tracing, and a library of geometric shapes, LightBurn tutorial provides users with a versatile toolkit to bring their ideas to life. The software's dynamic control over power levels, speed, and other settings ensures precise execution of designs, making it an invaluable asset for OMTech laser users.
2. RDWorks: Unleashing Advanced Capabilities

Another noteworthy software option used for generating OMTech laser cut files is RDWorks. Equipped with an array of design and production tools, RDWorks enables users to create intricate patterns, adjust cutting parameters, and optimize designs for OMTech laser cutting machines. From vector drawing to customizing kerf settings, RDWorks offers advanced capabilities that cater to the diverse requirements of laser cutting projects, making it a comprehensive solution for users seeking extensive control and customization.
3. CorelDRAW and AutoCAD: Leveraging Design Expertise

For users adept at graphic design and CAD (computer-aided design), software tools such as CorelDRAW and AutoCAD serve as powerful platforms for creating OMTech laser cut files. These industry-standard applications provide robust design capabilities, allowing users to craft intricate vector graphics, precise measurements, and detailed layouts for laser cutting and engraving. By leveraging the expertise of these design-oriented software programs, users can seamlessly translate their creative concepts into high-quality laser cut files for OMTech machines.
Selecting the Right Software for Your OMTech Laser Cutter
In conclusion, the software used to produce OMTech laser cut files plays a pivotal role in shaping the outcome of cutting and engraving projects. Whether it's the user-friendly interface of LightBurn tutorial, the advanced capabilities of RDWorks, or the design expertise of CorelDRAW and AutoCAD, each software option offers unique features to cater to the diverse needs of OMTech laser users. By understanding the strengths and functionalities of these software tools, users can make informed decisions to select the most suitable platform for creating intricate and precise laser cut files, unlocking the full potential of their OMTech laser cutting machines.
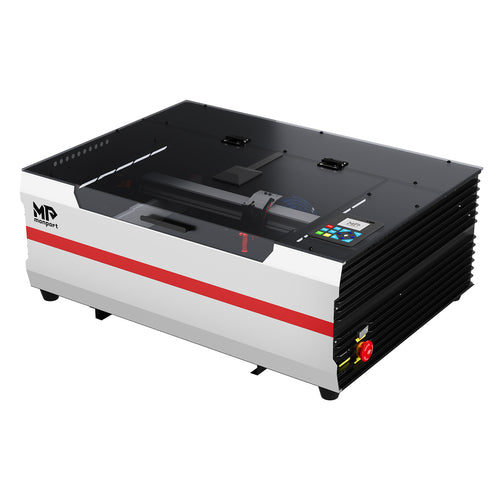
Despite the good heresays upon OMTech, many laser enthusiasts are all over various media forums seeking for a better option since OMTech has been kind of slow-paced when it comes to developing better features for their machines, not to mention the bad reviews of people regarding their customer service. Consequently, Monport has emerged to be a better laser machine provider than OMTech. Luckily, it also features LightBurn tutorial as software compatible for all its laser machines.
LightBurn: The Ultimate Laser Engraving Software for Monport Laser Cutters

| Picture |  |
 |
 |
 |
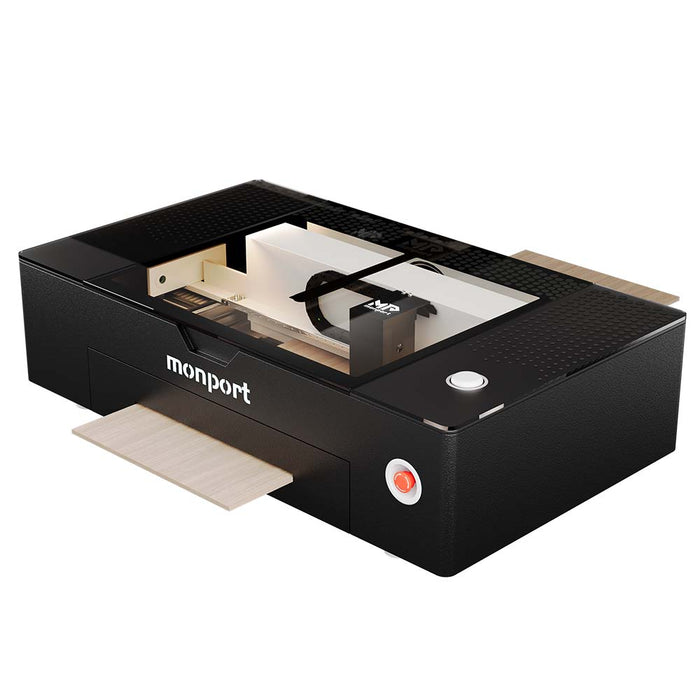 |
| Product Name | Monport 80W CO2 Laser | Monport 100W CO2 Laser | Monport 130W CO2 Laser | Monport Onyx 55W Desktop CO2 Laser | |
| Exclusive Code | BESTMP10 | BESTMP10 | BESTMP10 | BESTMP10 | BESTMP10 |
|
|
|||||
When it comes to laser engraving software, LightBurn tutorial stands above the competition as the ultimate choice for users. Boasting a wide range of powerful features and seamless compatibility with Monport laser cutters, LightBurn tutorial emerges as the optimal software solution for those seeking exceptional precision, efficiency, and versatility. In this article, we will explore why LightBurn tutorial is unrivaled in its class and why it perfectly complements the superior performance of Monport laser cutters.
1. Intuitive User Experience
One of LightBurn tutorial's standout features is its intuitive user interface, making it accessible for both beginners and experienced users. Its clean design and well-organized tools allow users to navigate effortlessly, ensuring a smooth experience throughout the design and engraving process. LightBurn tutorial simplifies complex tasks like editing nodes, creating vector graphics, and importing files, offering an enjoyable and user-friendly environment for laser engraving projects.
2. Robust Design and Editing Tools
LightBurn offers a comprehensive suite of design and editing tools, empowering users to unleash their creativity. From vector drawing to image tracing, LightBurn provides precise control over design elements and offers a wide range of customization options. The ability to adjust power levels, speed, and other settings ensures optimal results on Monport laser cutters, enabling users to achieve intricate and accurate engravings effortlessly.
3. Seamless Monport Compatibility
LightBurn takes compatibility to the next level with its seamless integration with Monport laser cutters. As Monport laser cutters offer exceptional performance and advanced features, LightBurn is designed to leverage these capabilities fully. Users can take advantage of Monport's extended cutting speed, larger working area, and advanced focus mode, directly from the LightBurn software. This powerful synergy amplifies the capabilities of both the software and the hardware, elevating the engraving experience and unlocking new possibilities for users.
4. Enhanced Workflow Efficiency
With LightBurn, workflow efficiency is significantly improved, thanks to its automation features. LightBurn's auto-focus mode simplifies setup by automatically adjusting the focal point, eliminating the need for manual adjustments. Additionally, the software allows for importing common design file formats, such as SVG, DXF, and AI, reducing time spent on file conversion. These time-saving features enable users to optimize their productivity and focus more on the creative aspects of their projects.
FAQs About OMTech Software, Drivers, and Files
Q1: What software can I use with OMTech laser cutters?
A: LightBurn, RDWorks, CorelDRAW, and AutoCAD are commonly used to create OMTech laser cut files.
Q2: Where can I download OMTech drivers?
A: Drivers are available on OMTech’s official website. Ensure you download the latest version for your operating system.
Q3: Are OMTech free files legal to use?
A: Yes, OMTech free files provided by the official source or authorized communities are safe to use for personal and commercial projects.
Q4: Can LightBurn be used with Monport as well?
A: Yes, LightBurn is fully compatible with Monport laser cutters, providing superior workflow and precision.
Q5: Do I need to update OMTech software frequently?
A: Regular updates are recommended to fix bugs, improve compatibility, and add new features.
What Software Do You Need to Create Laser Cut Files?
Creating a laser cut file requires more than just choosing a design idea. The software you use determines how you create your artwork, prepare your file, and communicate with your laser machine.
For most laser projects, the workflow usually includes two types of software:
- Vector design software, which is used to create and edit designs.
- Laser control software, which is used to prepare the design for engraving or cutting.
Understanding the difference between these two types of software can help beginners choose the right tools and avoid problems such as incorrect file formats, poor cutting results, or compatibility issues.
Vector Design Software vs Laser Control Software
Vector Design Software
Vector design software is used to create the actual artwork that will be cut or engraved. Unlike raster images made of pixels, vector graphics use mathematical paths, which allows laser machines to follow precise cutting lines.
Popular vector design programs include:
Adobe Illustrator
Adobe Illustrator is one of the most widely used professional vector design tools. It provides advanced drawing, typography, and layout features, making it suitable for users who need detailed and customized designs.
It is commonly used for:
- Custom logos
- Product packaging
- Detailed patterns
- Professional artwork preparation
However, Illustrator is a professional design tool, so beginners may need time to learn the interface and design workflow.
Inkscape
Inkscape is a free and open-source vector design software that is popular among beginners and hobbyists.
It supports common laser cutting file formats and provides essential tools for:
- Creating simple vector designs
- Editing SVG files
- Preparing basic cutting patterns
For users who are just starting with laser engraving or cutting, Inkscape can be a practical option without requiring a paid subscription.
CorelDRAW
CorelDRAW is another professional vector design program commonly used in manufacturing, signage, and commercial design industries.
It provides powerful tools for:
- Technical drawings
- Layout design
- Large-scale production graphics
- Professional vector editing
It is often preferred by users who need more advanced design control for commercial applications.
Laser Control Software
After creating a design file, it usually needs to be imported into laser control software before processing.
Laser control software allows users to:
- Import design files
- Set cutting and engraving parameters
- Adjust speed and power settings
- Position designs
- Send jobs to the laser machine
LightBurn
LightBurn is one of the most popular laser control software options among laser engraving users.
It supports common file formats and provides an integrated workflow from design preparation to machine operation.
Key features include:
- Importing SVG, DXF, AI, and other design files
- Creating simple shapes and edits
- Setting engraving and cutting parameters
- Managing multiple layers
- Previewing the cutting path before production
For beginners, LightBurn is often easier to learn compared with combining multiple separate programs because it connects design preparation and laser operation in one workflow.
Best Software for Creating Laser Cut Files
There is no single “best” laser cutting software for every user. The right choice depends on your experience level, project requirements, and whether you are creating designs casually or producing products commercially.
LightBurn: Best All-in-One Laser Workflow
LightBurn is a popular choice for laser engraving and cutting users because it combines design preparation and machine control in one platform.
It is suitable for:
- Beginners learning laser projects
- Makers creating custom products
- Small businesses producing personalized items
Users can import existing designs or create simple shapes directly inside the software before sending the job to their laser machine.
For users who want a straightforward workflow, LightBurn reduces the need to switch between multiple programs.
Adobe Illustrator: Best for Professional Vector Design
Adobe Illustrator is a strong choice for designers who already work with professional graphic tools.
It is especially useful for:
- Complex illustrations
- Brand designs
- Detailed vector artwork
- Commercial product designs
Many professional designers create their artwork in Illustrator first and then export it into a laser control program for engraving or cutting.
However, because Illustrator focuses on graphic design rather than laser operation, users typically need additional software to complete the production workflow.
Inkscape: Best Free Option for Beginners
For users who want to create laser cut files without investing in expensive software, Inkscape is a practical starting point.
Its advantages include:
- Free access
- SVG editing capability
- Basic vector drawing tools
- Beginner-friendly learning resources
It is suitable for simple projects such as:
- Wooden signs
- Personalized gifts
- Decorative patterns
- Basic acrylic designs
For more advanced production needs, users may eventually combine Inkscape with dedicated laser control software.
How to Create a Laser Cut File Step by Step
Creating a laser cut file involves several steps, from designing the artwork to preparing the final machine settings.
Understanding the complete workflow helps beginners avoid common mistakes and achieve better engraving and cutting results.
Design Your Artwork
The first step is creating a vector design that matches your project requirements.
During the design stage, consider:
- Final product size
- Material thickness
- Cutting lines and engraving areas
- Assembly requirements
- Personalization elements
For example, a wooden sign may require a combination of engraved text and cut outlines, while an acrylic display piece may need multiple layers for assembly.
Choose the Right File Format
After completing the design, export the file in a format supported by your laser software.
Common formats include:
- SVG
- DXF
- AI
Different formats are suitable for different purposes. Vector-based formats are generally preferred because they maintain precise cutting paths.
Import the File into Laser Software
Once the design file is ready, import it into laser control software such as LightBurn.
At this stage, users can:
- Adjust the design position
- Resize artwork
- Separate engraving and cutting layers
- Check the cutting path
Previewing the design before running the machine helps reduce material waste.
Adjust Cutting Parameters
Before starting the job, laser settings should be adjusted based on the material and project requirements.
Important parameters include:
- Laser power
- Cutting speed
- Number of passes
- Focus distance
- Air assist settings
Different materials require different settings. For example, wood, acrylic, leather, and metal all respond differently to laser processing.
Testing settings on a small sample piece before production can help achieve more consistent results.
Common File Formats for Laser Cutting
Choosing the correct file format is an important part of preparing laser cutting projects. Different formats are designed for different types of design workflows.
| File Format | Common Usage |
|---|---|
| SVG | Vector cutting designs, logos, patterns, and simple artwork |
| DXF | Technical drawings, engineering designs, and precise shapes |
| AI | Professional vector designs created with Adobe Illustrator |
| Simple designs, document-based artwork, and file sharing |
SVG Files
SVG (Scalable Vector Graphics) is one of the most commonly used formats for laser cutting projects.
Because SVG files are based on vector paths, they can be resized without losing quality and are suitable for many DIY and maker projects.
Common uses include:
- Signs
- Decorative patterns
- Personalized gifts
- Craft projects
DXF Files
DXF (Drawing Exchange Format) is commonly used for technical drawings and engineering-related designs.
It is useful when projects require:
- Accurate measurements
- Mechanical parts
- Assembly designs
- Precise geometric shapes
AI Files
AI files are created by Adobe Illustrator and are commonly used by professional designers.
They preserve detailed vector information and are suitable for complex commercial designs.
PDF Files
PDF files are often used for sharing designs because they are widely supported.
However, not all PDF files contain editable vector paths. Before using a PDF file for laser cutting, users should confirm that the artwork contains proper vector information.
Conclusion

In conclusion, LightBurn effortlessly outshines its competitors as the premier software for laser engraving. Its intuitive user experience, robust design tools, seamless Monport compatibility, enhanced workflow efficiency, and continuous development make it the ideal choice for users seeking exceptional precision and versatility. By harnessing LightBurn's power in tandem with the superior performance of Monport laser cutters, users gain access to unrivaled engraving capabilities, enabling them to bring their creative ideas to life with unmatched precision and finesse.
Read More: Mastering Metal Engraving: How to DIY Engrave Metal with a Metal Fiber Laser Cutting Machine