

How to

Polishing Creativity: The Woodworking Engraving Machine Revolution
Woodworking engraving machines have emerged as indispensable tools for artisans seeking to elevate their craft and unleash their creativity. With their precision, versatility, ease of use, and potential for future innovations, these machines are poised to revolutionize the woodworking industry and inspire a new generation of craftsmen to push the boundaries of what's possible in woodworking engraving.
Read moreHow to
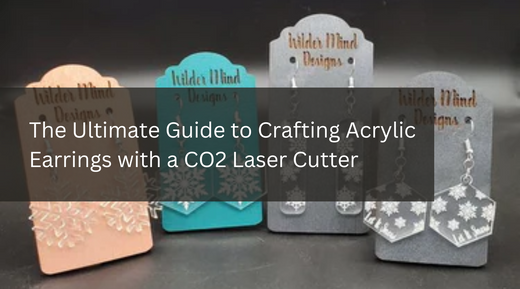
The Ultimate Guide to Crafting Acrylic Earrings with a CO2 Laser Cutter
By following this comprehensive guide, you can harness the capabilities of a CO2 laser cutter to create stunning acrylic earrings that reflect your unique style and personality. Embrace the endless possibilities of acrylic jewelry design and unleash your creativity to craft earrings that make a statement wherever you go.

Mastering the Art of Cutting Clear Acrylic: A Comprehensive Guide
With the right tools, techniques, and attention to detail, cutting clear acrylic can be a rewarding and enjoyable process. Whether you're a seasoned crafter or a DIY enthusiast, following these steps will help you achieve clean, precise, and professional-looking cuts in clear acrylic for your projects. So roll up your sleeves, unleash your creativity, and let your clear acrylic creations shine bright for all to admire.
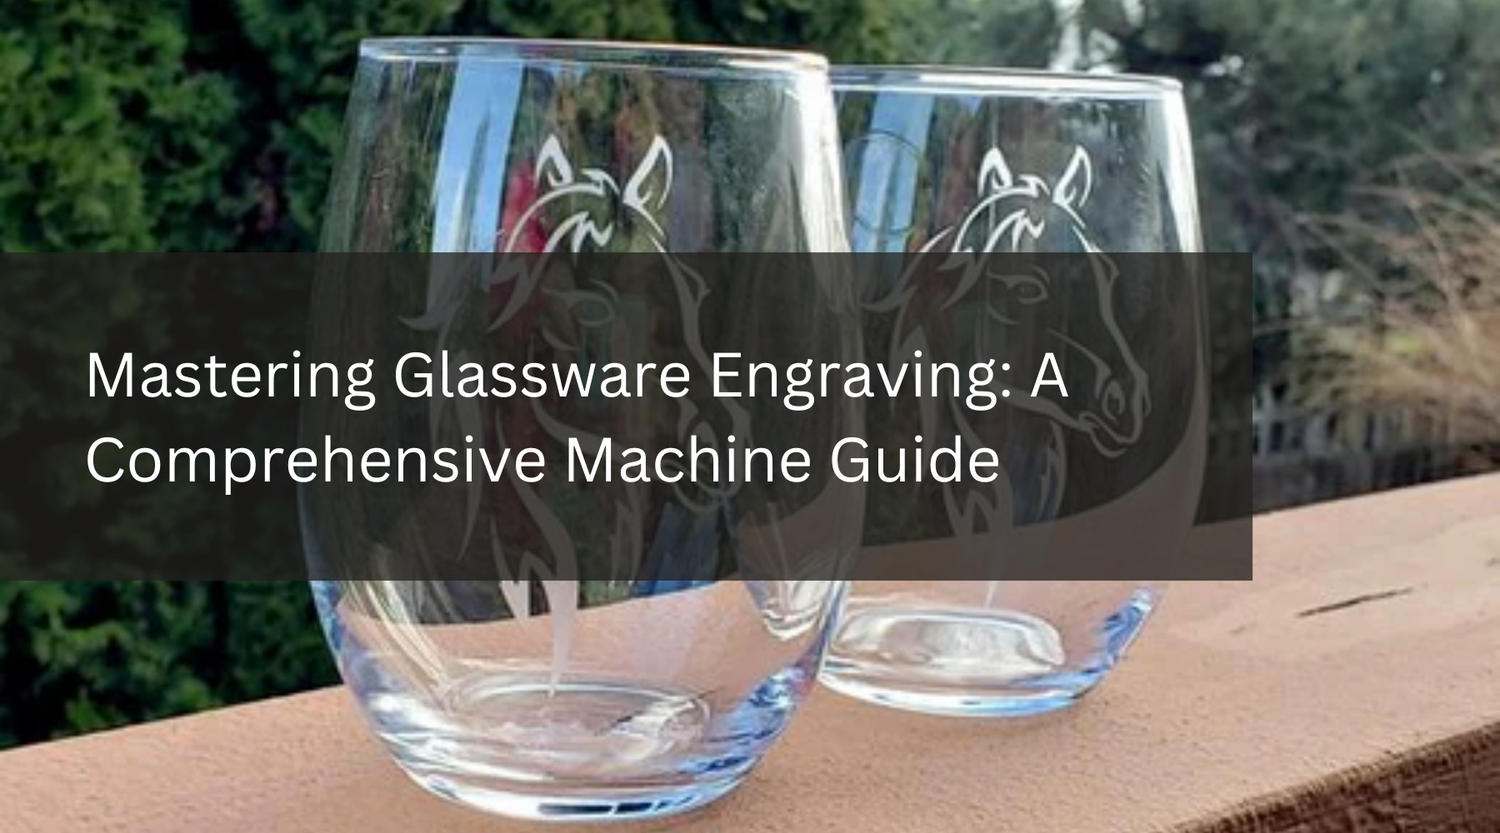
Mastering Glassware Engraving: A Comprehensive Machine Guide
With the right engraving machine and techniques, glassware engraving opens up a world of creative possibilities, allowing you to personalize and embellish glass items with stunning designs and intricate details. By considering the key features of engraving machines, mastering the techniques, and experimenting with different settings, you can achieve professional-quality results and elevate your glassware engraving projects to new heights of creativity and craftsmanship.

Enhance Your Woodworking Decor with DIY Projects
Woodworking decor is a timeless art that not only adds warmth and charm to any space but also reflects the creativity and craftsmanship of its creator. Whether you're a seasoned woodworker or a novice looking to delve into the world of DIY projects, there's no better time to unleash your creativity than now. In this guide, we'll explore the exciting realm of woodworking decor and discover how you can make stunning wood projects that will elevate your home or workspace. Monport 80W CO2 Laser Engraver & Cutter (28" x 20") with Autofocus Why Woodworking Decor? Woodworking decor offers a unique opportunity to infuse your personal style and flair into your living or working environment. From rustic farmhouse accents to sleek modern designs, the possibilities are endless when it comes to creating custom wood pieces. Not only does woodworking allow you to express your creativity, but it also provides a sense of satisfaction and fulfillment as you bring your ideas to life. Getting Started: Essential Tools and Materials Before diving into your woodworking journey, it's essential to have the right tools and materials on hand. Here's a list of some basic items you'll need to kickstart your DIY projects: Tools Materials Circular Saw Wood Boards Power Drill Sandpaper Wood Glue Wood Stain Chisels Wood Finish Clamps Wood Screws Popular Woodworking Decor Projects Now that you have your tools and materials ready, let's explore some popular woodworking decor projects that you can easily tackle: Floating Shelves: Perfect for displaying photos, plants, or decorative items, floating shelves add both style and functionality to any room. Wooden Signs: Personalize your space with custom wooden signs featuring your favorite quotes, phrases, or family names. Picture Frames: Showcase your cherished memories with handcrafted wooden picture frames in various shapes and sizes. Coffee Tables: Create a statement piece for your living room by building a unique coffee table from reclaimed wood or hardwood boards. Wall Art: Get creative with intricate wood carvings, geometric designs, or abstract patterns to adorn your walls with one-of-a-kind artwork. FAQs about Woodworking Decor Q: Do I need prior experience to start woodworking? A: While prior experience can be helpful, woodworking is accessible to beginners with patience and a willingness to learn. Q: How can I protect my wood projects from damage? A: Applying a clear coat or sealant can help protect your wood projects from moisture, scratches, and wear over time. Q: What types of wood are best for woodworking decor? A: Common wood species used in woodworking decor include pine, oak, maple, cherry, and walnut, each offering unique characteristics and aesthetics. Important Details: Using a Laser Engraver & Cutter To add a new dimension to your woodworking projects, consider incorporating the Monport 80W CO2 Laser Engraver & Cutter. With its autofocusing feature and spacious 28" x 20" work area, this versatile machine enables precise engraving and cutting on various materials, including wood, acrylic, leather, and more. Whether you're personalizing wooden gifts, creating intricate designs, or prototyping new ideas, the Monport laser engraver empowers you to bring your vision to life with ease. Key Takeaways Woodworking decor allows you to unleash your creativity and personalize your living or working space. Start with essential tools and materials, and gradually expand your skill set as you gain confidence. Incorporating a laser engraver & cutter can enhance the precision and intricacy of your wood projects. Conclusion: Embrace the Art of Woodworking Decor In conclusion, woodworking decor offers a rewarding outlet for self-expression and craftsmanship. Whether you're a beginner or seasoned woodworker, there's always something new to learn and create in this versatile and fulfilling hobby. By embracing the beauty of wood and leveraging modern tools like the Monport laser engraver, you can elevate your DIY projects to new heights and transform your space with handmade charm and character. So roll up your sleeves, pick up your tools, and let your imagination run wild as you embark on your woodworking journey!

The Benefits of Laser Cutting Machines at Home for Crafting Wooden Anniversary Gifts
Laser cutting machines offer a host of benefits for crafters looking to create personalized and meaningful anniversary gifts at home. From precision and accuracy to versatility and customization, these machines empower makers to unleash their creativity and express their love and appreciation in a tangible way.

Personalize Your Love: Engravings for Engagement Rings and How to Engrave Sterling Silver
Engravings add a personal and meaningful touch to engagement rings, allowing couples to express their love and commitment in a unique way. Whether it's a romantic phrase, special date, or symbolic engraving, the options are endless for creating a customized ring that represents your love story.

Exploring Color Laser Engraving: Techniques and Tools
Color laser engraving allows makers to add durable colors to metal surfaces using controlled laser settings. This guide explains laser color engraving techniques, materials, and how fiber lasers support professional color engraving results.

Shaping Steel: Essential Techniques for Laser Etching Metal Surfaces
Master the art of metal etching with the Monport GI60 Fiber Laser Engraver, equipped with exceptional speed, precision, and a host of features tailored for metal jewelry engraving.

The Fine Art of Cutting Plastic: Tips and Tricks
Cutting plastic sheets may seem like a challenging task, but with the right techniques and tools, it becomes straightforward and enjoyable. Whether you're working with thin acrylic or thick PVC, measuring accurately, and using the appropriate cutting method ensures clean and precise results.

Be a Metal Jewelry Engraving Pro: Techniques and Tools
Engraving on metal jewelry opens up a world of creative possibilities, allowing artisans to personalize and enhance their designs. With the right techniques and tools, you can achieve stunning results that will delight customers and elevate your craftsmanship.

Mastering the Art of Personalization: How to Engrave Metal Rings
Engraving metal rings requires precision, patience, and the right tools for the job. By following these steps and using an engraver machine for metal, you can create beautiful and personalized pieces of jewelry that are as unique as the individuals who wear them.

Personalize Your Stanley Tumbler: Mastering Engraving Techniques
Personalizing your Stanley Tumbler through custom engraving is a rewarding and creative endeavor. By mastering the various engraving techniques and following best practices, you can transform your tumbler into a one-of-a-kind masterpiece that reflects your individuality and style.