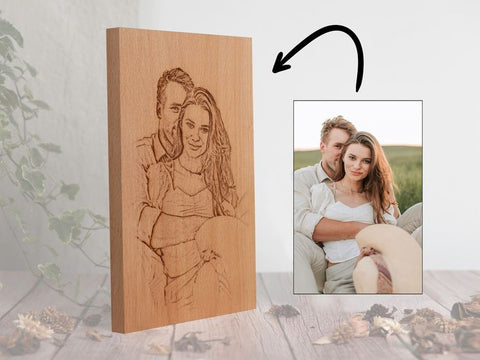
The warmth of photo onto wood diy paired with cherished memories captured in a photograph creates a truly special combination. This guide explores various methods of how to put a picture on wood, equipping you with the knowledge to transform photos into beautiful and lasting keepsakes. We'll also delve into inspiring project ideas with wood to spark your creativity and guide you in crafting unique pieces.
Monport 80W CO2 Laser Engraver & Cutter (24" x 16") with Autofocus
Unlock Big Savings at Monport Laser! Use code BESTMP10 at checkout for an exclusive discount – Click here to shop now!
Methods on How to Put a Picture on Wood: Choosing the Right Approach
Several techniques allow you to put a picture on wood. The ideal method depends on the desired finish, project complexity, and tools available. Here's an overview of popular options for putting pics on wood:
-
Mod Podge Transfer:
- This classic method utilizes Mod Podge, a water-based sealant, glue, and finish, to adhere a printed image onto a wood surface.
- It's a budget-friendly and beginner-friendly option, perfect for creating vintage-style transfers.
-
Image Burning:
- This technique involves using a heated tool to physically burn the image onto the wood surface.
- It offers a rustic and unique aesthetic but requires practice and caution due to the use of heat.
-
Laser Engraving:
- For exceptional precision and detail, a CO2 laser engraver like the innovative Monport 80w CO2 Laser offers unmatched capabilities.
-
This advanced method allows you to directly engrave the image onto the wood, creating a permanent and professional-looking finish. Putting pics on wood has never been easier or more precise.

Project Ideas with Wood to Ignite Your Creativity
With your chosen method in mind, explore these inspiring project ideas with wood to bring your photo onto wood diy transfer dreams to life. Whether for gifts or décor, putting pics on wood adds a personal touch:

-
Personalized Photo Signs:
- Create custom signs featuring family photos, inspirational quotes, or welcoming messages for your entryway or living room.

-
Photo Coasters:
- Transform cherished memories into functional and beautiful coasters, adding a personal touch to your coffee table.

-
Memory Boxes:
- Craft a keepsake memory box adorned with a transferred photo, perfect for storing treasured mementos.

-
Photo Wall Art:
- Design unique wall hangings by transferring photos onto wooden plaques or slices, creating a personalized gallery wall.

-
Photo Gifts:
- Handmade photo onto wood diy gifts with transferred images, like cutting boards or phone stands, make thoughtful and sentimental presents.
Beyond the Techniques: Taking Your Project to the Next Level
Once you've successfully transferred your picture onto wood, consider these finishing touches to elevate your putting pics on wood project:
-
Sanding and Staining: For a polished look, sand the wood smooth before applying a stain or paint. This enhances the overall aesthetic and allows the wood grain to show through beautifully.
-
Varnishing: Adding a coat of varnish protects your artwork from dust, moisture, and fading. Choose a matte or gloss finish depending on your desired look.
-
Embellishments: For an extra touch, incorporate decorative elements like shells, dried flowers, or fabric scraps around your photo onto wood diy transfer.
The Monport 80w CO2 Laser: Unleashing Creative Potential
While all the techniques mentioned above can create beautiful results, the Monport 80w CO2 Laser offers unmatched precision, detail, and versatility. Here's how this innovative tool elevates your wood picture transfer projects:

-
Exceptional Detail and Accuracy: The high-performance laser beam ensures crisp and clear photo onto wood diy reproduction on the wood surface, capturing every detail of your image.
-
Versatility on Various Wood Types: The Monport 80w CO2 Laser works seamlessly on different wood types, allowing you to experiment with textures and colors.
-
Ease of Use and Control: The user-friendly interface makes operating the laser engraver effortless. Upload your image, adjust settings, and witness your vision come to life with minimal technical expertise.
How to Put Pictures on Wood with the Monport 80w CO2 Laser
The Monport 80w CO2 Laser unlocks a world of creative possibilities for incorporating photos onto wood. Here's a step-by-step guide on how to putting pics on wood to help you achieve stunning results:
Materials:
- Monport 80w CO2 Laser Engraver
- Computer with laser engraving software (compatible with the Monport 80w CO2 Laser)
- Wood substrate (choose a type and size suitable for your project)
- Sandpaper (various grits)
- Stain or paint (optional)
- Varnish (optional)
- Soft cloth
Instructions:

1. Prepare Your Image: Choose a high-resolution image for optimal engraving results. Black and white photos generally work best, but grayscale images can also be used. Edit your image in a photo editing software to adjust brightness, contrast, and remove any unwanted elements. Save the image in a format compatible with your laser engraving software (typically JPG, BMP, or DXF).
2. Prepare the Wood Substrate: Ensure your wood surface is clean, dry, and free of debris. Sand the wood with varying grits (starting with a coarser grit and progressing to finer grits) to achieve a smooth and even surface. This allows for better laser beam interaction and a cleaner engraving result. If desired, stain or paint your wood before engraving for a customized background color. Let the stain or paint dry completely before proceeding.

3. Laser Engraving Software Setup: Open your laser engraving software and import your prepared image. The software will typically display the image and allow you to adjust various settings like laser power, speed, and scan lines. Consult your user manual or the software's help documentation for specific instructions.
4. Setting Up the Monport 80w CO2 Laser: Place your wood substrate securely on the laser engraver's workbed. Adjust the laser head height to achieve the optimal focal distance for engraving on wood (refer to your user manual for specific instructions). Important Safety Note: Always wear proper safety glasses when operating the laser engraver to protect your eyes from the laser beam.

5. Test Engraving: Before engraving your entire image, it's recommended to perform a test engraving on a scrap piece of wood with similar characteristics. This allows you to fine-tune the laser settings for the best engraving quality on your chosen wood type.

6. Engraving Your Image: Once you're satisfied with your test engraving results, proceed with engraving your image onto your wood substrate. The laser engraving process may take some time depending on the image size and complexity. Monitor the process and ensure proper ventilation to remove smoke and fumes.

7. Finishing Touches: Once the engraving is complete, allow the wood to cool down. You may want to do some light sanding to remove any minor residue left behind by the laser engraving process. Apply a coat of varnish to protect the engraved image and enhance the overall finish of your project.
Laser Engraving Photos on Wood: Tips for Flawless Results
The Monport 80w CO2 Laser unlocks a world of creative possibilities for wood engraving, and incorporating photos onto wooden surfaces is a popular and rewarding project. Here are some valuable tips to ensure your laser-engraved photos on wood are nothing short of stunning:

Image Preparation is Key:
- Resolution Matters: Start with a high-resolution photo. The more detail in your image, the better the laser can reproduce it on wood. Aim for images at least 300dpi for optimal results.
- Embrace Grayscale: Laser engravers work with variations in light and dark tones. Convert your photo onto wood diy to grayscale mode in your photo editing software before engraving.
- Edit for Success: Adjust brightness, contrast, and remove unwanted elements to enhance the image for engraving. Consider sharpening the image slightly to increase detail definition.
Optimizing Your Wood for Laser Perfection:
- Choose the Right Wood: Not all wood is created equal for laser engraving. Select wood with a light or even color for better contrast with the engraved image. Birch plywood, maple, and basswood are popular choices for their clean engraving results.
- Prepare the Surface: Sand the wood surface smooth with varying grits of sandpaper, starting coarse and progressing to fine. This removes any imperfections and ensures a clean surface for optimal laser interaction. Wipe away dust with a soft cloth.
Laser Settings: Finding the Sweet Spot

- Consult Your Manual: Refer to your Monport 80w CO2 Laser user manual for recommended settings based on your chosen wood type and desired engraving depth.
- Start with a Test: Before engraving your final piece, perform a test engraving on a scrap piece of wood with similar characteristics. Use this opportunity to fine-tune settings like power, speed, and resolution for the best results.
- Power Plays: Generally, a lower laser power setting will produce a lighter, more detailed engraving. A higher power setting will create a deeper, more contrasting engraving, but may risk burning the wood.
- Speed Matters: Slower engraving speeds allow for more detail and a cleaner finish. However, speeds that are too slow can scorch the wood.
Engraving and Beyond: Achieving a Flawless Finish
- Secure Your Wood: Ensure your wood piece is firmly secured onto the laser engraver's workbed to prevent movement during the engraving process.
- The Big Reveal: Once the engraving is complete, allow the wood to cool down completely before handling.
- Light Sanding: You may choose to lightly sand the engraved surface with a fine-grit sandpaper to remove any minor imperfections.
- Embrace Color (Optional): While the natural engraved look is beautiful, consider staining or painting your wood to add a pop of color and highlight the wood grain. Ensure the chosen stain or paint is compatible with laser engraving.
- Seal the Deal: Finally, apply a coat of varnish to protect your artwork from dust, moisture, and fading. Choose a matte or gloss finish depending on your desired aesthetic.
With these valuable tips in mind, you can transform your photos into captivating laser-engraved wooden masterpieces. The Monport 80w CO2 Laser offers the precision, detail, and ease of use to elevate your woodcrafting projects to a whole new level. So grab your favorite photos, select your wood, and get ready for some inspired putting pics on wood experiences.
Frequently Asked Questions (FAQs)
-
Q: What is the easiest way to put a picture on wood for beginners?
A: The simplest method is using Mod Podge transfer. It’s budget-friendly, requires minimal tools, and is great for beginners who want a vintage-style look without special equipment. -
Q: Why should I choose laser engraving instead of other methods?
A: Laser engraving with a CO2 laser like the Monport 80W offers precision, durability, and professional results. Unlike glue-based transfers or burning, it creates a permanent design with crisp details on various wood types. -
Q: What kind of wood works best for putting pictures on wood with a laser engraver?
A: Light-colored woods such as birch plywood, maple, and basswood work best. These woods provide better contrast and allow fine details to stand out clearly after engraving. -
Q: Do I need to prepare the wood before engraving or transferring photos?
A: Yes, preparation is key. Always sand the surface smooth, clean off dust, and if desired, apply stain or paint beforehand. Proper preparation ensures better adhesion or engraving quality. -
Q: How can I protect my finished photo on wood project from damage?
A: After transferring or engraving, applying a varnish or sealant helps protect the surface from dust, moisture, and fading. This step ensures your keepsake lasts for years while maintaining its beauty.
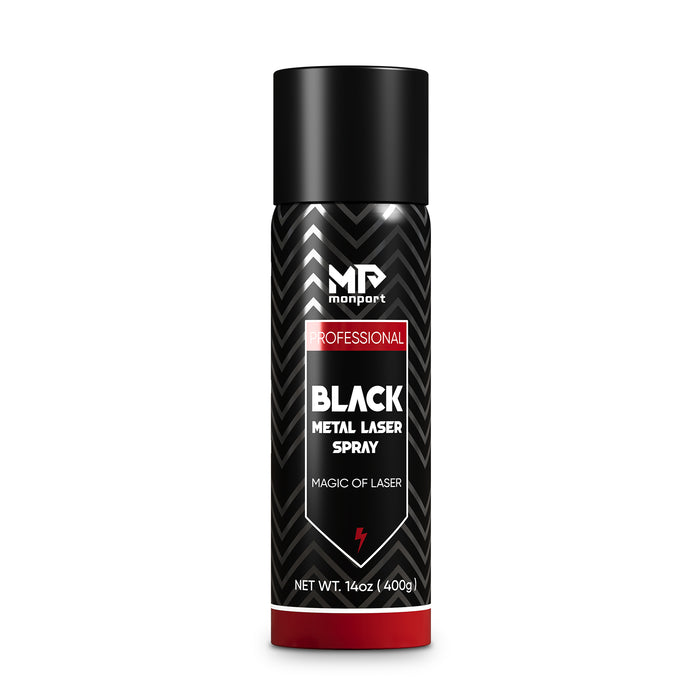
Achieve Flawless Results with Monport Black Laser Marking Spray
If you're looking to upgrade your metal engraving projects, the Monport black laser marking spray is the perfect companion. Specially formulated for CO2 laser engraving machines (25W and above), this spray ensures your metal markings are sharp, permanent, and highly visible. Whether you're engraving aluminum, stainless steel, or brass, this spray delivers impressive results every time.
Why Choose Monport Black Laser Marking Spray?
This black laser marking spray is designed for effortless application. Simply clean the metal surface with alcohol, shake the can for two minutes, and spray from 6 to 8 inches away. The ultra-fine mist provides an even coating thanks to its anti-clog nozzle, and it dries within five minutes, helping you maintain a smooth and efficient workflow.
After laser engraving, all you need to do is rinse off the surface to reveal bold, high-contrast black marks. There’s no mess, no residue—just clean, permanent results. The formula is free of alcohol in the package, ensuring safe and clean use.
Key Benefits
-
Permanent and durable markings
The fine-grained formula penetrates deeply into metal surfaces, creating marks that are heat-resistant and long-lasting. -
High compatibility
Works seamlessly with CO2 laser engraving machines, making it ideal for customizing tools, jewelry, glassware, and more. -
Even, precise spray
The nanoparticle formula and anti-clog nozzle provide consistent coverage, even for detailed designs. -
Quick application and cleanup
No waiting, no hassle. Spray, engrave, rinse—and your design is ready to shine.
The black laser marking spray comes in a 14 oz aluminum can, offering plenty of product for multiple projects. Its compact size and strong performance make it a go-to tool for both professionals and DIY creators.
Conclusion
Transforming cherished memories into beautiful wooden masterpieces is a fulfilling creative endeavor. By combining the power of the Monport 80w CO2 Laser with the methods and project ideas for wood explored in this guide, you can turn your photos into stunning works of art on wood. So, unleash your creativity, embrace the beauty of wood, and embark on a journey of personalized wood picture creation!
Read More: Transform Your Memories with Photo Laser Engraving


