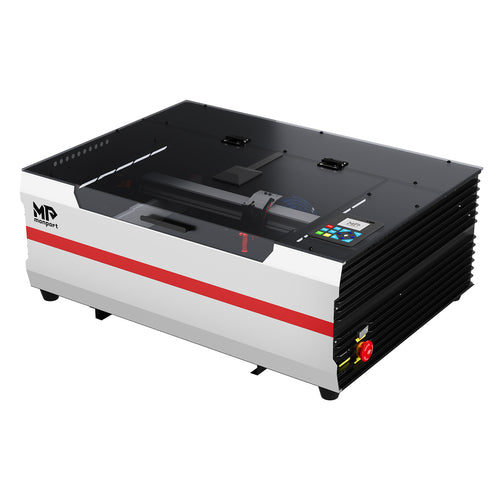
For most small businesses that want to engrave and cut leather in one registered workflow, a CO2 laser is the best category to investigate first. A diode laser can be a practical entry point for occasional surface engraving on smaller, verified materials. A fiber laser is a specialist option for a narrow marking application, not the default machine for general leatherwork.
The word best still depends on the job. A maker engraving pre-cut hat patches has different requirements from a shop cutting wallet panels from a full sheet. Material construction, usable work area, exhaust, focus control, software, fixtures, and batch size all affect the decision.

Which Laser Is Best for Leather? The Short Answer
| Primary job | Laser category to investigate first | Why | Main limitation |
|---|---|---|---|
| Engrave and cut leather goods or patches | CO2 gantry laser | Combines raster engraving and vector cutting over a practical work area | Requires appropriate cooling, exhaust, optics care, space, and maintenance |
| Occasional surface personalization | Enclosed diode laser | Can be an accessible starting point for small, verified leather products | Typically slower for production and more limited for cutting |
| Batch engraving on pre-cut blanks | CO2 laser with a repeatable jig; specialist systems only after validation | Positioning and repeatability may matter more than cutting power | The blank's face, backing, adhesive, and liner must all be checked |
| One validated mark on one specific material | Fiber only if the material and process have been verified | Galvo motion can be fast within a smaller marking field | Not a general leather cutter and not a safe assumption for unknown coatings |
If leather is one product line among wood, acrylic, paper, and other suitable nonmetals, compare the broader range of Monport CO2 laser engravers. Start with the material and product dimensions, then narrow the machine category.
Safety Gate: Confirm the Material Before Comparing Machines

A laser cannot make an unknown material safe. Before running a sample, identify every layer the beam may contact: leather face, coating, pigment, fabric backing, foam, adhesive, reinforcement, and release liner. A marketplace title such as “PU leather” or “leatherette” is not a complete composition statement.
Ask the supplier whether the exact product is intended for laser processing and request technical or safety documentation when available. If the composition is incomplete or contradictory, do not use a test burn to identify it. Trotec's guidance on materials unsuitable for laser processing specifically lists PVC and leather or artificial leather containing chromium (VI). The material supplier and the manual for the exact laser should remain the primary references for your job.
Machine size does not determine optical risk. The FDA explains that laser products are assigned hazard classes and that higher classes can present greater injury risk when used improperly. Review the FDA overview of laser products and hazard classes, the product labels, and the manufacturer's safety instructions. Use suitable beam containment, interlocks, exhaust, supervision, and fire precautions for the equipment and workplace.
For a broader pre-purchase review, use these laser safety questions to ask before buying. Safety features should be evaluated as part of the complete installation, not as a checklist detached from the material and workflow.
Which Leather Materials Can You Evaluate for Laser Processing?

| Material | What to verify | Practical decision |
|---|---|---|
| Natural leather | Tannage, dye, finish, oils, thickness, and supplier guidance | Test a same-batch offcut and evaluate contrast, surface damage, residue, edge quality, and odor control |
| Vegetable-tanned leather | Finish, color, thickness, and variation across the hide | Often selected for engraving projects, but each hide and finish still requires testing |
| Coated or dyed leather | Coating composition and care instructions | Test for discoloration, melted finish, residue, and cleaning damage before production |
| Laserable leatherette | Written confirmation that the complete construction is intended for laser use | Use only as specified by the supplier; do not treat all synthetic leather as equivalent |
| Adhesive-backed patch blank | Face, backing, adhesive, liner, and whether approval covers engraving, cutting, or both | Engrave pre-cut blanks if full-thickness cutting is not approved |
| Unknown faux leather or scrap | Composition cannot be verified | Do not process it |
If synthetic material is part of your product line, review the distinctions in Monport's guide to laser engraving faux leather, then confirm the exact blank with its supplier. General blog advice cannot replace product-specific documentation.
CO2 Laser Engraver vs Diode Laser Engraver vs Fiber Laser Engraver for Leather

CO2 Laser Engraver: the strongest all-around category
A CO2 gantry laser is usually the most versatile option when the same job requires detailed engraving and contour cutting. The material can remain in one position while the machine completes the engraved layer and then follows the cut path. This is useful for patches, keychains, wallet panels, journal covers, labels, ornaments, and other approved leather parts.
The advantage is not simply higher wattage. It is the combination of a suitable wavelength for many nonmetal workflows, a gantry work area, layer control, and the ability to arrange several parts in one job. For a closer look at the process, see Monport's guide to laser engraving and cutting leather.
CO2 ownership also requires planning. Confirm cooling, electrical requirements, exhaust routing, machine clearance, optical maintenance, software, and replacement support. A built-in fan does not automatically make a room or discharge location suitable.
Diode Laser Engraver: useful for lower-volume surface work
A diode laser may suit a maker adding names, logos, or simple designs to small verified products. It can be a lower-commitment way to learn artwork preparation, focus, framing, and parameter testing before a business invests in faster cutting or larger batch layouts.
Judge the complete station, not the laser head alone. An open-frame diode may need a manufacturer-approved enclosure, extraction, suitable base, and additional safety controls. Labor matters as well: a less expensive machine can become a bottleneck when long cycle times limit order capacity.
Fiber Laser Engraver: a specialist path, not the default upgrade
Fiber lasers are primarily associated with metal marking. A specific leather or leatherette product may respond to a particular fiber process, but that does not make fiber the general recommendation for leather buyers. It will not replace a CO2 gantry system when the job requires cutting patch outlines or larger panels.
Only consider fiber for leather when the exact material, desired mark, supplier guidance, and machine process have been validated together. Do not assume that faster galvo movement guarantees an acceptable or safe result on coatings, pigments, adhesives, or composite blanks.
Which Monport CO2 Laser Engraver Fits a Leather Workflow?

The following comparison is a selection framework, not a claim that one machine is best for every leather product. No universal leather thickness, cycle time, or cut result is stated because those outcomes depend on the exact material, artwork, focus, optics, airflow, maintenance, and settings.
| Current model | Published work area and relevant features | Best fit to investigate | Decision boundary |
|---|---|---|---|
| Monport Reno45 45W Desktop CO2 Laser | 16 × 12 in. work area, built-in water cooling, and magnetic assisted focus | Small leather goods, test batches, pre-cut patches, and makers moving from occasional work toward a repeatable CO2 workflow | Confirm that the usable bed fits the full sheet, jig, hold-downs, and batch margins rather than only one finished patch |
| Monport Reno65 65W Desktop CO2 Laser | 24 × 16 in. work area, built-in water cooling, magnetic assisted focus, and multiple configurations | Growing shops that need larger layouts, more parts per batch, or room for wallet panels, patch sheets, and mixed products | Choose the Basic, Pro, or Vision configuration by camera, control, and workflow needs; do not pay for features the shop will not use |
| Monport MEGAS 70W Desktop CO2 Laser | 28 × 14 in. work area, built-in water cooling, 8MP camera, autofocus, LightBurn compatibility, and optional conveyor support | Camera-assisted layout, larger batch production, mixed nonmetal work, and businesses that value visual placement and workflow automation | Measure the shape of the work area as well as total area; a long belt panel and a wide patch sheet use bed geometry differently |
Buyers who are still deciding between footprints can compare the full Monport Reno desktop CO2 series or browse desktop laser engravers. Verify the exact configuration on the product page because features can differ within one series.
How Much Work Area Do You Need?

Do not choose a bed by looking only at the finished patch dimensions. The usable layout must also contain sheet margins, a registration jig, hold-downs, spacing between parts, and clearance required by the machine.
Use this planning method:
- Measure the largest flat product or sheet you expect to process.
- Add the footprint of the jig or hold-down method.
- Add safe margins and spacing between repeated pieces.
- Confirm that focus and head travel remain usable at the edges.
- Create a sample layout in the intended software before purchasing.
For patch batches, estimate capacity with the real outer cut path, not the visible logo size. For belts or long panels, confirm pass-through or conveyor procedures on the exact model and determine how the material will be supported without shifting.
Seven Features That Matter More Than a Marketing Wattage

1. Effective beam containment and safety controls
Review the product classification, protective housing, interlocks, emergency stop, labels, and operating instructions. A compact footprint does not reduce the need to control access to the beam.
2. Exhaust designed for the complete installation
Leather processing produces smoke, particles, and strong odor. Evaluate duct diameter, total length, bends, make-up air, discharge location, maintenance, and any filtration approved for the use case. Monport's overview of setting up a laser cutter exhaust system can help frame the installation questions, but the exact machine manual and local requirements take priority.
3. Controllable air assist
Air assist can move smoke and debris away from a cut and help control deposits or flare-ups. The appropriate airflow depends on the material and operation; more is not automatically better for every surface engraving. Review how air assist affects laser cutting, then test the approved controls on the same material batch.
4. Repeatable focus and material support
Leather can curl, bow, or vary in thickness. The bed, hold-down method, and focus system should keep the working surface consistent without placing fixtures in the beam path. Autofocus can reduce setup time; a clearly documented manual or assisted focus process can also be repeatable.
5. Software and controller compatibility
The software should separate engraving, scoring, and cutting into distinct layers, preview the job, position artwork, and create controlled tests. If LightBurn is part of the workflow, confirm compatibility with the exact controller and license. Monport's LightBurn setup guide provides an internal starting point.
6. Fixtures, camera tools, and batch repeatability
A camera can help place artwork, but a physical jig is often the stronger control for repeated pre-cut blanks. Evaluate how quickly an operator can load the next part, confirm orientation, frame the job, and detect a misplaced blank.
7. Support, maintenance, and replacement parts
Check warranty terms, manuals, technical support, optics, consumables, controller documentation, cleaning access, and service procedures. Downtime during a customer order is a business cost even when the purchase price was low.
How to Laser Engrave Leather: A Repeatable Workflow?

Step 1: Create a material record
Record the supplier, product name, color, construction, thickness, batch, finish, backing, and available technical documentation. Keep a labeled offcut with the record. Reject unidentified scraps and unknown synthetic leather.
Step 2: Prepare the artwork
Use clean vector paths for cut lines and suitable raster or vector artwork for engraving. Put engraving, scoring, and cutting on separate layers. Remove duplicate paths, close required outlines, and check small text, narrow gaps, and artwork placed near the finished edge.
Step 3: Build a physical sample
Test the smallest text, finest detail, narrowest gap, tightest inside radius, and actual outer shape. A design that looks clear on screen may merge, scorch, or lose contrast on the finished material.
Step 4: Flatten, support, and focus the material
Use the bed and hold-down method recommended for the machine. Confirm that clips, magnets, weights, or fixtures cannot enter the beam path. If the leather is severely curled, improve support or use a smaller section rather than expecting one focus setting to compensate.
Step 5: Run a controlled material test
Begin with the machine manufacturer's guidance and a same-batch offcut. LightBurn's official Material Test documentation explains how its test generator varies parameters such as speed, power, interval, and passes. It also warns users to check whether speed is expressed in millimeters per second or millimeters per minute.
For engraving, evaluate contrast, surface damage, detail, residue, odor control, and cleanability. For cutting, evaluate complete separation, kerf, edge condition, backside deposits, dimensional accuracy, and whether the backing remains usable. Change one major variable at a time.
Step 6: Engrave before contour cutting
When engraving and cutting the same sheet, engraving first usually preserves registration because the material remains supported as one piece. Inspect the engraving before releasing the cut layer. Stay with the machine throughout the job and follow its fire-safety instructions.
Step 7: Clean a sacrificial sample first
Allow the exhaust system to clear the enclosure as directed before opening it. Test the leather supplier's approved cleaning method on an inconspicuous offcut. A cleaner suitable for unfinished natural leather may discolor a coated, dyed, or synthetic surface. See Monport's guide to cleaning laser-engraved leather for additional considerations.
Step 8: Save the approved process
A useful production record includes the machine, laser source, lens where relevant, material and batch, focus method, bed setup, speed, power, interval or line spacing, passes, units, air-assist setting, exhaust arrangement, artwork version, operation order, cleaning method, photographs, and acceptance notes.
Repeat the test after a material batch change, optical change, maintenance event, or relevant software or machine configuration change. A saved setting is a controlled starting point, not proof that every new hide or blank will behave identically.
Leather Patch Production: From One Sample to a Repeatable Batch

Choose between pre-cut blanks and sheet production
Pre-cut blanks reduce cutting requirements, but they increase the importance of registration. Sheet production lets a CO2 laser engrave and cut the outline without moving the material, provided every layer is approved for both operations.
Build an orientation-proof jig
A registration jig should fix position and prevent a blank from being loaded backward. An asymmetric corner, notch, or stop can make orientation obvious. Frame the first job using the manufacturer's approved positioning method before marking the blank.
Measure the real cut result
Check the actual outer dimensions, smallest inside radius, corners, face, backside, and edge. Measure kerf from your process rather than copying a generic number. If an adhesive or liner becomes sticky, distorted, or contaminated, stop and verify whether the complete blank is approved for laser cutting.
Validate heat application separately
Hat fabric, crown construction, patch material, adhesive, press shape, pressure, temperature, and dwell time all affect the bond. Follow the patch or adhesive supplier's instructions and test the completed product after cooling. A successful engraving test does not validate the attachment process.
Approve a first article and inspect the batch
Compare the first completed patch with a written acceptance standard before running the full quantity. Check position, contrast, detail, dimensions, edge condition, residue, and adhesive integrity at planned intervals. Monport's explanation of batch engraving workflow can help when planning layouts and repeatable production.
Estimate Throughput Without Inventing a Patches-per-Hour Claim
Published head speed is not finished-product throughput. Measure the complete process:
Total batch time = artwork preparation + loading and alignment + framing + engraving + cutting + unloading + cleaning + inspection + attachment or packaging
Then calculate:
Completed pieces per hour = accepted pieces in the batch ÷ total batch minutes × 60
Run more than one representative batch. Include rejected pieces and operator time. A larger bed may improve output by holding more parts, but only if exhaust, file preparation, loading, and post-processing can support the larger batch.
Common Leather Laser Problems and What to Test Next
| Problem | Likely areas to investigate | Next controlled test |
|---|---|---|
| Mark is too dark or the surface is damaged | Excess delivered energy, focus error, or a reactive finish | Verify focus; test higher speed or lower power within manufacturer guidance on a fresh offcut |
| Mark is light or uneven | Low delivered energy, dirty optics, uneven material, or inconsistent focus | Inspect optics and focus, flatten the sample, and compare a small test grid |
| Fine details merge | Dense artwork, unsuitable line interval, excessive energy, or material texture | Enlarge or simplify detail, run an interval test, and reduce delivered energy |
| Smoke stains the face | Extraction, airflow pattern, residue, or incompatible masking | Check exhaust and seals; test approved airflow and supplier-approved masking separately |
| Cut edge is heavily charred | Poor focus, excessive energy, inefficient passes, dirty optics, or weak extraction | Verify the machine condition, then test a combination that separates the material with less heat exposure |
| Material does not cut through | Material or thickness is unsuitable, energy is insufficient, focus is wrong, or optics need service | Stop repeated blind passes; confirm capability and material approval before building a controlled cut test |
| Backing becomes sticky or distorted | Adhesive or liner is unsuitable for full-thickness processing | Ask the supplier whether cutting is approved; switch to pre-cut blanks when only engraving is approved |
| Results drift during a batch | Material variation, contamination, focus change, airflow change, or mechanical movement | Compare with the first article, inspect the machine, and retest the current material batch |
Plan the Total Cost, Not Just the Machine Price
Build the purchase budget around the operating system:
Total initial setup cost = machine + exhaust or approved filtration + cooling and air-assist requirements + software + fixtures + electrical work + workbench + initial approved materials + cleaning tools + training and safety equipment
Also estimate recurring costs for replacement optics or consumables, duct or filter maintenance, materials, test pieces, cleaning, rejected parts, labor, and downtime. Current product prices can change, so this guide does not freeze a temporary sale price into a long-lived article.
Buying Checklist for a Leather Laser Engraver
- List the exact leather goods, patch blanks, and other products you plan to make.
- Confirm that every material layer is intended for laser processing.
- Decide whether you need engraving only or engraving plus contour cutting.
- Measure the largest sheet, product, jig, and required margins.
- Estimate batch size with a real layout rather than a single finished-piece dimension.
- Plan beam containment, exhaust, cooling, air assist, electrical service, and maintenance access.
- Confirm software and controller compatibility for the exact configuration.
- Compare focus, camera, fixtures, and loading steps for repeat orders.
- Check warranty, manuals, technical support, consumables, and replacement parts.
- Test the exact material and complete finished workflow before accepting customer orders.
Frequently Asked Questions
Can all leather be laser engraved?
No. Natural and synthetic materials vary in tannage, coatings, dyes, backings, adhesives, and other components. Use only materials that the supplier identifies as suitable for laser processing and follow the machine manufacturer's material guidance.
Is a CO2 or diode laser better for leather?
A CO2 laser is generally the stronger all-around category when you need engraving, contour cutting, larger layouts, or repeat batches. A diode can suit occasional surface engraving on smaller verified products when its slower workflow and cutting limits are acceptable.
Can a laser engrave and cut leather patches?
Yes, when the face, backing, adhesive, and liner are all approved for the intended operation and the machine has suitable capability. A CO2 gantry laser is usually the practical category for engraving and contour cutting without moving the sheet. Otherwise, engrave approved pre-cut blanks.
How much laser power do I need for leather?
Power alone cannot answer the question. Source type, material construction, thickness, optics, focus, speed, airflow, passes, and the desired result all matter. Choose the laser category and work area first, then use manufacturer guidance and a controlled same-batch test.
What leather engraving settings should I use?
There is no universal setting. Begin with guidance for the exact machine and material, confirm the units, run a small parameter test, and record the approved result. Do not transfer settings between machines without testing.
How many leather patches can a laser produce per hour?
Calculate it from a complete representative batch. Artwork, loading, framing, engraving coverage, contour length, unloading, cleaning, inspection, rejected pieces, and attachment all affect output. Maximum head speed is not the same as accepted finished products per hour.
Can laser-engraved patches be machine washed?
Wash durability depends on the patch face, coating, backing, adhesive, garment or hat fabric, and application process. Use the material supplier's care guidance and run a documented wash test on the finished product before making a customer claim.
Does laser engraving weaken leather?
Removing or thermally altering material can affect its structure. The impact depends on leather construction, engraving depth, location, and mechanical load. Keep unvalidated engraving away from straps, fastener areas, and other load-bearing zones, and test the finished item for its intended use.
How should I price laser-engraved leather patches?
Include material, test pieces, machine time, operator labor, cleaning, rejected parts, heat application, packaging, overhead, and target margin. Use the measured complete workflow rather than pricing from laser cycle time alone.