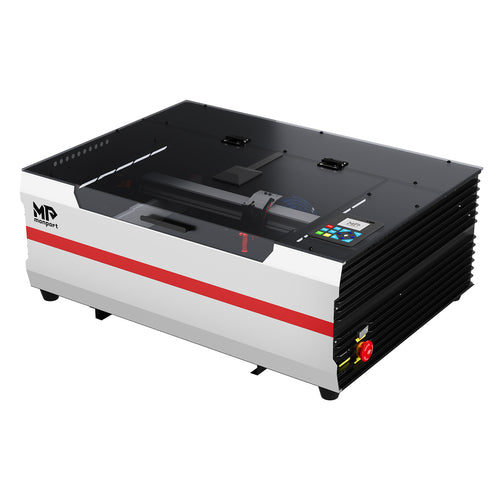
The best laser engraver for wood is not automatically the machine with the highest wattage, largest bed, or fastest advertised speed. It is the machine that fits your real products, processes the wood you actually buy, produces saleable results consistently, and supports the number of orders you expect to complete.
For most businesses that want to engrave and cut wood, an enclosed CO2 laser is the most practical place to begin. A diode laser may be suitable for smaller, engraving-focused projects and a lower initial budget. A fiber laser is primarily designed for metal marking and is not normally the first choice for general wood engraving or cutting.
This guide will help you choose between those technologies, estimate the right machine category, evaluate wood and sheet goods, calculate the full cost of ownership, and run a fair sample test before buying.

Quick Answer: What Is the Best Laser Engraver for Wood?
The best machine category depends on the work:
- Choose an enclosed CO2 laser when wood is a primary material and you need both engraving and cutting, a larger usable work area, pass-through access, or repeatable batch production.
- Consider a diode laser when you mainly engrave small projects, production volume is modest, and a lower purchase price matters more than throughput.
- Evaluate fiber lasers separately when metal marking is the primary requirement. Do not assume a metal-focused fiber system is an effective replacement for a CO2 or diode wood laser.
These are category-level recommendations, not performance guarantees. Two lasers with the same listed power can deliver different results because of their optics, focal setup, motion system, air assist, exhaust, controller, enclosure, and software workflow.

Define the Work Before Comparing Machines
A useful buying process begins with products, not specifications. List the work you expect to produce during the next 12 to 24 months. For each product, document:
- Wood species or sheet material and supplier
- Finished dimensions and material thickness
- Maximum engraving or cutting area
- Whether the job requires engraving, cutting, or both
- Typical and peak order quantities
- Required detail, contrast, edge quality, and cleanup
- Target production time per order
- Need for a jig, camera, rotary attachment, or pass-through
Engraving Only or Engraving and Cutting?
Engraving and cutting place different demands on a machine. Fine engraving depends on accurate focus, stable motion, suitable artwork, beam delivery, and a flat material surface. Cutting also depends on material thickness, air assist, extraction, support below the sheet, and the quality required at the edge.
If your business only adds names and logos to finished products, prioritize positioning, detail, repeatability, and fast setup. If you also cut signs, ornaments, inlays, packaging, or product blanks, test the exact thickness and material supplied to your shop. A listing that says a machine “cuts wood” does not tell you how fast it cuts, how much charring it produces, or whether the result meets your standard.
Choose for the Largest Real Product
Measure the largest product you realistically expect to process, including the jig and clearance needed to position it. Published bed dimensions do not answer every fit question.
- Is the full stated work area usable for both engraving and cutting?
- Can the lid close with the product and fixture installed?
- Is there enough vertical clearance for boxes, trays, and assembled products?
- Can long boards pass through the machine safely?
- Does a rotary attachment fit the diameter, length, weight, handles, and taper of the product?
- Can irregular workpieces be registered consistently?
A larger table can also increase batch capacity, but only when the software, fixtures, and positioning process allow the available area to be used efficiently.
One-Off Work or Batch Production?
For one personalized cutting board, artwork setup and positioning may take longer than the engraving itself. For 50 identical products, table capacity, acceleration, fixture registration, loading, unloading, inspection, and rework can determine whether an order takes hours or days.
Compare effective throughput: the number of acceptable finished pieces produced per hour after accounting for the entire workflow.
Effective throughput should include: file preparation, loading, positioning, focusing, engraving or cutting, unloading, cleanup, inspection, rejected pieces, and routine maintenance.
CO2 vs Diode vs Fiber Lasers for Wood

| Laser type | Typical wood use | Main advantages | Important limitations | Best suited to |
|---|---|---|---|---|
| CO2 | Engraving and cutting compatible solid wood and sheet goods | Versatile for nonmetal materials; available in enclosed desktop and large-format systems; suitable for mixed engraving, cutting, and batch workflows | Requires appropriate exhaust and may require cooling, air assist, more floor space, and additional installation planning | Custom-product businesses, woodworking shops, sign makers, schools, and production teams |
| Diode | Small-format engraving and lighter-duty cutting on compatible materials | Lower entry cost and compact machine options | Production speed, enclosure, extraction, work area, and cutting capability vary significantly by system | Hobby users, early-stage sellers, and low-volume engraving work |
| Fiber | Not normally selected for general wood processing | Strong fit for many metal-marking applications | The wavelength and system design are generally intended for other materials; wood results and safety must not be assumed | Businesses whose primary need is metal marking rather than woodworking |
If wood, acrylic, leather, and other nonmetal products make up most of your catalog, compare the current range of CO2 laser engravers. If available floor space is limited, begin with the desktop CO2 laser category and then verify that the usable work area and vertical clearance fit your products.
How Wood and Sheet Goods Change the Result?
Wood is not a uniform material. Species, density, grain, moisture, resin, adhesive, surface finish, and flatness can all change engraving contrast and cutting consistency. A capable machine cannot remove natural variation, but a controlled material process can make the results more repeatable.

Solid Wood
Solid wood can produce attractive contrast, but light and dark grain may engrave at different tones. Resin-rich areas may respond differently from surrounding fibers. Warped boards can move part of the design outside the best focus range.
Test several boards from the intended supplier rather than one ideal sample. Include both light and dark grain areas in the artwork, inspect fine detail across the board, and decide how much natural variation customers will accept.
Plywood
Plywood consists of veneer and adhesive layers. Voids, glue distribution, veneer species, and inconsistent internal layers can affect cut-through and edge quality. Two sheets with the same listed thickness may not process identically.
Before standardizing a product, test more than one sheet and more than one material batch. Record the supplier and product code. Monport also provides a plywood material collection that can be used when comparing known sheet options for laser projects.
MDF and Engineered Wood
MDF offers a relatively uniform surface, but it contains binders and can create substantial smoke and residue during processing. Confirm that the material is permitted by the equipment manufacturer, obtain supplier documentation when needed, and evaluate the extraction requirement before committing to production.
Veneer, Painted Wood, and Finished Products
Thin veneer can be damaged if the process penetrates the surface layer. Paint, sealant, stain, laminate, preservative, adhesive, or an unknown backing may change both the result and the emissions produced.
Do not use a test burn as a substitute for material identification. Process only materials whose composition is known and allowed by the machine manufacturer.
Eight Buying Factors That Matter More Than a Headline Specification

1. Usable Work Area and Machine Access
Compare usable processing space, not just nominal bed dimensions. Check door openings, vertical clearance, pass-through design, fixture space, and access for loading heavy or awkward products. Bring a real product to a demonstration whenever possible.
2. Power for the Work You Actually Sell
More power can support faster processing or more demanding cuts, but wattage alone does not determine quality. Material composition, thickness, focus, optics, air assist, speed, number of passes, and target edge finish all affect the result.
Ask a vendor to demonstrate four jobs: your finest engraving, your most demanding cut, your most common material, and a realistic batch. Require the test record to identify the machine, laser configuration, lens, material, settings, number of passes, and total job time.
3. Focus, Optics, and Motion Quality
Small text and photo engraving depend on more than the nominal beam spot. Focus accuracy, lens choice, usable depth of focus, motion stability, artwork resolution, dithering method, belt or drive condition, and wood grain all affect the result.
A useful detail test should include small positive text, reversed text, thin lines in multiple directions, closely spaced shapes, solid fills, and a dithered photograph. Inspect for doubled edges, banding, lost text, uneven fills, and changes across different areas of the bed.
4. Effective Production Throughput
Maximum motion speed is not the same as production speed. A machine running at a lower setting may finish an actual order faster if it offers easier positioning, a larger batch area, reusable jigs, reliable preview, or fewer rejected parts.
For a business comparison, calculate:
Saleable pieces per hour = accepted finished pieces ÷ total elapsed workflow time
Run this calculation on a complete batch, not a single sample.
5. Air Assist, Exhaust, and Workspace Requirements
Wood processing produces smoke and particles. Air assist can affect flame control, residue, and cut quality, while exhaust moves process emissions away from the machine and workspace.
Confirm duct routing, exhaust or filtration requirements, make-up air, noise, filter replacement, cleaning access, and local building or workplace requirements. The correct installation depends on the machine, material, room, and jurisdiction. Wood dust and wood-processing exposure are workplace concerns addressed by the U.S. Occupational Safety and Health Administration.
6. Camera, Jigs, Rotary Support, and Pass-Through
A camera can speed up placement on irregular products, but its value depends on calibration, software integration, and the placement tolerance your product requires. For identical batches, a well-designed jig may be faster and more repeatable.
If you engrave rolling pins, wooden cups, or cylindrical containers, verify the product's diameter, length, weight, handles, taper, and required vertical clearance against the available rotary attachment options.
7. Software and File Workflow
Test the complete path from design file to finished job. Confirm file-format support, layer management, process settings, camera integration, job saving, rotary operation, and network requirements.
Software compatibility depends on the controller inside the machine. Review Monport's CO2 laser software comparison and verify the current controller against the software developer's documentation before purchasing a license.
8. Support, Parts, and Maintenance
Downtime can outweigh a modest difference in purchase price. Ask who provides support, when the team is available, where replacement parts ship from, and which repairs an operator can complete without an on-site technician.
Request a written maintenance schedule and review the relevant files in the Monport Download Center. For purchasing or service questions, check the current U.S.-based technical support information.
What CO2 Laser Power Should You Consider for Wood?
There is no universal wattage for every wood species or thickness. The ranges below are screening categories for building a shortlist, not promises of a particular cut depth or speed.

| Machine category | Typical starting use | What to verify | Relevant Monport category |
|---|---|---|---|
| Compact 40W–50W class | Small products, personalization, prototypes, and engraving-first workflows | Usable bed size, enclosure, controller, software, vertical clearance, and realistic cutting needs | Reno Series and other desktop CO2 options |
| 60W–80W class | Mixed engraving and cutting, growing custom-product catalogs, and moderate batch production | Batch capacity, camera or fixture workflow, cooling, exhaust, pass-through, and job time at saleable quality | MEGAS 70W desktop CO2 laser and comparable configurations |
| 80W-and-up large-format class | Larger products, thicker compatible stock, higher throughput, and production-oriented workflows | Installed footprint, electrical service, cooling, material handling, full-bed consistency, service access, and total operating cost | Traditional and industrial CO2 laser engravers |
A higher-power machine may process demanding work faster, but it is not automatically better for every shop. If the work area is too small, the software is unsuitable, the machine cannot accommodate fixtures, or the installation exceeds the available space and electrical capacity, additional power will not solve the main problem.
Wood Laser Engraver Selection Matrix by Application
| Application | Starting category | Prioritize | Test before buying | Common mistake |
|---|---|---|---|---|
| Wood ornaments, tags, and small gifts | Compact CO2 or suitable enclosed diode system | Simple software, fine detail, jig repeatability, low setup time | A full fixture loaded with several pieces | Buying for one sample instead of a repeatable batch |
| Cutting boards and serving boards | Desktop or larger CO2 system sized to the largest board | Bed access, focus over uneven surfaces, camera or jig placement, exhaust | Several boards showing real grain and flatness variation | Checking nominal bed size without allowing for fixtures or door clearance |
| Wood signs | CO2 system with suitable work area or pass-through | Long-material access, alignment, full-width consistency, cutting workflow | The largest panel and a multi-position alignment test | Assuming pass-through access automatically guarantees accurate tiling |
| Photo engraving | CO2 or diode system proven on the chosen wood | Focus, motion stability, dithering workflow, tonal consistency | The same photograph on multiple boards | Judging photo quality from a vendor's specially selected sample |
| Furniture parts and long boards | Larger CO2 system with verified access | Pass-through, support, safe handling, registration, operator access | The real part, including any assembly or hardware | Improvising unsafe placement after purchase |
| Growing batch-production shop | Mid-power or production-oriented CO2 system | Saleable pieces per hour, uptime, fixtures, parts, support, full-bed consistency | A complete order-size batch | Using maximum speed as a substitute for real throughput |
A Hypothetical Buying Example
Consider a small business that engraves 18-by-12-inch cutting boards and sells occasional batches of personalized ornaments. The owner rarely cuts thick material but expects holiday orders to grow.
The first screening requirements would be a usable bed and door opening that fit the cutting board with its jig, reliable positioning, enough batch area for ornaments, suitable exhaust, and software that saves repeatable jobs. Maximum cutting thickness would be less important than setup time and engraving consistency. A live test should include one cutting board and a complete ornament fixture, with total time measured from loading to inspection.
This example does not identify one universally best model. It shows how the product mix determines which specifications deserve priority.
Compare Total Cost, Not Purchase Price Alone
The machine price is only one part of the investment. Build a total-cost worksheet before comparing quotes.

Total installed cost = machine + freight + exhaust or filtration + cooling + air assist + electrical work + computer and software + accessories + setup and training.
Then estimate ongoing costs:
- Replacement filters, optics, belts, tubes, and other wear items
- Cleaning and scheduled maintenance labor
- Software renewals or upgrades
- Material used for setup and testing
- Rejected pieces and rework
- Support or technician travel not included in the warranty
- Production lost during downtime
For a product-level comparison, use:
Cost per saleable piece = materials + direct labor + consumables + allocated equipment cost + rejected-piece cost, divided by accepted pieces.
A lower-priced machine can be the correct choice for occasional work. For a busy shop, slow positioning, small batches, frequent cleanup, or limited support can erase the initial saving.
How to Test a Wood Laser Engraver Before You Buy?
A controlled sample test is one of the most practical ways to compare shortlisted machines. Use the same material, file, batch size, quality target, and scoring method for each vendor.
Step 1: Bring Real Materials and Products
Use material from the supplier you expect to buy from. Include a difficult or less-perfect sample, not only the flattest board. Bring an assembled product or fixture when shape and placement matter.
Step 2: Use One Standard Test File
Create a file that includes:
- Small positive and reversed text
- Thin horizontal, vertical, and diagonal lines
- Closely spaced vector shapes
- A solid fill
- A grayscale or dithered photograph
- The corners and curves used in your normal cutting work
Step 3: Document the Test Conditions
Record the machine, laser configuration, lens, software, material, thickness, focus method, air-assist condition, speed, power, interval or resolution, number of passes, and total job time. Settings from one machine should not be treated as universal settings for another.
Step 4: Measure the Whole Workflow
Start the timer before loading and stop after the finished pieces are removed and inspected. Include file preparation, alignment, focusing, preview, processing, unloading, and cleanup. If batch production matters, test a realistic batch.
Step 5: Score the Result
| Criterion | Question to answer | Suggested score |
|---|---|---|
| Detail | Is small text readable, and are fine lines clean? | 1–5 |
| Consistency | Does tone and geometry remain stable across the sample and work area? | 1–5 |
| Surface and edge quality | Are smoke staining, charring, residue, and cleanup acceptable? | 1–5 |
| Throughput | How many acceptable pieces can the complete workflow produce per hour? | Measured result |
| Ease of repetition | Can another trained operator repeat the job from the saved file and notes? | 1–5 |
| Installation | Can the workspace meet the exhaust, cooling, electrical, access, and noise requirements? | Pass or fail |
| Support | Are training, parts, response channels, and warranty terms clear in writing? | 1–5 |
| Total cost | What is the installed cost and estimated cost per saleable piece? | Calculated result |
Keep every sample and compare the results under the same lighting. A persuasive demonstration should not replace documented acceptance criteria.
Common Wood Laser Engraving Problems
| Problem | Possible causes | Practical next check |
|---|---|---|
| Heavy smoke staining | Insufficient extraction, unsuitable airflow, excessive energy, or a sensitive surface | Verify exhaust and air assist, inspect airflow, and run a controlled material test. Use removable masking only when it is compatible with the material and process. |
| Blurred or doubled detail | Incorrect focus, movement, loose mechanics, poor artwork, or unsuitable settings | Check material flatness and focus, inspect the motion system, and run a known vector test pattern. |
| Uneven engraving tone | Grain variation, warped material, inconsistent finish, or focus variation | Test multiple boards, fixture the part, and compare results in several areas of the bed. |
| Cut does not complete | Material variation, poor focus, dirty optics, inadequate air assist, or an unsuitable speed, power, and pass combination | Stop and inspect instead of repeating the same pass blindly. Clean and focus according to the manual, then change one documented variable. |
| Excessive flare-up | Resin, debris, poor airflow, unsuitable setup, or lack of monitoring | Stop the job safely, clean the machine, confirm the material, and review the manufacturer-approved setup before restarting. |
| Good sample but inconsistent batches | Supplier variation, fixture movement, changes in focus, dirty optics, or undocumented settings | Track material batch, fixture position, maintenance state, operator, and saved job version. |
Change one variable at a time and record the result. A material library containing sample pieces, photographs, supplier details, and test notes is more useful than an unexplained list of “best settings.”

Safety and Material Checks Before You Start
Laser processing combines heat, combustible material, smoke, moving equipment, and electrical components. Always follow the machine manufacturer's manual, approved-material guidance, installation requirements, and applicable workplace rules. The U.S. Food and Drug Administration's laser product information provides additional background on laser products and safety.
- Never leave active wood processing unattended.
- Use the enclosure, interlocks, exhaust, and protective features as designed.
- Confirm the composition of wood products, adhesives, coatings, and laminates before processing.
- Do not process unknown materials.
- Install and maintain the exhaust or filtration system specified for the machine and workspace.
- Keep the bed, exhaust path, and surrounding area free of combustible debris.
- Know how to stop the machine and respond to a fire before starting a job.
- Inspect optics, air paths, fixtures, and material placement according to the maintenance schedule.
- Train operators and control access to the equipment.
This article is a buying guide. It does not replace the equipment manual, a material safety data sheet, a workplace risk assessment, or local regulatory requirements.
Final Wood Laser Engraver Buying Checklist
- The usable work area, door opening, and vertical clearance fit my largest real product and fixture.
- I have tested the actual wood or sheet goods supplied to my business.
- The test included my finest engraving, most demanding cut, and realistic batch.
- I measured total workflow time instead of relying on advertised maximum speed.
- The exhaust, cooling, air assist, electrical, noise, and workspace requirements are documented.
- The controller and software support my files and production workflow.
- Required accessories are included in the quote or listed separately.
- Maintenance tasks, replacement parts, support channels, and warranty terms are clear.
- I calculated total installed cost and estimated cost per saleable piece.
- The machine fits both current work and realistic near-term growth.
Frequently Asked Questions
What type of laser is best for engraving wood?
An enclosed CO2 laser is often the most versatile choice for businesses that engrave and cut wood or need a larger work area and batch capacity. A diode laser may suit smaller engraving projects and lower-volume work. Test the exact material and product before buying.
How much laser power do I need for wood engraving?
There is no universal wattage for every wood project. A compact 40W–50W CO2 machine can be a starting category for smaller engraving-focused work, while 60W–80W machines are commonly compared for mixed engraving, cutting, and growing production. Higher-power systems may suit larger or more demanding workflows. Material, thickness, focus, optics, air assist, speed, and target quality must still be tested.
Can the same laser engrave and cut wood?
Many CO2 systems and some diode systems can engrave and cut compatible wood products. Capability varies by machine and material. Evaluate cut completion, edge quality, smoke residue, speed, and repeatability—not only whether the beam passes through the sheet.
What wood gives the best laser engraving contrast?
The preferred wood depends on the required color, grain, detail, and consistency. Light, relatively uniform woods can make dark engraving easier to see, but boards of the same species may still vary. Test several samples from the supplier you plan to use.
Is a camera necessary for a wood laser engraver?
A camera can help position artwork on irregular or preassembled products, but it is not essential for every workflow. Reusable jigs may be faster and more repeatable for identical batches. Test camera calibration and placement accuracy on your products.
Do I need a rotary attachment for wooden products?
You need a compatible rotary attachment when the engraved area must follow a cylindrical or tapered surface that cannot be processed accurately while stationary. Verify product diameter, length, weight, taper, handles, and machine clearance before choosing the rotary.
Can I copy wood engraving settings from another machine?
Use online settings only as a rough reference. Results change with the machine, laser source, lens, focus, material, thickness, moisture, finish, airflow, and maintenance condition. Build a controlled test grid and record settings validated on your own system.
Does a wood laser engraver need ventilation?
Wood laser processing creates smoke and particles, so an appropriate exhaust or filtration setup is part of the installation. Follow the equipment manufacturer's requirements and applicable local workplace, fire, and building rules.
What should a small business prioritize?
Prioritize repeatable output, usable work area, saleable pieces per hour, extraction, software fit, parts availability, support, and total cost. A machine that is easy to operate and maintain is often more valuable than one selected only for maximum wattage or speed.
Final Recommendation
For most serious wood engraving and cutting workflows, begin with enclosed CO2 laser systems that match the largest product, required batch size, material, installation limits, and available support. Consider a diode system when projects are smaller and lower initial cost is the main priority. Evaluate metal-focused laser systems separately.
Do not choose the best laser engraver for wood from specifications alone. Shortlist two or three machines, test your own materials and files, measure the full workflow, compare total installed cost, and confirm service requirements in writing.
To continue your research, review Monport's wood laser engraving application guide, compare CO2 laser engraver options, or use the demo-room directory to explore a machine demonstration.