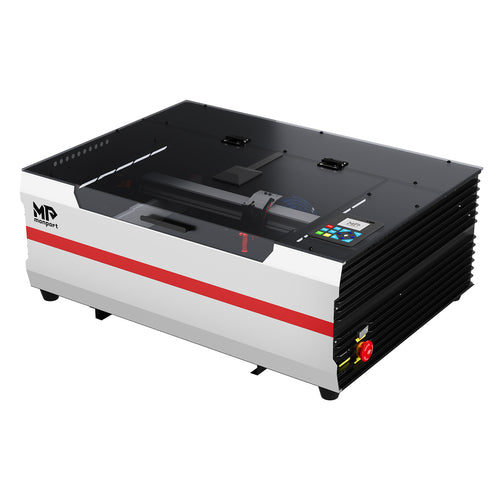
The best laser engraver for tumblers is the one that matches the tumbler surface, the finish you want and the production volume you can support. A coated stainless-steel cup, a bare-metal bottle and a glass tumbler do not require the same laser source.
For most powder-coated tumblers, an enclosed diode laser is a practical entry point and a CO2 laser offers more room to grow. For direct marking on bare stainless steel, a fiber laser is the more appropriate technology. A CO2 laser is usually the better choice when tumblers are part of a wider product range that includes glass, wood, acrylic or leather.
The rotary attachment is equally important. A powerful laser paired with an unstable or incompatible rotary can produce stretched artwork, slanted text, ghosting and visible wrap seams. This guide explains how to choose the complete system rather than chasing the largest wattage number.

Technical review basis: The process guidance below is based on laser-software documentation, manufacturer information and general laser-safety guidance linked in this article. Always verify the live specifications, included accessories and local requirements before buying or operating equipment.
Quick Answer: Which Laser Is Best for Tumblers?
Use this table as a first filter. The recommendation changes when the material or business model changes.
| Tumbler or business need | Usually the best laser type | What the process does | Important requirement |
|---|---|---|---|
| Powder-coated stainless-steel tumbler | Enclosed diode or CO2 | Removes the coating to reveal the metal underneath | Compatible rotary, extraction and a tested coating |
| Painted metal tumbler | Diode or CO2 after testing | Changes or removes the painted surface | Verified coating composition and a spare blank |
| Bare stainless-steel tumbler | Fiber laser | Marks or engraves the metal directly | Suitable lens, clearance and galvo-compatible rotary |
| Glass tumbler | CO2 laser | Creates a controlled surface effect on the glass | Stable rotary and conservative material testing |
| Mixed personalized-gift business | CO2 laser | Handles coated tumblers and many compatible nonmetals | Enough bed height, cooling and ventilation |
| Advanced metal marking or selected color effects | MOPA fiber laser | Provides wider pulse control on suitable metals | Parameter development and experienced operation |
There is no universal winner. If you are validating a small range of coated tumblers, start with the simplest enclosed system that can produce repeatable samples. If tumblers are one category in a broader gift business, CO2 may create more useful capacity. If bare metal is the core product, choose fiber instead of forcing a diode or CO2 laser to do the wrong job.
Start With the Process, Not the Wattage
Two tumblers can look almost identical while requiring different laser settings and even different laser sources. Before comparing machines, answer three questions:
- What is the exterior material and coating?
- Do you want coating removal, a surface mark or a deeper engraving?
- Will you make a small front logo or a repeatable full wrap?
Removing a coating
Many colored stainless-steel tumblers are personalized by removing powder coating or paint. In this process, the laser primarily interacts with the surface layer rather than deeply cutting the stainless steel below. The contrast comes from the difference between the coating and the exposed metal.
Results can change with coating chemistry, color, thickness, wavelength, focus, speed, power, line interval and cleaning. Settings from one supplier or color are not guaranteed to transfer to another blank. Treat every new blank as a material that needs a controlled test.
Marking bare metal
A bare stainless-steel tumbler has no colored layer to remove. Direct metal marking normally calls for a fiber laser. Depending on the alloy and parameters, the result may be a light surface mark, a dark mark, a shallow engraving or a deeper texture. These finishes are not interchangeable: a visible mark is not automatically deep, and a deep engraving is not automatically dark.
Engraving glass
CO2 lasers are commonly used for glass surface work, but glass quality, wall thickness, internal stress and settings affect the result. Start with a conservative test and inspect for chipping, cracking or an uneven frosted effect. A successful test on one glass blank does not prove that every blank in the same product category will behave the same way.
Small logos versus full wraps
A small logo near the top of a straight cylinder may fit within a usable focus range in limited circumstances. The farther the surface curves away from the focal plane, the greater the risk of distortion and uneven detail.
For full-wrap designs, wide artwork and repeatable commercial work, a rotary attachment is effectively essential. The rotary turns the tumbler so the software can map the artwork around the circumference instead of treating the curved cup like a flat sheet.
Diode, CO2 or Fiber: Which Laser Type Fits Your Tumblers?

Diode lasers: a sensible entry point for coated tumblers
An enclosed diode laser can be a practical starting point for powder-coated or painted tumblers, especially when you also want to work with wood, slate and selected opaque materials.
- Compact footprint and comparatively simple maintenance.
- Useful for testing a small product range and occasional personalization.
- Compatible roller and chuck rotaries are available for some systems.
- Often easier to fit into a small workshop than a larger CO2 machine.
Standard visible-blue diode sources are not general-purpose bare-metal engravers. Clear materials may not absorb the wavelength effectively, and open-frame systems require a carefully controlled enclosure and extraction setup. Production speed also varies with coating, artwork, optical output and motion settings. Compare verified optical output and the complete workflow, not the biggest number in a product title.
CO2 lasers: the versatile choice for a broader catalog
A CO2 laser is often the most useful option when tumblers are sold alongside glassware, wood gifts, acrylic signs, leather products, packaging or slate. It can remove many coatings from metal tumblers and is commonly used for glass surface work.
For tumbler work, check bed height and rotary clearance before looking at power. Some machines need a removable bed, lowered worktable or riser. CO2 ownership can also involve cooling, optics cleaning, beam-path maintenance on applicable systems, exhaust and tube service. Choose CO2 because its material range supports your product plan, not simply because its wattage is higher.
For an example of a desktop CO2 product profile, see the Monport 70W MEGAS CO2 laser page. Treat any product page as a starting point: confirm the current rotary option, working height, exhaust arrangement, warranty and regional electrical requirements before purchase.
Fiber lasers: the focused choice for bare metal
Fiber lasers are designed for suitable metals such as bare stainless steel, metal bottles, tags, tools, jewelry and anodized aluminum. A galvo fiber system uses a marking field and focal distance that must accommodate both the tumbler and the rotary.
A fiber laser is not a replacement for a CO2 laser when your main work is cutting wood or acrylic sheets. It is the right tool when direct metal marking is central to the product range.
For background reading, see this explanation of how a fiber laser works. For an example of a metal-marking product profile, review the Monport 100W MOPA fiber system and verify the current specifications and included rotary before making a buying decision.
MOPA fiber: useful for advanced metal process development
MOPA fiber systems provide broader pulse control for specialized metal marking and selected surface effects. That flexibility is valuable when you already understand focus, frequency, pulse width, hatch settings, lens calibration and material variation.
MOPA does not guarantee a particular color or finish. Results still depend on alloy, surface preparation, focus, heat management and parameter stability. If your normal product is created by removing a colored coating, MOPA capability may add cost without solving your main production problem.
Five Tumbler Laser Setups by Use Case
The profiles below are equipment strategies, not a claim that one model is best for every buyer. Use them to match the system to your actual work.

1. Budget setup for testing coated tumblers
Choose an enclosed diode laser with a compatible rotary when you are validating a small range of powder-coated tumblers, making occasional gifts or testing small front-facing logos. Prioritize enclosure quality, extraction and rotary stability over a small difference in advertised power.
A low-priced open frame can become expensive after adding an enclosure, exhaust, rotary, riser, software, safety controls and test stock. Do not select this profile for direct bare-metal engraving or high-volume production unless repeat tests show that the complete workflow meets your required output.
2. Enclosed setup for a home workshop
For a home workshop, an enclosed machine with documented interlocks, controlled extraction and enough vertical clearance is generally easier to manage than an exposed frame. Confirm the enclosure design, emergency stop, exhaust connection, rotary port, framing method, software support, parts availability and technical support.
An enclosure does not make unknown materials safe or remove the need for supervision. Material verification, extraction and the manufacturer’s operating procedures still apply.
3. CO2 setup for coated tumblers and glass
Choose CO2 when glassware and other nonmetal products are an important part of the catalog. Look for rotary clearance, removable or adjustable bed components, convenient focusing, stable low-power behavior, controller compatibility, exhaust performance and repeatable origin positioning.
For a broader machine comparison, link readers to your CO2 laser engraver collection. Keep the recommendation conditional: a CO2 laser still needs a tested tumbler coating and a rotary that physically fits the machine.
4. Fiber setup for bare stainless steel
Choose fiber when direct work on bare metal is the main business. The setup should include a suitable rotary, enough focal and physical clearance, an appropriate lens for the marking area, stable chucking or support, compatible software and a controlled laser-safe workspace.
A roller may not provide enough grip for every heavy or tapered cup. A chuck can offer more positive control, but jaw placement, cup protection and handle clearance must be checked before production.
5. MOPA setup for advanced metal marking
Choose MOPA when you have a clear reason to develop specialized metal finishes or need wider pulse control. It is best suited to an operator who can build and document material-specific parameters. A 60W or 100W MOPA product page, such as the Monport GT 60W MOPA example or Monport 100W split MOPA example, should be checked for current lens, rotary, enclosure and support details.
How to Choose a Rotary Attachment?
“Rotary” is not one universal accessory. The correct choice depends on the tumbler’s diameter, taper, handle, weight, length and the machine controller.
Roller rotary
A roller rotary supports the tumbler on rotating wheels. It is convenient for straight-sided cylinders, smooth blanks, quick loading and repeated work on similar diameters.
Watch for slipping, sideways walking, poor grip on glossy surfaces and difficulty with severe taper. A leveling support may be required to keep the artwork horizontal.
Chuck rotary
A chuck rotary holds the workpiece with adjustable jaws. It can provide more positive control for tapered, heavy or slippery products. Before buying, verify minimum and maximum gripping diameter, internal or external grip, jaw protection, handle clearance, product length and weight, and space under the laser head.
Straight, tapered and handled tumblers
Straight tumblers are usually easiest. A tapered tumbler has a changing diameter, so the engraving region may not remain level and the artwork may need distortion compensation. Handled cups can collide with the rotary, laser head, frame, enclosure or worktable. Rotate the complete setup through one full revolution with the laser off before firing.
Machine and software compatibility
Confirm the controller type, motor and connector, driver requirements, rotary mode, steps-per-rotation calibration, software machine profile, Z clearance and whether a riser or lowered bed is needed. LightBurn’s rotary documentation explains why galvo and rotary workflows need correct setup information. Its laser-type documentation also helps clarify the difference between diode, CO2 and galvo systems.
How to Test a Tumbler Before Production?
Use a repeatable test process before accepting customer orders. A successful single sample is not proof that a blank, coating or rotary workflow is stable.
- Verify the blank. Ask the supplier for the exterior material and coating description. Record supplier, product code, color, size, batch and purchase date. Do not process an unknown coating merely because it is advertised as laserable.
- Measure the usable area. Mark the safe zone between the rim, lower curve, handle, seam, decorative band and changes in diameter. Do not design only from the advertised cup capacity.
- Install and level the rotary. With the laser off, rotate the cup fully. Check frame, head, enclosure, handle and cable clearance. Confirm that the engraving region stays level.
- Calibrate rotation. Engrave a measured test shape. If a square becomes a rectangle or a circle becomes an oval, correct the rotary calibration before stretching artwork.
- Run a controlled test grid. Change one parameter group at a time. Evaluate coating removal, edge sharpness, residue, discoloration, surface damage, fine detail and cleaning time.
- Frame the design. Check top and bottom margins, seam position, orientation, handle position, wrap start and end points, and personalized spelling.
- Engrave while supervised. Watch for movement, smoke, unexpected flame, cable tension, collision and loss of focus. Never leave an operating laser unattended.
- Clean and inspect. Use a method approved for the blank and finish. Inspect under consistent lighting for incomplete removal, stretched lines, a visible seam, scratches and heat damage.
- Repeat the result. Test multiple blanks from the intended batch. Save the approved artwork, machine, lens, rotary, focus method, settings and cleaning process as one production record.
For software workflow context, see this beginner guide to laser engraving software for Windows. Software can help with layout and control, but it cannot compensate for an unsuitable rotary or an unknown coating.
Common Tumbler Engraving Problems and Fixes

| Problem | Likely causes | First correction to try |
|---|---|---|
| Stretched or compressed artwork | Wrong steps per rotation, roller diameter, device profile or slipping | Calibrate the rotary with a measured shape before editing the artwork |
| Slanted text | Uneven surface, taper, sideways movement or misalignment | Level the engraving area and test a simple rectangle |
| Visible full-wrap seam | Incorrect circumference, gap or overlap at the start point | Move the seam away from critical text and test compensation |
| Incomplete coating removal | Wrong focus, speed, energy, line interval, coating or contamination | Verify focus and cleanliness before increasing power |
| Double lines or ghosting | Backlash, looseness, cup movement or unstable support | Inspect the fixture and rotary mechanics before changing artwork |
| Tumbler slipping | Insufficient grip, poor balance, glossy surface or aggressive acceleration | Adjust spacing, support or rotary type without damaging the cup |
| Focus changes on a taper | Changing diameter moves the surface out of the focal range | Reduce design height, level the region or use a suitable fixture |
What Does a Complete Tumbler Engraving Setup Cost?
Budget for the complete workflow, not just the laser head. A realistic equipment list may include:
- Laser machine and rotary attachment.
- Riser, adjustable bed or fixtures.
- Enclosure, exhaust or filtration.
- Computer and control or design software.
- Test tumblers, cleaning supplies and maintenance parts.
- Fire-response equipment and other safety controls.
- Packaging, failed-product allowance and workspace preparation.
Total setup cost = machine + rotary + workspace preparation + extraction + software + test stock + safety equipment + contingency
For each product, calculate:
Unit cost = blank + machine allocation + labor + cleaning + packaging + selling costs + expected waste
Do not copy another seller’s retail price or claimed margin. Blank cost, labor, shipping, personalization time and failed-product rate vary by business.
Safety and Workspace Requirements
Laser processing can create smoke, particles and gases. Odor alone does not show whether extraction is adequate. Before running a tumbler:
- Verify the material and coating with the supplier or manufacturer.
- Follow the laser manufacturer’s operating instructions and enclosure requirements.
- Use extraction appropriate to the process and keep the work area clear of flammable residue.
- Never process unknown plastics, coatings or materials simply because they look similar to a tested blank.
- Remain present during operation and keep a shutdown and fire-response plan.
- Confirm electrical, ventilation, noise, storage and local workplace requirements.
Lasers can emit visible or invisible radiation. Required controls depend on device class, wavelength and enclosure. Review the manufacturer’s documentation and the FDA information on laser products. LightBurn also provides a general safety disclaimer and guidance page. These resources do not replace a site-specific risk assessment or local compliance advice.
When Is a Tumbler Laser Business Ready for Orders?

Before listing a design, validate the workflow rather than relying on one attractive sample. You should be able to identify the exact blank, reproduce the placement, clean the finish consistently and explain what happens if a customer requests a taper, handle or full wrap.
Keep a simple production record for each blank family. Include the supplier, coating, laser source, lens, rotary type, focus method, tested parameters, cleaning method, artwork dimensions and inspection notes. This record makes troubleshooting faster and reduces avoidable rework.
If you sell through a marketplace, review that platform’s current rules for personalized products and production partners. For example, Etsy publishes its current Creativity Standards; policies can change, so use the official page rather than an old summary.
Final Buying Checklist
- The laser source matches the exact tumbler surface.
- The process—coating removal, metal marking or glass work—has been tested on the intended blank.
- The rotary is compatible with the controller and software.
- The rotary supports the tumbler’s diameter, length, taper, handle and weight.
- The machine has enough vertical and horizontal clearance for a full revolution.
- Tapered products can be leveled or compensated.
- Enclosure and extraction suit the workspace.
- Software supports the required rotary workflow.
- Test results are repeatable across multiple blanks.
- Replacement parts, technical support and warranty terms are clear.
- The complete setup fits the budget after accessories and workspace costs.
- The machine solves a validated product need rather than a headline-wattage goal.
Frequently Asked Questions
Can a diode laser engrave stainless-steel tumblers?
A visible-blue diode laser can remove many colored coatings from stainless-steel tumblers, exposing the metal underneath. It is not a general substitute for a fiber laser when direct marking or deeper engraving on bare stainless steel is required.
Can a CO2 laser engrave metal tumblers?
A CO2 laser can remove many coatings from metal tumblers. It does not generally perform the same direct bare-metal process as a fiber laser. Test the exact coating and blank before selling the result.
Do I need a rotary for a small tumbler logo?
A very small design may fit within a limited usable focus range without rotation. For larger logos, full wraps and repeatable commercial work, use a compatible rotary.
Is a chuck or roller rotary better for tumblers?
A roller is convenient for straight cylinders and fast loading. A chuck can provide more positive control for heavy, tapered or slippery products. The better choice depends on geometry, grip, clearance and workflow.
Can a laser engrave tapered tumblers?
Yes, but the engraving region may need leveling and the artwork may require compensation. Severe taper increases the risk of focus variation, slanted designs and wrap mismatch.
What laser power is best for tumblers?
There is no universal wattage. Required output depends on laser type, coating, design, desired speed and production volume. Compare verified optical output and repeatable test results instead of headline wattage.
Can insulated tumblers be laser engraved?
Many double-wall tumblers can be customized, but compatibility depends on the exterior material and coating. The internal insulation does not determine whether the surface can be processed.
Is LightBurn required for tumbler engraving?
No. Some compatible machines use LightBurn, while others use manufacturer software or another controller platform. Confirm controller, operating system and rotary support before purchasing software. See the LightBurn overview for general software context.
Can I run a tumbler engraving business from home?
Potentially, if the machine, enclosure, extraction, electrical supply, material storage, noise and local requirements can be managed safely. A compact machine does not eliminate smoke or fire risks.
Conclusion
The best laser engraver for tumblers is the complete system that matches your material, holds the cup securely, maintains focus and produces a repeatable finish.
For coated tumblers, an enclosed diode or CO2 laser may be the right starting point. For glass, CO2 is generally the stronger fit. For direct work on bare stainless steel, choose fiber. Build the decision around the products you have tested, the rotary you can calibrate and the workspace you can operate safely—not around the highest advertised wattage.
Before buying, select a small set of representative blanks, test the complete workflow and record the results. That evidence will give you a more reliable buying decision than a generic “best laser” list.