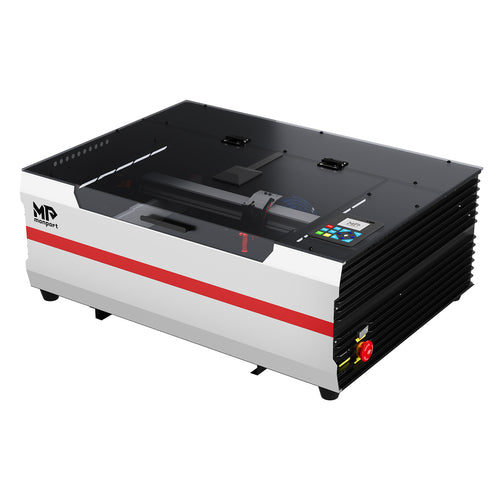
The best CO2 laser for acrylic is not automatically the machine with the highest wattage. The right choice depends on the acrylic you use, the size and thickness of your sheets, the edge quality you need, how often you run jobs, and what your workspace can safely support.
Acrylic, also known as PMMA, is used for signs, awards, displays, jewelry, lighting parts, organizers, templates, wedding products, and personalized gifts. A well-matched CO2 laser can cut clear and colored sheets accurately and produce a smooth-looking edge. A poorly matched machine can create haze, melted details, inconsistent dimensions, or operating costs that are difficult to justify.
This guide explains how to choose a CO2 laser for acrylic, how to match power and work area to your actual products, and how to test a new sheet before using it for customer orders. Product specifications and configurations can change, so verify current details in the manufacturer’s user manuals and product listings before you buy.

Safety first: Process only materials identified as laser-compatible by the machine manufacturer and material supplier. Obtain the exact material name and safety data when possible. Never laser-cut PVC, vinyl, or unidentified plastics. Use effective exhaust, keep the enclosure closed, and never leave an operating laser unattended.
Quick Answer: What Is the Best CO2 Laser for Acrylic?
For most makers and small businesses, the best acrylic laser cutter is an enclosed CO2 system with a usable work area that fits the products you make, stable cooling, effective exhaust, controllable air assist, reliable focusing, and software that supports repeatable jobs.
| Typical work | Machine category to consider | Buying priority |
|---|---|---|
| Samples, ornaments, jewelry, and occasional signs | Compact desktop CO2 laser | Enclosure, simple focusing, ventilation, and a bed that fits the products |
| Personalized products, displays, and regular orders | Mid-power desktop CO2 laser | Cooling stability, usable area, service access, and repeatable setup |
| Camera-assisted placement and repeated batches | Smart or batch-ready CO2 laser | Camera calibration, nesting, saved material settings, and job origins |
| Large sheets, thicker stock, or high daily output | Traditional 80W-and-up cabinet CO2 laser | Bed size, pass-through capability, cooling, exhaust, and serviceability |
Power is only one part of the decision. A slightly lower-powered machine with better focus control, cooling, exhaust, and workflow may be more useful than a higher-powered machine that does not fit your material or production process.
Why CO2 Lasers Work Well on Acrylic?
Most sheet acrylic used in laser projects is polymethyl methacrylate, or PMMA. CO2 lasers produce infrared energy that acrylic absorbs efficiently. This makes them suitable for both cutting and surface engraving when the material, focus, speed, power, airflow, cooling, and exhaust are balanced.

CO2 lasers are especially useful when your product range includes clear acrylic. Visible-light diode lasers may process certain dark, opaque sheets, but clear and lightly colored acrylic can transmit much of the visible beam. Fiber lasers are primarily intended for metal marking and engraving rather than standard clear acrylic cutting.
If you are still comparing laser types, start with Monport’s laser machine collection and compare the material range, enclosure, work area, and intended applications rather than comparing wattage alone.
Choose the Acrylic Before You Choose the Machine
“Acrylic” is not one uniform material. Manufacturing method, color, coating, protective film, and thickness can change engraving contrast, edge appearance, dimensional accuracy, and heat response. Monport’s acrylic material collection can help you identify the types of sheets available, but each new material should still be tested on your machine.

Cast acrylic
Cast acrylic is often selected for engraving because the engraved area can produce visible frosted contrast. It is commonly used for awards, plaques, edge-lit signs, photographs, and decorative products. Cast sheet can also cut cleanly, but thickness may vary slightly across a sheet or between batches. Measure the actual stock when a press-fit project depends on tight tolerances.
Extruded acrylic
Extruded acrylic is produced continuously and can provide consistent thickness and useful cutting performance. Engraving contrast may differ from cast sheet, and some extruded products may respond differently to heat. Do not copy a setting from another sheet without testing the exact brand, finish, and thickness.
Clear, colored, mirrored, and coated sheets
Clear, opaque, fluorescent, translucent, mirrored, and patterned acrylic can require different settings and handling. Mirrored acrylic may have a film or backing that changes which side should be engraved. Coatings, laminates, adhesives, and protective films must be verified as laser-compatible; never assume that a plastic film is safe because the acrylic underneath is safe.
For additional material ideas, browse Monport’s broader laser engraving materials collection and record the supplier, product name, measured thickness, and batch whenever possible.
Seven Factors That Determine the Best Acrylic Laser Cutter

1. Laser power for your normal jobs
Match power to the thickness, sheet size, production volume, and cycle time you need most often. A machine that cuts your thickest material only once a month may be less practical than one that handles your normal orders quickly and consistently.
Ask the manufacturer how its capacity was measured. A published maximum may use a particular acrylic formulation, lens, airflow, focus position, and number of passes. Treat it as a reference, not a universal promise.
2. Usable work area and pass-through capability
Compare the usable bed rather than the outside dimensions of the cabinet. Measure your most common sheet, fixture, and finished-product sizes. A larger bed may reduce repositioning. Pass-through or conveyor capability may be more valuable than extra wattage when you make long signs or repeated strips.
3. Air assist and exhaust
Air assist can help control the cut and reduce flame behavior, but maximum airflow is not automatically the best setting for every acrylic. Exhaust must remove smoke and vapor effectively without creating an unsafe installation. Plan the duct route, outlet location, make-up air, and filter maintenance before ordering the machine.
For ventilation planning, see Monport’s laser setup and ventilation guidance. Follow the machine manual and local requirements for your workspace.
4. Cooling and duty cycle
Ask what cooling system the machine requires, how temperature and flow are monitored, and what maintenance the manufacturer specifies. A basic pump and an active water chiller are not interchangeable. Stable cooling becomes more important as jobs run longer or repeat throughout the day.
Include cooling equipment, coolant, replacement parts, and maintenance time in your budget. Monport’s CO2 accessories collection is a useful starting point for checking related parts and upgrades.
5. Focus, optics, and bed design
Reliable focus affects kerf shape, edge quality, and cut-through. Check the focusing method, lens options, vertical clearance, and access to mirrors and lenses. Honeycomb, knife-blade, pin, and standoff beds can produce different amounts of underside marking and trapped heat.
Optics are consumable components. Before purchase, confirm how to clean and replace them, where replacement parts are sold, and which lens is suitable for your normal material range. The CO2 focus-lens listing illustrates the type of replacement-part information buyers should check.
6. Software, camera, and batch workflow
Software affects more than file import. A production workflow may need vector cutting, raster engraving, layers, color mapping, framing, camera positioning, nesting, saved material libraries, fixtures, repeatable origins, and offline operation.
A camera can reduce placement time on offcuts or preprinted stock, but it does not replace calibration or physical measurement. For software comparisons, see Monport’s CO2 laser software guide. If your machine supports LightBurn, the official LightBurn user guide is the appropriate place to confirm current workflow and safety documentation.
7. Support, parts, and total cost
The purchase price is only one part of the investment. Build a total-cost list that includes exhaust ducting or filtration, cooling, air-assist upgrades, software, electrical work, delivery, replacement lenses and mirrors, cleaning supplies, fixtures, test stock, and maintenance time.
Also check the availability of the laser tube, power supply, mirrors, lens, belts, switches, fans, and controller support. Monport’s laser accessories and parts collection can help you identify the types of service items that may be needed over the life of a machine.
Which CO2 Laser Power Is Right for Acrylic?
There is no universal wattage-to-thickness rule that applies to every sheet and every edge standard. Results vary with acrylic formulation, measured thickness, optics, focus, cooling, airflow, maintenance, and the number of passes. Use the following categories as a planning framework rather than a guaranteed thickness chart.

| Work profile | Configuration to evaluate | Why it may fit |
|---|---|---|
| Light creative work | Compact desktop CO2 system | Lower footprint and simpler setup for samples, ornaments, labels, and small products |
| Regular small-business production | Mid-power desktop CO2 system | Balances cutting capacity, bed size, workflow, and daily repeatability |
| Thicker stock or higher throughput | 80W-and-up cabinet system | Provides more capacity, but needs more space, cooling, exhaust, and installation planning |
Monport’s Reno range is one category to evaluate for compact CO2 work, while a larger smart or cabinet system may make more sense for batch production or larger sheets. Compare the exact configuration on the current product collection rather than assuming that two machines with similar wattage include the same bed, controller, cooling, or accessories.
Recommended CO2 Laser Categories for Acrylic
Compact desktop CO2 lasers
Compact desktop machines suit home studios, classrooms, design departments, and small product lines where most pieces fit comfortably inside the bed. They are easiest to justify when production volume is moderate and the workspace has a practical exhaust plan.
A Reno 65W-class machine can be evaluated for this role, but confirm the current work area, focusing method, cooling, exhaust, software requirements, warranty, and regional configuration before purchase. The machine’s fit should be judged by your normal products, not by the maximum thickness listed in an advertisement.
Smart desktop and batch-ready CO2 lasers
For personalized-product businesses, camera preview, automatic layout, repeatable origins, and batch handling can save more time than a small increase in power. Look for preview accuracy, camera calibration, nesting, saved settings, fixture support, and software compatibility.
A MEGAS 70W-class system can be evaluated when the workflow includes repeated layouts or larger batches. Verify the current camera, conveyor or pass-through configuration, software process, bed size, cooling, and safety requirements before buying.
Traditional 80W-and-up cabinet systems
Traditional cabinet systems may be better suited to larger materials, thicker stock, pass-through work, and high output. Their advantages can include a larger bed, deeper clearance, and serviceable standard components. Their disadvantages can include greater size, weight, installation effort, cooling demand, and material-handling requirements.
Use Monport’s full machine range to compare the exact model. Do not assume that every machine at the same wattage has the same controller, focusing system, bed, chiller, or included accessories.
A Safe Acrylic Test Matrix Before Production
Published settings are useful references, but they are not substitutes for testing your sheet on your machine. A small, documented test matrix protects material, improves repeatability, and prevents a customer order from becoming your first experiment.
Step 1: Confirm the material
Record the supplier, product name, cast or extruded construction, color, finish, nominal thickness, measured thickness, protective film, and batch or lot number when available. If the material identity is uncertain, do not process it. Ask the supplier for confirmation and review the safety data.
Step 2: Inspect and prepare the machine
- Inspect and clean the lens and mirrors according to the machine instructions.
- Confirm alignment and focus.
- Check coolant level, temperature, and flow.
- Turn on exhaust and verify airflow.
- Clear combustible residue from the bed and enclosure.
- Keep suitable fire-response equipment nearby.
Step 3: Build a small test grid
Change one variable at a time. For cutting, compare controlled speed and power combinations while keeping focus, airflow, path, and material constant. For engraving, compare speed, power, line interval, and image mode separately.
Use a small test shape that includes a straight edge, a curve, an inside corner, a small hole, a narrow slot, and an engraved area if engraving is part of the job.
Step 4: Evaluate more than cut-through
A part is not automatically acceptable because it separates from the sheet. Check edge gloss and consistency, melting or swelling, smoke staining or haze, underside marks, corner deformation, dimensional accuracy, protective-film residue, mating-part fit, and total cycle time.
Inspect the front, edge, and back under consistent light. Measure slots and tabs with calipers when the project depends on a press fit.
Step 5: Record the winning recipe
Save the material and batch, measured thickness, machine condition, lens and focus method, speed, power, number of passes, air-assist setting, bed support, exhaust setup, file version, edge-quality notes, cycle time, and dated photographs. This record makes it easier to identify whether a later problem comes from the machine, material, or changed settings.
How to Get Cleaner Acrylic Cuts?

Keep the optical path consistent
Dirty or misaligned optics can widen the kerf, reduce cutting ability, and make results vary across the bed. Follow the machine’s maintenance procedure and use cleaning materials approved for the lens and mirrors.
Use the right focus strategy
Focus affects energy density and kerf shape. Follow the manufacturer’s guidance for the material thickness and lens. If the edge differs from top to bottom, test focus position before simply increasing power.
Control heat accumulation
Closely spaced paths can overheat small features. Increase spacing, change the cut order, allow cooling time, or separate dense geometry into stages. Avoid repeatedly cutting the same area without understanding where the heat is going.
Tune airflow instead of maximizing it
Use enough airflow for safe, stable cutting, then evaluate the edge on the specific sheet. More airflow is not automatically better for every finish.
Improve material support
Reflections and trapped heat can mark the back surface. Test knife blades, pins, standoffs, or another approved support method. Keep the support system clean because residue can ignite or transfer stains.
Plan the cut order
Engrave before cutting unless the project requires another sequence. Cut internal features before the outside contour so the part remains located. For small pieces, plan how they will be retained without interfering with exhaust or the laser path.
Handle protective film carefully
Protective film may reduce surface scratches, but not every film is suitable for laser processing. Confirm the film material with the supplier. If it causes residue, flame, odor, or uncertain fumes, remove it and use an approved masking method instead.
Common Acrylic Cutting Problems and Fixes
| Problem | Possible causes | First test to run |
|---|---|---|
| Sheet does not cut through | Focus error, dirty optics, excessive speed, insufficient usable power, weak cooling or airflow, or material variation | Recheck focus and optics, then run a small controlled speed and power test |
| Edge looks melted or rounded | Too much heat, speed too low, repeated passes, or paths too close together | Reduce heat accumulation while monitoring cut-through |
| Edge looks frosty or cloudy | Material type, excessive airflow, focus, speed, contamination, or masking | Confirm cast or extruded material and compare a controlled focus and airflow test |
| White haze appears near the cut | Vapor redeposition, weak exhaust, unsuitable masking, or surface contamination | Improve verified exhaust flow and test a clean sample without uncertain film |
| Back surface has marks | Bed reflection, residue, trapped heat, or dirty support | Clean the support and test an approved raised-bed method |
| Small parts fuse or deform | Dense layout, too much heat, or insufficient cooling time | Increase part spacing or change the cut sequence |
| Tabs and slots do not fit | Incorrect kerf allowance or nominal rather than measured thickness | Measure the sheet and cut a kerf and fit test before resizing the design |
| Results vary across the bed | Alignment, bed level, focus variation, airflow imbalance, or optics condition | Test the same shape in multiple bed positions |
For controller, focus, and alignment troubleshooting, consult the machine’s official manual library before changing electrical or optical components.
Safety and Material Compatibility
A laser cutter should never be used as a material-identification tool. If you cannot verify a plastic, do not place it in the machine. Obtain material identification from the supplier and review the safety data before processing.
- Never process PVC, vinyl, or unknown plastics.
- Verify coatings, adhesives, laminates, mirrored layers, and protective films.
- Use effective exhaust or an approved filtration system.
- Keep the enclosure, bed, and exhaust path clean.
- Monitor every job and keep suitable fire-response equipment nearby.
- Follow the manufacturer’s cooling, maintenance, electrical, and installation instructions.
- Do not claim that a finished part is food-safe, medical-safe, structural, or outdoor-rated without separate material and application validation.
Monport’s laser technology and materials articles can provide additional background, but the machine manual and material supplier remain the primary sources for compatibility decisions.
Is a More Powerful CO2 Laser Always Better for Acrylic?
No. More power can expand cutting capacity and reduce cycle time in some jobs, but it can also increase purchase price, machine size, cooling demand, exhaust requirements, and installation complexity. Delicate engraving and thin parts still require controlled energy delivery.
The better question is: which machine completes your most common jobs with the required edge quality, work area, setup time, and daily capacity?
A small jewelry business may value camera placement and repeatability more than maximum power. A sign shop may prioritize bed size and pass-through capability. A batch-production workshop may care most about cooling stability, exhaust, serviceability, and cycle time.
Frequently Asked Questions
Can a CO2 laser cut clear acrylic?
Yes. Clear acrylic is one of the common reasons buyers choose a CO2 laser instead of a visible-light diode system. Actual capacity and edge quality depend on the machine, acrylic formulation and thickness, focus, optics, airflow, cooling, and settings.
Is cast or extruded acrylic better for laser engraving?
Cast acrylic is often preferred when a frosted, high-contrast engraved appearance is desired. Extruded acrylic can be useful when consistent sheet thickness and smooth cutting are priorities. Test the exact material because formulations and finishes vary.
What wattage CO2 laser do I need for acrylic?
Choose wattage according to your routine thickness, sheet size, production volume, and required cycle time. Compact systems can suit light creative work, mid-power desktop systems can serve regular small-business production, and 80W-and-up machines may be better for thicker stock or higher throughput. Do not select a machine using wattage alone.
Can a diode laser cut acrylic?
Some diode lasers can mark or cut certain dark, opaque acrylics, but results depend heavily on color and formulation. Clear and many lightly colored sheets transmit visible diode wavelengths, so a CO2 laser is generally the more versatile choice for a mixed acrylic workflow.
Do I need air assist for acrylic cutting?
Airflow is an important process and safety variable, but the best level depends on the machine and desired edge. Use the manufacturer’s system and test controlled adjustments rather than assuming maximum airflow always gives the best finish.
Should I leave the protective film on acrylic?
Only if the supplier confirms that the film is suitable for laser processing. Unknown films, adhesives, and coatings should be removed or verified before use. Compare a small masked and unmasked test when both methods are approved.
Why does my acrylic edge look cloudy?
Possible causes include material type, airflow, focus, speed, contamination, or masking. Confirm whether the sheet is cast or extruded, inspect the optics, and run a controlled test that changes one variable at a time.
Can a CO2 laser cut polycarbonate?
Do not treat polycarbonate as a direct substitute for acrylic. It behaves differently, can discolor or burn, and may not produce an acceptable cut. Follow the laser and material manufacturer’s compatibility guidance and use another cutting method when appropriate.
Can a CO2 laser engrave metal as well as acrylic?
A standard CO2 laser is primarily suited to non-metallic materials. It may mark certain coated or treated metals with a compatible process, but it is not a replacement for a fiber laser when direct metal marking or deep engraving is the main requirement. See the fiber laser guide for a source and application comparison.
How do I prevent acrylic parts from fitting too tightly?
Measure the actual sheet, cut a small kerf and fit test, and adjust the design based on the result. Do not rely only on the supplier’s nominal thickness or settings from another machine.
Final CO2 Laser for Acrylic Buying Checklist
- The machine can process the clear, colored, or specialty acrylic required by the business.
- The usable work area fits the normal sheet and product size.
- The machine can enter and operate safely in the workspace.
- Electrical, cooling, exhaust, and make-up-air requirements are understood.
- Air assist is controllable and appropriate for the planned work.
- The focusing method and vertical clearance fit the material and fixtures.
- The software supports the required design and batch workflow.
- Camera, pass-through, and conveyor features have been verified in the current configuration.
- The budget includes cooling, exhaust, software, accessories, maintenance, and test stock.
- Replacement optics, tubes, power supplies, and service support are available.
- The material supplier can identify cast or extruded construction, coatings, and film.
- A test matrix and production-record process are ready before customer orders begin.
Final Recommendation
The best CO2 laser for acrylic is the machine that consistently handles your actual materials, products, and production schedule. Start by listing the parts you make most often. Then compare usable work area, power, cooling, exhaust, focus, software, serviceability, and total setup cost.
Choose a compact desktop CO2 system for light creative work, a mid-power or smart batch-oriented system for growing personalized-product orders, and a larger 80W-and-up cabinet system when thicker material, larger sheets, or higher output justify the installation requirements.
Whichever category you choose, verify the material and run a small test matrix before production. Reliable acrylic work comes from a matched machine and a documented process—not from wattage alone.