Diode laser engravers have gained popularity for their versatility, affordability, and precision, making them perfect for those just entering the world of laser engraving. If you're looking for the best laser engraver for beginners, a reliable machine is essential. Diode laser engravers provide a great starting point for creating personalized projects, from home décor to custom gifts. One standout in this category is the Monport 6W Handheld Diode Laser Engraver, offering features tailored to beginners.
Monport 6W Handheld Diode Laser Engraver with Auto Focus
In this guide, we'll walk you through a detailed, step-by-step setup process for a diode laser engraver and explore why the Monport 6W Handheld Diode Laser Engraver is considered one of the best diode laser engravers for beginners.
Introduction: Why Diode Laser Engravers are Ideal for Beginners

When starting with laser engraving, choosing the right machine can make all the difference. Diode laser cutters are known for their compact design, affordability, and ease of use, making them ideal for hobbyists and beginners alike. The best laser engraver for beginners should be easy to set up, portable, and equipped with essential features for precise, detailed engraving tools.
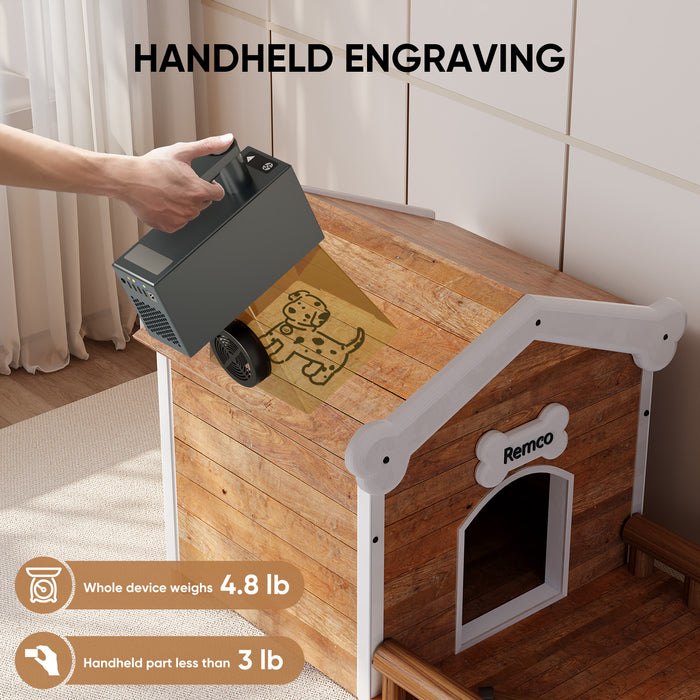
The Monport 6W Handheld Diode Laser Engraver is a great example. It’s compact, user-friendly, and comes with built-in safety features, making it one of the best diode laser engravers for those just getting started. This machine allows you to engrave on various materials such as wood, leather, anodized aluminum, and stainless steel, making it suitable for personalizing gifts or creating intricate designs with advanced engraving tools.
Step-by-Step Guide to Setting Up Your Diode Laser Engraver

1. Unboxing and Preparing Your Workspace
Setting up your best diode laser cutter starts with preparing your workspace. Ensure the area is well-ventilated to avoid inhaling fumes from engraving tools, especially when working with materials like wood or leather. Clear any flammable items from the area, and have safety goggles on hand to protect your eyes from laser exposure.
When unboxing the Monport 6W Handheld Diode Laser Cutter, check that all components are present. This includes the laser module, electric lift stand, power supply, and necessary cables. Ensure everything is in good condition before proceeding with setting up your engraving tools.
2. Assembling the Laser Engraver
The best laser engraver for beginners should be easy to assemble, and the Monport 6W Handheld Diode Laser Engraver does just that. The machine’s plug-and-play design means that assembly is straightforward. Here’s how to get started:
- Step 1: Attach the laser module to the electric lift stand.
- Step 2: Secure the stand to a stable surface and connect the power supply.
- Step 3: Plug in the laser engraver and ensure all cables are correctly connected.
With its electric lift stand, you can easily adjust the height of the laser head to accommodate various material sizes, ensuring precision with each use of the engraving tools.
3. Installing the Software
Most best diode laser engravers come with software to help you create designs and control the machine. For the Monport 6W Handheld Diode Laser Engraver, you can use software like LaserGRBL or LightBurn. These programs are beginner-friendly and compatible with a variety of file formats, including JPG, BMP, PNG, DXF, SVG, and more.
To install the software:
- Step 1: Download the appropriate software from the official website.
- Step 2: Connect your engraver to your PC or smartphone via USB or Bluetooth.
- Step 3: In the software, calibrate your engraver by following the setup wizard, which will guide you through focusing and alignment.
4. Calibrating and Focusing the Laser
Proper calibration is essential for achieving precise results with the best laser engraver for beginners. The Monport 6W Handheld Diode Laser Engraver features a dual red light focusing system, which simplifies the process. Here's how to calibrate your laser:
- Step 1: Place your material on the engraving bed.
- Step 2: Use the electric lift stand to adjust the height of the laser head. The dual red light system ensures that the laser is perfectly focused on the material.
- Step 3: Run a test engraving on a scrap piece of material to ensure the laser is correctly aligned and focused.
This engraver’s precise focus, down to 0.05mm, allows for intricate detailing, making it one of the best diode laser engravers for beginners looking to work on small, personalized projects.
5. Engraving Your First Project
Once the diode laser cutter is set up and calibrated, it’s time to start your first project. Whether you’re engraving wood, leather, or anodized aluminum, the Monport 6W Handheld Diode Laser Cutter offers fast and precise results.
- Step 1: Create or import your design into the software.
- Step 2: Adjust the speed and power settings based on the material. For beginners, it’s best to start with the recommended settings for each material.
- Step 3: Preview your design using the engraver’s 17,000mm/s outline preview feature, which helps confirm the design placement before engraving.
- Step 4: Start the engraving process and monitor the machine to ensure everything runs smoothly.
The Monport 6W Handheld Diode Laser Engraver also supports multi-angle and curved surface engraving, adding versatility to your projects.

Key Features of the Monport 6W Handheld Diode Laser Engraver
The Monport 6W Handheld Diode Laser Engraver offers several features that make it an excellent choice for beginners:
- Compact and Portable: Weighing only 4.8 lbs, this engraver is easy to transport and use anywhere.
- Fast and Precise Engraving: With speeds up to 800mm/s and precision down to 0.05mm, it’s perfect for detailed projects.
- Electric Lift Stand: Easily adjust the laser head’s height for materials of various sizes.
- Wide Range of Materials: Engrave on wood, leather, anodized aluminum, and more.
- Multiple Safety Features: Includes flame sensors, safety goggles, and protective shields for safe operation.
Key Takeaways
- The best laser engraver for beginners should be user-friendly, portable, and versatile, allowing you to engrave various materials.
-
The Monport 6W Handheld Diode Laser Cutter excels in portability, ease of setup, and precision, making it one of the best diode laser cutters for beginners.
- Setting up your diode laser engraver involves assembling the machine, installing the software, calibrating the laser, and running test engravings.
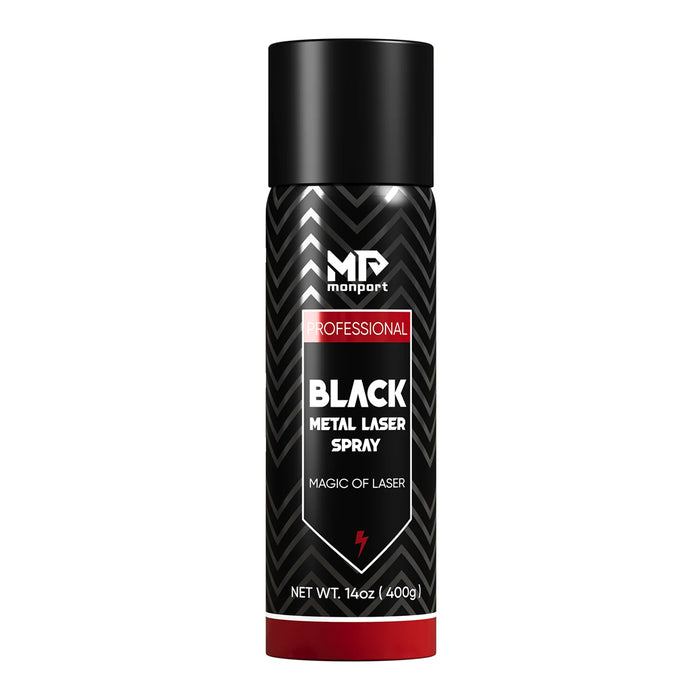
Enhance Your Metal Engraving with Monport Black Laser Marking Spray

Monport black laser marking spray is designed to provide sharp, high-contrast markings on a variety of metals, including aluminum, brass, and stainless steel. When used with CO2 laser engraving machines, this black laser marking spray ensures a smooth, even application that delivers long-lasting, permanent marks. The quick-drying formula of this spray helps maintain a fast-paced workflow, allowing the markings to dry in just minutes. With its easy-to-use design, Monport black laser marking spray creates professional-grade results for any metal engraving project. Whether you’re customizing tools, jewelry, or industrial parts, this black laser marking spray will ensure your creations stand out with exceptional precision and clarity.
Q&A About Monport Laser Engravers
Q: Is the Monport 6W Handheld Diode Laser Engraver suitable for beginners?
A: Yes, the Monport 6W Handheld Diode Laser Engraver is designed for ease of use, portability, and precision, making it ideal for beginners.
Q: What materials can the Monport 6W Handheld Diode Laser Engraver work with?
A: This engraver is compatible with wood, leather, anodized aluminum, cardboard, and more. It can cut through materials up to 0.23 inches thick.
Q: Can the Monport 6W Handheld Diode Laser Engraver handle large projects?
A: While it’s designed for portability, it can handle various project sizes thanks to its adjustable electric lift stand and multi-angle engraving capabilities.
Conclusion
For beginners looking to dive into the world of laser engraving, choosing the best laser engraver for beginners is essential. The Monport 6W Handheld Diode Laser Cutter offers a seamless experience with its plug-and-play design, ease of setup, and precision. By following this step-by-step guide, you’ll be ready to start engraving in no time, creating personalized gifts and projects with confidence using the right engraving tools.


