Introduction
Are you interested in creating custom shirts with unique designs? Vinyl printing, paired with a laser cutter, offers a versatile and durable option for adding personalized designs to clothing. This combination allows you to precisely cut intricate patterns and logos, ensuring your designs are both sharp and long-lasting on fabric. In this article, we will guide you through the process of vinyl printing shirts using a laser machine for sale. We will specifically focus on the Monport 130W Built-in Chiller CO2 Laser Engraver & Cutter, a cutting-edge laser machine ideal for vinyl printing projects. If you are looking for lasers for sale, this guide will help you understand their application in vinyl printing.
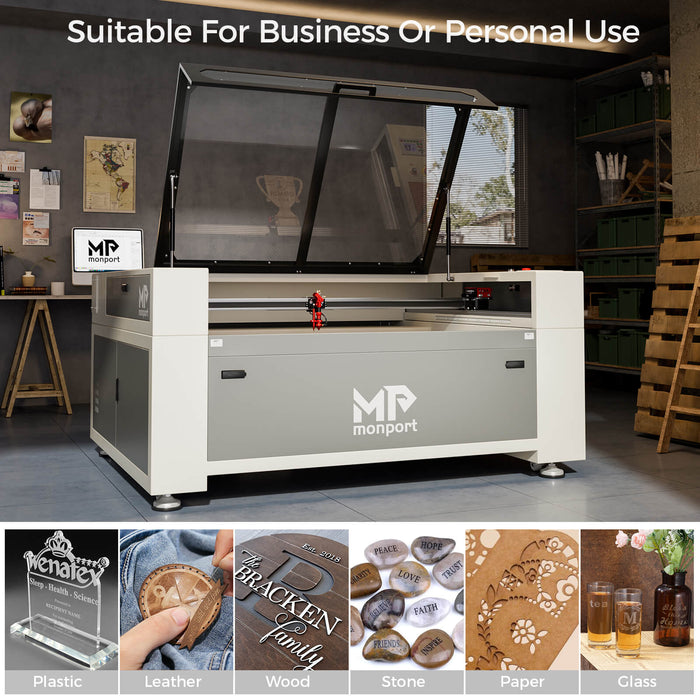
Monport 130W Built-in Chiller CO2 Laser Engraver & Cutter (55" x 35")
FAQs: Frequently Asked Questions
- What is vinyl printing? Vinyl printing is a technique in which adhesive vinyl sheets are cut into desired designs, placed onto fabric, and heat pressed to create customized shirts. If you are exploring lasers for sale, investing in a quality machine can enhance your vinyl printing process.
- Why choose a laser machine for vinyl printing shirts? Laser machines offer unparalleled precision and speed, making them perfect for intricate designs. Additionally, laser machines can cut through a variety of materials, including heat transfer vinyl, providing endless creative possibilities. Those searching for lasers for sale should consider machines that offer precision and efficiency.
- What features make the Monport 130W CO2 Laser Engraver & Cutter ideal for vinyl printing? The Monport 130W offers a large working area of 55” x 35”, allowing you to work on multiple shirts simultaneously. The built-in chiller ensures stable and consistent laser performance, while the CO2 laser engraves and cuts with incredible accuracy. If you are in the market for lasers for sale, this model provides a great balance of functionality and reliability.

Important Details: Step-by-Step Guide
Step 1: Prepare the design
- Choose a design or create your own using graphic design software.
- Ensure that the design is compatible with the file format supported by the laser machine (such as vector files).
- Scale the design to fit the desired shirt size.
Step 2: Set up the Monport 130W Laser Machine
- Ensure that the machine is properly calibrated and connected to a computer with the required design software.
- Adjust the laser power and speed settings according to the type of vinyl being used.
Step 3: Load the vinyl sheet
- Cut a piece of vinyl to fit the size of your design.
- Place the vinyl sheet onto the cutting mat and load it into the laser machine.
- Secure the vinyl sheet to prevent it from shifting during the cutting process.
Step 4: Configure the laser settings
- In the design software, adjust the laser settings to match the type and thickness of the vinyl.
- Specify which parts of the design should be cut (in the case of layered vinyl) and which parts should be engraved.
Step 5: Start the laser cutting process
- Double-check all settings and design parameters.
- Press the start button on the machine to begin the cutting process.
- Monitor the progress and ensure that the machine operates smoothly.
Step 6: Remove the excess vinyl
- Carefully remove the cut vinyl from the cutting mat, leaving the design intact.
- Weed out any unwanted vinyl using a weeding tool or tweezers.
Step 7: Transfer the design onto the shirt
- Preheat the heat press according to the recommended temperature and time for the specific type of vinyl.
- Position the weeded design on the shirt, ensuring proper alignment.
- Press the vinyl onto the fabric using the heat press, following the manufacturer's instructions.
 Takeaways
- Vinyl printing with a cutter machine offers precise and detailed designs, making it a popular choice for custom apparel and crafts.
- The Monport 130W CO2 Laser Engraver & Cutter is an excellent choice for vinyl printing projects.
- Proper setup and calibration are crucial for achieving accurate and consistent results.
- Weeding tools and heat presses are essential accessories for vinyl printing.
 Conclusion
Creating custom shirts with vinyl printing is a rewarding and creative process. By following a step-by-step guide using a cutter machine like the Monport 130W CO2 Laser Engraver & Cutter, you can bring your designs to life with precision and ease. Whether you are a hobbyist or a professional, the combination of vinyl and laser technology opens up a world of possibilities for personalized apparel, allowing you to craft intricate designs with unmatched accuracy. If you are in the market for laser cutter for sale, be sure to choose a model that fits your specific needs.


