Introduction
As a high-performance, multi-functional device, the Monport marking machine can achieve more accurate and efficient marking effects when combined with excellent design software. Among them, connecting to lightburn laser software is a wise choice, which not only improves the convenience of operation, but also allows you to fully utilize the potential of the Monport marking machine for creating laser cut greeting cards and laser engraved gifts.
Introduction to LightBurn laser software
LightBurn is a professional laser engrave software with powerful functions and a friendly user interface. It supports a variety of laser marking machines and engraving machines, making it an excellent choice for creating laser cut greeting cards and laser engraved gifts. It provides a wealth of tools and options that allow users to easily realize complex designs and ideas.

Advantages of connecting Monport marking machine to LightBurn laser software
- Easy to operate:By connecting to the LightBurn laser software, you can perform design and editing operations intuitively. The interface is clear and concise, allowing users to get started easily and realize their ideas quickly.
- Powerful functions:LightBurn software provides a wealth of tools and options, such as path optimization, layer management, etc., allowing users to more flexibly control the marking effect and achieve personalized customization.
- Accurate and efficient:With the precise positioning and parameter adjustment functions of LightBurn software, a higher precision and efficient marking process can be achieved, ensuring that every marking is as expected.
How to connect a Monport marking machine to LightBurn laser software
-
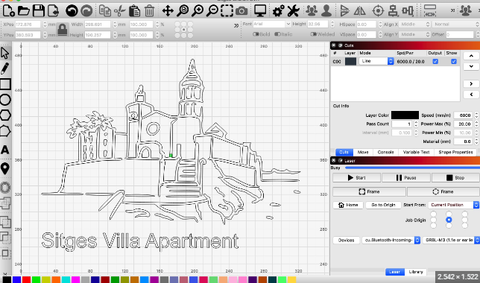
Download and install LightBurn software from the website. Note: If your LightBurn version is lower than V1.3.01, it is not compatible with our machine, please download the new version and reinstall it. LightBurn has a one-month free trial, after which you need to purchase a LightBurn license key for the Galvo version. The following tutorial takes GP30 as an example, making it ideal for designing laser cut greeting cards and laser engraved gifts with precision.
-
When installing the Lightburn software, don’t forget to install the driver
-
Copy the folder "pongp30" from USB to desktop
-
If the software is opened for the first time, a device window will pop up, click "Manually Create", select "JCZFiber", click "Next" Note: Make sure the machine is turned on and connected via USB
-
Import the EZCAD configuration and select "marckcfg7" in the "Plugs" folder and click "Next"; if everything is fine, you can see the window about "EZCAD Configuration Summary" and click "Next"
-
Change the name if necessary and enter the correct X and Y axis lengths according to the lens. Click "Next"
-
Click "Done" and it will be in the device list
-
When the machine is turned on and connected via USB, the status will change to "Ready"
-
Enter "Basic Settings" from the "Device Settings" button, click "Load COR File", select "jcz15.cor", and click "OK"
-
Change the frequency "Min20" and "Max200" settings. Open "Galvo2". It can already control the machine with lithography software.
Read More: Monport vs xTool: Which Laser Cutter is More Beginner-Friendly?
By connecting the Monport marking machine and LightBurn laser software, you will enjoy a more convenient, efficient, and accurate marking experience, allowing your creativity to be perfectly presented in laser cut greeting cards and laser engraved gifts! Limited Time Offer! Enter BESTMP10 at checkout – click here to shop!


