

Introduction
Wood engraved pens are not only functional writing instruments but also exquisite pieces of art. In this step-by-step guide, we will take you through the process of creating stunning wood pen engraving projects using a laser machine laser or a high-quality laser marking machine. But before we delve into the artistry, let's first explore the remarkable features of the Monport 60W CO2 Laser Engraver & Cutter, the best laser engraving machine for wood in the market. Whether you are learning how to engrave a pen for the first time or looking to create professional-level projects, this guide will help you craft wooden pens engraved with precision.
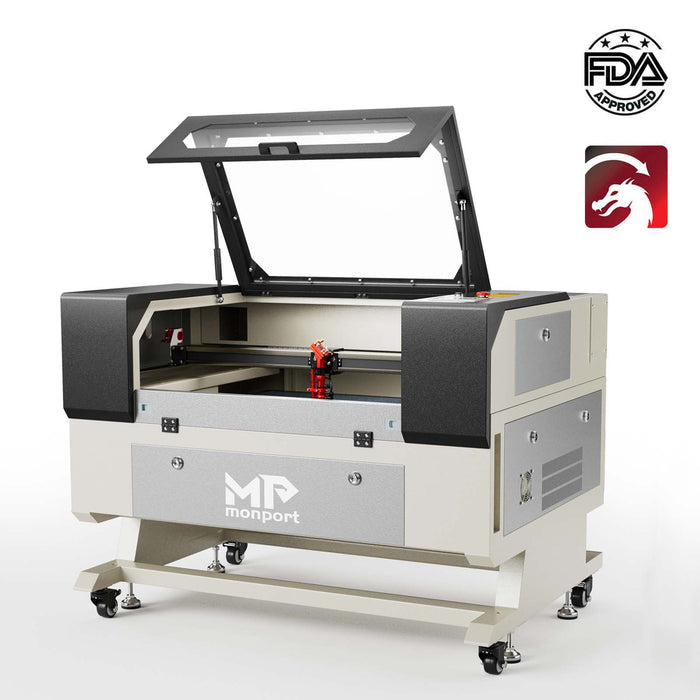
Monport 60W CO2 Laser Engraver & Cutter (28" x 20") with Autofocus

Monport 60W CO2 Laser Engraver & Cutter: Boost Your Creativity

Monport 60W CO2 Laser Engraver & Cutter (28" x 20") with Autofocus
Fireproof Viewing Window: Ensuring Safety in Style
-
Made from special fire-resistant polyester with iron frames
-
Melting point ranges from 432° to 488°, significantly reducing the risk of fire accidents
Provides peace of mind while working on intricate wooden pens engraved using a laser machine laser or a laser marking machine. Whether you’re exploring how to engrave a pen for the first time or refining your skills, this feature ensures safe precision.
Enclosed Aeronautical Aluminum Rail: Precision and Durability
-
Equipped with X and Y stepper motors for efficient power transmission
-
Prolongs the service time of rail units by preventing smoke and debris accumulation
Ensures high precision and accuracy in wooden pens engraved projects with the laser machine laser.
Laser Protective Glasses: Safeguarding Your Vision
-
Certified to protect your eyes against radiation damage caused by the class 4 laser machine laser
-
Essential for maintaining eye health during laser marking machine sessions
Provided for free with the Monport 60W CO2 Laser Engraver & Cutter, making it a safer choice when learning how to engrave a pen effectively.
Ruida Digital Controller: Utmost Flexibility and Compatibility
-
Compatible with various software platforms such as LightBurn, RDworks, AutoCAD, and CorelDRAW
-
Allows easy control of the laser machine laser head, project initiation, and adjustments of power and speed settings
Enhances user experience and compatibility with preferred design software when creating wooden pens engraved with precision.
High Speed and Resolution: Precision at Its Finest
-
Engraving Speed up to 800 mm/s and Cutting Speed up to 400 mm/s
-
Resolution of up to 4500 dpi for detailed and intricate wooden pens engraved with the laser machine laser
-
3 LED light strips offer the necessary illumination for precision work
-
2.0" Focal distance enables high-resolution etching of even the tiniest fonts
Autofocus: Simplifying Precision Calibration
Auto adjustment of focus through the control panel with a single button press with the laser marking machine eliminates the need for manual testing and tedious adjustment. This saves time and ensures precise engraving results on wood surfaces, an essential factor in how to engrave a pen efficiently.
Built-in Air Assist: Keeping Engravings Flawless
Guides a pressurized air stream through the laser machine laser head nozzle to displace debris, heat, and combustible gases from the engraving surface and laser beam path. Ensures clean and precise wooden pens engraved with minimal obstructions, crucial in mastering how to engrave a pen seamlessly.
Multiple Connectivity Options: Easy Integration
-
Two USB ports for flash drive connectivity and USB-to-USB PC connection
-
Ethernet port available for seamless connection
Offers flexibility in connecting the laser machine laser to various devices for hassle-free operation.
Red Dot Guidance: Precision and Convenience
Marks the laser machine laser head position, working path, and project sizes, providing visual assistance for enhanced accuracy when creating wooden pens engraved with intricate designs.
Automatic Safety Sensor: An Added Layer of Protection
Ensures machine safety by stopping operation even if the window cover is on. Easily resumes operation by pressing the "Enter" button. Guarantees a safe working environment during wood engraving sessions, prioritizing safety while learning how to engrave a pen.
Step-by-Step Guide to Making Wood Engraved Pens
Step 1: Selecting the Right Wood:

When selecting wood for pen crafting, it is essential to choose a suitable type that combines durability with an appealing grain pattern. Popular choices for crafting pens include maple, walnut, rosewood, and cherry. These wood varieties not only offer sturdiness but also present distinctive and visually attractive grain patterns. The careful consideration of wood type is integral to the crafting process, ensuring that the final product not only withstands regular use but also showcases a unique and aesthetically pleasing design for wood pen engraving.
Step 2: Cutting and Shaping the Pen Blank:

In the initial steps of pen crafting, the selected wood is cut into pen-sized blanks using a saw. This crucial task establishes the foundational shape for the subsequent stages. Following the cutting process, the blanks are shaped using a lathe or other suitable tools to achieve the desired contours. This shaping step adds precision and detail to the pen blanks, setting the stage for the intricate craftsmanship that will follow. Together, these actions lay the groundwork for creating customized and well-defined pen bodies, marking the beginning of the crafting journey.
Step 3: Sanding and Smoothing the Blanks:

Begin by employing progressively finer grit sandpaper to attain a smooth surface for the pen blanks. Initiate the sanding with a rough grit and systematically progress to finer grits. This incremental approach ensures the removal of imperfections and rough spots while gradually refining the surface texture. By concluding with a finer grit, the result is a polished finish that not only enhances the overall appearance of the pen but also sets the foundation for subsequent wood pen engraving.
Step 4: Designing the Engraving:

Utilizing computer software, carefully conceptualize and create a design that complements the size and shape of the pen. This step is crucial in ensuring that the chosen pattern aligns seamlessly with the pen's dimensions, guaranteeing a harmonious and visually appealing end result. Paying attention to the compatibility between design and pen characteristics is essential to achieve a well-crafted and aesthetically pleasing engraved pen. With the precision of a laser engraving machine, such as the Monport 60W CO2 laser cutter near me, the design can be perfectly executed to enhance the pen's overall look.
Step 5: Engraving the Wood:

Securely position the pen blank within the Monport 60W CO2 Laser Engraver & Cutter. This crucial step ensures stability and precision throughout the engraving procedure. Following the secure placement, meticulously set the desired parameters, including depth and speed, to achieve the intended engraving effect. Once the parameters are configured, initiate the engraving process using the digital controller, allowing for a controlled and accurate execution of the design onto the wood surface.
Step 6: Finishing and Assembling:

Enhance both the aesthetic appeal and protection of the wood. Begin by applying a suitable finish to the engraved wood pen, emphasizing its natural beauty while providing a layer of protection. Following the finishing process, proceed to assemble the pen, incorporating all necessary hardware components. Prioritize the meticulous arrangement of parts to ensure a seamless fit. Once assembled, meticulously check for smooth operation, ensuring that the pen functions correctly. This step marks the culmination of the crafting process, guaranteeing a polished and functional wood pen engraving masterpiece ready for use.
Achieve Flawless Results with Monport Black Laser Marking Spray
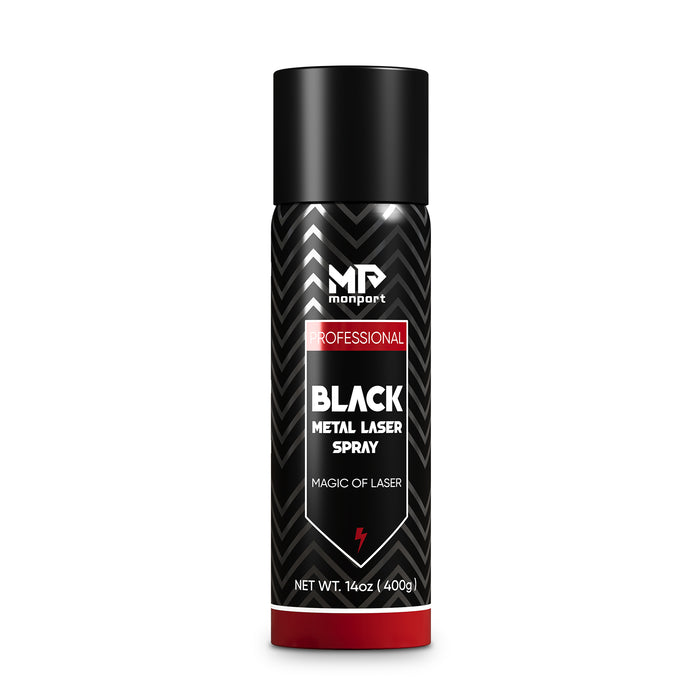
If you're looking to upgrade your metal engraving projects, the Monport black laser marking spray is the perfect companion. Specially formulated for CO2 laser engraving machines (25W and above), this spray ensures your metal markings are sharp, permanent, and highly visible. Whether you're engraving aluminum, stainless steel, or brass, this spray delivers impressive results every time.
Why Choose Monport Black Laser Marking Spray?
This black laser marking spray is designed for effortless application. Simply clean the metal surface with alcohol, shake the can for two minutes, and spray from 6 to 8 inches away. The ultra-fine mist provides an even coating thanks to its anti-clog nozzle, and it dries within five minutes, helping you maintain a smooth and efficient workflow.
After laser engraving, all you need to do is rinse off the surface to reveal bold, high-contrast black marks. There’s no mess, no residue—just clean, permanent results. The formula is free of alcohol in the package, ensuring safe and clean use.
Key Benefits
-
Permanent and durable markings
The fine-grained formula penetrates deeply into metal surfaces, creating marks that are heat-resistant and long-lasting. -
High compatibility
Works seamlessly with CO2 laser engraving machines, making it ideal for customizing tools, jewelry, glassware, and more. -
Even, precise spray
The nanoparticle formula and anti-clog nozzle provide consistent coverage, even for detailed designs. -
Quick application and cleanup
No waiting, no hassle. Spray, engrave, rinse—and your design is ready to shine.
The black laser marking spray comes in a 14 oz aluminum can, offering plenty of product for multiple projects. Its compact size and strong performance make it a go-to tool for both professionals and DIY creators.
FAQs
1. What makes the Monport 60W CO2 Laser Engraver ideal for wood pen engraving?
The Monport 60W CO2 Laser Engraver offers high precision, speed, and resolution, making it perfect for detailed wood pen engraving. Features like autofocus, built-in air assist, and a Ruida digital controller ensure clean, flawless, and efficient results.
2. Do I need special software to design engravings for wood pens?
Yes, you will need design software compatible with the laser machine, such as LightBurn, RDworks, AutoCAD, or CorelDRAW. These platforms allow you to create detailed patterns that can be directly transferred to the Monport 60W for accurate engraving.
3. How important is wood selection in pen engraving projects?
Wood selection is crucial because different types of wood provide varying levels of durability, grain patterns, and overall aesthetics. Popular options like maple, walnut, rosewood, and cherry ensure both sturdiness and an attractive look for engraved pens.
4. What safety features does the Monport 60W CO2 Laser Engraver include?
The machine comes with a fireproof viewing window, enclosed aluminum rails, laser protective glasses, and an automatic safety sensor. These features ensure safe operation while protecting both the user and the machine during engraving.
5. Can the Monport 60W CO2 Laser Engraver also be used for metal engraving?
Yes, with the help of Monport Black Laser Marking Spray, the machine can engrave metals like aluminum, brass, and stainless steel. The spray ensures permanent, high-contrast markings, making the machine versatile for both wood and metal projects.
Conclusion:
Wood engraved pens are not only practical writing instruments but also exquisite pieces of craftsmanship. By following this guide and using the Monport 60W CO2 laser cutter, you can create flawless wooden pens engraved that reflect your creativity. With its safety features, precision, and software compatibility, the Monport 60W CO2 Laser Engraver is the ultimate tool for mastering how to engrave a pen. Unleash your artistic potential and elevate your woodworking projects with this remarkable tool.
Unleash your creativity and elevate your craftsmanship with the Monport 60W CO2 Laser Engraver & Cutter—the best choice for wood engraving. Get yours now and bring your artistic visions to life with unmatched precision and safety.
Read More: Wood Laser Engraving: Transform Wood into Treasures


