Transforming a cherished photograph into a timeless piece of art using etching a photo onto glass is a beautiful way to preserve memories and create personalized gifts.Etching a photo on glass with the best craft lasers and etchers adds a touch of elegance and sophistication to any space, making it a popular choice for commemorating special moments.In this article, we'll explore the step-by-step process of etching a photo onto glass, along with tips and techniques to achieve stunning results.
Glass Etching for Photographs

Step 1: Selecting the Right Glass and Photo
Start by choosing a piece of glass suitable for laser engraving, such as a clear glass plaque or photo frame. Ensure the glass is clean and free from any smudges or fingerprints. Next, select a high-resolution digital photograph that you want to etch onto the glass. Adjust the size and orientation of the photo to fit the dimensions of the glass surface.
Step 2: Preparing the Laser Engraving Machine
Power up the laser engraving machine and ensure it is calibrated correctly for engraving on glass. Adjust the laser settings, including power, speed, and resolution, based on the thickness of the glass and the desired level of detail in the engraving. It's essential to perform test runs on scrap glass to fine-tune the settings and achieve optimal results.
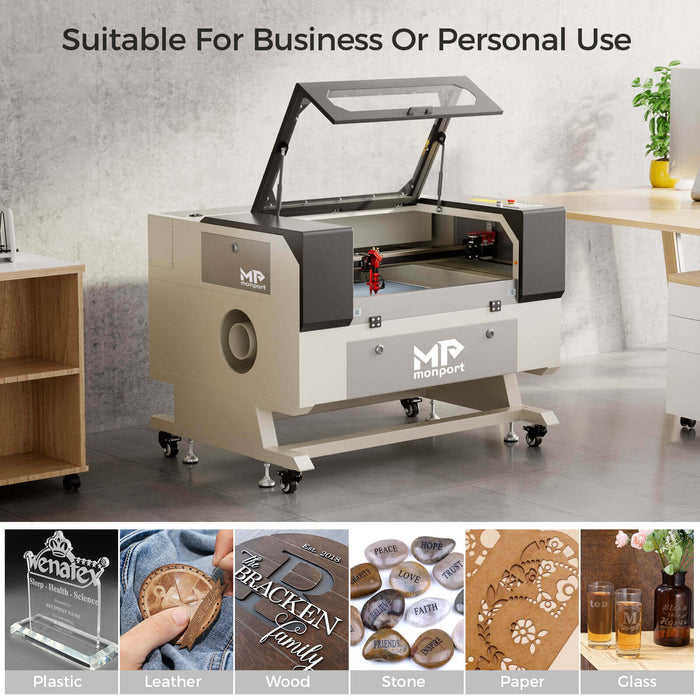
In Choosing an engraving machine well-suited for your glass etching project, some factors are to be considered. Monport's laser engraving machines are well-rounded with a wide variety of material applications such as glass.

Monport 60W CO2 Laser Engraver & Cutter (28" x 20") with Autofocus
- Fireproof Viewing Window: Made from special fire-resistant polyester with iron frames, this viewing window has a high melting point (432° to 488°) and ignition temperature (over 1000°), greatly reducing the risk of fire accidents caused by laser heat.
- Enclosed Aeronautical Aluminum Rail: Equipped with X and Y stepper motors, this rail ensures efficient power transmission and high precision. Designed to prevent smoke and debris buildup, it extends the service life of rail units.
- Free Laser Protective Glasses: Certified to protect against radiation damage from class 4 lasers, these glasses safeguard your eyes from direct, indirect, or reflected laser light.
- Ruida Digital Controller: Compatible with various software platforms (LightBurn, RDworks, AutoCAD, CorelDRAW), this controller offers control over laser operations, power, speed settings, and more, with a digital display for easy operation.
- High Speed and Resolution: Engraving speed up to 800 mm/s, cutting speed up to 400 mm/s, resolution up to 4500 dpi, with 3 LED light strips providing precision illumination and a 2.0" focal distance for high-resolution etching.
- Autofocus: Automatically correct focus with the touch of a button, eliminating manual adjustments.
- Built-in Air Assist: Guides pressurized air to displace debris, heat, and gases, ensuring precise engravings.
- 3-Way PC Connection: Two USB ports offer flash drive connectivity and USB-to-USB PC connection, along with an ethernet port for additional options.
- Red Dot Guidance: Indicates laser head position, marks working path, and frames project sizes for added convenience.
- Automatic Safety Sensor: Halts machine operation, even with the window cover on, with operation resuming by pressing the "Enter" button after closure.
Step 3: Importing and Positioning the Photo
Upload the digital photograph to the laser engraving software. Use the software's editing tools to adjust the positioning and size of the photo on the glass surface. Ensure the photo is aligned correctly and centered within the engraving area to achieve a balanced composition, leveraging the precision of the best craft lasers and etchers.
Step 4: Setting Up the Glass for Engraving
Secure the glass onto the engraving bed using clamps or adhesive tape to prevent movement during the engraving process. Double-check the positioning of the glass to ensure it aligns with the designated engraving area in the software.
Step 5: Initiating the Engraving Process
Once the setup is complete, initiate the engraving process through the laser engraving software. The laser beam will trace the contours of the photo onto the glass surface, etching the image with precision and accuracy, thanks to the capabilities of the best craft lasers and etchers. Monitor the engraving progress closely to ensure consistent results and a flawless finish.
Step 6: Post-Engraving Care
After the engraving is complete, carefully remove the glass from the engraving machine. Use a soft cloth or brush to gently remove any residual dust or debris from the engraved surface. Optionally, clean the glass with glass cleaner to achieve a polished finish.
Step 7: Displaying the Laser Engraved Glass Photo

Once the glass is clean and dry, display your laser engraved glass photo in a prominent location where it can be admired and appreciated. Consider framing the glass or incorporating it into a decorative display to enhance its visual impact, made possible with the precision of the best craft lasers and etchers.
Conclusion
Laser engraving technology offers a sophisticated and precise method for etching photos onto glass, transforming ordinary glass surfaces into personalized works of art. By following these step-by-step instructions and utilizing the capabilities of the best craft lasers and etchers, you can create stunning and enduring keepsakes that capture the beauty and sentiment of cherished memories. So, unleash your creativity, harness the power of laser engraving, and immortalize your favorite photos on glass with precision and elegance.


