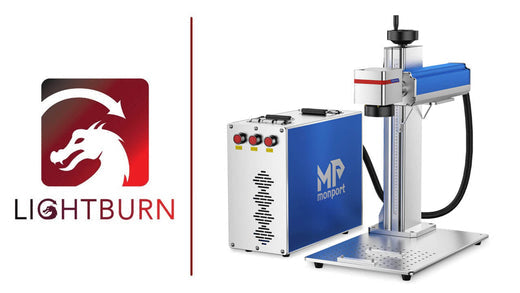
A fiber laser is a practical choice for direct marking and engraving on bare stainless steel. A stainless steel laser engraver such as the Monport GA MOPA fiber system uses a wavelength of about 1.06 microns. The result depends on the machine, lens, material surface, and settings: a contrasting surface mark and a recessed engraving require different process choices.
A CO₂ laser can also mark stainless steel with a compatible metal marking compound, such as an appropriate CerMark or LaserBond product. Follow the compound's instructions for the exact laser and material. This creates a bonded surface mark; it does not make the process equivalent to deep engraving into bare steel. See the technical distinction between metal engraving and marking compounds.

Monport GA 60W Upgraded Integrated MOPA Fiber Laser Engraver & Marking Machine with Auto Focus
Shown: GA 60W. The linked collection shows current integrated fiber models and availability.

Read More : Master Metal Engraving with the Best Budget Laser Engravers
Plan a Stainless Steel Engraving Job from the Finished Part
A request for stainless steel metal engraving needs more detail than a material name. A shop offering laser engraving on steel may handle several alloys and finished products. Establish what can be altered, where the mark belongs, and who approves it before committing a customer's part to production.
Can Stainless Steel Be Engraved After Assembly?
Sometimes, provided the complete item can be positioned and processed within the equipment's approved conditions. Check whether handles, fasteners, seals, adhesives, or neighboring components restrict access or introduce unknown materials into the work area. A flat sample made for deep laser engraving on stainless steel does not establish that the same design can be applied to an assembled product.
Can you engrave on stainless steel that already carries a logo or finish? First obtain approval for the exact area and alteration. Photograph the incoming condition, identify existing marks that must remain readable, and agree whether disassembly is permitted. Explain any risk to the item's appearance before accepting a valuable or irreplaceable piece.
Before you laser etch on stainless steel near a hole, seam, or edge, mark the allowed artwork boundary on the placement drawing. For engraving in stainless steel near a functional surface, have the part owner specify any restricted zones and remaining-wall requirements. These decisions belong in the job brief rather than being left to the operator at the machine.
Turn an Incomplete Request into an Approved Job Brief
A note that says only “stainless steel engrave” leaves the workshop guessing. A useful stainless engraving brief joins the material record to the artwork, part orientation, quantity, and acceptance criteria. For laser engraving on stainless steel 304, keep the supplier's material identification with the parts throughout receiving, staging, and delivery.
| Job detail | What the customer and workshop should agree |
|---|---|
| Identity and quantity | Part reference, material documentation, incoming quantity, and which pieces may be used for development. |
| Artwork and placement | Approved file revision, final dimensions, front/back orientation, reference edge or feature, and areas that must remain untouched. |
| Appearance and geometry | Required appearance, any specified recess, placement tolerances, and the agreed inspection condition. |
| Ownership and delivery | Who approves the proof, who authorizes changes, and how finished pieces must be identified and packed. |
Turn a requirement such as laser engraving on stainless steel without distortion into an approval record: identify the controlling drawing revision, the person authorized to accept the part, and the features to be inspected. For deep engraving on stainless steel, agree whether the shop or customer will provide the depth inspection record. These decisions prevent each side from assuming a different acceptance procedure.
Keep mixed orders physically identifiable. When a tray contains parts for laser engraving 304 stainless steel and another contains a different alloy, retain separate job labels even if the pieces look alike. This is a suggested handling workflow, not a method of determining an unknown alloy.
Choose the Best Laser Engraving Machine
When choosing a machine to laser etch stainless steel, start with the mark you need and the dimensions of the part. A suitable fiber system can process bare steel directly, but wattage alone does not establish its finish quality, engraving depth, or production speed.
Check the lens working area, focus range, fixture clearance, and available pulse controls. Compare samples made on your material at the final design size before choosing a configuration.
MOPA describes a master oscillator and power amplifier architecture. Check the exact model's manual for adjustable pulse width, frequency, and supported combinations; an infrared wavelength alone does not identify a MOPA system.
Choose the Marking Result Before the Laser Source
Laser marking on stainless steel covers several surface results. Specify the result when comparing a stainless steel engraving system; the word “etching” alone does not tell a supplier how much material should be removed.
| Desired result | What changes | What to verify |
|---|---|---|
| Dark surface mark | An annealing process changes surface color through oxidation without intentionally cutting a recess. | Contrast, surface condition, and suitability for the service environment. |
| Recessed engraving | Material is removed from the steel. | Measured depth, edge quality, remaining thickness, and total cycle time. |
| Design on coated steel | A compatible coating is removed or changed. | Coating identity, clean boundaries, and substrate condition. |
| Bonded compound mark | An applied marking compound forms the visible mark. | Laser compatibility, adhesion, cleanup, and durability for the intended use. |
For deep laser engraving on stainless steel, ask for a measured sample rather than judging depth from a dark photograph. Before ordering, confirm:
- The sample uses your alloy, finish, thickness, and final artwork size.
- The part fits the focus range and fixture, not just the stated marking area.
- The demonstration includes loading, processing, cleanup, and inspection time.
- The finished result meets your drawing or application requirements.
Assess Home Engraving and Alternative Marking Methods
Knowing how to engrave stainless steel at home also means knowing when the planned equipment and workspace do not suit the job. Start with the complete item, the required result, and the setup you can properly operate. A small footprint does not remove the need for beam protection, controlled access, and management of processing emissions.
Can You Laser Engrave Stainless Steel at Home?
Yes, with equipment suitable for the intended process and a workspace that meets its operating requirements. The question “Can I laser engrave stainless steel in this room?” needs a practical layout check: allow access for loading and extraction, keep other people outside the controlled work area, and plan protection for any possible beam path toward doors or windows.
Use the manufacturer's required enclosure, interlocks, and other protective measures; do not substitute ordinary screens or eyewear alone for the specified controls. Check the extraction route and any filtration requirements for the actual materials and compounds. OSHA's laser-hazard guidance treats access, beam containment, and airborne contaminants as separate issues; it does not certify an individual home setup.
A product listing labeled “laser engraver stainless steel” does not establish that the complete machine suits your room or finished item. Confirm its documented material capability, required accessories, controller and software compatibility, and working clearance. If those conditions cannot be met, obtain a specialist quote before buying the machine.
How to Engrave Stainless Steel with Diode Laser Equipment
First establish what the exact diode model can do on the supplied surface. Some blue-diode systems can create an oxidation-based mark on certain bare stainless surfaces, while other suitable jobs involve removing a compatible coating. Manufacturer material-processing guidance illustrates the first mechanism. Neither a visible color change nor coating removal proves that the process produces the controlled recess required by your drawing.
If you plan to laser engrave steel using equipment you already own, request a demonstration of the required result on matching stock. Identify whether the stated compatibility concerns bare metal, a particular coating, or an added marking compound. Do not turn a successful surface mark into a promise of deep metal removal.
How to Engrave Stainless Steel by Hand or by Scribing
Can you engrave stainless steel by hand? Yes, with suitable tools, a supported workpiece, and the required skill. Choose that route for work where a manually produced line is acceptable, and practice on expendable matching stock before touching the finished item. Follow the tool manufacturer's instructions rather than transferring laser settings to a contact process.
Machine scribe engraving on stainless steel is a separate contact-marking method. A carbide or diamond tip slides along the surface to form a continuous line, unlike the repeated impacts of dot-peen marking. Gravotech's scribing explanation describes that distinction. As a workholding consideration, plan support for tool contact instead of assuming that a laser-positioning fixture is suitable.
Compare the line style, repeatability, workholding, and data-entry workload for your actual order. A short hand-marked identifier and a batch of filled logos or changing serial numbers create different production demands. Use an approved sample to choose the method, and keep the same placement and acceptance requirements when comparing alternatives.
How to Engrave Stainless Steel
Stainless steel is widely used because of its durability and corrosion resistance. However, achieving clean results when you laser etch stainless steel requires the right techniques.
Use vector images
Vector graphics are ideal for laser etch stainless steel designs because they maintain sharp edges at any scale. Use formats like .AI, .EPS, or .SVG when supported by your design and laser software.
Choose the right font
When you laser etch stainless steel, bold and clean fonts work best. Sans-serif fonts such as Arial, Helvetica, Calibri, and Verdana can help keep lettering legible on metal surfaces.
Masking
Keep areas that must remain unmarked outside the active artwork and verify the position before running the job. Masking tape or coatings may be part of a manufacturer-approved process, but ordinary masking materials are not protective barriers against a laser beam. Use only materials approved for the selected laser process.
Bare stainless steel can be marked directly with a suitable fiber laser. A metal marking spray is used for a compatible bonded-mark process, especially with CO₂ equipment; it is not a substitute for removing steel to create a deeper recess. Follow the compound supplier's application, drying, cleanup, and safety instructions.
Use high contrast colors
Use clear shapes and enough spacing so the finished design stands out against the metal. Colors in a design file may assign software layers or settings; they do not directly select the final color of laser engraved stainless steel. With laser annealing, an oxide layer creates the color effect, so confirm the appearance on your actual surface.
Clean the surface
It is important to clean the stainless steel surface before engraving to remove any dirt, oil, or other contaminants that may affect the engraving quality. A clean surface ensures your stainless steel laser engraver performs at its best.
Laser Engraving 304 Stainless Steel: Check the Grade and Finish
Before laser engraving 304 stainless steel, confirm the grade from the supplier's documentation. “Stainless steel” describes a family of alloys, while polished, brushed, and coated describe surface conditions. Keep those details separate in your job record.
Record the grade, thickness, supplier or batch, surface finish, and intended result. Retest when those conditions change; a recipe accepted for one 304 part is not automatically validated for 316 or an unidentified blank.
| Surface condition | What to compare on the sample |
|---|---|
| Brushed 304 | Brushing direction, background texture, and visibility of small lettering at the final size. |
| Polished 304 | Actual focus and the appearance of the mark under consistent viewing and lighting conditions. |
| Coated stainless steel | Known coating composition, laser compatibility, and whether the goal is coating removal or a mark in the steel. |
For laser marking on polished stainless steel, use a sample with the same finish as the production part. Do not add an “anodized coating” as a routine stainless-steel preparation step. Identify an existing coating before deciding how to process it.
Using the right laser wavelength
Wavelength and power describe different properties: wavelength describes the light, while watts measure power. A fiber laser system must be matched to your marking or engraving goal. Required passes depend on the lens, material, settings, and desired depth; a 20W rating alone cannot guarantee a one-pass result.
Prepare Files for Logo Engraving on Stainless Steel
Logo engraving on stainless steel introduces a problem that a material test cannot solve: the file imported into the laser software may differ from the approved design. When teaching an operator how to laser engrave stainless steel, include a file review before any production settings are loaded.
Fix Missing Fills, Duplicate Paths, and Changed Lettering
Keep an editable master and a separate production copy. Confirm the imported width against a known dimension, inspect orientation, and compare the lettering with the approved artwork. For stainless steel laser etching, pay particular attention to counters, the open spaces inside letters, and small gaps that are easy to overlook in a large screen preview.
In LightBurn, Fill Mode requires closed shapes. When laser etching stainless steel from a vector logo, an open outline may therefore need a drawing repair rather than a new power setting. Nested or overlapping shapes can also behave differently when assigned to the same layer or separate layers; check the actual output preview. See the official Fill Mode explanation.
Duplicate objects are another file issue to resolve before laser etching on stainless steel. LightBurn documents that duplicated shapes can cause repeated processing in Line Mode or unexpected missing fills. Use its Delete Duplicates guidance on a working copy, then inspect the preview again instead of deleting overlapping design elements indiscriminately.
For static logo lettering, follow the software's font import requirements: install the required fonts or convert the lettering to paths in the design application before import. Preserve editable text for names and serial-number templates that must change. This distinction supports highly legible stainless steel marking while keeping variable content usable.
Approve Placement Separately from the Metal Finish
The job instructions should explain how to engrave on stainless steel at the approved location. Include a dimensioned proof showing the mark's size, orientation, and distance from agreed reference features. A physical sample answers a different question about the appearance of laser etched stainless steel. Obtain approval for both when the finish is important; a black shape on a screen is not a metal sample.
For high-precision laser engraving on stainless steel, send a dimensioned proof with an explicit revision identifier. Ask the customer to confirm spelling, symbols, and the intended viewing direction. Keep the confirmation with the production file so that a later email attachment does not silently replace the approved design.
Also clarify requests for laser printing on stainless steel. A customer may mean a flat graphic, a colored surface effect, a bonded mark, or an engraved recess. Describe the agreed finished result on the proof. Before you laser etch stainless steel for the full order, resolve that ambiguity with a representative sample rather than treating “printing” as a specific process.
Laser Settings for Stainless Steel: Control Heat and Verify Results
Start with guidance for your exact machine, then test a representative sample. Laser settings for stainless steel marking must match the lens, alloy, surface, and desired result. A successful mark on another machine does not validate your setup.
Test Your Settings on a Representative Sample
- Define the required contrast or depth and any dimensional limits.
- Use material from the intended batch; fix the lens, focus, and support conditions.
- Run a small test matrix, changing one variable or a controlled pair at a time within the machine's supported ranges.
- Complete the specified cleanup, let the sample cool, and inspect the result.
- Repeat the accepted setup and save the settings, sample photo, and inspection record.
| Record | Include |
|---|---|
| Machine and material | Model, source, lens/working area, software; grade, thickness, finish, and batch. |
| Laser settings | Power (%), speed (mm/s), frequency (kHz), pulse width (ns) if adjustable, line spacing (mm), passes, and focus offset (mm). |
| Workholding and scan | Fixture/support, artwork area, scan or section sequence, and cooling conditions. |
| Finished result | Final text size, contrast, measured depth and location, cooled flatness, inspection method, and acceptance decision. |
Before testing, use the equipment's required beam protection and extraction, and check the material or compound safety documentation. OSHA's laser guidance identifies laser-generated fumes and vapors as hazards requiring appropriate controls.
Reduce Distortion When Laser Engraving Stainless Steel
If your goal is laser engraving on stainless steel without distortion, first separate heat-related warping from a stretched or misaligned design. The following process-development checks help you investigate the cause; they are not a guarantee of zero deformation.
- The part bends: compare support, local heat buildup, scan sequence, and cooling between stages on the actual thickness. More passes alone do not ensure less heat. After cooling, release the fixture as required for inspection and check flatness against the drawing.
- The part is flat but the artwork looks stretched: check scale, positioning, and surface focus. For curved cups, use the tumbler rotary setup and troubleshooting guide.
Check Precision, Readability, and Engraving Depth
High-precision laser engraving on stainless steel needs checks at the final design size. Inspect the smallest text, line gaps, edges, and position on the actual part. For highly legible stainless steel marking, review contrast under the intended viewing conditions.
Measure recessed engraving with a method suited to the depth and tolerance; darkness does not establish depth. For codes, successful scanning does not replace a specified quality-verification procedure. Check required cleaning, wear, or corrosion performance for the finished application before approving a production batch.
Run Stainless Steel Laser Marking Batches Without Data Mix-ups
Laser marking on stainless steel supports identification only when the marked information belongs to the correct part. A stainless steel engraving system needs an approved data file and a clear loading sequence as well as a suitable laser. A repeated logo can be correct while the name, serial number, or encoded value beneath it is wrong.
How to Laser Mark Stainless Steel with Unique Serial Numbers
Separate fixed artwork from fields that change. For stainless steel laser engraving with customer names or asset numbers, verify the first entry, last entry, longest value, blank cells, and any leading zeros before production. Keep an untouched copy of the supplied list and an approved working version.
LightBurn supports CSV entries and serial-number expressions through Variable Text. Its Current value identifies the next data row or number to use; Auto-Advance can change that value when a job is started, sent, or saved in a machine-specific format. The sequence can also wrap at its configured end. Check these controls against the Variable Text documentation before enabling automatic progression.
In LightBurn's CSV formatting, row and column indexes start at zero. Save text in a supported encoding and preview accented characters or symbols rather than assuming they survived export. Its formatting guide also explains leading-zero and serial-width behavior. An identifier that looks tidy after truncation may still be the wrong identifier.
Match Each Fixture Position to the Correct Record
For high precision stainless steel engraving across a tray, define one loading orientation and identify each pocket. Link the approved row or serial number to that pocket before starting. This also makes it easier to inspect and pack laser engraved stainless steel in the customer's requested order.
If a code and a readable number are both present, compare their evaluated values. LightBurn provides a separate Variable Offset for barcodes; copying a design does not by itself prove that all copies contain the intended data. Follow its barcode configuration guidance and check the actual decoded value against the order record.
Resume Interrupted Jobs and Protect Repeat Orders
When showing someone how to laser engrave on stainless steel in a batch, practice the restart decision as well as the normal start. After an interruption, record the last confirmed finished identifier, separate uncertain pieces, and reconcile the software's current value with the next physical part. Do not infer completion from an advanced counter alone.
For a repeat stainless laser engraving order, retrieve the approved artwork and data revision together. Restore the validated laser settings for stainless steel marking, then check whether the customer changed the quantity, identifiers, orientation, or material supply. A familiar filename is not sufficient revision control.
Keep rework decisions separate from the normal sequence. When laser marking stainless steel, rerunning a completed piece may change its appearance even if its identifier stays the same. Have an authorized person decide whether an uncertain item can be reprocessed, accepted, or replaced, and record the outcome before returning it to the accepted batch.
Estimate Time and Cost per Accepted Engraved Part
The useful comparison between stainless steel engravers is the cost of delivering an accepted order. A stainless steel laser engraver with a short marking cycle may still need substantial loading, cleaning, data preparation, and inspection time. Compare each steel engraving solution using the same job scope and accepted quantity.
Separate First-Order Setup from Repeat Production
For a fiber laser engraving stainless steel, measure the complete work sequence instead of multiplying a software runtime estimate by the order quantity. Separate one-time preparation from work repeated for every item. The price of laser engraving for stainless steel should reflect both, with allowances based on the actual job rather than a promised hourly output.
| Cost component | Include | Avoid double counting |
|---|---|---|
| Setup | Artwork repair, fixture preparation, material development, and approval work. | Do not charge a reusable setup twice within the same estimate. |
| Production | Loading, positioning, laser processing, unloading, and any defined cleanup. | If a shop rate already includes equipment and labor, do not add those items again. |
| Quality and delivery | Data checks, inspection, accepted/rejected sorting, identification, and packing. | Use the same acceptance requirements when comparing quotes. |
| Materials and consumables | Blanks, applicable marking compounds, consumables, and work lost to rejected pieces. | Include replacement blanks once, in the appropriate cost category. |
Cost per accepted part = total job cost ÷ number of accepted parts. Use the quantity that passes the agreed checks as the denominator. Track the cost of rejected and reworked pieces in the total; otherwise, a fast process with poor yield can appear cheaper than it is.
If you already quote laser engraving steel, do not automatically reuse the same allowance for every stainless job. The artwork area, part handling, required appearance, and inspection work may differ. For laser marking on polished stainless steel, include the agreed handling and packing work needed to preserve the delivered finish.
Compare Deep Engraving and Outsourcing on the Same Scope
For deep laser engraving stainless steel parts, request an estimate that separates material removal, specified finishing, and inspection. Approve the development cost and sample before committing to a batch price.
A quote headed “laser stainless steel engraving” should state who supplies the blanks, which file revision is used, what counts as acceptance, and how rework is handled. Compare setup charges, accepted quantity, turnaround, and packing on the same basis. For a one-off job, sending the work to a specialist can avoid purchasing equipment and developing a process that will rarely be reused.
Before purchasing a stainless steel engraving laser, use a representative order to compare the workload you would retain in-house with the work covered by a service quote. Include operator time and the ability to manage variable data, awkward parts, and delivery requirements. No universal purchase price or payback period follows from the material name alone.
Applications
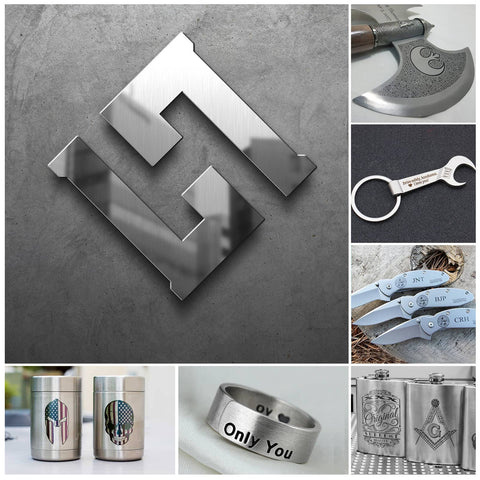
Stainless steel is widely used and can be used in many applications. When used with a laser marking machine for marking and engraving stainless steel, you can significantly expand your product line and processing capacity. Some common applications of laser engraving and marking stainless steel and other metals include:
- Personalized jewelry, such as pendants, bracelets, and rings.

- Memorial plaques, such as for dedications or memorials.

- Custom signage, such as for business logos or directional signs.

- Gift items, such as photo frames, keychains, and money clips.

- Housewares, such as coasters, wine stoppers, and picture frames.

- Corporate gifts, such as pens, lighters, and desk accessories.

FAQs About Laser Engraving Stainless Steel
Can you laser engrave stainless steel permanently?
Yes, laser engraving can produce lasting marks on stainless steel, but a permanent visible mark does not prove unchanged corrosion resistance. Research on laser-marking thermal effects shows that processing can affect corrosion performance. Validate durability for the intended use and choose any post-fabrication treatment to match the part specification.
Is fiber laser required for laser engraving stainless steel?
For a recess in bare stainless steel, choose a laser capable of controlled metal removal; a suitable fiber system is a common choice. CO₂ equipment with marking compound can create a visible surface mark, but that process does not replace direct engraving into the steel.
What thickness works best for laser engraving stainless steel?
There is no single best thickness for laser engraving stainless steel. The part must fit the focus range and fixture, with enough remaining material for the intended engraving. Test thin pieces for deformation and check the finished part against its dimensional requirements.
Does surface finish affect laser engraving results?
Yes. Polished, brushed, and coated surfaces can produce different results with the same settings. Test the actual finish for contrast, edge quality, and readability; do not assume that a recipe accepted on one surface will work equally well on another.
Can I use the same settings for every stainless steel engraving job?
No. Laser settings for stainless steel marking depend on the laser source, lens, alloy, finish, and desired result. Test representative material, record power, speed, focus, and relevant pulse controls, then verify readability or depth before applying those settings to a production batch.
How can I reduce distortion when laser engraving stainless steel?
Reducing heat buildup can lower distortion risk, but no setting guarantees distortion-free stainless steel engraving. Test the actual thickness, support the part consistently, and adjust passes and scan strategy within the machine's guidance. Check dimensions or flatness after cooling against the drawing requirements.
Final Thoughts
Learning how to laser etch stainless steel properly allows you to produce high-quality, durable, and professional metal markings. With the right machine, correct settings, and proper preparation, laser etch stainless steel projects can achieve outstanding precision and long-lasting results.
A high-quality stainless steel laser engraver is essential for consistent laser etch stainless steel output across both small and large-scale applications.
Find the right Monport setup for your stainless steel projects. Compare current machines and compatible accessories, and review the specifications for your material, part size, and intended result. Check the product page and checkout for current pricing, availability, and offer terms, then click here to shop now!