Laser engraving machines and with the right laser engraving machine software have revolutionized the way we personalize, decorate, and mark various materials. But to harness the full potential of your laser engraver, you need powerful and user-friendly laser engraving machine software. Enter Lightburn, a widely recognized leader in laser engraving machine software, and a perfect companion for your Monport 40w CO2 laser (Lightburn ready!).
This comprehensive guide delves into how to use Lightburn, empowering you to unlock the creative possibilities of laser engraving. We'll explore its features, basic operations, and helpful tips to take your engraving projects to the next level with LightBurn software how to use.

Monport 40W Pro Lightburn-Supported (12" X 8") CO2 Laser Engraver & Cutter with Air Assist - 40W Pro
Read More: Exploring Laser Design Software: Lightburn and Beyond
Lightburn: The Industry Standard for Laser Engraving Software
LightBurn has established itself as the leading software choice for laser engraving enthusiasts and professionals alike. Its intuitive interface, powerful features, and broad compatibility make it an ideal companion for various laser engraving machines, including the Monport 40W CO2 Laser LightBurn Ready. Learn lightBurn software how to use now!
Benefits of Using Lightburn for Laser Engraving
- Intuitive Interface: Lightburn boasts a user-friendly design that simplifies complex tasks. Beginners can quickly grasp the software's functionalities, while experienced users can navigate its advanced features with ease.
- Extensive Material Support: Lightburn provides predefined settings and profiles for a wide range of materials, including wood, acrylic, glass, leather, and more. This ensures optimal engraving results with minimal experimentation.
- Powerful Design Tools: Lightburn offers a robust suite of design tools, allowing you to import and edit images, create vector graphics, and manipulate text elements for your engraving projects.
- Layer Control: The software allows you to organize your design elements into separate layers, granting precise control over engraving order, power settings, and speed for each layer. This is particularly beneficial for creating multi-layered engravings with varying depths and effects.
- Advanced Features: Lightburn caters to experienced users with advanced functionalities like dithering patterns, variable power engraving for creating grayscale or photographic effects, and a user-customizable interface.
- Cross-Platform Compatibility: Lightburn operates seamlessly on Windows and Mac computers, offering greater flexibility for users with different operating systems.
How to Use Lightburn Software
-
Download and Install: LightBurn software how to use offers a free trial, allowing you to explore its functionalities before purchasing. Download the software from the official LightBurn website, ensuring compatibility with your operating system (Windows, Mac, or Linux). Follow the on-screen instructions for a smooth installation. For a better laser engraving experience, you can download a paid license key on the Monport website.
-
Connect Your Laser Engraver: Once installed, Lightburn will prompt you to connect your laser engraver. The Monport 40w CO2 laser, with its Lightburn compatibility, should be readily detected. If not, consult your laser's manual or Lightburn's documentation for specific connection instructions.
-
Interface Overview: Lightburn features a user-friendly interface with various workspaces and tools. Here's a quick breakdown of key areas:
- Workspace: This is the central area where you import your artwork, position it for engraving, and preview the laser path.
- Toolbar: The toolbar houses various tools for design manipulation, layer management, and laser settings.
- Layer Panel: This panel allows you to organize your artwork into separate layers, each with customizable engraving settings for different materials or depths.
- Laser Control Panel: This section provides access to essential laser controls like power, speed, and scan direction, allowing you to fine-tune your engraving parameters.
Importing and Preparing Artwork
LightBurn software how to use supports a wide range of file formats, including popular image formats (JPEG, PNG) and vector graphics formats (DXF, SVG). Ensure your artwork is optimized for laser engraving. For clean lines and precise engravings, use vector graphics created in design software like Adobe Illustrator or Inkscape.
Working with Layers
LightBurn software how to use has a layer system that allows you to assign specific settings to different parts of your artwork. This enables you to define different engraving depths, cutting paths, or even raster engraving (image engraving) for intricate details. Utilize this feature to create multi-layered designs with varying textures and finishes.
Setting Up Laser Parameters
The laser control panel offers crucial settings for fine-tuning your engraving process. Here's a breakdown of some key parameters:

- Power: Power output determines the depth and intensity of the engraving. Higher power creates deeper engravings, but requires careful calibration to avoid damaging the material.
- Speed: Laser speed determines the engraving time and overall detail level. Slower speeds create more intricate engravings, while faster speeds are suitable for larger areas.
- Scan Direction: This controls the direction in which the laser beam moves across the material. Experiment with different scan directions to achieve desired results depending on the material and desired effects.
Lightburn Tips and Tricks for Laser Engraving Success
- Test Cuts and Engravings: Before engraving your final project, utilize the test cut and engrave features on scrap material to test your settings and ensure optimal results.
- Material Specific Settings: Research the recommended laser settings for your specific material. Lightburn provides a helpful library of pre-configured settings for various materials, but adjustments might be necessary.
- Safety First: Always prioritize safety when operating your laser engraver. Wear appropriate personal protective equipment (PPE) such as safety glasses and a respirator.
Lightburn and Your Monport 40w CO2 Laser
LightBurn software how to use unlocks the full potential of your Monport 40W CO2 laser. With its user-friendly interface, powerful features, and LightBurn compatibility, the Monport 40W CO2 laser and LightBurn software create a perfect combination for your laser engraving endeavors.
Lightburn Frequently Asked Questions (FAQs):
1. Does Lightburn offer a free trial?
Yes, Lightburn offers a free trial period, allowing you to explore the software's features and functionalities before committing to a purchase. Download the trial version from the official Lightburn website.
2. Is Lightburn compatible with my laser engraver?
Lightburn boasts extensive compatibility with a wide range of laser engravers. The Monport 40w CO2 laser, with its "Lightburn ready" designation, ensures seamless integration. However, it's always recommended to check Lightburn's website for a comprehensive list of supported devices.
3. What file formats can Lightburn import?
Lightburn supports a wide variety of file formats, including commonly used image formats like JPEG, PNG, BMP, and vector graphics formats like DXF, DWG, SVG, AI (Adobe Illustrator).
4. I'm new to design software. Can I still use Lightburn?
LightBurn software how to use focuses primarily on laser control and doesn't offer extensive design editing features. While basic editing tools are available within LightBurn, for complex design creation, you might need additional software like Adobe Illustrator or Inkscape to create vector graphics suitable for laser engraving.
5. How can I learn more about Lightburn's features and functionalities?
Lightburn offers a wealth of resources to help you master the software. Here are some helpful options:
- Lightburn's User Manual: A comprehensive user manual is available on the Lightburn website, providing detailed explanations of all features and functionalities.
- Lightburn Tutorials: Lightburn offers a library of video tutorials that visually demonstrate various software aspects and workflows.
- Lightburn Community Forum: The Lightburn community forum is a valuable resource where you can connect with other users, ask questions, and share experiences.
6. Where can I purchase Lightburn?
Monport offer various licensing options to suit your needs, whether you're a hobbyist or a professional user.
By incorporating these FAQs and the previous guide, you have a strong foundation for using LightBurn software how to use and your Monport 40W CO2 laser to create stunning laser engravings. Remember, LightBurn's user-friendly interface, powerful features, and extensive resources empower you to unleash your creativity and explore the exciting world of laser engraving.
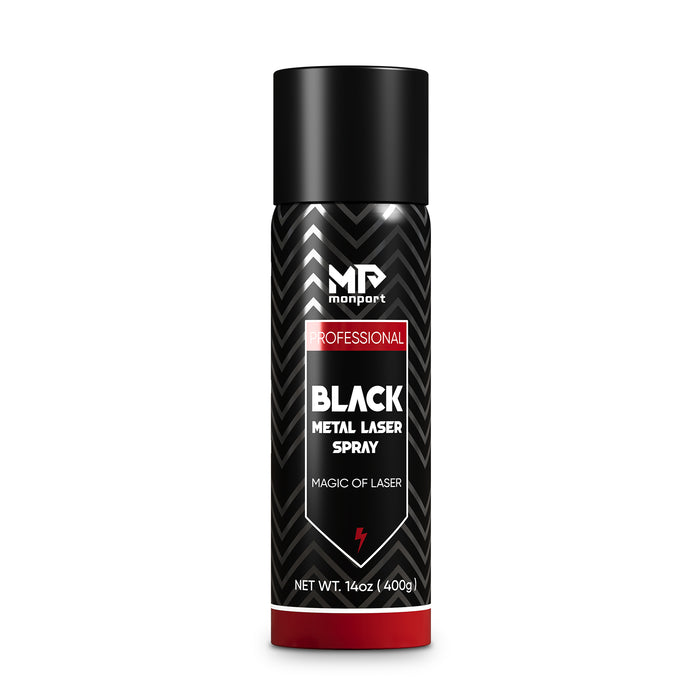
Revolutionize Your Metal Engraving with Monport Black Laser Marking Spray

Transform your metal engraving experience with the Monport black laser marking spray—the perfect solution for achieving crisp, high-contrast, and permanent marks on a variety of metal surfaces. Engineered for use with CO2 laser engraving machines of 25 watts and above, this innovative spray simplifies the marking process with its aerosol convenience and precision performance. Each 14 oz aluminum can delivers a powerful and even coat, thanks to its anti-clog nozzle and fine-grained nanoparticle formula. Whether you’re personalizing jewelry, labeling tools, or customizing glassware, the black laser marking spray ensures consistent, durable results.
Designed for metals like aluminum, stainless steel, and brass, it penetrates deeply to create heat-resistant black markings that last. Simply clean your surface with alcohol, shake the can for two minutes, spray from 6 to 8 inches away, and let it air dry for just five minutes. Once the laser has done its job, a quick rinse reveals your permanent masterpiece. Alcohol-free and easy to use, the Monport black laser marking spray is your go-to companion for effortless, professional-grade laser engraving. Don’t settle for anything less—choose black laser marking spray for sharp detail, quick results, and top-tier durability every time.
Final Takeaway
Lightburn empowers you to unleash your creativity and transform your laser engraver into a powerful tool. This beginner's guide has equipped you with the fundamental knowledge to start using Lightburn. Remember, practice makes perfect! Experiment with different settings, materials, and design techniques to unlock your full engraving potential. With Lightburn by your side, the possibilities are endless!


