Halloween pumpkin lanterns bring a familiar orange glow to windowsills, entry tables, and party displays. But a pumpkin-inspired lantern does not have to be carved from a fresh pumpkin. Reusable wooden lanterns can carry a classic jack-o'-lantern face, engraved details, and a battery-powered LED light without relying on a perishable decoration.
This guide explores laser-engraved Halloween pumpkin lanterns made with decorative wooden panels. You'll find pattern ideas, a practical plan for assembling finished components, material considerations, and a look at Monport CO2 laser options for customized wood decorations.
What Is a Laser-Engraved Halloween Pumpkin Lantern?
Unlike a traditional jack-o'-lantern made from a hollow pumpkin, a wooden pumpkin lantern is typically a small decorative enclosure or preassembled frame with a pumpkin-shaped or pumpkin-illustrated front. The front panel can combine two effects: engraved surface artwork that remains visible in daylight and open decorative shapes through which an LED glow can show at night.
Those effects serve different purposes. Engraving adds lettering, lines, and texture to a surface; an opening allows light to pass through. A flat engraved wooden pumpkin plaque can look beautiful, but it will not automatically function as a glowing lantern. A well-planned display accounts for the panel, the enclosure, and the light source as separate design elements.
For another take on flat seasonal pieces, explore Monport's laser-engraved wood pumpkin design ideas. This article focuses instead on the light-up lantern format.
Four Halloween Pumpkin Lantern Design Ideas
1. Classic Jack-o'-Lantern Face
A wide grin, triangular eyes, and a simple curved pumpkin outline make an immediately recognizable Halloween design. Black details on natural wood create a nostalgic look during the day, while a warm LED behind the open facial shapes creates contrast after sunset. This is a good visual direction for a small tabletop decoration because it reads clearly from a distance.
2. Haunted House Silhouette
Instead of a face, imagine the pumpkin shape as a miniature Halloween scene: a crooked roofline, a few windows, a crescent moon, and one small bat. The windows become the brighter features of the final display, while engraved lines describe the house and surrounding landscape. Keep the illustration visually simple so the silhouette stays legible.
3. Autumn Leaves and Botanical Pumpkin
For decor that works beyond Halloween night, use a pumpkin outline framed by falling leaves, vines, and subtle lettering. Warm wood tones and a gentle amber LED feel seasonal without looking especially spooky. A botanical version can complement fall table settings and Thanksgiving displays.
4. Personalized Pumpkin Lantern
A family name, street number, or short seasonal greeting can turn an ordinary lantern into a personalized centerpiece. Try a compact message such as “Welcome, Fall” above the pumpkin motif. Decorative lettering should complement the artwork rather than overwhelm it, particularly if the finished lantern will be viewed from across a room.
Step-by-Step: Plan a Wooden Pumpkin Lantern Display
Start with a clear design and a set of professionally prepared or ready-made components. The steps below focus on planning, personalization, and display; any machine fabrication should be handled by a trained adult operator in accordance with the equipment and material manufacturer's guidance.
Step 1: Choose a Lantern Format
Decide whether the project will be a tabletop box lantern, a standing pumpkin silhouette with a separate light behind it, or a decorative insert for an existing LED lantern. A freestanding silhouette is visually simple; a box lantern has a more traditional enclosed appearance. Choose a finished frame or a professionally fabricated kit that is stable when displayed.
Step 2: Select the Pumpkin Artwork
Pick one clear focal motif from the four ideas above. For a classic Halloween result, pair a large pumpkin face with a small supporting detail, such as a bat or crescent moon. For a personalized result, reserve a clean area for text instead of squeezing letters into every open space. A simple two-color sketch can help you compare how the decoration will look in daylight and when illuminated.
Step 3: Review the Panel Design and Material
A wooden front panel and a light source play distinct roles. Before ordering or commissioning fabricated components, confirm their finished dimensions, the material's suitability for its intended manufacturing method, and compatibility with the specific lantern body. Ordinary fresh pumpkins, unknown coated materials, and mystery plastics should not be assumed suitable for the Monport 40W Pro merely because they appear in seasonal craft photographs.
Step 4: Personalize the Finished Components
Once prepared parts are available, consider water-based decorative finishes, removable paper accents, or pre-made nameplates to tie the lantern to a party theme. Let any finish fully dry according to its label before assembling the display. A lightly weathered palette, such as orange, charcoal, and cream, works particularly well with a vintage-inspired pumpkin face.
Step 5: Add a Battery-Powered LED Light
Use a commercially made LED light intended for decorative lanterns, following its placement and clearance instructions. Check that the finished enclosure accommodates the light without obstruction. Avoid open-flame candles in wooden or acrylic decorations. An LED option makes it easier to achieve a consistent glow for indoor table displays.
Step 6: Style and Photograph the Display
Place the completed lantern on a stable, dry indoor surface and add a few low-key props, such as faux leaves or a folded piece of neutral fabric. Photograph the same lantern twice: once in daylight to show engraved surface details and again in dim ambient light to reveal the LED effect. That before-and-after comparison is especially useful for a project blog because it makes the design's purpose immediately clear.
Choosing Materials for Pumpkin-Themed Lantern Decor
The best material depends on whether the piece is a decorative faceplate, a structural enclosure, or a translucent accent. Material selection should follow documented compatibility, not assumptions based on appearance.
| Material | Visual effect | Best suited to | Key consideration |
|---|---|---|---|
| Wooden panels | Warm grain and darker engraved details | Faceplates, signs, decorative frames | Choose manufacturer-approved material and a stable finished enclosure |
| Known laser-compatible acrylic | Clean silhouettes and potential translucent accents | Professionally fabricated decorative inserts | Compatibility varies; do not assume all plastics are suitable |
| Paper or cardstock accents | Soft graphic contrast | Removable decoration away from the light source | Keep within the LED accessory's specified clearances |
| Fresh pumpkins | Traditional natural jack-o'-lantern look | Separate conventional seasonal display | Not an established material application for this specific machine |
For a related material-based decor concept, Monport also discusses Halloween decorations based on balsa wood. Keep the lantern project distinct by emphasizing the combination of engraved artwork and LED illumination.
Monport CO2 Laser Engravers for Wooden Halloween Decor
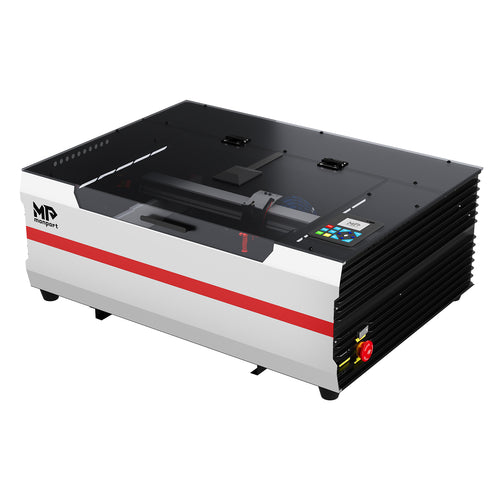
The Monport 40W Pro CO2 Laser Engraver & Cutter is a compact model with a published 8 × 12-inch engraving area, LightBurn compatibility, and air assist. Monport lists wood among its supported engraving materials, making the machine a useful point of reference for small decorative panels. Those specifications do not establish compatibility with whole, irregularly shaped fresh pumpkins, so this guide focuses on wooden lantern components instead.

For readers comparing current equipment options, the Monport Reno45 45W CO2 laser engraver offers a published 16 × 12-inch work area for wood-related projects. You can also explore Monport's desktop CO2 laser engraver collection to compare machine sizes, supported materials, specifications, and current availability. Choose equipment according to the size and material of the planned components rather than assuming that every Halloween decoration is compatible.
For more visual inspiration, watch the Halloween laser project video below. Always refer to the relevant machine and material documentation before commissioning engraved or cut components.
More Ways to Coordinate a Halloween Pumpkin Lantern Display
Pair the Lantern with a Wooden Welcome Sign
A coordinating sign can repeat the same pumpkin icon or typeface used on the lantern. This makes a small entryway arrangement feel like one collection rather than several unrelated pieces.

Use a Pumpkin-Themed Decorative Backdrop
A flat engraved pumpkin illustration can work as a companion backdrop rather than a lantern itself. It provides a second layer of autumn color while keeping the illuminated object as the main focal point.

For broader seasonal inspiration beyond lanterns, see Monport's Halloween outdoor decoration ideas. Any outdoor display should use components specifically rated for the environment.
Frequently Asked Questions About Halloween Pumpkin Lanterns
Can a laser-engraved wooden pumpkin be used as a lantern?
It can form part of a decorative lantern if the overall design includes a suitable enclosure or support, an appropriate light source, and features that allow light to show. A fully solid engraved plaque is not automatically a lantern.
Are laser-cut and laser-engraved details the same?
No. Engraved details alter the surface appearance, while cutout openings can transmit light from inside a finished lantern. Designs often use both effects for contrast, but each serves a different purpose.
Can the Monport 40W Pro directly engrave a real pumpkin?
The published product material list and work-area specifications do not establish whole-pumpkin compatibility. This guide therefore focuses on pumpkin-inspired wooden decoration concepts rather than recommending that application.
What lighting works for a wooden Halloween lantern?
A commercially made, battery-powered decorative LED is a sensible option when used according to its manufacturer's directions. Never use an exposed flame inside a wooden or acrylic lantern.
How can a pumpkin lantern design feel more personal?
Choose one identifiable detail—a family initial, a short greeting, or a distinctive seasonal motif—and repeat it consistently across the lantern and matching signs. Strong contrast and uncluttered artwork usually communicate the design more clearly than a crowded illustration.
Final Thoughts
The appeal of laser-engraved Halloween pumpkin lanterns is the combination of familiar jack-o'-lantern imagery with the reusable feel of a designed object. Start with a clear decorative concept, distinguish surface engraving from light-transmitting openings, and make the LED effect part of the visual plan from the beginning. A wooden pumpkin lantern can then become a coordinated seasonal centerpiece rather than a one-night decoration.
For more pumpkin-themed design inspiration, explore Monport's wood pumpkin project ideas. When planning personalized wooden panels, compare the sizes and supported materials of Monport's desktop CO2 machines with the details of your intended display.