Want Halloween decor that feels like it came from an old postcard rather than a modern party aisle? Vintage Halloween decorations draw on faded orange-and-black palettes, mischievous black cats, smiling jack-o'-lanterns, and lettering inspired by early holiday prints. Personalized metal accents can bring those familiar motifs into a display without losing their nostalgic character.
This guide shares five DIY vintage Halloween decoration ideas built around pre-made metal blanks, plus design tips, material considerations, and an overview of how Monport fiber laser marking equipment fits into a professional customization workflow. The emphasis is on the look and use of each finished piece—not on engraving electronic circuit boards.
What Makes Vintage Halloween Decorations Look Authentic?
Retro Halloween style is recognizable because its visual choices work together. An aged-paper color palette, slightly imperfect illustration, and a few well-chosen seasonal symbols often feel more convincing than a crowded scene full of unrelated graphics.
- Classic motifs: arched-back black cats, crescent moons, bats, owls, grinning pumpkins, and silhouettes of old houses.
- Limited colors: pumpkin orange, charcoal black, ivory, muted gold, and distressed copper tones.
- Period-inspired type: bold serif lettering, decorative borders, and restrained Art Deco or old-print influences.
- Collected details: small tags, framed plaques, vintage-style ribbon, and repeated motifs that make separate objects feel like one set.
For a polished display, choose one main motif and repeat it at different sizes. A black cat on the front-door plaque, a smaller version on an ornament, and a matching cat icon on a party place card create a collection instead of a random assortment.
5 Vintage Halloween Decoration Ideas with Personalized Metal Details
These ideas use pre-shaped metal blanks as decorative surfaces. They are design concepts rather than documented Monport test projects; final appearance and material compatibility should be confirmed with the production team before any item is made.
1. Retro Black Cat Door Plaque
A black cat is one of the most instantly recognizable vintage Halloween icons. Picture a small rectangular metal plaque with an arched cat silhouette, a crescent moon, a thin ornamental border, and a phrase such as “The Witch Is In.” Use a high-contrast layout so the central cat remains visible from across a doorway.
Design direction: Choose an already-finished metal plaque, keep the illustration large, and avoid tiny distressed lettering that disappears at a distance. A short name or house number can personalize the sign without making it look like a modern nameplate. Display it with an existing wreath or ribbon rather than treating the plaque as an outdoor installation by default.
2. Vintage Pumpkin Metal Ornaments
Small, pre-cut pumpkin-shaped ornaments are a natural fit for retro Halloween decoration ideas. Instead of bright cartoon faces, consider an old postcard-inspired jack-o'-lantern with triangular eyes, a crooked grin, and tiny star or moon accents. A matching set could feature three different expressions while keeping the same border and typography.
Design direction: Let the pumpkin silhouette do most of the work. Add a date, family initial, or short message on the lower half. These ornaments work well on a seasonal display tree, decorative branches, or as reusable gift tags. Check that the chosen blank already has suitable hanging hardware and smooth, finished edges.
3. Antique-Style Haunted House Plaque
For a moodier look, use a pre-made oval or rectangular metal plaque with a tall haunted-house silhouette. A single lit window, a crooked roofline, and a few bare branches suggest a story without needing a complex illustration. Typography such as “October House” or “Open After Dark” can reinforce the vintage theme.
Design direction: Leave generous empty space around the building so fine architectural details remain legible. For a tabletop arrangement, pair the finished plaque with old books, dried foliage, and an unlit decorative lantern. Keep the engraved metal as the focal point rather than competing with a dozen props.
4. Personalized Halloween Party Nameplates
Not every vintage Halloween decoration needs to hang on a wall. Small metal nameplates can make a dessert table, seating arrangement, or themed photo corner feel intentional. A matching series might use a bat icon at the top, each guest's name in a prominent serif typeface, and a tiny ornamental flourish below.
Design direction: Plan one reusable layout with enough room for names of different lengths. Keep all finished nameplates the same dimensions and visual style. After the party, they can become keepsakes or return as part of next year's decor. For more Halloween craft categories beyond metal accents, explore Monport's DIY Halloween craft ideas.
5. Mini Tombstone Tags for a Gothic Display
Miniature tombstone-shaped metal tags can add a playful, old-cemetery feel to a bookshelf, mantel, or themed table. Rather than realistic grave markers, make them unmistakably whimsical: curved Victorian borders, stylized stars, a tiny raven, and phrases such as “Here Lies My Candy” or “Resting Witch Face.”
Design direction: Select pre-made blanks with rounded corners and use simple lettering that can be read at a glance. Group tags in odd numbers—three or five—beside a black cat figurine or vintage-style pumpkin. A coordinated set can look more carefully designed than one oversized sign.
Choosing Materials for Laser-Engraved Halloween Decor
Material choice determines both the finished appearance and which equipment is appropriate. For metal-focused projects, stainless steel and certain anodized or coated aluminum blanks are common starting points for evaluating fiber laser marking. However, not every finish responds in the same way, and a compatible-looking blank should not be assumed suitable without manufacturer guidance.
- Stainless steel: Offers a clean, industrial or antique-metal appearance for plaques, tags, and keepsakes. Resulting contrast depends on the material and marking method.
- Anodized aluminum: Can offer strong contrast for small decorative tags, although the specific anodized finish must be evaluated for compatibility.
- Pre-finished metal blanks: Useful when a project needs a consistent silhouette, hanging hole, or edge finish without requiring a metal-cutting operation.
- Wood and acrylic: Popular in broader Halloween crafting, but should not be presented as interchangeable with metals on a fiber-only marking machine. Their suitability depends on a different, appropriately specified process.
Do not treat salvaged electronic circuit boards as ordinary craft blanks. Their layered materials, coatings, and components create separate technical and safety considerations. For more examples of metal-focused holiday design, see Monport's article on Halloween metal engraving designs.
How to Give DIY Vintage Halloween Decorations a Cohesive Look
Build a Small Motif Library
Start with four or five visual elements—perhaps one pumpkin, one cat, a moon, a star border, and a single decorative typeface. Reuse these across the plaque, ornament, and nameplate ideas. This gives every piece an obvious family resemblance and keeps the artwork from becoming overly busy.
Design for the Object, Not Just the Screen
A detailed illustration may look impressive at desktop size but lose its character on a small tag. Before choosing a final composition, evaluate whether the main motif and text remain readable at the dimensions of the actual blank. Favor a strong silhouette, clear hierarchy, and enough negative space around the lettering.
Match the Display to the Finish
For a nostalgic look, pair dark metal details with matte orange paper, warm ivory fabric, or subdued ribbon. Repeat one accent color rather than adding every Halloween shade at once. Indoor display arrangements also make it easier to control the overall theme and protect finishes not rated for outdoor exposure.
Keep Personalization Subtle
A short surname, year, house number, or party title is usually enough. Placing personalization in a small banner or lower border preserves the vintage artwork as the focal point. If the piece is intended for a gift, a personal message on the reverse can keep the front visually clean.
Where the Monport GPro 30W Fits into Metal Decoration Projects
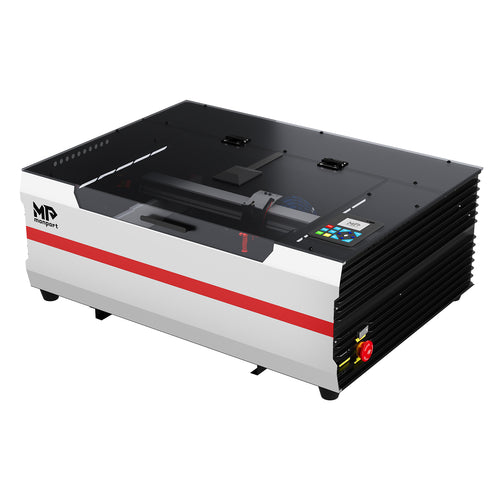
The original version of this article featured the Monport GPro 30W Split MOPA Fiber Laser Engraver, shown in the images below. As a fiber-based marking system, the GPro belongs to a category used for detailed designs on compatible metal surfaces. MOPA technology provides additional control over laser pulse characteristics, but the final appearance still depends on the specific material and machine configuration; a particular color or finish is not guaranteed.

The example images are useful for understanding the machine category, but they are not proof that any particular Halloween design or metal blank has been tested on this model. This article also does not recommend processing circuit boards, painted mystery coatings, or unspecified plastics. A qualified operator should follow the equipment documentation, approved-material guidance, and appropriate protective controls.

Original Monport GPro Setup Video
The following video was included in the original article and is retained as a product reference, not as instructions for making the holiday items described here.
For current models and official product specifications, browse the Monport fiber laser engraver collection. You can also read other GPro 30W project ideas for additional context about the model referenced in this article.
Frequently Asked Questions
What are easy vintage Halloween decorations to personalize?
Pre-made ornament blanks, small door plaques, party nameplates, and decorative tags are convenient starting points because their shapes are already defined. A black cat, pumpkin, or haunted-house motif makes each piece recognizable without complicated artwork.
Which colors make Halloween decorations look vintage?
Try weathered orange, charcoal, ivory, muted gold, and copper tones. The combination of limited colors, bold silhouettes, and retro lettering matters more than adding a distressed effect to every surface.
Can a fiber laser engraver make wooden Halloween decorations?
Fiber laser systems are primarily associated with marking compatible metals and some other approved materials. Wood projects typically call for different equipment, such as a suitable CO2 laser system. Always check the particular material and manufacturer's compatibility information rather than assuming one machine handles every craft material.
Can I use an old circuit board as the decoration blank?
That is not recommended as a general-purpose craft method. Circuit boards can contain layered composites, coatings, and electronic components that introduce material-specific hazards. Choose a known, approved decorative blank instead of treating electronic waste as a standard engraving surface.
Do I need a laser engraver to enjoy these vintage Halloween ideas?
No. The creative direction—retro motifs, coordinated typography, and personalized metal-looking accents—can also inspire printed, painted, or professionally produced decorations. Laser marking is one possible professional customization method, not a requirement for enjoying the style.
Final Thoughts
The most memorable vintage Halloween decorations do not need to be elaborate. A black cat door plaque, a coordinated set of pumpkin ornaments, and a few personalized tags can make a room feel thoughtfully decorated. Focus first on the visual story: familiar retro imagery, clear typography, and a consistent finish across every piece.
When a project calls for permanent marks on compatible metal blanks, explore Monport's current fiber laser engravers and confirm the intended material and equipment specifications with the manufacturer. For more inspiration outside this vintage-metal theme, see Halloween outdoor decoration ideas.