Ever tried to mark stainless steel or aluminum with a laser and ended up with a faint, patchy result? The problem usually isn't the machine. It's the settings.
Laser metal marking is tricky to get right. Move the speed up by just 10%, or drop the power a little too low, and a mark that should look crisp and black turns out gray and weak. Getting it right comes down to understanding how your laser cutting and engraving software controls power, speed, and frequency on metal.
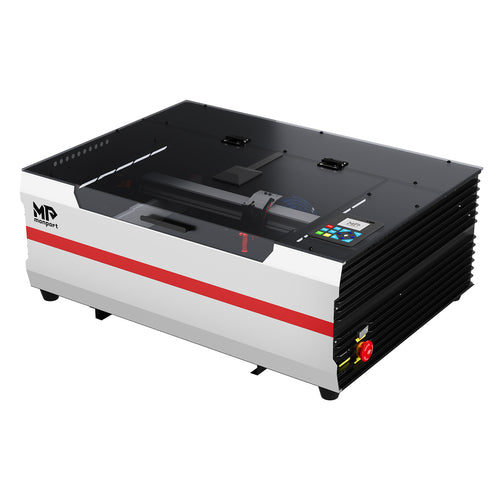
This guide breaks that down step by step. Whether you're running a dedicated fiber laser like the Monport GA Series MOPA Fiber Laser or a CO2 machine such as the Monport MEGAS 70W paired with marking spray, you'll walk away knowing how to set up your software, dial in your settings, and skip the mistakes that ruin an otherwise good job.

What Is Laser Metal Marking, and Why Does Software Do Most of the Work?
Laser metal marking is the process of using a focused laser beam to leave a permanent mark on metal. It happens one of three ways: discoloring the top layer (annealing), engraving a shallow groove, or reacting with a coating like marking spray.
Metal doesn't forgive bad settings the way wood or acrylic does. Run the speed 10% too fast, or the power slightly too low, and you'll get a mark that looks gray instead of black — or one that wipes off with a fingernail.
That's why your laser cutting and engraving software matters so much. It's what translates your design into the exact power, speed, frequency, and pass count the laser needs for that specific metal. Good software also gives you:
- Live camera alignment
- Saved material presets
- Batch and array tools
Those three things are what separate a one-off hobby project from a repeatable production process.

Three Software Settings That Actually Control Your Metal Marking Results
Most beginners assume the machine determines mark quality. It's really three settings inside your laser cutting and engraving software.
Power and Speed Ratio
Power and speed work together, not separately. Too fast at high power, and the beam skips across the surface without enough dwell time to anneal properly — you get weak, incomplete marks. Too slow at high power, and you risk burning through thin material or blowing out fine detail.
Monport fiber laser machines are compatible with Lightburn software that lets you save a working ratio as a named preset. Find the right combination once, and you won't need to re-test it on the next project. Note that Monport's own M-Design Hub is built for the MEGA CO2 series.
Frequency Settings for Fiber Lasers
Frequency (measured in kHz) is unique to fiber lasers, and it has a bigger effect on color than most people expect. Lower frequencies tend to produce darker, matte marks on stainless steel. Higher frequencies shift things toward lighter grays, and sometimes color effects on certain alloys.
If your laser cutting and engraving software supports frequency sweep testing — running a small grid of samples at different frequency values — use it. It's the fastest way to land on the exact tone a project calls for.
Camera Alignment and Batch Fill
Camera alignment lets you place your design directly onto a live preview of the material, instead of guessing where the origin point sits. That matters most for repeat production — nameplates, awards, a batch of identical tags.
Pair it with batch or array fill tools, and a slow one-at-a-time process turns into an actual workflow. That's the difference between a hobby project and running a small engraving business.

Step-by-Step: How to Mark Metal With a Laser
- Clean the surface. Wipe the metal with isopropyl alcohol and let it dry fully. Oils and fingerprints cause uneven marking.
- Load your design into your laser cutting and engraving software. Vector files (SVG, DXF) engrave cleaner text and line work than raster images.
- Start from a material preset. If your software has a stainless steel or aluminum preset, use it as a baseline instead of guessing.
- Run a small test grid. Mark a 3x3 or 4x4 grid of squares at different power/speed/frequency combinations on a scrap piece. Five minutes here saves a lot more time later.
- Save your best result as a named preset, tied to that specific metal and machine.
- Align with the camera preview, if your machine has one, before firing.
- Run the final job, then check the mark under good lighting before calling it done.
The sequence is the same whether you're working with a dedicated fiber laser like the Monport GM Series Fiber Laser for direct laser metal marking, or a CO2 machine like the Monport MEGAS 70W with Monport Laser Marking Spray as an intermediary layer.

Choosing the Right Machine for Laser Metal Marking
Not every laser handles metal the same way. Here's how the two common approaches compare:
| Feature | Fiber Laser (direct metal marking) | CO2 Laser + Marking Spray |
| Best for | Stainless steel, aluminum, titanium, brass | Aluminum, stainless steel, brass (with spray coating) |
| Mark type | Annealed color, engraved, or deep-etched | Surface-bonded black mark |
| Speed for production | Faster for repeat metal jobs | Requires spray application time |
| Software needs | Frequency + power/speed control | Power/speed control, no frequency setting |
| Typical machines | Monport GA Series MOPA Fiber Laser, Monport GM Series Fiber Laser | Monport MEGAS 70W CO2 Laser with Monport Laser Marking Spray |
| Good fit for | Jewelry, tools, industrial parts, deep engraving | Makers already running a CO2 machine who want to add metal projects occasionally |
If metal marking is going to be a regular part of your product line, a dedicated fiber laser such as the Monport GA Series MOPA Fiber Laser paired with capable laser cutting and engraving software gives you more consistent results and a wider range of finishes.
Already own a CO2 machine like the Monport MEGAS 70W? Monport Laser Marking Spray is a practical way to add metal marking without buying a second machine. You can browse the full lineup of Monport fiber laser engravers — GA, GM, and GQ Series — to compare power options for your project volume.

Common Mistakes to Avoid When Marking Metal With a Laser
- Skipping the test grid. Jumping straight to the final piece with untested settings is the single most common cause of failed laser metal marking jobs.
- Using raster images for text. Small text stays cleaner as vector paths than as a converted image.
- Ignoring focus height. Even a millimeter off can noticeably soften a mark on metal, since the beam needs to be precisely concentrated at the surface.
- Skipping surface prep. Dust, oil, or fingerprints between the laser and the metal cause patchy, inconsistent marking.
- Running outdated software. Monport periodically updates presets and calibration in M-Design Hub, and LightBurn does the same for its users. Checking for updates before a big batch job takes five minutes and can save the whole run.
Frequently Asked Questions
Do I need a fiber laser for laser metal marking, or can a CO2 laser do it too?
A fiber laser — the Monport GA Series or Monport GM Series, for example — is the more direct tool, since it's built to interact with metallic surfaces. A CO2 laser like the Monport MEGAS 70W can mark metal too, but only with a coating like Monport Laser Marking Spray, since CO2 wavelengths don't absorb into bare metal the way fiber wavelengths do.
What laser cutting and engraving software works best for metal projects?
LightBurn is the go-to choice for metal marking, mainly for its frequency control and camera alignment tools, and it's the software fiber laser users will rely on. Monport's own M-Design Hub is designed for the MEGA CO2 series rather than fiber lasers. If you're running a GA, GM, or GQ Series fiber laser, LightBurn is the software you'll want to be set up in.
Why does my metal marking look gray instead of black?
Almost always a power, speed, or frequency mismatch for that metal. Run a small test grid across a few frequency values — frequency affects tone more than most beginners expect.
Can I mark colored or coated metals?
Yes. Anodized aluminum, for instance, marks differently than bare aluminum, since the laser reacts with the coating layer rather than the raw metal underneath. Test on the same coated material you'll use for the final piece.
How do I keep settings consistent across a batch of the same product?
Save your tested power, speed, and frequency combination as a named preset. Use camera alignment or a fixed jig to keep material placement consistent piece to piece.
Key Takeaways
- Laser metal marking quality depends more on software settings than most people expect — power, speed, and frequency all interact.
- Always run a small test grid before committing to a final piece.
- Fiber lasers, like the Monport GA Series and Monport GM Series, mark metal directly. CO2 lasers like the Monport MEGAS 70W need Monport Laser Marking Spray to get similar results.
- Reliable laser cutting and engraving software with camera alignment and preset saving makes repeat production far more consistent.
- Clean surfaces, correct focus height, and vector-based designs all noticeably improve mark quality.
Ready to Start Marking Metal Like a Pro?
Whether you're eyeing the precision of the Monport GA Series MOPA Fiber Laser or want to add metal projects to your existing Monport MEGAS 70W setup, the right machine makes every step in this guide easier to execute.
Use code BESTMP10 at checkout for 8% off your next Monport laser engraver — a solid way to upgrade your setup before your next batch run.