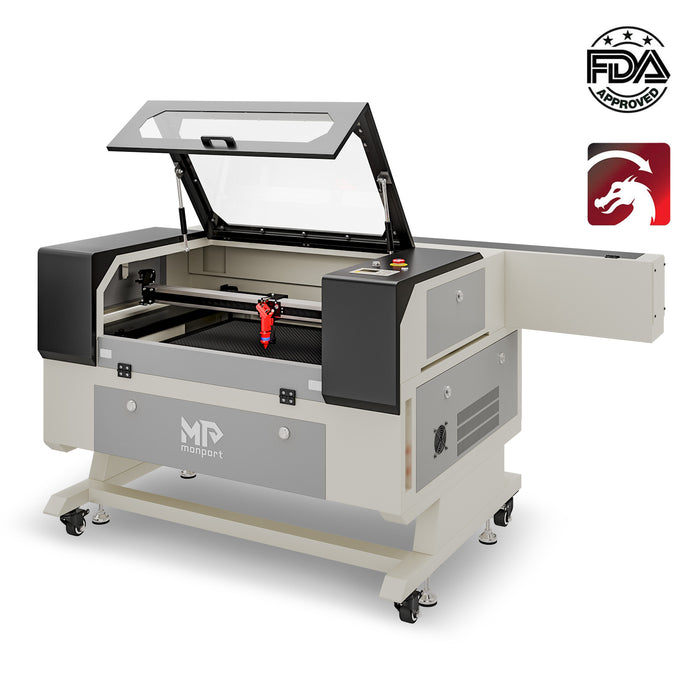
Creating a laser engraved t shirt allows you to design personalized, professional-quality apparel with precision. Using the Monport 100W CO₂ Laser Engraver & Cutter, you can achieve clean, detailed vinyl prints and unique designs on fabric. This guide walks you through how to laser engrave t shirts step by step while exploring the features that make Monport machines ideal for this task.
Introducing Monport's 100W CO2 Laser Engraver & Cutter
Introducing Monport 100W CO₂ Laser Engraver & Cutter
The Monport 100W CO₂ Laser Engraver & Cutter is perfect for laser engraving t shirts and other fabric projects. Key features include:
-
Large Work Area: 28" x 20" bed for larger designs
-
Four-Way Pass-Through: Handles oversized workpieces
-
Stable Work Surface: Metal honeycomb board with aluminum panel
-
Software Compatibility: Supports RDWorks, LightBurn, Windows, and Mac
-
Versatile Applications: Engraves wood, glass, acrylic, leather, and fabric
Step 1: Design your T-Shirt

Start by creating a custom design using graphic software or pre-made templates. Consider the size and placement for your laser engraved t shirt.
Step 2: Prepare the Vinyl
Once you have your design ready, it's time to prepare the vinyl sheet. Choose a heat transfer vinyl (HTV) that suits your design and desired color. Remember to mirror your design before cutting the vinyl to ensure that it appears correctly on the t-shirt.
Step 3: Load the Vinyl into the Laser Engraver
Open the lid of the Monport 100W CO2 Laser Engraver & Cutter and carefully position the vinyl sheet on the work bed. Ensure that the vinyl is flat and smooth, without any wrinkles or creases. Close the lid securely to maintain a stable environment for the engraving process.
Step 4: Set the Engraving Parameters
Using the control software of the laser engraver, set the appropriate engraving parameters for vinyl printing. Adjust the power, speed, and resolution settings according to the specifications of your machine and the desired outcome. It's recommended to do a test run on a piece of scrap vinyl to ensure the settings are optimal.
Step 5: Start the Engraving Process

The Monport laser will cut through the vinyl according to your design, creating precise and detailed patterns for your laser engraved t shirt.
Step 6: Transfer the Design onto the T-Shirt

Carefully remove the vinyl sheet from the laser engraver and peel off the excess vinyl to reveal your design. Position the design on the desired area of the t-shirt, ensuring it is centered and aligned correctly. Apply heat and pressure using a heat press or an iron to transfer the design onto the fabric. Follow the instructions provided by the vinyl manufacturer for the recommended temperature and duration.
Step 7: Final Touches
-
Allow the vinyl to cool before removing the transfer sheet
-
Your laser engraved t shirt is now complete and ready to wear
Tips for Perfect Laser Engraved T Shirts
-
Always perform test runs for precise results
-
Use proper heat press settings to prevent vinyl distortion
-
Experiment with different HTV colors for enhanced visual effects
FAQs About Laser Engraved T Shirts
Q: Can any t-shirt be used for laser engraving?
A: Cotton or cotton-blend fabrics work best for vinyl-based laser engraved t shirts.
Q: Do I need a special laser for fabric engraving?
A: No, CO₂ lasers like the Monport 100W handle vinyl cutting and engraving on fabric safely.
Q: Can I wash a laser engraved t shirt?
A: Yes, but follow the HTV manufacturer’s washing instructions to preserve the design.
Q: What software is recommended for designing t-shirts?
A: LightBurn, CorelDRAW, and RDWorks are fully compatible with Monport laser machines.
Q: Is heat pressing necessary?
A: Yes, heat press or iron application ensures the vinyl adheres securely to the t-shirt.
Conclusion
Vinyl printing t-shirts using a laser engraver offers a world of possibilities for creating unique and customized designs. The Monport 100W CO2 Laser Engraver & Cutter provides the precision and performance required for high-quality prints on fabric. Ensure you visit Monport's website to explore their range of laser engraving machines and take advantage of the best deals available. With their laser engraving tips and superior equipment, you'll be well on your way to creating stunning vinyl-printed t-shirts that will impress and delight.


