The world of CO2 laser engraving is brimming with creative possibilities arising two questions for beginners, how to use a Monport CO2 laser engraver and the question "how do I connect my OMTech to my computer?". From personalized gifts to stunning home decor, these versatile laser cutter for sale machines can transform your ideas into reality. But for beginners, navigating the setup and operation process can be daunting. With the right guidance and practice, however, you can quickly master the art of laser etching and create unique, high-quality pieces with ease. This guide will equip you with the knowledge on how to use a Monport Laser Engraver and answer the question "how do I connect my OMTech to my computer?", empowering you to embark on your creative journey with your engraving machine for sale.
Monport 40W Pro Lightburn-Supported (12" X 8") CO2 Laser Engraver & Cutter with Air Assist - 40W Pro
How do I connect my OMTech to my computer?
While specific instructions might vary depending on your OMTech laser cutter for sale model, here's a general roadmap for connecting it to your computer:
- Identify Your Connection Type: Most OMTech models utilize a USB connection. Locate the USB port on your Monport Laser Engraver or other engraving machine for sale and ensure you have the compatible cable.
- Install Drivers (if applicable): Some OMTech models might require specific drivers for your computer to recognize the laser engraver. Check your user manual or the manufacturer's website for download links and installation instructions.
- Software Selection: OMTech engravers often come bundled with laser cutting software. Alternatively, popular options like LightBurn offer broad compatibility with various CO2 laser cutters, including OMTech models.
- Software Installation: Follow the on-screen instructions to install your chosen laser cutting software.
-
Making the Connection:
Once the software is installed, connect the USB cable from your laser cutter for sale or laser engraver to your computer's USB port. Launch the software and look for options to connect or establish communication with the Monport Laser Engraver. This might involve selecting the correct COM port or device from a dropdown menu within the software. Once connected, you can begin designing and sending your laser engraving projects to the engraving machine for sale.
- Testing the Connection: Many software programs offer a test firing function. This allows you to send a simple laser pulse to verify successful communication between your computer and the laser engraver.
Important Safety Note: Always refer to your specific OMTech model's user manual for detailed connection instructions and safety protocols. Never activate the laser without proper eye protection and ensuring the work area is free of flammable materials.
How to use your Monport Laser Engraver
Monport CO2 laser engravers are known for their user-friendly approach. Here's a basic guide to get you started:

1. Power Up and Familiarization: Turn on your Monport laser engraver and become acquainted with its physical layout. Identify the power button, emergency stop button, working area, and ventilation system.

2. Software Compatibility: Many Monport models boast LightBurn software compatibility. LightBurn offers a powerful and intuitive interface for creating designs, controlling laser settings, and monitoring your projects. Download and install LightBurn if you plan to use it.

3. Material Selection and Placement: Choose your engraving material, ensuring it's compatible with CO2 laser cutting. Clean and secure your material onto the laser engraver's workbed.

4. Design and Settings: Prepare your design using LightBurn or other compatible software. LightBurn allows you to import designs, adjust laser power, speed, and other settings based on your material and desired outcome.

5. Test Firing and Adjustments: Before engraving your entire project, perform a test cut on a scrap piece of your material to ensure optimal settings. Refine your settings as needed based on the test results.

6. Engraving Time! Once you're confident with your settings, initiate the engraving process. Monitor the progress through the observation window while maintaining proper ventilation.
Monport Motherboard Installation Made Easy: A Video Guide
Equipping your Laser Engraver with a new motherboard can unlock enhanced features and functionalities. If you're a Monport Laser Engraver user considering a motherboard upgrade, this section is for you! This guide applies to any engraving machine for sale that supports similar upgrades.
We've included a helpful video tutorial demonstrating the installation process for the Monport 40W desktop CO2 laser engraver's GRBL motherboard. This visual guide provides a clear step-by-step walkthrough, making the upgrade process a breeze and helping you get the most out of your laser cutter for sale.
In the video, you'll witness:
- The necessary tools and components required for the motherboard installation.
- A detailed breakdown of the disassembly process, carefully removing the existing motherboard and related components.
- A close-up look at the installation of the new GRBL motherboard, ensuring proper connection of all wires and components.
- Valuable tips and pointers throughout the process to guide you through the upgrade smoothly.
By following along with this comprehensive video tutorial, you can confidently install your new Monport GRBL motherboard and experience the performance and feature enhancements it offers. Remember, if you encounter any difficulties during the installation process, consult your Monport user manual or reach out to their customer support for assistance. With the upgraded laser cutter for sale, you'll unlock even more creative potential and efficiency in your laser engraving projects.
Important Safety Precautions
- Always wear laser safety glasses when operating your CO2 laser engraver.
- Never leave the laser engraver unattended while in operation.
- Ensure proper ventilation to remove fumes and dust particles created during the engraving process.
- Keep flammable materials away from the working area.
Unlocking Your Creative Potential

Once connected and comfortable with the software, you're ready to explore the vast possibilities of your CO2 laser engraver! Here are some additional tips:
- Consult the User Manual: Your laser engraver's user manual is an invaluable resource. It provides detailed instructions for operation, safety protocols, and troubleshooting tips.
- Start with Test Cuts: Before diving into your final project, experiment with scrap material to get a feel for the laser settings and how they impact different materials.
- Explore Online Resources: The laser engraving community is vast and supportive. Utilize online forums, tutorials, and project ideas to expand your knowledge and creativity.
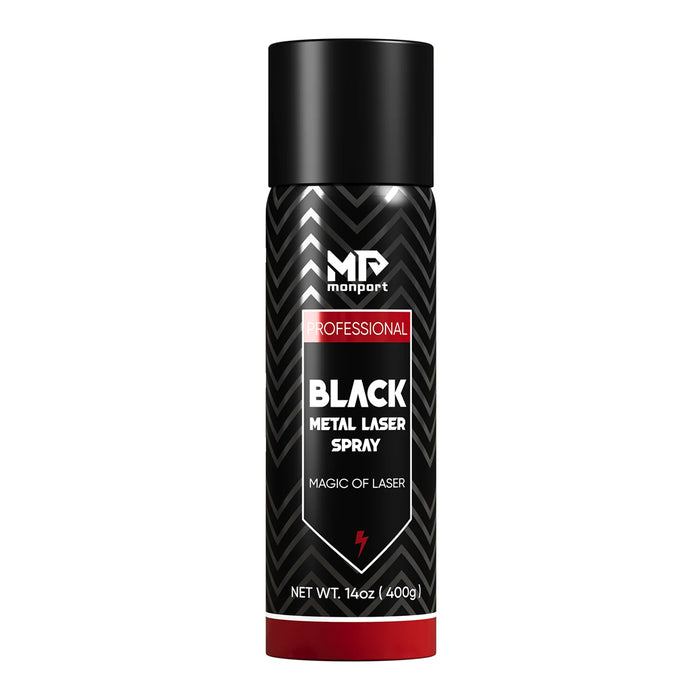
Enhance Your Metal Engraving with Monport Black Laser Marking Spray

Monport black laser marking spray offers a reliable and easy-to-use solution for creating high-contrast, permanent marks on various metals. Compatible with CO2 laser engraving machines, this black laser marking spray provides an excellent finish on materials like aluminum, stainless steel, and brass. With its advanced formula, the spray ensures even coverage and deep penetration into the surface, producing durable marks that are resistant to heat and wear. The black laser marking spray dries quickly, allowing you to complete your projects efficiently. After engraving, simply rinse off the spray to reveal sharp, crisp markings. Monport’s black laser marking spray is the perfect tool for personalizing products, customizing metal items, and creating high-quality industrial markings with ease.
Conclusion: Mastering Your Craft, One Engraving at a Time
The world of CO2 laser engraving awaits your creative spark. With the knowledge you've gained from this guide, you're well on your way to confidently connecting, operating, and getting the most out of your OMTech or Monport laser cutter for sale. Remember, the journey to laser engraving mastery is filled with exploration and discovery. Embrace online resources, experiment with different materials and settings, and don't be afraid to start simple. As you grow in skill and creativity, your possibilities for unique, personalized creations will be endless.
Ready to transform your ideas into stunning reality? Head to your laser engraver, fire up your chosen software, and let your creativity take flight! You might be surprised by the incredible projects you can create with your newfound CO2 laser engraving skills using your Monport Laser Engraver or other engraving machine for sale. Happy engraving!


