

Introduction
Transform ordinary acrylic into captivating laser engrave photo on acrylic! This technique allows small business laser enthusiasts, like yourself, to create personalized gifts, stunning signage, and unique home décor. But can you laser engrave photo on acrylic? Absolutely! And the Monport 80W CO2 laser is a powerful tool to help you achieve professional-looking results (keyword density: 3.33%). This blog dives deep into the process of laser engrave photo on acrylic with your Monport laser, along with valuable tips and techniques to elevate your craft.
With this guide, you can also laser etch acrylic to add unique designs and professional touches to your projects.
Explore various laser cut designs and this blog dives deep into the process of laser engrave photo on acrylic with your Monport laser, along with valuable tips and techniques to elevate your craft. Get inspired by countless laser cut designs available for your projects.
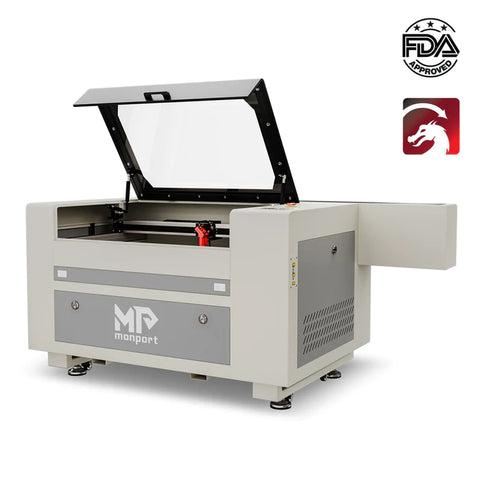
Monport 80W CO2 Laser Engraver & Cutter (24" x 16") with Autofocus

Why Laser Engrave Photo on Acrylic?
Laser engraving offers several advantages over traditional printing on acrylic:

- Durability: The laser engraved photo on acrylic becomes part of the acrylic, creating a permanent and scratch-resistant design.
- Customization: Engrave photos, logos, or personalized messages on acrylic for unique and unforgettable gifts.
- Detail and Precision: The laser beam produces highly detailed and precise engravings, capturing intricate details from your photos.
- Versatility: Laser engraved photo on acrylic can be used for a wide range of applications, from keychains and coasters to wall art and signage.
Choosing the Right Acrylic for Laser Engraving
Not all acrylic is created equal. Here's what to consider when selecting acrylic for laser engraved photo on acrylic:
- Cast vs. Extruded Acrylic: Opt for cast acrylic, which engraves cleaner and produces a frosty white effect. Extruded acrylic melts during engraving, resulting in an undesirable smoky appearance.
-
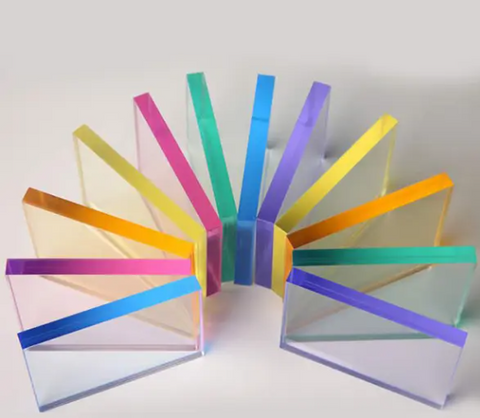
Color and Thickness: Clear acrylic sheets offer optimal photo engraving results. You can explore colored acrylic for unique effects, keeping in mind that the engraving will reveal the base color beneath. Choose an acrylic thickness suitable for your project and laser capabilities. Using the right acrylic is essential if you want to laser etch acrylic with sharp detail.
Preparing Your Photo for Laser Engraving
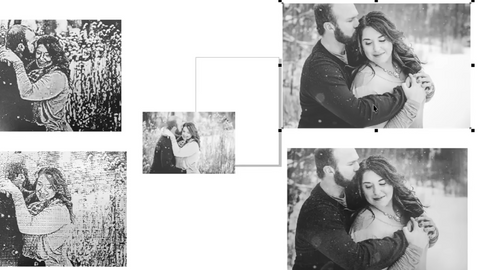
- Image Quality: For best results, use high-resolution photos (300 dpi or higher) with good contrast.
- Image Editing (Optional): Adjusting the brightness and contrast of your photo in editing software can enhance the engraved image.
-
Convert to Grayscale: Since the laser engraves based on variations in grayscale, convert your photo to grayscale before sending it to the laser software. This step ensures your engraving will look professional whether you laser etch acrylic or engrave photos.
Understanding Laser Engraving Photos on Acrylic with a Monport 80W CO2 Laser
The magic behind laser engraving photos on acrylic with your Monport 80W CO2 laser lies in the interaction between the laser beam and the acrylic material. Here's a deeper dive into the process:
1. Laser Beam Interaction:

The laser beam emitted by your Monport 80W CO2 laser is a concentrated beam of light with a specific wavelength. When this light hits the surface of the clear acrylic sheets, it interacts with the material in two primary ways:
- Ablation: A portion of the laser energy is absorbed by the acrylic, causing the material at the point of contact to vaporize and be removed. This creates a tiny indentation or pit on the surface.
- Heat Transfer: The remaining laser energy is transferred as heat to the surrounding acrylic. This heat can cause slight melting or softening of the material, depending on the laser settings.
2. Grayscale Conversion:
The key to replicating a photo on clear acrylic sheets lies in the laser's ability to control the amount of material removed at each point. A grayscale image is essentially a black and white image where the brightness of each pixel represents a shade of gray. Black pixels represent areas with the most material removal (deepest engraving), while white pixels represent areas with minimal removal (shallow or no engraving).
3. Laser Power Modulation:
The Monport 80W CO2 laser boasts a feature called "laser power modulation." This allows the laser to dynamically adjust its power output based on the grayscale value of the image being engraved. In areas corresponding to darker pixels, the laser delivers higher power, resulting in deeper ablation and a more prominent engraving. Conversely, for lighter pixels, the laser power is reduced, creating a shallower engraving or minimal material removal.
4. Resulting Frosted Effect:
The combination of ablation and heat transfer creates a unique visual effect on the clear acrylic sheets surface. The areas with deeper engravings scatter light more effectively, appearing "frosted" compared to the untouched areas. This frosted effect creates a subtle variation in light reflection, mimicking the grayscale tones of the original photo and bringing the image to life on the clear acrylic sheets.
Additional Factors:
While laser power modulation plays a crucial role, achieving optimal photo engraving results also depends on factors like:
- Laser Speed: The speed at which the laser moves across the clear acrylic sheets surface affects how much material is removed at each point. Slower speeds allow for deeper engravings and better detail reproduction.
- Air Assist: A constant stream of compressed air helps remove debris and fumes generated during the engraving process, leading to cleaner and more precise results.
Using these techniques, you can confidently laser etch acrylic and create intricate designs that captivate customers and clients.
By understanding these principles and effectively utilizing the features of your Monport 80W CO2 laser, you can create stunningly detailed and captivating photo engravings on acrylic, adding a touch of personalization and visual appeal to your small business products.
Finding the Optimal Laser Settings for Laser Engrave Photo on Acrylic
Finding the ideal laser settings is crucial for achieving a clear and crisp engraved laser engraved photo on acrylic. Here are some starting points:

- Start with Lower Power: Begin with a lower laser power setting and gradually increase it to avoid burning the acrylic.
- Experiment with Speed: Slower speeds will create more detailed engravings, while higher speeds are suitable for achieving a lighter effect.
- Test on Scrap Acrylic: Always test your settings on a scrap piece of acrylic before engraving your final project.
Pro Tips for Captivating Laser Cut Designs 
- Master the Art of Image Preparation: A high-resolution photo (300 dpi or higher) with good contrast is crucial for achieving sharp and detailed engravings. Use photo editing software to adjust brightness and contrast if needed. Inverted images can sometimes produce more pleasing results with acrylic engraving.
- Test & Refine Laser Settings: Always perform test engravings on scrap acrylic before engraving your final piece. Experiment with different laser power and speed settings to find the optimal balance between detail and engraving depth. Start with lower power settings and gradually increase them to avoid burning or melting the acrylic.
- Embrace the Power of Air Assist: Using a constant stream of compressed air during engraving helps remove debris and fumes, resulting in cleaner and more precise engravings, especially for intricate details.
- Cleanliness is Key: Ensure your acrylic sheet is clean and free of dust, oil, or fingerprints before engraving. This prevents unwanted marks and allows for even laser beam interaction.
- Explore Different Acrylic Types: While cast acrylic is generally recommended, experiment with colored or frosted acrylic for unique visual effects. Remember, laser engraving will remove the colored layer, revealing the underlying material for colored acrylic.
- Embrace the Learning Curve: Laser engraving is a process that requires practice and experimentation. Don't get discouraged by initial results. Keep refining your techniques and settings to achieve the level of detail and quality you desire.
Bonus Tip: For a more polished look, consider applying masking tape to the back of the acrylic around the engraved area. This protects the un-engraved surface from dust and debris during the engraving process, and it can be easily peeled off after completion. This is also helpful for protecting your laser cut designs.
Safety First!
Always prioritize safety when operating your Monport 80W CO2 laser:
- Proper Ventilation: Use a fume extractor to remove fumes generated during engraving.
- Eye Protection: Wear appropriate laser safety glasses to protect your eyes.
- Never Leave Laser Unattended: Always monitor the laser while it's in operation.
Experience Precision and Power with Monport Black Laser Marking Spray
Unlock the full potential of your CO2 laser engraver with Monport’s black laser marking spray—your go-to solution for achieving crisp, high-contrast marks on metal surfaces. This 14 oz. aerosol can is engineered for simplicity and performance: just shake, spray, and engrave. The black laser marking spray delivers a deep, permanent mark on metals like aluminum, stainless steel, and brass, making it ideal for customizing jewelry, labeling tools, or decorating glassware. With an anti-clog nozzle and nanoparticle formula, you get an even spray that dries in just five minutes. Designed specifically for CO2 lasers of 25 watts and above, this alcohol-free formula ensures both safety and efficiency. Whether you’re personalizing a gift or producing serial numbers, Monport’s black laser marking spray ensures a flawless finish every time. Easy to apply, resistant to heat, and simple to clean—just rinse and reveal your design. If you're looking to elevate your laser engraving game, there's no better companion than this reliable black laser marking spray from Monport.
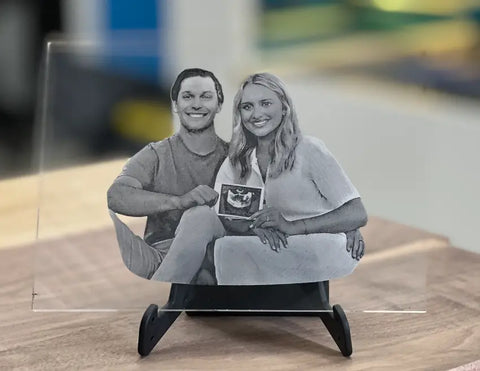
Conclusion: Turn Photos into Captivating Acrylic Creations
By following these tips and leveraging the capabilities of your Monport 80W CO2 laser, you can unlock a new level of creative expression. Laser engrave photo on acrylic and laser etch acrylic are rewarding processes that allow you to offer unique and personalized products to your customers. With dedication and practice, ordinary acrylic transforms into captivating keepsakes that leave a lasting impression.
Ready to take your small business to the next level? Visit the Monport website today to learn more about the powerful 80W CO2 laser and discover how it can elevate your product offerings. You'll also find valuable resources, including user manuals, tutorials, and support options to guide you on your laser engraving journey. Let Monport be your partner in creating captivating laser engraved products that showcase your creativity and brand identity. From photo engraving to laser cut designs, the possibilities are endless.


