How to clean acrylic after laser engraving? Transforming ordinary acrylic and wood into stunningly engraved masterpieces is what laser engraving is all about. While the laser engraving process itself delivers remarkable results, the final step of cleaning plays a crucial role in showcasing the true beauty of your creation. This comprehensive guide explores the best practices for how to clean acrylic after laser engraving, and delves into the exciting world of DIY wood laser engravers. We'll also introduce the Monport ONYX 55W CO2 Laser Engraver – a powerful tool that empowers you to bring your creative visions to life.
MONPORT ONYX 55W Desktop CO2 Laser Engraver with Autofocus
How To Clean Acrylic After Laser Engraving: A Step-by-Step Guide
Once you've completed your laser engraving project on acrylic, proper cleaning ensures a flawless finish. HereOnce you've completed your laser engraving project on acrylic, proper cleaning ensures a flawless finish. Here's how to achieve professional-looking results:

-
Allow the Acrylic to Cool: Let the engraved acrylic cool down completely before handling it. This prevents accidental smudging or warping from the laser engraving process.
-
Remove Debris: Use a soft microfiber cloth or compressed air to gently remove any loose dust or debris left behind by the laser engraving process. Avoid using paper towels or abrasive cloths that can scratch the acrylic surface.
-
Cleaning with Water: For light cleaning, use a damp microfiber cloth with clean water. Wring out the cloth thoroughly to avoid excess moisture. Wipe the acrylic surface gently in a circular motion to remove any laser engraving residue.
-
Stubborn Residue: If you encounter stubborn smoke residue or adhesive film from the laser engraving, a mild soap solution can be used. Mix a few drops of mild dish soap with lukewarm water. Dampen your microfiber cloth in the solution, wring it out thoroughly, and gently wipe the engraved surface. Avoid using harsh chemicals or abrasive cleaners as they can damage the acrylic.
-
Drying: After cleaning with water or a mild soap solution, use a clean, dry microfiber cloth to thoroughly dry the acrylic surface. Leaving any moisture droplets can cause watermarks that may obscure the laser engraving.
DIY Wood Laser Engravers: Unlocking Your Creativity
While pre-built laser engravers offer convenience, building your own DIY wood laser engraver can be a rewarding project for hobbyists with technical expertise. Here's a brief overview of the DIY wood laser engraver concept:
- Planning and Design: The initial phase involves meticulous planning and design. You'll need to research components, source materials, and create detailed schematics for the laser assembly, frame structure, and control system.
- Safety First: Safety is paramount! Laser beams pose a significant risk of eye damage. Ensure you have a comprehensive understanding of laser safety protocols before embarking on a DIY laser engraver project. Invest in proper laser safety glasses and adhere to all safety precautions.
- Technical Expertise: Building a DIY wood laser engraver requires a strong foundation in electronics, mechanics, and laser safety protocols. Carefully source compatible components and meticulously assemble the machine, ensuring precise alignment of the laser module and other critical components.
- Software Integration: Software plays a crucial role in controlling the laser engraver. You'll need to choose compatible software and configure it to work seamlessly with your DIY machine lens at regular intervals. Consult your user manual for specific cleaning instructions to avoid damaging the lens coating.
- Maintain Mirror Alignment: While most DIY wood laser engravers come pre-calibrated, it's essential to check the mirrors periodically for proper alignment. Misaligned mirrors can affect engraving quality and even damage the laser beam path. Refer to your user manual for proper mirror alignment procedures.
- Keep Your Work Area Clean: Maintain a clean workspace around your DIY wood laser engraver to prevent dust and debris from entering the machine and potentially impacting performance.
DIY Wood Laser Engraver Project Ideas: Spark Your Creativity
The possibilities are endless when it comes to crafting with a DIY wood laser engraver. Here are some inspirational ideas to ignite your creativity:
g
- Personalized Home Decor: Create custom signs, coasters, wall hangings, or photo frames with engraved designs, family names, or inspirational quotes to add a personal touch to your living space.

- Unique Kitchen Utensils: Engrave custom designs or monograms onto wooden spoons, rolling pins, or cutting boards for a touch of personalization and a conversation starter in the kitchen.

- Gifts with a Touch of Heart: Engrave names, dates, or special messages onto wooden keychains, jewelry boxes, or picture frames for heartfelt and unique gifts for any occasion.

- Crafting Supplies: Engrave custom designs onto wooden stencils or wooden stamps to create unique patterns on fabrics, cards, or other craft projects.

- Pet Accessories: Personalize pet tags or create engraved food bowls for your furry companions.
Effortless Laser Marking with Monport Black Laser Marking Spray
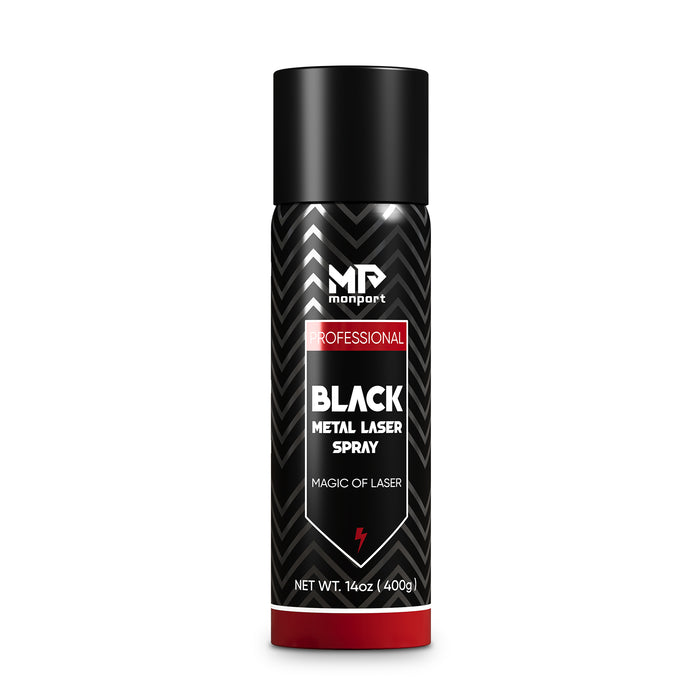
Looking to elevate your laser engraving projects? Monport Black Laser Marking Spray is the solution you’ve been waiting for. This high-performance aerosol spray is designed for use with CO2 laser engraving machines, ensuring easy and precise results with every application. Whether you're personalizing jewelry, customizing glassware, or serializing tools, this spray provides you with high-contrast, permanent marks that stand out.
The Benefits of Using Black Laser Marking Spray
-
Compatible with CO2 Laser Engraving Machines Designed for use with CO2 laser engraving machines of 25 watts and above, Monport Black Laser Marking Spray is the ideal companion for your engraving needs. It transforms your metal surfaces into highly legible, permanent black marks after laser engraving, making it perfect for a wide range of applications from metalwork to custom art pieces.
-
Permanent, High-Contrast Marks When you apply Monport Black Laser Marking Spray, the result is a high-contrast, dark black mark on your metal surface that is permanent and durable. This spray works on various metals, including aluminum, stainless steel, and brass. The fine-grained formula ensures deep penetration into the metal, producing heat-resistant markings that will last for years, even under challenging conditions.
-
Even and Powerful Application With the advanced spray technology in Monport Black Laser Marking Spray, you can achieve a smooth, even application every time. The 14 oz can features an anti-clog nozzle that guarantees no blockages, making the spray process both easy and efficient. The nanoparticle formula delivers more coverage with a thinner coating, which results in a professional-quality finish for all your metal marking projects.
-
Easy to Use and Quick Drying Using Monport Black Laser Marking Spray couldn’t be simpler. Just shake the can for 2 minutes, spray from a distance of 6 to 8 inches, and let the surface dry for 5 minutes. Once it’s dry, you’re ready to engrave, saving you valuable time. After engraving, rinse and wipe away the residue to reveal your crisp, dark black markings without any fuss.
-
Effortless Cleanup and Maintenance After marking your metal pieces, simply rinse and wipe the surface to reveal your high-contrast engraving. The black laser marking spray ensures there is no residue left behind, so your workpieces remain clean and ready for immediate use. The easy cleanup means that you can maintain a smooth and efficient workflow, whether you’re working on a small DIY project or a larger-scale production.
Why Choose Monport Black Laser Marking Spray?
Monport’s Black Laser Marking Spray is a game-changer for anyone looking to create durable, precise, and high-quality laser marks on metal surfaces. Its compatibility with CO2 lasers, combined with its easy application and cleanup, makes it an indispensable tool for professionals and hobbyists alike. With Monport Black Laser Marking Spray, you can be confident that your metal engraving projects will have permanent, high-contrast results every time.
Add this versatile spray to your toolkit today and experience effortless laser marking like never before!
The Future of DIY Creation: Where Technology Meets Artistry
DIY wood laser engravers represent a transformative force in the world of crafting. This technology empowers individuals to unleash their creativity and personalize everyday objects, transforming them into unique and cherished pieces. With the Monport ONYX 55W CO2 Laser Engraver as your companion, you can become part of this exciting creative revolution. This versatile machine offers exceptional performance, user-friendly features, and the ability to work with various materials, making it the perfect tool to bring your artistic vision to life.
Ready to Dive into the World of Laser Engraving?
Visit the Monport website today to explore the Monport ONYX 55W CO2 Laser Engraver and discover a world of possibilities for your DIY wood engraving projects. We offer comprehensive resources, including video tutorials and user manuals, to guide you on your engraving journey.


