Laser engraving on acrylic offers a fantastic way to personalize and customize a vast array of items with lazer machines. From creating stunning awards and signage to crafting unique keychains and ornaments, the possibilities are virtually endless with etching acrylic.This guide delves into the world of how to laser etch acrylic equipping you with the essential knowledge and practical tips and tricks to embark on this exciting journey with lazer machines, specifically highlighting the capabilities of the Monport 40w CO2 Laser for engraving acrylic projects.
One of the most exciting aspects of working with lasered acrylic is its perfect compatibility with how to laser etch acrylic technology. This opens a doorway to a vast world of creative possibilities, from personalized awards and signage to stunning LED light displays and unique ornaments using laser engraving acrylic techniques. Many crafters especially love engraving acrylic for decorative and commercial projects alike.
Read More : Tricks to Engrave Acrylic Laser Perfectly
Understanding Acrylic for Laser Engraving
Acrylic, also known as Plexiglass, is one of the most laser engraving acrylic-friendly materials. It’s lightweight, shatter-resistant, and available in various colors. The smooth surface ensures a crisp, frosted-white contrast when engraving acrylic with a CO₂ laser.
Types of Acrylic
-
Cast Acrylic: Poured into molds, it offers high clarity, even thickness, and excellent contrast for laser engraving on acrylic. Ideal for beginners.
-
Extruded Acrylic: Formed by extrusion, it is less uniform in thickness and requires testing for optimal laser etching acrylic results.
Recommendation: Cast acrylic is preferred for clear, crisp engraved acrylic outcomes.
Why Choose Acrylic for Laser Engraving
Acrylic, or Plexiglass, is one of the most laser engraved acrylic-friendly materials. It’s lightweight, shatter-resistant, and available in various colors. Its smooth surface ensures clean, frosted-white engraving results when processed with a CO₂ laser, making it ideal for both artistic and commercial use.

Understanding Acrylic for Laser Engraving
Not all acrylics are created equal. Here's a crucial distinction to remember:

-
Cast Acrylic: Poured into molds, cast acrylic boasts exceptional clarity and even thickness. During this process, various colors can be incorporated, making it available in a vibrant palette. When how to laser etch acrylic is applied to cast acrylic, it produces a beautiful frosted white contrast against the clear base, perfect for achieving high-quality engravings.
-
Extruded Acrylic: Produced by forcing molten acrylic through a shaped die, extruded acrylic comes in long sheets. While similar in appearance to cast acrylic, its molecular structure affects how it reacts to laser engraving acrylic processes. Achieving a clear contrast often requires adjustments and experimentation with laser settings when engraving acrylic sheets.
Recommendation: For optimal results, especially for beginners, cast acrylic is the preferred choice due to its superior contrast and ease of laser engraving acrylic.
Choosing the Right Acrylic Laser Engraver
Two main types of lasers are used for acrylic:
-
CO₂ Laser Engravers: Best for laser engraving on acrylic and laser etching plexiglass, providing smooth and precise results.
-
Diode Lasers: Limited for clear acrylic but can work with masking techniques.
Monport 40W CO₂ Laser for Acrylic
-
High Precision: Engraving accuracy up to 0.01 inches
-
Fast Speed: 350 mm/sec for detailed designs
-
Red Dot Guidance: Ensures perfect alignment for laser engraving acrylic projects
-
Dual Work Bed: Flexible setup for small and large pieces
-
Built-in Ventilation: Keeps workspace clean and safe
Step-by-Step Guide: How to Laser Engrave Acrylic
-
Select the Right Material: Cast acrylic sheets (minimum 3mm) for best results.
-
Remove Protective Film: Prevents melting or surface distortion during laser etching acrylic.
-
Masking for Clear Acrylic: Optional for diode lasers to prevent transparency issues.
-
Design Your Artwork: Use software like LightBurn or CorelDRAW.
-
Adjust Laser Settings:
-
Power: Controls engraving depth
-
Speed: Affects precision and detail
-
Pulse Rate (PRF): Smooths the engraving surface
-
-
Test Run: Always try settings on scrap acrylic first.
-
Clean Engraved Surface: Use a soft cloth to remove residue.
Pro Tips:
-
Start with lower power and slower speed for finer details.
-
Adjust air assist for smoke removal.
-
Combine laser engraving on acrylic with other materials for multi-layered designs.
Applications of Laser Engraving Acrylic

- Awards and Plaques: Personalized awards and recognition plaques with high-quality laser engraved acrylic text, logos, or images.

- Signs and Decorative Pieces: Create eye-catching signage for businesses, offices, or even home décor with intricate designs and lettering.

- LED Light Displays: Combine the clarity of acrylic with laser-engraved patterns to create stunning and customizable LED light displays.

- Ornaments: Personalize ornaments for Christmas, holidays, or special occasions with laser-engraved names, dates, or messages.

- Wedding Invitations: Add a touch of elegance and personalization to your wedding invitations with laser-engraved details.

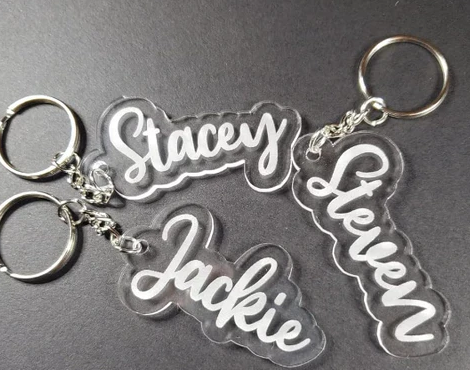
- Keychains: Design and create unique keychains with laser-engraved logos, names, or custom designs.
Achieve Precision and Durability with Monport Black Laser Marking Spray

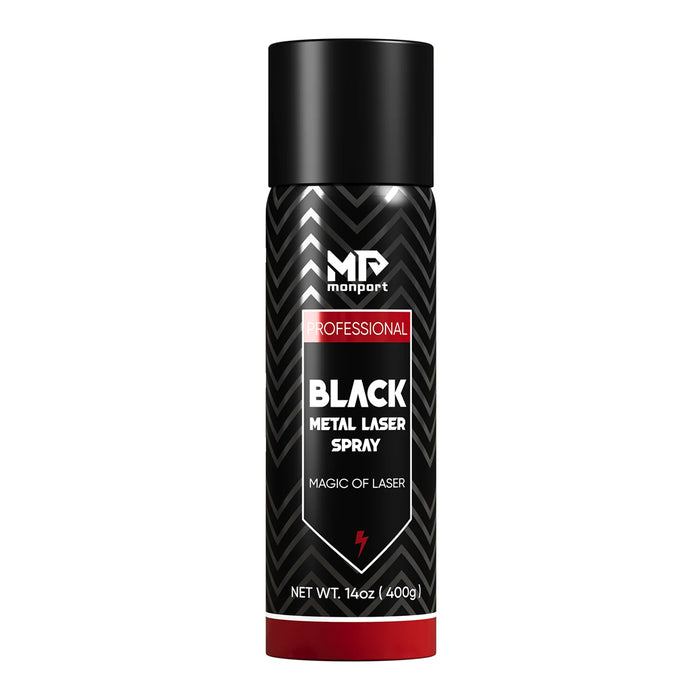
Monport black laser marking spray is the ultimate solution for achieving high-contrast, permanent black markings on metals like aluminum, stainless steel, and brass. Specifically designed for CO2 laser engraving machines of 25 watts and above, this black laser marking spray ensures deep penetration and long-lasting results. Its advanced anti-clog nozzle provides an even and smooth application, making it easy to achieve consistent, high-quality engravings. The quick-dry formula allows the black laser marking spray to dry in just five minutes, ensuring an efficient workflow. Once engraving is complete, simply rinse off the excess black laser marking spray to reveal sharp, crisp markings with no residue. Whether for customizing jewelry, personalizing glassware, or marking industrial tools, Monport black laser marking spray guarantees exceptional performance and durability.
How to Engrave Acrylic Laser: Essential Tips and Tricks for Beginners
Having explored the fundamentals of acrylic sheets and lazer machines choices, delve into these practical tips and tricks to elevate your acrylic laser engraving experience:
- Master the Art of Test Runs: Before embarking on your final project, always perform test runs on scrap acrylic pieces. This allows you to experiment with different laser settings and ensure you achieve the desired results without wasting valuable material.
-
Play with Power and Speed: These are the two most crucial settings that significantly impact the etching acrylic outcome.
- Power: Think of this as the laser's intensity. Higher power settings create deeper engravings, but excessive power can burn the acrylic.
- Speed: This controls how fast the laser beam moves across the material. Slower speeds result in finer details but take longer. Start with lower power and slower speeds, gradually increasing them based on your test results.
- Embrace the Learning Curve: Laser engraving, especially for beginners, involves a learning process. Be patient, experiment, and don't be discouraged by initial challenges. The more you practice, the better you'll understand the nuances of the process and achieve exceptional results.
-
Safety First: Laser engraving involves working with powerful equipment. Always prioritize safety by:
- Wearing appropriate eye protection specifically designed for the laser wavelength you're using.
- Working in a well-ventilated area to remove fumes produced during the engraving process.
- Following the manufacturer's instructions for safe operation and maintenance of your laser engraver.
Laser Engraving on Acrylic: Frequently Asked Questions (FAQs)
Delving into the exciting world of laser engraving on acrylic sheets often sparks numerous questions. This FAQ section aims to address some of the most common queries beginners encounter:
Materials and Preparation:
- Which type of acrylic is better for laser engraving, cast or extruded?
Cast acrylic is generally the preferred choice due to several factors:
- Superior Contrast: Cast acrylic offers a distinct white frosted effect in the engraved areas, providing a clear contrast against the transparent base.
- Consistent Material Distribution: The even distribution of material in cast acrylic ensures predictable engraving results.
- Wider Color Options: Cast acrylic boasts a wider range of vibrant colors to fuel your creative projects.
- What thickness of acrylic should I use?
A minimum thickness of 1/8 inch (3mm) is recommended for clear acrylic. This ensures the design has enough depth to stand out prominently. Thicker acrylic pieces can be used for specific applications, but they might require adjustments to laser settings for optimal engraving.
- Do I need to remove the protective layer on the acrylic sheet?
Yes, removing the protective layer is crucial before engraving. This layer is often present to prevent scratches during transportation and can melt during the process, distorting the design.
Laser and Engraving Process:
- Can I engrave clear acrylic with a diode laser?
While diode lasers don't directly engrave clear acrylic due to their wavelength, a workaround exists:
1. Apply a temporary masking layer using water-washable materials like paint or markers.
2. The laser will remove the masking material, revealing the engraved design on the underlying clear acrylic.
-
What are some essential laser settings to consider for acrylic engraving?
- Power: This determines the laser beam's strength and directly affects the engraving depth. Higher power settings result in deeper engravings.
- Speed: This controls how fast the laser moves across the material. Slower speeds create finer details but take longer.
- Pulse Rate (PRF): This refers to the number of laser pulses delivered per second. Higher PRFs can lead to smoother engravings but require adjustments in power to avoid burning the material.
General Tips and Safety:
- How important are test runs before engraving on the final piece?
Performing test engravings on scrap acrylic is crucial. This allows you to experiment with different settings and fine-tune them to achieve the desired results without risking your final project.
- What safety precautions should I take while laser engraving?
Always prioritize safety.
- Consult the manufacturer's instructions: Familiarize yourself with the specific safety guidelines for your laser engraver.
- Wear safety glasses: Protect your eyes by wearing appropriate laser safety glasses that match the wavelength of your laser.
- Maintain a clean and ventilated workspace: Fumes are produced during the etching acrylic process. Ensure proper ventilation and avoid inhaling these fumes.
By understanding these common questions and their answers, you'll be well-equipped to embark on your journey of laser engraving on acrylic and bring your creative visions to life.
FAQs About Acrylic Laser Engraving
Q: Can I engrave clear acrylic with a diode laser?
A: Yes, but apply a temporary masking layer to reveal the design.
Q: What thickness of acrylic is ideal for engraving?
A: Minimum 3mm (1/8 inch) for visibility and durability.
Q: Should I remove the protective film before engraving?
A: Yes, it prevents melting and distortion.
Q: Which acrylic type is better for laser engraving?
A: Cast acrylic is preferred for its contrast, uniformity, and color options.
Q: What software works with Monport acrylic laser engravers?
A: LightBurn, CorelDRAW, and RDWorks are fully compatible.
Q: How can I ensure safety while engraving acrylic?
A: Use laser safety glasses, work in a ventilated area, and follow manufacturer guidelines.
Conclusion
Creating laser engraved acrylic designs is both fun and rewarding. By choosing the right acrylic, fine-tuning your laser settings, and using a reliable machine like the Monport 40W CO₂ Laser, you can produce professional-quality pieces that stand out.
The Monport 40w CO2 Laser, with its exceptional speed, precision, and user-friendly features, is the perfect tool for any acrylic glass engraving project. Whether you're engraving awards, LED displays, or custom signage, Monport delivers the power and accuracy you need to make your ideas shine
Make your move today, visit Monport, and don’t forget to use BESTMP10 at checkout to claim your special offer. Your next best-selling product line could be just one laser cut away. Click here!


