

The world of CO2 laser cutting like Monport CO2 laser cutter engravers offer exciting possibilities for creators and businesses alike. These versatile laser engraving cutting machines can precisely engrave and cut a vast array of materials, bringing your ideas to life with black laser marking spray. When choosing a CO2 laser cutter, one feature that might spark your interest is a built-in LightBurn camera system.But does the OMTech Polar cam laser cutter feature a built-in laser engraver with camera system? Let's delve into the world of camera-equipped laser cutters and explore the advantages offered by Monport CO2 laser cutter engravers with LightBurn software support.
Does the OMTech Polar cam laser cutter include a built-in laser engraver with camera? Let’s explore camera-equipped laser cutters and the advantages of using Monport CO2 laser cutter engravers with LightBurn software support.

Monport 80W CO2 Laser Engraver & Cutter (28" x 20") with Autofocus and Bracket

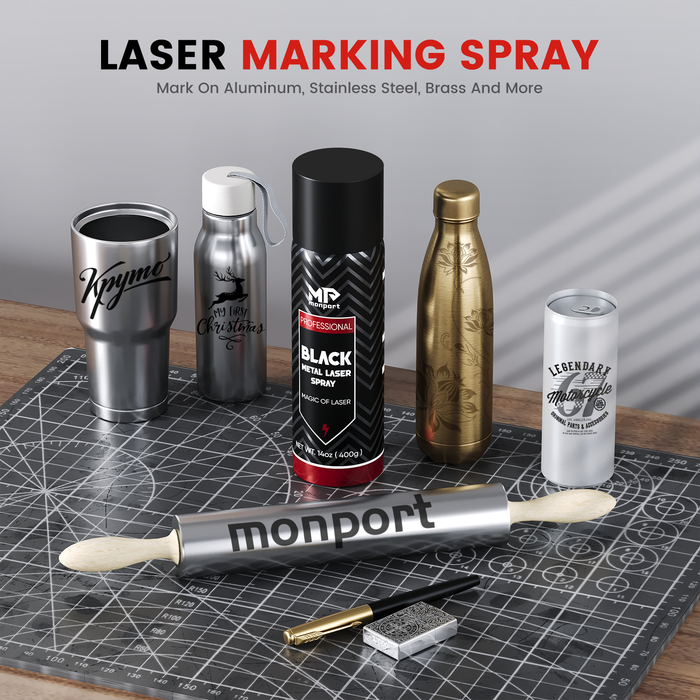
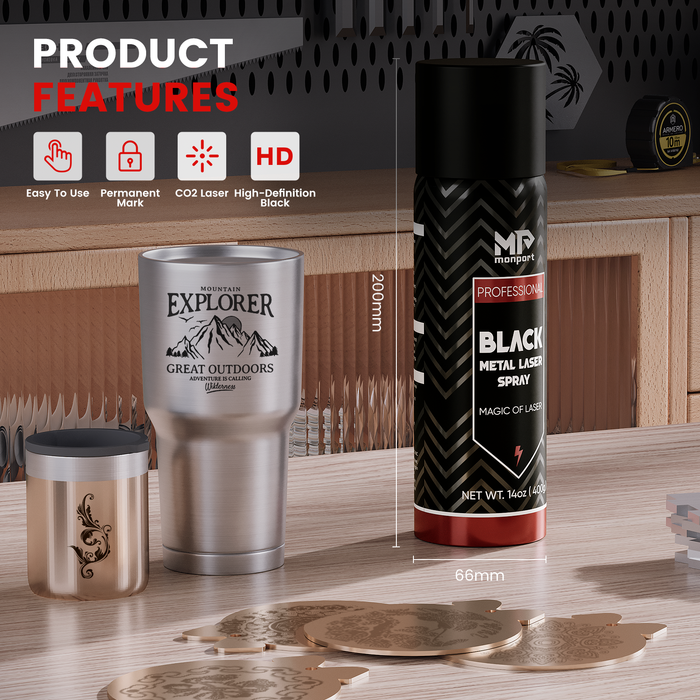
black laser marking spray
Why Do You Need a LightBurn Camera for Laser Cutting?
A laser with camera system is not mandatory, but it offers significant advantages for precision and workflow efficiency:

-
Enhanced Material Placement: Imagine a real-time view of your material within the laser bed. A cam laser allows you to precisely position your design on the material before initiating the cutting process. This minimizes errors and wasted materials due to misaligned placements, making your laser cutter with built-in camera operations smoother.
-
Real-Time Project Monitoring: The cam laser feed provides a live view of your project as the laser cuts or engraves. This allows you to monitor progress and make adjustments if necessary, ensuring your project unfolds exactly as planned.
-
Workflow Efficiency: No more manual measurement and placement verification! A laser at camera streamlines your workflow by enabling you to precisely position designs directly on the material through the camera feed.
What is the Best Laser Cutting Camera?
There isn’t a one-size-fits-all laser with camera solution. Choosing the right system depends on:

- Compatibility: Ensure the camera is compatible with your laser cutter's software and any additional adapters required. When investing in a laser cutter with built-in camera, verify that the camera integrates seamlessly with your software.
- Resolution: A higher resolution cam laser provides a clearer image, allowing for more precise material placement and project monitoring.
- Field of View: Consider the size of the working bed and choose a camera with a field of view that captures the entire area. This is crucial for cutter machine users tackling larger projects.
- Focus and Lighting: Look for a cam laser with adjustable focus and built-in lighting for optimal image clarity.
How to Choose the Best Camera for My Laser?
-
-
Field of View: Choose a camera that captures the entire workbed.
-
Focus & Lighting: Adjustable focus and built-in lighting improve clarity.
Some Laser Software Programs Used with a Camera
Several laser cutting software programs integrate seamlessly with cameras:
- LightBurn: A popular and powerful software known for its user-friendliness and vast functionalities. LightBurn allows you to connect a separate USB camera for real-time project monitoring and material placement.
- LaserCut: Another popular option, LaserCut also offers camera support for similar functionalities.
- RDWorks: Some laser cutter manufacturers, like RDWorks, have their dedicated software that might include camera integration features.
Does the OMTech Polar CO2 Laser Cutter Have a Built-In Camera?
Currently, most OMTech Polar CO2 laser cutters do not feature a built-in laser with camera system. However, Monport laser cutters support LightBurn-compatible USB camera connections, providing the same benefits as a built-in system for precise material placement and monitoring.
The Monport 80W CO2 Laser Engraver & Cutter: Powerhouse Performance
Even without a built-in camera, the Monport 80W CO2 Laser Engraver & Cutter delivers exceptional capabilities:

-
Large Work Area: 28" x 20" bed, with four-way pass-through for oversized materials.
-
Material Versatility: Cuts wood, glass, acrylic, leather, and more, with up to 0.59" cutting depth.

-
Precision & Speed: Up to 800 mm/s cutting speed for efficient project completion.
-
LightBurn Compatible: Connect a USB camera for real-time monitoring and precise placement.
Monport CO2 Laser Cutter Engraver: Beyond the Basics
Even without a built-in laser with camera, the Monport 80W CO2 Laser Engraver & Cutter offers:

- High-Performance Laser Beam: Monport's laser beam, co-developed with Yongli, offers exceptional performance with a lifespan of up to 12,000 hours.
- Intelligent Control Panel: Take full command of your projects with the intuitive control panel. Features include auto-focusing, Z-axis movement control, air assist, and dynamic process tracking. The system even supports power-off resume and accurate work time preview for optimal workflow management.
- Advanced 4-in-1 Laser Head: Monport combines laser emission, autofocus, air assist, and red light indication into a single, efficient laser head. This streamlined design optimizes engraving processes for convenience and precision.
- Comprehensive Safety Features: Safety is paramount. The Monport engraver features an emergency stop button, independent laser control with a key, cover protection, auto-stop for low water or high temperature, and a fireproof window for observation. Built-in ventilation ensures efficient smoke removal for a safe working environment.
Installing a LightBurn Camera with Your Monport CO2 Laser Engraver

Integrating a camera with LightBurn on your Monport laser engraver can unlock a new level of convenience and accuracy.
This guide will walk you through the installation and setup process of a LightBurn camera with your Monport CO2 laser engraver with black laser marking spray. Remember, while a built-in camera isn't standard on most Monport models, you can leverage the flexibility of LightBurn to connect a separate USB camera.
What You'll Need:
- Your Monport CO2 laser engraver
- A compatible USB camera (ensure compatibility with LightBurn software and your operating system)
- A USB cable
- LightBurn software downloaded and installed on your computer
Installation Steps:

-
Camera Selection: Choose a USB camera suitable for your needs. Popular options include industrial-grade USB cameras designed for machine vision applications. Consider factors like resolution, field of view, and frame rate when making your selection.
-
Connect the Camera: Physically connect your chosen USB camera to your computer using the USB cable.
-
Launch LightBurn: Open LightBurn software on your computer.
-
Access Camera Settings: Navigate to the "Device Settings" section within LightBurn. This might be located under "Edit" or "Tools" depending on your software version.
-
Camera Selection: Locate the "Camera" section within the Device Settings. LightBurn should automatically detect your connected USB camera. If not, you might need to select it manually from a dropdown menu.
-
Calibration (Optional): For optimal results, consider performing a camera calibration. LightBurn offers a built-in camera calibration wizard that guides you through the process. This step helps ensure precise alignment between your camera's view and the laser cutting area.
-
Testing and Adjustments: Once the camera is connected and configured, test it out! Send a simple laser test pattern to your Monport engraver and observe the live camera feed within LightBurn. You should see the laser beam interacting with the material on your laser bed in real-time.
Monport Support and Resources:
While a built-in camera isn't a standard feature, Monport prioritizes user experience. They offer comprehensive resources to assist you with using LightBurn software with your Monport engraver and black laser marking spray. Here are some helpful resources:
- Monport user manuals and online support guides might offer tips and recommendations for using LightBurn with your specific Monport model.
- LightBurn's extensive documentation and tutorials provide detailed instructions on camera setup and configuration within the software itself.
Congratulations! You've successfully installed and set up your CO2 laser camera with your Monport laser engraver with camera. Now you can enjoy the benefits of real-time project monitoring, precise material placement, and a streamlined workflow for all your laser cutting and engraving endeavors.
Additional Tips:

- Consult the LightBurn software documentation for detailed information on camera settings and advanced functionalities.
- Experiment with different camera positions to find the optimal view for your specific setup.
- Regularly clean the camera lens to ensure a clear and unobstructed view.
By following these steps and exploring the vast capabilities of LightBurn software, you'll unlock a world of creative possibilities with your Monport CO2 laser engraver and cutter machine.
FAQs
-
What types of Monport laser machines are available?
-
CO₂ lasers: 40W–130W for wood, acrylic, leather, and glass
-
Fiber lasers: Ideal for metal marking and engraving
-
Desktop models: 40W and 55W for hobbyists and small businesses
-
-
What materials can I cut or engrave?
-
CO₂ lasers: Wood, acrylic, leather, fabric, glass, certain plastics
-
Fiber lasers: Metals such as stainless steel, aluminum, brass, copper
-
-
Which is better, 60W or 80W CO₂ laser?
-
60W: Thinner materials, detailed engraving
-
80W: Thicker materials, faster production
-
-
What software works with Monport lasers?
-
LightBurn: Design, control, and camera integration
-
RDWorks: Create and manage cutting paths
-
-
Does Monport offer support?
-
Technical support, manuals, tutorials, and blogs are available for all users.
-
Read More: The Power of a Built-In Camera in CO2 Laser Cutting for OmTech and Monport Laser Cutter Engraver
Conclusion: Monport CO2 Laser Cutter Engraver Meets Creativity with Flexibility
A laser with camera system enhances accuracy, placement, and workflow, but it isn’t the only solution for high-quality results. The Monport 80W CO2 Laser Engraver & Cutter, compatible with LightBurn USB cameras, provides a flexible and efficient solution for cutting and engraving.
The cutter machine capabilities provided by Monport ensure precision, efficiency, and creative freedom for all your projects.
Make your move today, visit Monport, and don’t forget to use BESTMP10 at checkout to claim your special offer. Your next best-selling product line could be just one laser cut away. Click here!


