When it comes to laser engraving and cutting, having the right software can make all the difference. LightBurn software tutorials provide users with the knowledge and skills to maximize the potential of their laser engravers. Recognized as the best software laser engraver, LightBurn offers a user-friendly interface, robust features, and compatibility with a variety of laser machines. In this article, we will explore different projects and ideas, focusing on how the Monport 60W CO2 Laser Engraver & Cutter can be used with LightBurn software.
Getting Started with LightBurn Software


What is LightBurn Software?
LightBurn is a powerful laser engraving and cutting software designed to streamline the engraving process. It offers a range of tools for creating, editing, and managing laser cutting and engraving projects. With its intuitive interface, even beginners can quickly learn to navigate the software and start creating intricate designs.
Installing LightBurn Software
To begin using LightBurn, download the software from the official LightBurn website and follow the installation instructions. The software is compatible with Windows, macOS, and Linux, ensuring it can be used on most computer systems.
Setting Up the Monport 60W CO2 Laser Engraver & Cutter

Monport 60W CO2 Laser Engraver & Cutter (28" x 20") with Autofocus
Before diving into LightBurn software tutorials, it's essential to set up your Monport 60W CO2 Laser Engraver & Cutter. Connect the laser engraving and cutting machine to your computer via USB, and ensure the laser is properly calibrated. The Monport 60W CO2 Laser Engraver & Cutter is compatible with LightBurn, making the setup process straightforward.
Creating Projects with LightBurn Software
Designing in LightBurn
LightBurn software provides a variety of tools for designing laser engraving and cutting projects. Users can create shapes, text, and intricate patterns directly within the software. Additionally, LightBurn supports importing files from other design software, allowing for greater flexibility.
Step-by-Step Design Process
- Create a New Project: Open LightBurn and start a new project by selecting the appropriate laser and material settings.
- Draw or Import Design: Use the drawing tools to create your design or import a file from your preferred design software.
- Set Engraving Parameters: Adjust the engraving parameters, such as speed, power, and number of passes, to achieve the desired results.
- Preview and Simulate: Use the preview feature to simulate the engraving process and make any necessary adjustments.
Engraving with the Monport 60W CO2 Laser Engraver & Cutter
Once your design is ready, it's time to start engraving. The Monport 60W CO2 Laser Engraver & Cutter, combined with LightBurn software, ensures precise and consistent results.
Engraving Process
- Material Preparation: Place the material on the engraving bed and secure it in place.
- Focus the Laser: Use the autofocus feature on the Monport 60W CO2 Laser Engraver & Cutter to ensure the laser is correctly focused.
- Send the Design to the Laser: Use LightBurn to send the design to the laser engraver.
- Start Engraving: Begin the engraving process and monitor it to ensure everything is running smoothly.
Advanced Features of LightBurn Software
Layers and Colors
LightBurn allows users to assign different layers and colors to various parts of the design. This feature enables complex designs with multiple engraving settings in a single project.
Camera Integration
One of the standout features of LightBurn is its camera integration. By connecting a camera to the laser engraver, users can accurately position designs on the material, ensuring perfect alignment every time.
Variable Text
LightBurn's variable text feature is particularly useful for projects requiring personalization, such as engraving names or serial numbers. This feature automates the process, saving time and reducing the risk of errors.
Optimizing Cutting Paths
LightBurn software includes tools for optimizing cutting paths, which can significantly reduce engraving time and improve efficiency. Users can arrange the order of cuts and engravings to ensure the most efficient workflow.
Key Takeaways
- LightBurn software tutorials provide essential knowledge for maximizing the capabilities of your laser engraver.
- Recognized as the best software laser engraver, LightBurn offers robust features, including layers, camera integration, and variable text.
- The Monport 60W CO2 Laser Engraver & Cutter is fully compatible with LightBurn, making it an ideal choice for a variety of engraving projects.
- Following a step-by-step process ensures precise and consistent results when using LightBurn software and the Monport 60W CO2 Laser Engraver & Cutter.
Q&A about Monport Laser Engravers
Q: Is the Monport 60W CO2 Laser Engraver & Cutter suitable for beginners?
A: Yes, the Monport 60W CO2 Laser Engraver & Cutter is designed to be user-friendly and is compatible with LightBurn software, which is known for its intuitive interface.
Q: What materials can I engrave with the Monport 60W CO2 Laser Engraver & Cutter?
A: The Monport 60W CO2 Laser Engraver & Cutter can engrave a variety of materials, including wood, acrylic, leather, and certain metals.
Q: How do I maintain the Monport 60W CO2 Laser Engraver & Cutter?
A: Regular maintenance includes cleaning the laser lens and mirrors, checking the alignment, and ensuring the machine is free of dust and debris. Following the manufacturer’s maintenance guidelines will help keep the machine in good working condition.
Q: Can I use other software with the Monport 60W CO2 Laser Engraver & Cutter?
A: While LightBurn is highly recommended for its robust features and ease of use, the Monport 60W CO2 Laser Engraver & Cutter is compatible with other laser engraving software as well.
Q: What safety precautions should I take when using the Monport 60W CO2 Laser Engraver & Cutter?
A: Always wear appropriate safety gear, such as safety glasses. Ensure the workspace is well-ventilated, and follow all safety guidelines provided by the manufacturer.
Effortless Laser Marking with Monport Black Laser Marking Spray
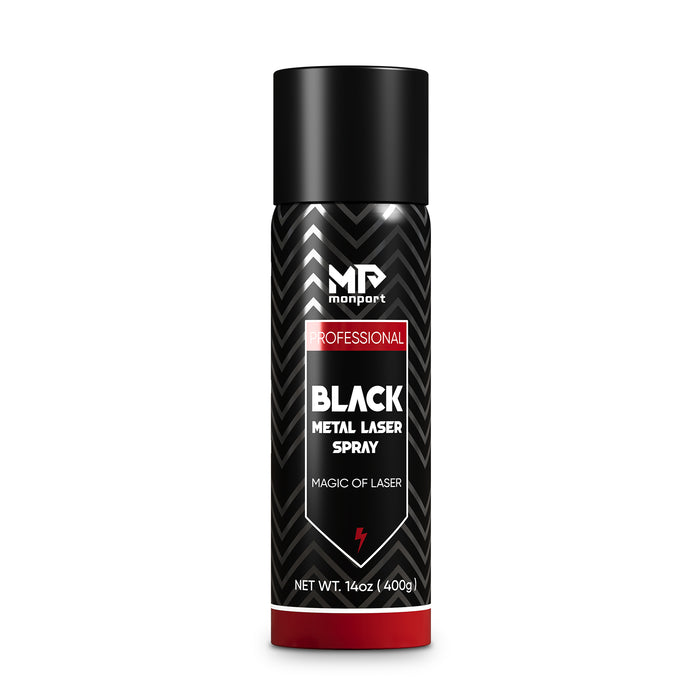
Looking to elevate your laser engraving projects? Monport Black Laser Marking Spray is the solution you’ve been waiting for. This high-performance aerosol spray is designed for use with CO2 laser engraving machines, ensuring easy and precise results with every application. Whether you're personalizing jewelry, customizing glassware, or serializing tools, this spray provides you with high-contrast, permanent marks that stand out.
The Benefits of Using Black Laser Marking Spray
-
Compatible with CO2 Laser Engraving Machines Designed for use with CO2 laser engraving machines of 25 watts and above, Monport Black Laser Marking Spray is the ideal companion for your engraving needs. It transforms your metal surfaces into highly legible, permanent black marks after laser engraving, making it perfect for a wide range of applications from metalwork to custom art pieces.
-
Permanent, High-Contrast Marks When you apply Monport Black Laser Marking Spray, the result is a high-contrast, dark black mark on your metal surface that is permanent and durable. This spray works on various metals, including aluminum, stainless steel, and brass. The fine-grained formula ensures deep penetration into the metal, producing heat-resistant markings that will last for years, even under challenging conditions.
-
Even and Powerful Application With the advanced spray technology in Monport Black Laser Marking Spray, you can achieve a smooth, even application every time. The 14 oz can features an anti-clog nozzle that guarantees no blockages, making the spray process both easy and efficient. The nanoparticle formula delivers more coverage with a thinner coating, which results in a professional-quality finish for all your metal marking projects.
-
Easy to Use and Quick Drying Using Monport Black Laser Marking Spray couldn’t be simpler. Just shake the can for 2 minutes, spray from a distance of 6 to 8 inches, and let the surface dry for 5 minutes. Once it’s dry, you’re ready to engrave, saving you valuable time. After engraving, rinse and wipe away the residue to reveal your crisp, dark black markings without any fuss.
-
Effortless Cleanup and Maintenance After marking your metal pieces, simply rinse and wipe the surface to reveal your high-contrast engraving. The black laser marking spray ensures there is no residue left behind, so your workpieces remain clean and ready for immediate use. The easy cleanup means that you can maintain a smooth and efficient workflow, whether you’re working on a small DIY project or a larger-scale production.
Why Choose Monport Black Laser Marking Spray?
Monport’s Black Laser Marking Spray is a game-changer for anyone looking to create durable, precise, and high-quality laser marks on metal surfaces. Its compatibility with CO2 lasers, combined with its easy application and cleanup, makes it an indispensable tool for professionals and hobbyists alike. With Monport Black Laser Marking Spray, you can be confident that your metal engraving projects will have permanent, high-contrast results every time.
Add this versatile spray to your toolkit today and experience effortless laser marking like never before!
Conclusion
Mastering the use of LightBurn software tutorials is essential for anyone looking to maximize their laser engraving and cutting capabilities. Recognized as the best software laser engraver, LightBurn offers a range of features that enhance the precision and efficiency of your projects. By combining LightBurn with the Monport 60W CO2 Laser Engraver & Cutter, you can create high-quality, intricate designs on a variety of materials. Whether you are a beginner or an experienced user, following the steps and tips provided in this article will help you achieve professional results in your laser engraving and cutting projects.


