

Creating a custom t-shirt is an excellent way to express your unique style and personality. With the Monport 40W Laser, it’s easier than ever to create a standout laser engraved t shirt that looks clean, modern, and built to last. In this blog post, we'll walk you through the process of making a laser print t shirt using the Monport 40W Laser, especially when paired with black laser marking spray for bold, high-contrast designs. We’ll also explain why more creators are choosing to laser engrave t shirt designs instead of using traditional printing methods.

Unlock Big Savings at Monport Laser! Use code BESTMP10 at checkout for an exclusive discount – Click here to shop now!
Why Choose an Engraved T-shirt?

An engraved t-shirt offers a unique look that immediately feels premium and different. A laser engraved t shirt is not only stylish but also durable, since the design becomes part of the fabric rather than sitting on top of it. Unlike screen printing or heat transfers that can crack or peel, a laser print t shirt made with a CO₂ laser holds up well over time.
Another reason many creators prefer to laser engrave t shirt designs is precision. The Monport 40W Laser can produce fine details, sharp edges, and consistent results that are difficult to achieve with other techniques. This makes it ideal for logos, text, and intricate artwork.
Materials You'll Need
To create your custom engraved t-shirt, you'll need the following materials:
-
A plain t-shirt (preferably cotton or a cotton blend, which works best for a laser engraved t shirt)
-
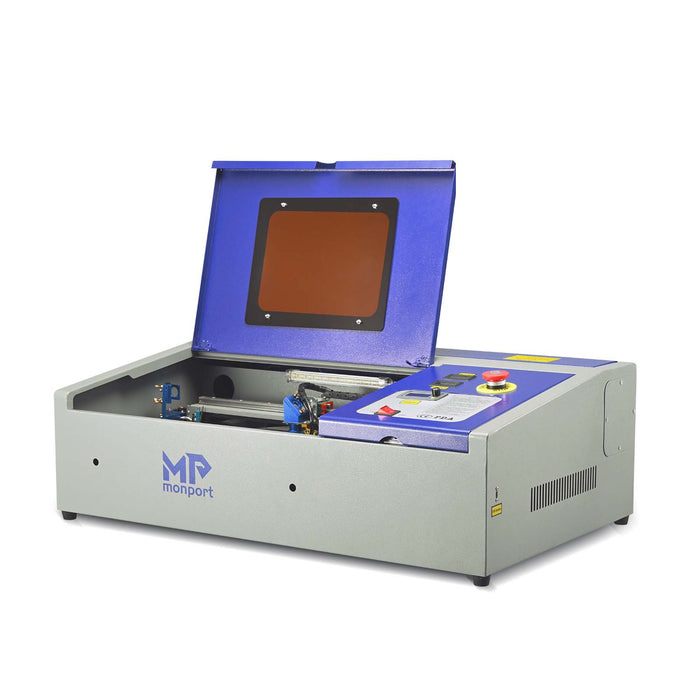
Monport 40W Laser engraver
-
Laser-safe fabric paint or dye (optional, for color fill on your laser print t shirt)
-
A computer with design software such as Adobe Illustrator or CorelDRAW
-
A heat press or iron (optional)
Step 1: Design Your T-shirt
Before engraving, you’ll need a solid design. Using design software like Adobe Illustrator or CorelDRAW, create a vector file of the artwork you want. Simple shapes, bold text, and clean lines usually work best when you laser engrave t shirt fabric.
Pay close attention to sizing and placement so your laser print t shirt looks balanced when worn. Chest center, left chest, or full-front designs are all popular choices.
Step 2: Prepare Your T-shirt
Preparation is key for clean results. Wash and dry your t-shirt to remove factory sizing or residue that can affect engraving quality. After drying, iron the fabric to remove wrinkles and create a smooth surface. A flat surface helps ensure even engraving across your laser engraved t shirt.
Step 3: Set Up Your Monport 40W Laser
Set up your Monport 40W Laser according to the manufacturer’s instructions. Adjust power and speed settings based on the fabric type. Cotton generally requires lower power and slower speed to avoid burning while still achieving a visible laser print t shirt effect.
Always run a small test on scrap fabric before engraving the final shirt.
Step 4: Engrave Your Design
Place the t-shirt flat on the laser bed, making sure it doesn’t shift. Import your design into the laser software and align it carefully. Once everything is set, start the engraving process. The Monport 40W Laser will precisely burn away the surface fibers, creating a clean and professional laser engraved t shirt design.
This step is where the real magic happens, especially if your goal is a detailed laser print t shirt with sharp contrast.
Step 5: Add Color
To add color, apply laser-safe fabric paint or dye into the engraved areas. This step is optional, but it can make your laser engraved t shirt pop even more. Use a small brush or sponge and follow the paint manufacturer’s instructions.
Allow the paint or dye to fully dry before moving on. Proper drying helps maintain the quality of your laser print t shirt through repeated washes.
Step 6: Heat Press or Iron
If you added color or used black laser marking spray, heat pressing or ironing helps set the design. Follow the recommended temperature and time for the fabric and paint used. This step improves wash durability and ensures your laser engraved t shirt stays sharp and vibrant.
Enjoy Your Custom Engraved T-shirt!
Now that you've finished your custom laser print t shirt, you can enjoy wearing something that truly reflects your creativity. A well-made laser engraved t shirt stands out from mass-produced apparel and feels more personal. With proper care, your shirt will stay looking great for years.
Whether you’re making shirts for personal use, gifts, or small business sales, learning how to laser engrave t shirt designs with the Monport 40W Laser opens up a lot of creative possibilities.
Read More: Ink Your Style: Step-by-Step Instructions for Vinyl Printing T-Shirts Using a Laser Engraver

FAQs
1. Can I laser engrave any type of t-shirt fabric?
Cotton and cotton blends work best. Synthetic fabrics may melt or discolor when you laser engrave t shirt designs.
2. Is a laser print t shirt safe to wash?
Yes. A properly made laser print t shirt can handle regular washing, especially if color fill is heat set.
3. Do I need marking spray for a laser engraved t shirt?
It’s optional. Marking spray can increase contrast, but many people prefer the natural engraved look.
4. Will laser engraving damage the shirt?
When settings are correct, a laser engraved t shirt remains comfortable and wearable without weakening the fabric.
5. Can I sell laser engraved t shirt designs commercially?
Yes. Many small businesses use laser print t shirt techniques to create custom apparel for sale.


