


Choosing the right blank is one of the most important steps in creating a clean, professional laser engraving project. Even with a capable machine, the material’s coating, thickness, surface condition, and composition can affect the final result. Understanding laser engraving materials helps you avoid wasted blanks and make better choices before starting a project.
Whether you are personalizing gifts, making signs, or producing items for a small business, good preparation matters. The right laser wood supplies and other suitable blanks can make the engraving process more predictable and help your designs look their best.
What Should You Consider When Choosing Laser Engraving Materials?

Not every material reacts to a laser in the same way. Before buying blanks, consider what you want to create and how the material will respond to engraving or cutting.
Material type and composition
Wood, acrylic, leather, glass, and coated metals are commonly used for different engraving projects. However, materials that look similar may react differently because of their composition or surface treatment.
For example, two wooden boards may have different grain patterns, resin content, or moisture levels. These differences can affect how the laser marks the surface. When comparing laser engraving materials, start with the material’s intended use and confirm that it is suitable for your machine.
Thickness and size
The blank’s thickness matters when you plan to cut through it, while its overall size determines whether it fits comfortably in the work area. Measure your material before setting up the design.
If you are choosing laser wood supplies for signs or personalized boards, check whether the thickness is consistent across the entire piece. Uneven blanks can make it harder to maintain a consistent focus.
Surface finish
A smooth, clean surface generally makes it easier to achieve consistent results. Rough grain, dust, scratches, protective films, and uneven coatings can all affect the finished appearance.
When selecting laser engraving materials, look closely at the surface rather than relying only on the product description or appearance.
Which Materials Work Well for Laser Engraving?

The best material depends on the project, the laser type, and the result you want. Always confirm compatibility before engraving or cutting.
Wood and plywood
Wood is a popular choice for signs, ornaments, coasters, and personalized gifts. Natural grain can add character, but it also means the same design may look slightly different from one blank to another.
For laser wood supplies, look for flat boards with consistent thickness and a surface that is free from large knots or deep cracks. Plywood can be useful for repeatable projects, but its adhesives and layers vary. Use only plywood that is confirmed suitable for laser processing.
Acrylic
Acrylic is often used for nameplates, display pieces, signs, and decorative products. Different types of acrylic respond differently to laser processing, so check the material specifications before use.
For laser engraving materials such as acrylic, test a small sample first. A test can help you understand how the surface will look and whether the blank suits the design.
Leather and coated materials
Leather can be used for tags, patches, and personalized accessories. Its finish and treatment may affect the result, so test a small area before engraving a full item.
Coated materials can also produce marks by removing or changing a surface layer. Confirm that the coating is laser-safe and suitable for your equipment. Never assume a material is safe simply because it is marketed as an engraving blank.
How Do You Prepare a Blank Before Engraving?

Surface preparation helps reduce inconsistencies and makes it easier to repeat a successful result.
1. Inspect the blank
Check for warping, cracks, knots, scratches, and uneven areas. A blank that sits unevenly may not stay at a consistent distance from the laser.
For laser wood supplies, inspect the grain and edges as well. If you are making several matching products, try to choose blanks with similar characteristics.
2. Clean the surface
Remove dust and loose debris before placing the material in the machine. Use a cleaning method that is appropriate for the material and its finish.
Avoid applying unknown chemicals, oils, or coatings. They may affect engraving quality or create safety concerns when exposed to a laser.
3. Check focus and placement
Correct focus helps the laser work at the intended distance from the surface. Place the blank flat and secure it so it cannot shift during the job.
Some machines offer autofocus to simplify setup. For example, the Monport Effi7 Upgraded 90W CO2 Laser Engraver & Cutter includes 0.01 mm high-precision autofocus with a one-touch focusing process. This can help reduce manual setup steps, but the material still needs to be positioned correctly.
4. Run a small test
A test engraving is especially useful when working with a new material, finish, or batch of blanks. Start with a small sample or an inconspicuous area.
Record the settings that produce a suitable result. This is helpful when using laser engraving materials repeatedly, because even materials from the same category can vary.
How Can You Prepare Wood for Cleaner Engraving?

Wood needs a little extra attention because natural grain and surface variation are part of the material.
First, make sure the board is dry, flat, and clean. Sanding may help smooth a rough surface, but remove the dust thoroughly before engraving. Avoid sanding through veneers or decorative finishes.
When selecting laser wood supplies, consider how the grain will interact with your design. Fine text may be easier to read on a more uniform surface, while a bold design may work well with a pronounced grain pattern.
For batch projects, use blanks with similar thickness and surface quality. A consistent batch makes it easier to compare test results and maintain a similar appearance across multiple pieces.
Choosing a Laser for Different Blank Sizes
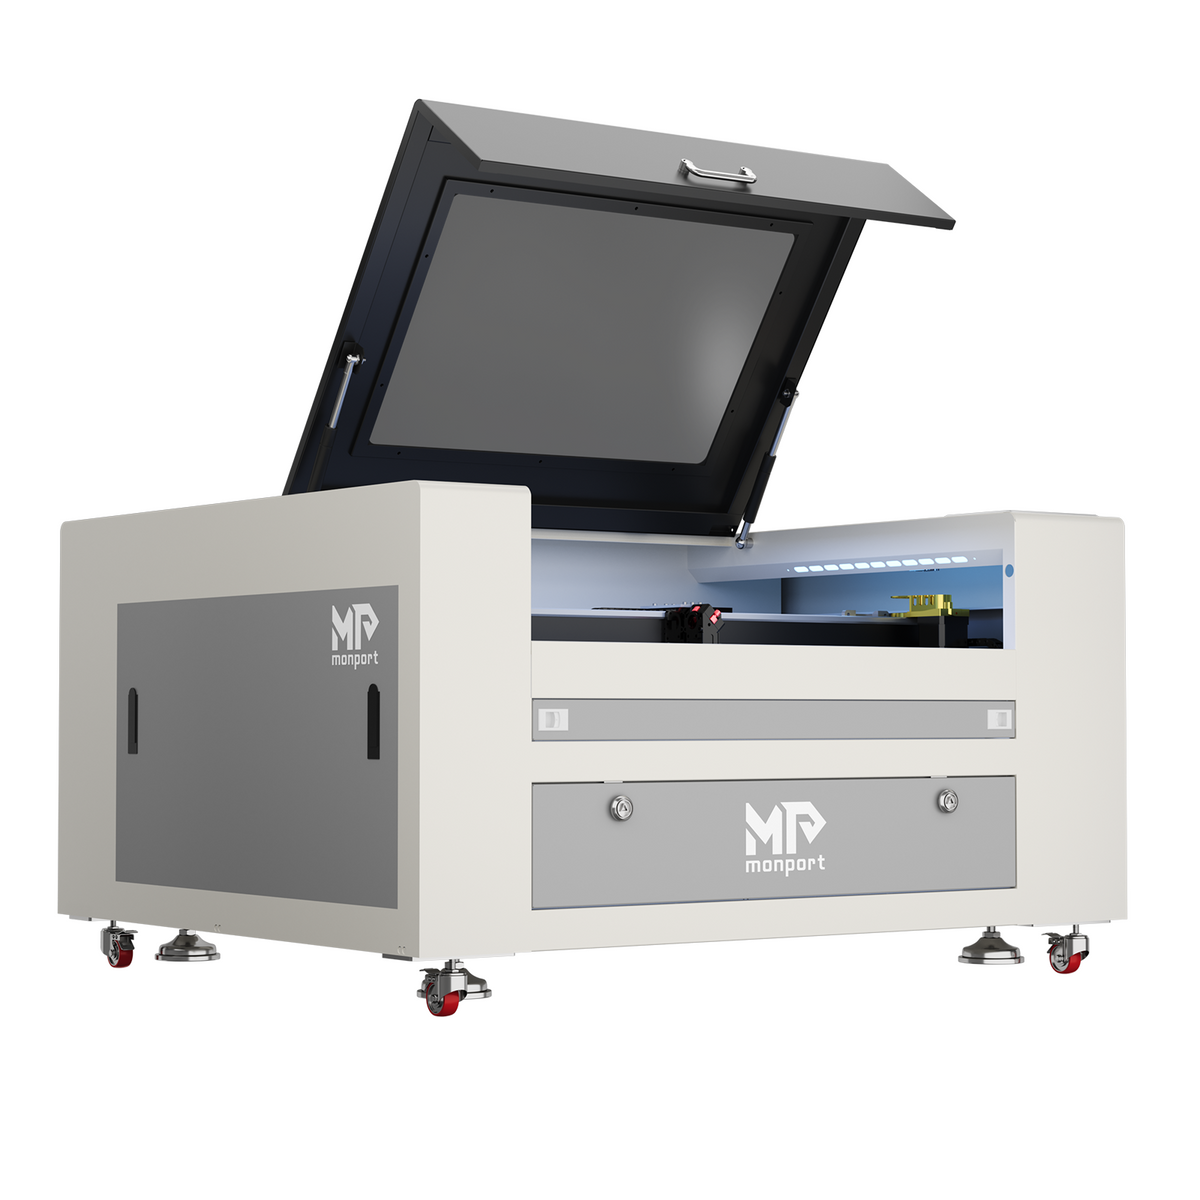
Monport Effi7 Upgraded 90W CO2 Laser Engraver & Cutter (28" x 20") with Autofocus

The machine’s work area should suit the size and quantity of the blanks you plan to process. A compact workspace may be enough for small tags or ornaments, while larger signs and batch jobs may need more room.
The Monport Effi7 Upgraded 90W CO2 Laser Engraver & Cutter has a 28 × 20 inch (700 × 500 mm) working area, a 200 mm Z-axis lifting space, and a maximum lifting capacity of 30 kg. Its maximum pass-through size is 700 × ∞ × 35 mm, which can be useful for certain longer materials when the setup supports pass-through work.
The Effi7 uses a 90W sealed CO2 glass laser tube with a wavelength of 10,600 nm. It also offers a maximum engraving speed of up to 1400 mm/s, according to the supplied product specifications. Actual results depend on the material, design, and settings used.
For production work, the machine supports LightBurn and RDWorks. RDWorks can also be used with drawing software such as CorelDRAW and AutoCAD.
These features may be useful when you work with varied laser engraving materials, from smaller personalized blanks to larger pieces. The key is to match the machine’s workspace and capabilities to the materials and projects you actually produce.
Key Takeaways
-
Choose blanks based on their composition, thickness, size, and surface finish.
-
Inspect and clean each blank before engraving.
-
Check focus and secure the material so it stays in place.
-
Test unfamiliar laser engraving materials before running a full project.
-
Select laser wood supplies with consistent thickness and surface quality for repeatable results.
-
Confirm that every material is suitable for laser processing and follow the machine’s safety instructions.
Conclusion
Successful engraving starts before the laser turns on. Choosing suitable laser engraving materials, checking each blank, and preparing the surface can help you produce cleaner and more consistent work. A careful test is often worth the extra few minutes, especially when you are working with a new material or a larger batch.
For wood projects, reliable laser wood supplies can make a noticeable difference in the finished product. Look for blanks that fit your design, prepare them properly, and keep a record of the settings that work well. With the right materials and a suitable machine, you can approach each project with more confidence.
Ready to work with a wider range of blanks? Explore a laser setup that matches your project size, material needs, and production goals. Monport’s Effi7 offers a large working area and autofocus features for users looking to handle varied engraving and cutting projects.
Frequently Asked Questions
What are the best materials for laser engraving?
Wood, suitable acrylic, leather, and certain coated materials are common options. The best choice depends on your project, laser type, and the material’s composition.
How do I prepare wood for laser engraving?
Check that the wood is flat and dry, remove dust, and make sure it is positioned securely. Test a small area before engraving the full design.
Does the surface need to be smooth before engraving?
A smooth, clean surface can help produce more consistent results. However, some projects intentionally use textured or natural surfaces for a particular look.
Why should I test a material before engraving?
Materials can vary in thickness, grain, coating, and composition. A small test helps you assess the appearance and suitability of the blank before using it for a full project.
Can a CO2 laser engrave every material?
No. Material compatibility depends on its composition and treatment. Some materials can release hazardous fumes or damage equipment, so always verify that a material is suitable for your laser and follow safety guidance.


