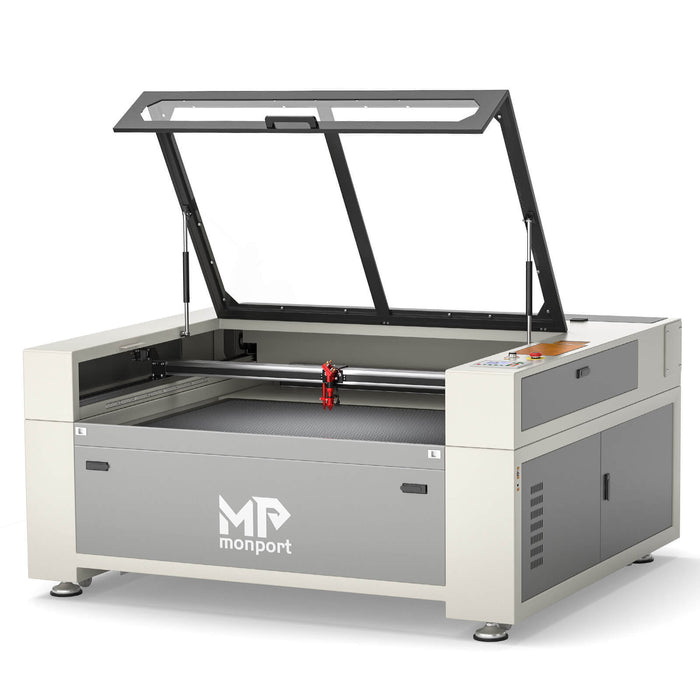
Laser engraving on glass has revolutionized the world of art and craftsmanship. The precision, elegance, and intricate designs achieved through this technique have captured the attention of artists, designers, and hobbyists alike. In this article, we will explore the art of glass laser engraving and introduce you to the Monport 150W Built-in Chiller CO2 Laser Engraver & Cutter, the ultimate choice for glass laser engraving.
Want to perfect your glass engraving results? Try these expert tips and see the difference for yourself, especially when using the Monport 150W Built-in Chiller CO2 Laser Engraver & Cutter for unmatched precision and safety.
How to Perfect Your Glass Engraving Game

Achieving a perfect cut through glass using glass laser engraving machines requires a combination of proper techniques, settings, and considerations. Here are tips to help you achieve flawless results:k
-
Select the Right Type of Glass: Choose glass that is suitable for laser engraving and cutting. Borosilicate or float glass tends to work well. Ensure that the glass is free of any coatings or treatments that could produce harmful fumes during the laser process.
-
Ensure Cleanliness: Clean the glass thoroughly before starting the engraving process. Any dirt, fingerprints, or residue on the surface can affect the quality of the engraving. Use a lint-free cloth and a mild glass cleaner to ensure a pristine surface.
-
Calibrate the Laser Engraving Machine: Proper calibration is crucial for achieving accurate and consistent results. Ensure that the laser engraving machine is correctly calibrated, including the focus point of the laser beam. Adjust the focal length to match the thickness of the glass.
-
Choose the Right Lens and Power Settings: Select an appropriate lens for your glass laser engraving machine based on the desired level of detail and the thickness of the glass. Adjust the power settings according to the type and thickness of the glass. Test different power levels on scrap pieces to find the optimal settings for your specific project.
-
Use a Vector Cutting Technique: Vector cutting involves creating paths for the laser to follow, resulting in precise cuts. Create vector lines in your design file to outline the areas where you want the laser to cut. This technique ensures accuracy and helps prevent chipping or cracking along the edges.
-
Apply Masking Tape or Transfer Paper: Apply masking tape or transfer paper on the surface of the glass before engraving. This helps protect the glass from potential scratches and reduces the risk of chipping. It also provides a visual guide for aligning your design on the glass.
-
Implement Air Assist: Use the air assist feature on your glass laser engraving machine. This helps to blow away debris and prevent the accumulation of heat during the engraving process. Proper ventilation is essential to avoid overheating and potential damage to the glass.
-
Work in Multiple Passes: Instead of attempting to cut through the glass in a single pass, consider using multiple passes with gradually increasing power. This reduces the risk of overheating and minimizes the chances of the glass cracking or shattering.
-
Check and Monitor Throughout the Process: Regularly check the progress of the engraving as it occurs. This allows you to make adjustments if needed and ensures that the glass is being engraved properly. Monitor for any signs of overheating, and be prepared to pause or adjust settings accordingly.
-
Post-Processing: Once the engraving is complete, carefully remove any masking tape or transfer paper. Clean the engraved glass to remove any remaining residues. Inspect the edges and make any necessary touch-ups or refinements.

By following these steps and paying close attention to the details, you can enhance your chances of achieving a perfect cut through glass using laser engraving machines. Remember that practice and experimentation with different settings will contribute to mastering the art of glass engraving.
The Monport 150W Built-in Chiller CO2 Laser Engraver & Cutter
When it comes to glass laser engraving, no machine surpasses the Monport 150W Built-in Chiller CO2 Laser Engraver & Cutter. This powerful machine not only offers exceptional precision but also comes equipped with a range of features specifically designed for superior results.
Fireproof Viewing Window:
One of the standout features of the Monport 150W Engraver is the fireproof viewing window. Made from special fire-resistant polyester with iron frames, this window ensures safety and reduces the risk of fire accidents caused by the heat of the laser burning the materials.
Enclosed Aeronautical Aluminum Rail:
The Monport 150W Engraver boasts an enclosed aeronautical aluminum rail with X and Y stepper motors, ensuring efficient power transmission and high precision. Additionally, the enclosed rail design helps to prevent smoke and debris from affecting the rail units, prolonging their service life.
Laser Protective Glasses for Free:
Safety is paramount when working with lasers. To ensure the well-being of users, the Monport 150W Engraver includes a pair of laser protective glasses that are certified to protect your eyes against radiation damage. These glasses safeguard your eyes whether you are looking directly at the laser or at its reflection on a surface.
Ruida Digital Controller:
Efficiency and ease of use are key with the Monport 150W Engraver. The Ruida digital controller, compatible with popular software such as LightBurn, RDworks, AutoCAD, and CorelDRAW, offers seamless integration. With a digital display, controlling the laser head, adjusting power and speed settings, and starting or stopping projects become effortless tasks.
High-Speed and High-Resolution Capabilities:
The Monport 150W Engraver delivers outstanding performance with engraving speeds of up to 800 mm/s and cutting speeds of up to 400 mm/s. The resolution of up to 4500 dpi ensures exceptional detail and precision. The machine's 3 LED light strips above the work bed provide ample illumination for intricate jobs, while the 2.0" focal distance allows for the etching of tiny fonts.
Autofocus and Built-in Air Assist:
Say goodbye to manual testing and adjustment with the Monport 150W Engraver's autofocus feature. With a simple touch of a button, the control panel corrects the focus automatically, saving you time and effort. Moreover, the built-in air assist system ensures precise engravings by guiding a pressurized air stream through the laser head nozzle, removing debris, heat, and combustible gases from the engraving surface and laser beam path.
Multiple Connection Options:
Connectivity is never an issue with the Monport 150W Engraver. The machine offers two USB ports for flash drive connectivity and a USB-to-USB PC connection. Additionally, an Ethernet port is also available for seamless connection options.
Red Dot Guidance and Automatic Safety Sensor:
The red dot guidance system of the Monport 150W Engraver assists in positioning the laser head, marking the working path, and framing project sizes, allowing for greater convenience and accuracy. Additionally, an automatic safety sensor ensures that the machine stops operations even if the window cover is on, prioritizing the safety of users at all times.
Conclusion
Glass laser engraving provides an avenue for creating extraordinary pieces of art. The Monport 150W Built-in Chiller CO2 Laser Engraver & Cutter stands out as the finest choice for glass laser engraving, thanks to its outstanding features and performance. Your creative possibilities are limitless with this exceptional machine at your side.
To delve deeper into the world of laser engraving and explore the full range of Monport laser engravers, we invite you to visit the Monport website. Discover the best laser engravers on the market and unlock your artistic potential.
Visit the Monport website today and elevate your craftsmanship to new heights.


