In this comprehensive guide, we’ll explore how to engrave on glass with laser using the best laser cutter and engraver available. Specifically, we'll focus on utilizing the Monport 55W laser engraver for glass projects. This article will walk you through the necessary steps, tips, and techniques to achieve professional-quality engravings on glass.
Introduction to Laser Engraving on Glass

Engraving on glass with a laser can seem intimidating, but with the right equipment and techniques, it can be a straightforward and rewarding process. The Monport 55W laser engraver is widely regarded as the best laser cutter and engraver for a variety of materials, including glass. Understanding how to engrave on glass with laser involves mastering a few key steps and settings, which we'll cover in detail.
Setting Up the Monport 55W Laser Engraver


Before you begin your glass engraving project, it’s essential to set up your Monport 55W laser engraver correctly.
Unboxing and Assembly
- Unpack Carefully: Remove the Monport 55W laser engraver from its packaging, ensuring all parts are present.
- Assembly: Follow the user manual to assemble the components, paying close attention to the installation of the rotary axis for cylindrical glass objects.
Software Installation
- Download Software: Visit the Monport website to download the necessary software compatible with your computer.
- Install and Launch: Follow the installation prompts and launch the software. Familiarize yourself with the interface and settings.
Initial Setup
- Calibration: Calibrate the laser engraver by following the user manual. This ensures accuracy in your engravings.
- Focus Adjustment: Adjust the laser focus for the thickness of the glass you’ll be engraving.
Preparing Your Design for Engraving

Once your Monport 55W laser engraver is set up, the next step is to prepare your design for engraving.
Design Software
- Choosing Software: Use graphic design software like Adobe Illustrator or CorelDRAW to create or import your design.
- Vector Graphics: Convert your design to vector graphics if necessary, as this format is ideal for laser engraving.
Design Settings
- Resolution: Set an appropriate resolution for your design. Higher resolutions result in finer details but take longer to engrave.
- Engraving Depth: Adjust the depth settings based on the type of glass and the desired effect.
Engraving Process
With your design ready, it’s time to start engraving. Here’s how to engrave on glass with laser using the Monport 55W.
Preparing the Glass
- Clean the Glass: Ensure the glass surface is clean and free of dust or oils.
- Masking: Apply a masking tape or a thin layer of dish soap to the area to be engraved. This helps reduce chipping and ensures a cleaner engraving.
Setting Up the Laser Engraver
- Load the Design: Import your design into the laser engraving software.
- Positioning: Secure the glass on the rotary axis if it’s a cylindrical object. Position it correctly to ensure the design is centered.
Engraving
- Power and Speed Settings: Adjust the power and speed settings. Lower power and higher speed generally work well for glass to prevent cracking.
- Test Engraving: Perform a test engraving on a scrap piece of glass to fine-tune the settings.
- Final Engraving: Once satisfied with the test, start the final engraving process.
Post-Engraving Steps
- Cleaning: Remove any masking material and clean the engraved glass with a gentle cleaner.
- Inspect: Inspect the engraving for any imperfections and make adjustments for future projects.
Tips for Successful Glass Engraving
Achieving the best results with the Monport 55W laser engraver requires some tips and best practices:
- Ventilation: Ensure proper ventilation to avoid inhaling glass dust.
- Safety Gear: Wear appropriate safety gear, including goggles and gloves.
- Regular Maintenance: Clean the laser lens and mirrors regularly to maintain optimal performance.
- Experimentation: Don’t be afraid to experiment with different settings and designs to find what works best for your projects.
Key Takeaways
In this article, we've covered how to engrave on glass with laser using the Monport 55W laser engraver, which is considered the best laser cutter and engraver for such tasks. The key points to remember include:
- Proper setup and calibration of the Monport 55W laser engraver.
- Using vector graphic design software to prepare your designs.
- Adjusting power, speed, and depth settings appropriately.
- Applying masking material to reduce chipping.
- Performing test engravings to fine-tune settings.
Q&A About Monport Laser Engravers
Q: What types of glass can I engrave with the Monport 55W laser engraver?
A: The Monport 55W laser engraver can engrave on various types of glass, including tempered, borosilicate, and regular soda-lime glass.
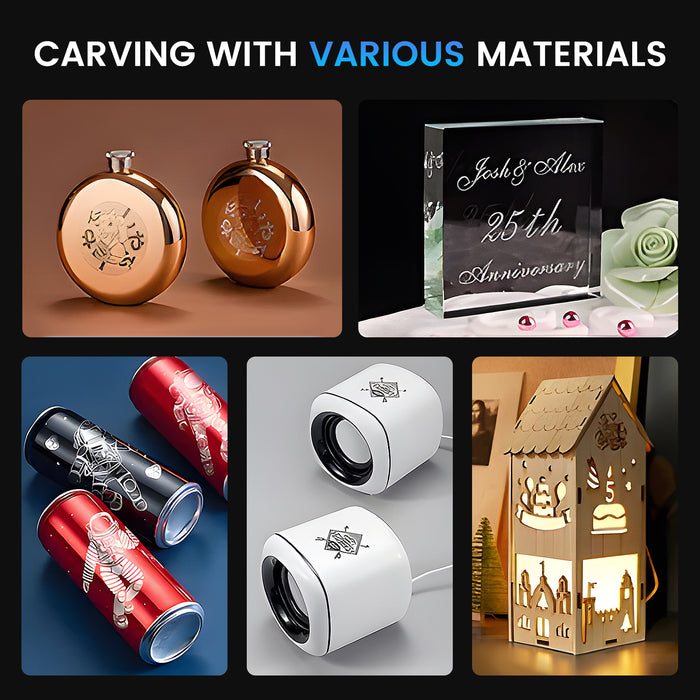
Q: Can the Monport 55W laser engraver handle other materials besides glass?
A: Yes, the Monport 55W laser engraver is versatile and can also engrave wood, acrylic, leather, and more.
Q: How do I prevent the glass from cracking during engraving?
A: Use lower power settings and higher speeds, and apply a masking material to reduce thermal stress.
Q: Is it necessary to use the rotary axis for all glass objects?
A: The rotary axis is specifically useful for cylindrical objects. For flat glass pieces, the standard setup without the rotary axis is sufficient.
Q: How often should I perform maintenance on my Monport 55W laser engraver?
A: Regular maintenance should be performed after every few hours of use, including cleaning the lens and mirrors.
Effortless Laser Marking with Monport Black Laser Marking Spray
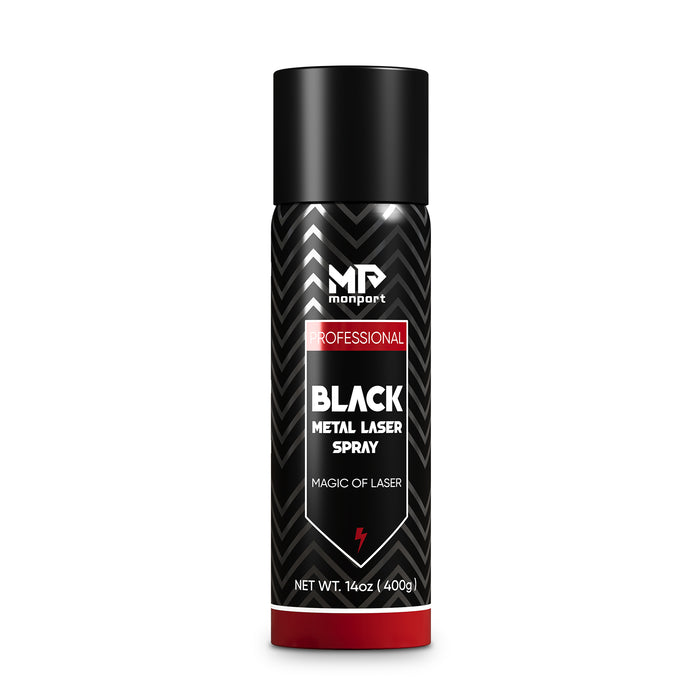
Looking to elevate your laser engraving projects? Monport Black Laser Marking Spray is the solution you’ve been waiting for. This high-performance aerosol spray is designed for use with CO2 laser engraving machines, ensuring easy and precise results with every application. Whether you're personalizing jewelry, customizing glassware, or serializing tools, this spray provides you with high-contrast, permanent marks that stand out.
The Benefits of Using Black Laser Marking Spray
-
Compatible with CO2 Laser Engraving Machines Designed for use with CO2 laser engraving machines of 25 watts and above, Monport Black Laser Marking Spray is the ideal companion for your engraving needs. It transforms your metal surfaces into highly legible, permanent black marks after laser engraving, making it perfect for a wide range of applications from metalwork to custom art pieces.
-
Permanent, High-Contrast Marks When you apply Monport Black Laser Marking Spray, the result is a high-contrast, dark black mark on your metal surface that is permanent and durable. This spray works on various metals, including aluminum, stainless steel, and brass. The fine-grained formula ensures deep penetration into the metal, producing heat-resistant markings that will last for years, even under challenging conditions.
-
Even and Powerful Application With the advanced spray technology in Monport Black Laser Marking Spray, you can achieve a smooth, even application every time. The 14 oz can features an anti-clog nozzle that guarantees no blockages, making the spray process both easy and efficient. The nanoparticle formula delivers more coverage with a thinner coating, which results in a professional-quality finish for all your metal marking projects.
-
Easy to Use and Quick Drying Using Monport Black Laser Marking Spray couldn’t be simpler. Just shake the can for 2 minutes, spray from a distance of 6 to 8 inches, and let the surface dry for 5 minutes. Once it’s dry, you’re ready to engrave, saving you valuable time. After engraving, rinse and wipe away the residue to reveal your crisp, dark black markings without any fuss.
-
Effortless Cleanup and Maintenance After marking your metal pieces, simply rinse and wipe the surface to reveal your high-contrast engraving. The black laser marking spray ensures there is no residue left behind, so your workpieces remain clean and ready for immediate use. The easy cleanup means that you can maintain a smooth and efficient workflow, whether you’re working on a small DIY project or a larger-scale production.
Why Choose Monport Black Laser Marking Spray?
Monport’s Black Laser Marking Spray is a game-changer for anyone looking to create durable, precise, and high-quality laser marks on metal surfaces. Its compatibility with CO2 lasers, combined with its easy application and cleanup, makes it an indispensable tool for professionals and hobbyists alike. With Monport Black Laser Marking Spray, you can be confident that your metal engraving projects will have permanent, high-contrast results every time.
Add this versatile spray to your toolkit today and experience effortless laser marking like never before!
Conclusion
Engraving on glass with the Monport 55W laser engraver, the best laser cutter and engraver, can produce stunning results when done correctly. By following the steps outlined in this guide, you’ll be well-equipped to create intricate and beautiful glass engravings. Remember to prioritize safety, experiment with different settings, and maintain your equipment for the best outcomes. Happy engraving!


