Last updated: September 20, 2026
The Olympic Games inspire unity, sportsmanship, and creativity in people of all ages to create easy DIY engraving materials Engaging children with fun and educational Olympic-themed crafts is a wonderful way to celebrate this global event. One of the most iconic symbols of the Olympics is the torch, and creating a mini version is an exciting activity for kids.
In this blog post, we'll provide a step-by-step guide on how to make an Olympic torch craft, including tips and tricks to ensure a successful project. Additionally, we’ll include a detailed Olympic torch guided drawing to help you and your children design and craft a beautiful and meaningful torch. Whether you’re a teacher, a parent, or simply someone who loves to create, this guide will offer everything you need for a memorable Olympic-themed craft experience.

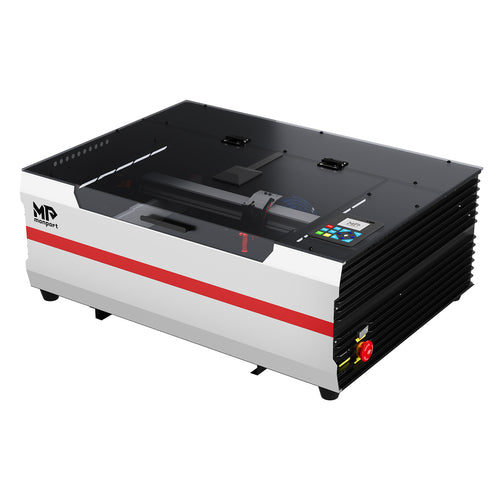
Monport 40W Pro Lightburn-Supported (12" X 8") CO2 Laser Engraver & Cutter with Air Assist

Read More : How to Make Olympic Torch Craft: Step-by-Step Guide to Crafting Mastery
The Magic of olympic games crafts for Kids

Crafting an Olympic torch DIY ignites more than creativity—it introduces children to Olympic values, culture, and teamwork. This craft project encourages:
-
Creative expression
-
Fine motor skill development
-
Cultural awareness
From simple paper torches to engraved designs using laser cutting, this activity grows with your child’s skill level.
Materials Needed for an Olympic Torch Craft

- Cardboard tube or laser cut stick (from paper towels or wrapping paper)
- Construction paper (yellow, orange, red, and white)
- Glue
- Scissors
- Markers or crayons
- Optional: Glitter, sequins, or other decorative DIY engraving materials
Step-by-Step Guide: How to Make an Olympic Torch Craft
-
Prepare the Torch Body:
- Decorate the cardboard tube with paint, markers, or construction paper to resemble the Olympic torch handle.
- Consider adding a ribbon or string for a handle.
-
Create the Flame:
- Cut long strips of yellow, orange, and red construction paper.
- Crinkle the strips to create a flame-like effect.
- Glue the flame strips together, overlapping them to create a fuller look.
-
Assemble the Torch:
- Insert the flame into the top of the cardboard tube.
- Secure the flame in place with glue or tape.
- Decorate the base of the torch with Olympic rings or other designs.
Adding a Personal Touch
To make your olympic torch diy even more special, consider adding personal touches:

- Write names or messages: Encourage children to write their names or messages on the torch.
- Incorporate Olympic symbols: Add Olympic rings, country flags, or athlete figures to the design.
- Use recycled materials: Incorporate recycled things for DIY engraving materials like bottle caps or cardboard boxes into the craft.
Tips for a Successful Easy olympic games crafts for Kids
-
Keep it simple: Focus on basic shapes and colors for younger children. This diy olympic torch craft is suitable for younger children.
-
Encourage creativity: Let children experiment with different designs and. This DIY engraving materials promotes creativity.
-
Make it fun: Create a festive atmosphere with music and encouragement. This diy olympic torch craft can be done with music.
-
Safety first: Supervise children closely when using scissors and glue. Safety is key with this DIY engraving materials.
The Role of Laser Engraving onto Wood in Olympic Torch Crafts
While the above method is perfect for young children, older kids or adults may enjoy a more advanced approach. A laser cutter, like the Monport 40W CO2 laser, can be used to create intricate torch designs from wood, acrylic, or other materials. By engraving onto wood, you can create stunning and personalized designs for your olympic torch diy.
Key Benefits of Using a Laser Cutter:
- Precision cutting for complex shapes
- Ability to create customized designs
- Durable and long-lasting finished product
If you're looking to take your Olympic torch crafts to the next level, the Monport 40W CO2 laser can be a valuable tool. Its precision and speed make it ideal for cutting and engraving onto wood, acrylic, and other materials. The laser's fine detail and capability to engrave onto wood allow for customized and meaningful Olympic torch designs.
Monport 40W CO2 Laser
If you're looking to take your Olympic torch crafts to the next level, the Monport 40W CO2 laser can be a valuable tool. Its precision and speed make it ideal for cutting and engraving wood, acrylic, and other materials.
Key Features of the Monport 40W CO2 Laser:

- Exceptional Speed and Precision: Delivers accurate and fast cuts, perfect for engraving onto wood.
- Lightburn Compatibility: Offers seamless integration with design software for efficient engraving onto wood.
- Built-in Air Assist: Ensures clean and precise cuts and engraving onto wood.
- Machine Component Upgrade: Provides enhanced performance and durability, ensuring long-lasting engraving onto wood results.
Achieve Flawless Results with Monport Black Laser Marking Spray
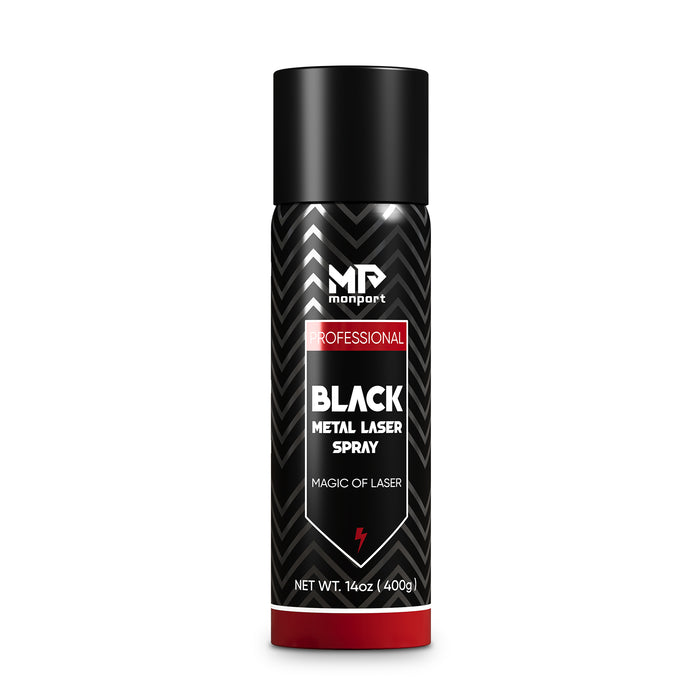
Want to add engraved metal elements to your Olympic torch DIY?
Use Monport black laser marking spray—ideal for CO2 lasers (25W+). It produces durable, high-contrast black markings on stainless steel, aluminum, brass, and more.
Spray Benefits:
-
Fast-drying and clean application
-
Deep, permanent marks
-
Anti-clog nozzle for fine detail work
Perfect for engraving nameplates, medals, or torch tags that complement your olympic games crafts.
Why Choose Monport Black Laser Marking Spray?
This black laser marking spray is designed for effortless application. Simply clean the metal surface with alcohol, shake the can for two minutes, and spray from 6 to 8 inches away. The ultra-fine mist provides an even coating thanks to its anti-clog nozzle, and it dries within five minutes, helping you maintain a smooth and efficient workflow.
After laser engraving, all you need to do is rinse off the surface to reveal bold, high-contrast black marks. There’s no mess, no residue—just clean, permanent results. The formula is free of alcohol in the package, ensuring safe and clean use.
Key Benefits
-
Permanent and durable markings
The fine-grained formula penetrates deeply into metal surfaces, creating marks that are heat-resistant and long-lasting. -
High compatibility
Works seamlessly with CO2 laser engraving machines, making it ideal for customizing tools, jewelry, glassware, and more. -
Even, precise spray
The nanoparticle formula and anti-clog nozzle provide consistent coverage, even for detailed designs. -
Quick application and cleanup
No waiting, no hassle. Spray, engrave, rinse—and your design is ready to shine.
The black laser marking spray comes in a 14 oz aluminum can, offering plenty of product for multiple projects. Its compact size and strong performance make it a go-to tool for both professionals and DIY creators.
Final Thoughts
For anyone using a CO2 laser engraver, the Monport black laser marking spray is a game changer. With its easy application, permanent results, and high compatibility with metal surfaces, it’s the ideal solution to elevate your laser engraving to the next level. Try it once, and you’ll never want to engrave without it!
Olympic Torch Craft for Kids: Easy Paper Roll Tutorial
An Olympic torch craft is an easy way to bring creativity, movement, and international sports themes into a classroom or family activity. Children can make their own colorful paper torch using a cardboard tube, construction paper, tissue paper, glue, and a few simple decorations.
This project does not require a laser cutter or specialized equipment. The basic version is designed for children ages four and older and can usually be completed in 20 to 30 minutes. Teachers can also prepare the materials in advance for a larger classroom or group activity.
Safety note: This project uses paper flames only. Never place a candle, lighter, LED bulb that becomes hot, or any other real flame inside the craft.
Quick Craft Overview
| Project detail | Recommendation |
|---|---|
| Recommended age | Ages 4–10 |
| Project time | 20–30 minutes |
| Difficulty | Easy |
| Estimated cost | Approximately $1–$3 per torch |
| Adult supervision | Recommended for cutting and gluing |
| Finished size | Approximately 14–18 inches tall |
| Main materials | Cardboard tube, colored paper, glue, and scissors |
| Best for | Classrooms, family activities, camps, and sports-themed events |
Children ages four to six may need an adult to prepare the paper flames and wrap the handle. Older children can cut their own flame shapes, create layered designs, and add names, colors, or country-inspired decorations.
Materials for a Paper Olympic Torch
Most of the supplies for this project are inexpensive and easy to find. Before children begin, organize the materials by color and prepare a protected work surface.
Basic Materials
For one paper torch, prepare:
-
One cardboard paper towel tube, approximately 10–11 inches long
-
One sheet of gold, yellow, or white construction paper
-
One sheet of red tissue paper or lightweight construction paper
-
One sheet of orange tissue paper or lightweight construction paper
-
One sheet of yellow tissue paper or lightweight construction paper
-
One glue stick or a small amount of white craft glue
-
One pair of child-safe scissors
-
Clear tape
-
A ruler
-
A pencil
-
Markers, crayons, or colored pencils
Optional decorations include:
-
Metallic paper
-
Washable paint
-
Paper stars
-
Country-color ribbons
-
Name labels
-
Paper confetti
-
Non-shedding craft sequins
Avoid small decorations when making this project with children who may place objects in their mouths. Loose glitter can also be difficult to manage in a classroom, so metallic paper or crayons are usually cleaner alternatives.
Recycled Material Alternatives
You do not need to buy a new set of materials for every torch. Several common household items can be reused:
-
Replace the paper towel tube with a rolled piece of cereal-box cardboard.
-
Use clean wrapping-paper tubes and cut them into shorter sections.
-
Use paper shopping bags instead of new construction paper.
-
Cut red, orange, and yellow flame layers from leftover gift tissue.
-
Use clean magazine pages to create a patterned handle.
-
Use leftover ribbon or paper strips for decoration.
If a cardboard tube feels too soft, insert a rolled sheet of scrap paper inside it. This creates a firmer handle without adding much weight.
Do not use containers that previously held chemicals, cleaning products, food grease, or unknown substances.
Classroom Quantities
For a class of 20 children, prepare:
| Material | Suggested quantity |
|---|---|
| Cardboard tubes | 22 |
| Gold or yellow construction paper | 25 sheets |
| Red tissue paper | 8–10 sheets |
| Orange tissue paper | 8–10 sheets |
| Yellow tissue paper | 8–10 sheets |
| Glue sticks | 10–12 to share |
| Child-safe scissors | 10 pairs to share |
| Clear tape | 4–5 rolls |
| Markers or crayons | 4–5 shared sets |
| Printed flame templates | 22 copies |
| Table covers or scrap paper | Enough for each work area |
The two extra cardboard tubes and templates provide replacements if a material tears or a child wants to restart.
For younger groups, prepare the flame shapes and handle coverings before the activity. This can reduce the project time to approximately 15–20 minutes.
How to Make an Olympic Torch Craft
Set up the materials before beginning and show children a finished example. The example should provide guidance without requiring every child to create the same design.
Step 1 — Prepare the Handle
Place the cardboard tube vertically on the work surface.
Cut a piece of gold, yellow, or white construction paper large enough to wrap around the entire tube. For a standard paper towel tube, a rectangle measuring approximately 11 by 7 inches should work, although the exact size may vary.
Apply glue along one short edge of the paper. Wrap the paper firmly around the tube, smooth out any wrinkles, and glue or tape the final edge in place.
Leave approximately half an inch of paper extending beyond the bottom of the tube. Fold this excess paper inward for a cleaner finished edge.
Children can also paint the tube instead of wrapping it, but the paint must dry before the remaining steps are completed.
Estimated time: 5 minutes
Helpful tip: If the paper begins to unwrap, secure the seam with a narrow piece of clear tape.
Step 2 — Cut the Paper Flames
Create three flame shapes in different sizes:
-
One large red outer flame
-
One medium orange flame
-
One small yellow inner flame
For a standard torch, the largest flame can be approximately 5 inches wide and 8 inches tall. The orange flame should be about 4 inches wide and 7 inches tall, while the yellow flame can be about 3 inches wide and 5½ inches tall.
The shapes do not need to be perfectly symmetrical. Slightly curved and uneven points can make the finished flame look more natural.
Children who are not ready to use scissors can tear tissue paper into long flame-like strips instead. An adult can also prepare the shapes before the activity.
Estimated time: 5–7 minutes
Safety note: Use child-safe scissors and supervise younger children throughout the cutting step.
Step 3 — Layer the Flame Colors
Place the large red flame flat on the table. Center the orange flame on top of it, followed by the smaller yellow flame.
Glue the three layers together near the bottom. Leave the upper sections partly loose so the flame has more volume.
For a fuller result, gently crumple the tissue paper before layering it. You can also add two or three smaller strips between the main layers.
Another option is to fold each flame layer in half vertically, open it again, and glue only along the fold. This creates a slightly three-dimensional shape.
Estimated time: 3–5 minutes
Helpful tip: Use only a small amount of glue. Too much liquid glue can make tissue paper tear or become flat.
Step 4 — Attach the Flame
Pinch or loosely roll the bottom inch of the completed flame.
Insert the pinched end approximately 1–2 inches into the top of the cardboard tube. Secure it inside the tube with clear tape.
If the flame leans to one side, add a small folded strip of cardboard inside the tube to support it. Avoid adding heavy decorations near the top because they can make the torch difficult for a child to hold.
Gently separate and shape the paper layers after the flame is attached. Bend a few points outward to make the flame appear wider.
Estimated time: 3–5 minutes
Helpful tip: Test the flame before taping it permanently. Shorten the lower section if it sits too deeply inside the handle.
Step 5 — Add a Name or Country-Inspired Design
Children can now personalize their torch.
Decoration ideas include:
-
Writing the child’s name vertically along the handle
-
Adding stars, stripes, or geometric patterns
-
Using colors inspired by a chosen country
-
Drawing small sports symbols
-
Adding a paper ribbon around the lower handle
-
Writing a word such as “Courage,” “Friendship,” or “Teamwork”
-
Creating a class, camp, or family emblem
Encourage children to develop their own designs instead of copying an official event logo.
Official Olympic names, symbols, emblems, and ring designs may be protected intellectual property, especially when used by businesses or on products offered for sale. For commercial projects, promotional content, merchandise, or published templates, review the relevant usage rules and obtain legal guidance before reproducing official marks.
Estimated time: 5–10 minutes
Printable Flame Template
A flame template helps younger children create recognizable shapes without drawing them from scratch. Use three nested outlines for the red, orange, and yellow layers.
Small Flame Template
Use this size for toilet paper tubes or compact tabletop crafts:
-
Outer red flame: 4 inches wide × 6 inches tall
-
Middle orange flame: 3 inches wide × 5 inches tall
-
Inner yellow flame: 2 inches wide × 4 inches tall
Large Flame Template
Use this size for paper towel tubes or classroom torch relays:
-
Outer red flame: 5 inches wide × 8 inches tall
-
Middle orange flame: 4 inches wide × 7 inches tall
-
Inner yellow flame: 3 inches wide × 5½ inches tall
How to Draw the Template
-
Draw a curved teardrop shape for the outer flame.
-
Add two or three uneven points at the top.
-
Draw a slightly smaller flame inside the first shape.
-
Add the smallest flame inside the middle layer.
-
Trace each shape onto the correct paper color.
-
Cut around the solid outer lines.
The outline should remain simple. Too many narrow points can be difficult for younger children to cut and may tear easily.
Black-and-White Printing Version
For a printer-friendly worksheet:
-
Use black outlines only.
-
Place the three flame sizes on one US Letter or A4 page.
-
Avoid shaded or colored backgrounds.
-
Add labels beneath the shapes: “Outer Flame,” “Middle Flame,” and “Inner Flame.”
-
Keep at least half an inch of space between the shapes.
-
Use solid cutting lines rather than dotted decorative lines.
Teachers can print the template on regular paper and ask children to trace it onto colored construction paper. For younger groups, print directly onto red, orange, and yellow paper and prepare the pieces before class.
Classroom Printing Tips
For a class of 20:
-
Print 22 template sheets to allow for mistakes.
-
Prepare one completed sample.
-
Store each color layer in a separate labeled tray.
-
Use paper clips or envelopes to keep each child’s three flame pieces together.
-
Print a few enlarged templates for children who need easier cutting shapes.
-
Keep one uncut master copy for future activities.
Age-Based Variations
The same torch design can be adjusted for different ages and ability levels.
Ages 4–6
For younger children:
-
Pre-cut the flame shapes.
-
Pre-cut the paper used to cover the handle.
-
Use glue sticks instead of liquid glue.
-
Provide large decorations that are easy to hold.
-
Keep the project to three flame layers.
-
Let children focus on arranging colors and decorating the handle.
-
Have an adult attach the flame to the tube if necessary.
A simple version can usually be completed in 15–20 minutes.
Avoid small sequins, loose beads, staples, hot glue, craft knives, and difficult cutting patterns.
Ages 7–10
Older children can complete more of the project independently.
They can:
-
Measure and cut the handle covering
-
Draw their own flame shapes
-
Experiment with layered or folded paper flames
-
Add a short written message
-
Create original country-inspired patterns
-
Design a class or team emblem
-
Compare different recycled materials
-
Help organize a paper torch relay after the craft is finished
For an additional challenge, ask children to sketch their design before building it. They can label the materials, colors, and decorations they plan to use.
Classroom and Group Activity Guide
A little preparation can make this project easier to manage with a larger group.
Before the Activity
Allow approximately 30–45 minutes to organize materials for a class of 20.
Teachers or group leaders should:
-
Count and inspect the cardboard tubes.
-
Remove any loose paper or damaged edges.
-
Prepare the flame templates.
-
Divide tissue paper by color.
-
Test the glue on the selected materials.
-
Make one finished example.
-
Cover tables with scrap paper or reusable table covers.
-
Create a separate drying area if paint or liquid glue will be used.
Table Organization
Set up groups of four or five children per table.
Give each table:
-
One tray of flame paper
-
Two or three glue sticks
-
Two pairs of scissors
-
One roll of clear tape
-
One container of markers
-
One finished sample or printed reference image
Keep extra materials at a central supply table. This reduces clutter and prevents every child from searching through the full supply collection.
Suggested Activity Schedule
| Activity | Approximate time |
|---|---|
| Explain the project and safety rules | 5 minutes |
| Wrap or decorate the handle | 5 minutes |
| Cut and layer the flame | 8–10 minutes |
| Attach the flame | 5 minutes |
| Personalize the torch | 5–10 minutes |
| Cleanup and display | 5 minutes |
Cleanup and Storage
Ask children to place paper scraps into separate recycling and trash containers.
Store unfinished torches upright in a box or drying rack. If the flames are crushed during storage, gently reshape the paper before displaying the olympic games crafts.
Finished torches can be used for:
-
A classroom parade
-
An international sports lesson
-
A teamwork activity
-
A school display
-
A pretend torch relay
-
A discussion about courage, friendship, and fair play
Children should walk—not run—while carrying the torches indoors.
Common Problems and Fixes
The Paper Flame Keeps Falling Over
The flame may be too large or too heavy.
Fix: Shorten the flame, remove heavy decorations, or insert a folded cardboard support inside the top of the tube.
The Flame Will Not Stay Inside the Tube
The bottom of the flame may be too narrow for the tape to hold.
Fix: Fold the bottom into a flat tab before inserting it. Use two crossed strips of tape inside the tube.
The Cardboard Tube Feels Too Soft
Some recycled tubes bend easily.
Fix: Roll a sheet of scrap paper or thin cardboard and insert it into the tube. Secure the bottom with tape.
The Construction Paper Will Not Stay Wrapped
The paper may be too thick, or there may not be enough glue along the seam.
Fix: Curve the paper around the tube before applying glue. Secure the seam with clear tape until the glue dries.
The Tissue Paper Tears
Tissue paper becomes fragile when too much liquid glue is applied.
Fix: Use a glue stick, apply glue only near the bottom, or place the tissue paper on the table before smoothing it.
The Flame Colors Blend Together
The flame layers may be too similar in size.
Fix: Trim the yellow and orange layers so that at least half an inch of each surrounding color remains visible.
The Torch Is Top-Heavy
The flame or upper decorations may be too large.
Fix: Reduce the size of the flame and keep metallic paper, ribbons, and labels on the handle instead of the top.
Optional Laser-Cut Version for Adult Makers
Adult makers can create a reusable torch-inspired display from laser-compatible plywood or acrylic. Design a simple handle and layered flame pieces in vector software, then test the fit on scrap material before cutting the final version. Use only materials confirmed as safe for your machine, provide proper ventilation, and never cut PVC, vinyl, or unidentified plastics.
A compact CO₂ machine such as the Monport 40W CO₂ laser engraver can be used for small wood or approved acrylic components. Laser equipment should be operated only by a trained adult. Keep children away from the machine during cutting, engraving, ventilation, and cleanup. The laser-cut version should remain a separate adult project rather than replacing the child-friendly paper tutorial.
Final Thoughts
This paper Olympic torch craft uses simple supplies but gives children plenty of room for creativity. Younger children can assemble pre-cut pieces, while older children can measure, draw, cut, and personalize the entire design.
For the best result, keep the handle light, use clearly different flame sizes, and prepare materials according to the age of the group. Whether the craft is used for a classroom lesson, family activity, camp, or sports-themed celebration, the finished torch can support conversations about teamwork, courage, friendship, and respectful international participation.
Frequently Asked Questions About Olympic Torch Crafts
What age is a diy olympic torch suitable for?
Most children ages 4 and up can enjoy an olympic torch diy with supervision.
How long does an olympic torch craft take?
Most projects take 20–30 minutes, depending on decoration time.
Can recycled materials be used?
Yes, recycled paper and cardboard work well for an olympic torch diy.
Is this craft safe for classrooms?
Yes, with basic supervision during cutting and gluing.
Conclusion
A diy olympic torch is a simple yet meaningful way to celebrate creativity and learning. This olympic torch diy project brings families and classrooms together while reinforcing teamwork and imagination. With basic materials and clear steps, an olympic torch craft can become a fun tradition for any Olympic-themed event.