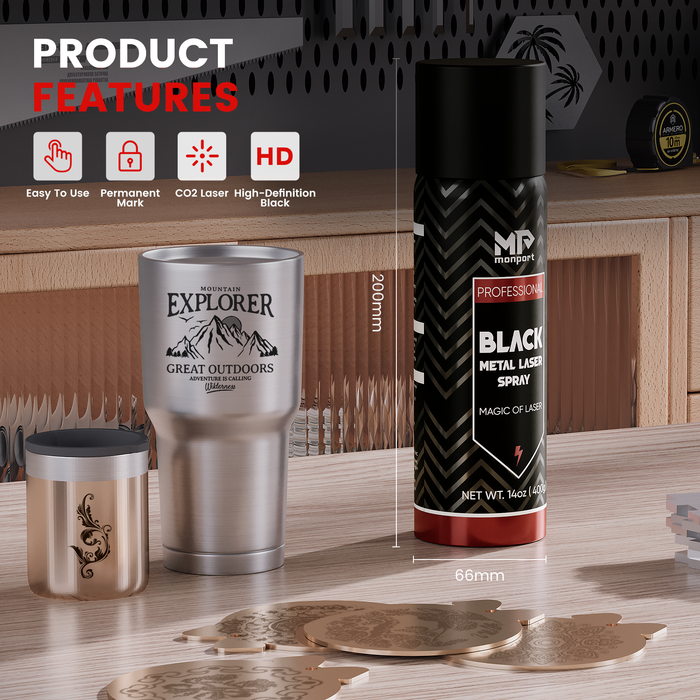
How to cut acrylic light panels to bring your creative visions to life? Acrylic light panels are a versatile material prized for their clarity, durability, and light-diffusing properties. They find applications in various fields, from crafting stunning signage and lighting fixtures to creating unique home décor elements with a good laser cutter and black laser marking spray. This guide explores the art of cutting acrylic light panels and how the Monport Onyx 55W Desktop Mini Laser Engraver empowers you to achieve clean cut acrylic panels, professional results.
MONPORT ONYX 55W Desktop CO2 Laser Engraver with Autofocus - Machine
Unlocking the Potential of Cut Acrylic Light Panels
Acrylic, also known as polymethyl methacrylate (PMMA), offers numerous advantages for creative projects:

- Crystal Clarity: Acrylic boasts superior transparency compared to glass, allowing light to pass through beautifully.
- Durability & Lightweight: Highly resistant to scratches and impacts, acrylic is significantly lighter than glass, making it ideal for various applications.
- Versatility: Available in a wide range of colors, thicknesses, and finishes, acrylic caters to diverse creative needs.
- Light Diffusion: Acrylic panels excel at diffusing light evenly, creating a soft, luminous effect.
These qualities make cut acrylic light panels perfect for applications such as:

- Signage & Displays: Create eye-catching signs, product displays, or menu boards with clear or colored acrylic using a good laser cutter.
- Lighting Fixtures: Craft custom lampshades, diffusers, or decorative lighting elements with a good laser cutter.
- Home Décor: Design unique wall art, shelving units, or decorative objects using a good laser cutter.
- Prototyping: Acrylic's versatility makes it ideal for rapid prototyping and creating functional models with a good laser cutter.
Cutting with Precision: CO2 Laser Engraving for Acrylic Cutting
A CO2 mini laser engraver, like the Monport Onyx 55W Desktop Mini Laser Engraver, utilizes a focused laser beam to cut acrylic material. Here's how this method offers distinct advantages:
- Unmatched Precision: The laser beam delivers incredibly clean and precise cuts, eliminating the risk of ragged edges or melted material.
- Versatility: The laser can cut various acrylic thicknesses and shapes depending on the laser power settings.
- Minimal Heat Impact: The laser beam produces minimal heat, reducing the risk of warping or deformation of the acrylic.
- Clean Cuts: Laser cutting creates smooth, polished edges, often eliminating the need for further finishing.
Introducing the Monport Onyx 55W Laser Engraver: Your Cutting Edge
The Monport Onyx 55W Desktop Mini Laser Engraver is a powerful tool that empowers you to achieve exceptional results when cutting acrylic light panels. Here's how some of its features make it ideal for this task:
- Powerful & Efficient Performance: The 55W laser tube tackles acrylic cutting with ease, allowing you to cut through 10mm thick acrylic panels in a single pass.
- One-Touch Auto-Focus: This user-friendly feature eliminates manual adjustments, ensuring optimal engraving distance and precise cuts for your acrylic projects.
- Spacious Work Area: With a 19" x 11.5" working area, the Onyx 55W accommodates various acrylic panel sizes.
- Multi-Material Compatibility: This versatile mini laser engraver cuts a wide range of materials, including different thicknesses of acrylic.
- Safer & Cleaner Design: The enclosed design with an exhaust fan ensures a safe and clean working environment, free from dust and fumes.
Cutting with Confidence: How to Cut Acrylic Light Panels Using Your CO2 Laser Engraver
Here are some essential steps to follow when using a CO2 laser engraver to cut acrylic light panels:
- Design & Software: Create your desired cutting design using design software compatible with your mini laser engraver.
- Material Selection: Choose the appropriate acrylic panel thickness based on your project requirements.
- Laser Settings: Consult the user manual or experiment on scrap material to determine the ideal laser power and speed settings for clean cutting through your chosen acrylic thickness.
- Cutting Process: Secure the acrylic panel in the laser bed and initiate the cutting process according to your mini laser engraver's instructions.
Beyond Cutting: The Creative Potential of the Onyx 55W
The Onyx 55W Desktop Laser Engraver goes beyond cutting, unlocking a world of creative possibilities for your acrylic light panel projects. Here's how you can leverage its versatility to add stunning visual elements and personalized touches:
Engraving for Enhanced Visual Appeal
- Engrave intricate patterns or designs: Transform your acrylic light panels from simple shapes into captivating works of art. Laser engraving allows you to etch detailed patterns, geometric shapes, or even nature-inspired motifs onto the surface, creating a beautiful interplay of light and shadow when illuminated.
- Add Text & Logos: Personalize your light panels with engraved text messages, quotes, or company logos. This technique is ideal for creating custom signage, promotional displays, or one-of-a-kind home décor pieces.
- Multi-Layer Engraving: Take your creativity a step further by exploring multi-layer engraving. By engraving designs at different depths, you can create a 3D effect, adding visual complexity and depth to your acrylic light panels.
Light Manipulation Techniques
- Selective Frosting: Use the mini laser engraver to create frosted areas on your acrylic panels. These frosted sections diffuse light differently than the clear areas, producing a captivating visual effect and allowing you to create custom light gradients or patterns within the panel itself.
- Photo Engraving: For a truly personalized touch, the Onyx 55W can be used for photo engraving. By adjusting the laser settings, you can create a black and white image permanently etched onto the surface of your acrylic light panel. This technique is ideal for crafting custom nightlights, lampshades featuring cherished memories, or unique signage with a personal touch.
Creating Functional and Decorative Pieces
- Combine Cutting & Engraving: The true power of the Onyx 55W lies in its ability to combine cutting and engraving techniques. For example, you can laser-cut custom shapes from your acrylic light panel and then engrave intricate designs or patterns onto the surface. This allows you to create functional and decorative pieces like custom lighting fixtures, decorative shelves, or personalized room dividers that diffuse light beautifully.
- Engraved Lighting Effects: By strategically engraving patterns or designs onto specific areas of your acrylic light panel, you can manipulate how light diffuses through the material. This allows you to create custom lighting effects, such as directional light patterns or even soft, glowing text messages.
Software & Design Inspiration
The Onyx 55W works seamlessly with design software like Lightburn, allowing you to unleash your creativity. Explore online resources and tutorials to discover endless design possibilities for engraving and light manipulation techniques on acrylic with your laser engraver cutter.
With the Monport Onyx 55W Desktop laser engraver cutter as your creative partner, the possibilities for transforming acrylic light panels are limitless. Experiment, explore, and push the boundaries of your imagination to create unique and stunning pieces that add a touch of light and personality to your projects.
Acrylic Cutting Speeds & Power Settings with the Monport Onyx 55W
The Monport Onyx 55W Desktop Laser Engraver empowers you to achieve clean and precise cuts on acrylic light panels. To ensure optimal results, here's a guide to recommended cutting speeds and power settings based on acrylic thickness:
-
8mm Acrylic: For thicker acrylic panels (8mm), prioritize a slower cutting speed (Speed 5) combined with maximum power (Power 100) to ensure a clean cut through the entire material. This setting combination delivers precise results while minimizing the risk of burning or melting the edges.
-
6mm Acrylic: For medium-thickness acrylic panels (6mm), you can increase the cutting speed (Speed 10) while maintaining maximum power (Power 100). This setting allows for a faster cutting process while still delivering clean cuts.
-
4mm Acrylic: For thinner acrylic panels (4mm), a slower cutting speed (Speed 10) paired with moderate power (Power 50) is recommended. This combination ensures a clean cut without excessive heat impacting the material.
Important Considerations:
- These settings serve as a starting point. It's crucial to experiment on scrap material before working on your final acrylic piece.
- Factors like the specific type of acrylic and desired edge finish may influence the optimal settings.
- The Monport Onyx 55W software allows for fine-tuning speed and power settings to achieve the best results for your project.
Q&A
What are the main benefits of using acrylic light panels in creative projects?
Acrylic light panels are lightweight, durable, and offer excellent light diffusion and crystal-clear transparency. They are also available in various colors, thicknesses, and finishes, making them versatile for applications like signage, lighting fixtures, home décor, and prototyping.
Why is the Monport Onyx 55W Desktop Laser Engraver ideal for cutting acrylic light panels?
The Monport Onyx 55W offers powerful cutting capabilities, one-touch autofocus for precision, a spacious work area, and multi-material compatibility. It delivers clean, polished cuts with minimal heat impact, making it perfect for producing professional results with acrylic panels.
How can you achieve the best cut quality on acrylic light panels with a CO2 laser engraver?
To get the best results, choose the right acrylic thickness, adjust your laser power and speed settings according to the material, and test on scrap pieces before final cutting. The Monport Onyx 55W also allows for fine-tuning settings to avoid warping or rough edges.
Can the Monport Onyx 55W be used for both cutting and engraving acrylic?
Yes. You can cut precise shapes from acrylic panels and also engrave intricate patterns, text, or images. This allows for unique designs such as custom lighting fixtures, signage, and decorative elements with personalized visual effects.
What additional creative effects can be achieved when working with acrylic light panels?
You can use techniques like selective frosting for light gradients, photo engraving for personalized designs, and multi-layer engraving for 3D effects. Combining cutting and engraving also opens the door to creating functional and decorative pieces with stunning lighting effects.
Investing in Your Creativity
The Monport Onyx 55W Desktop Laser Engraver Cutter empowers you to transform acrylic light panels from raw material into stunning, functional pieces. With its user-friendly features, versatility, and powerful laser technology, this machine unlocks a world of creative possibilities for crafters, hobbyists, and small businesses alike, especially when used with black laser marking spray.
Ready to embark on your acrylic light panel cutting journey? Visit our website to explore the Monport Onyx 55W Desktop Laser Engraver and discover how to cut acrylic ligh panels as well as bring your creative visions to life!
Read More: The Ultimate Guide to Engraving Aluminium Dog Tags and Black Aluminum Panels


