https://monportlaser.com/blogs/40w-lightburn-ready-co2-laser-engraver.atomMonportlaser - 40W Lightburn-ready CO2 Laser Engraver2023-03-30T16:21:46+08:00Monportlaserhttps://monportlaser.com/blogs/40w-lightburn-ready-co2-laser-engraver/how-to-get-a-quality-40w-co2-laser-engraver-cutting-machine2023-03-30T16:21:46+08:002023-03-31T17:50:59+08:00How To Get A Quality 40W CO2 Laser Engraver Cutting MachineWang wenting
A 40W CO2 Laser Engraver Cutting Machine is a high-quality machine that is used to cut and engrave different kinds of materials. It can be used in various industrial applications where precision cutting needs to be done. There are several types of 40W CO2 Laser Engraver cutting machines available in the market today. They vary greatly in terms of price and quality and it is important that you choose one that suits your needs perfectly if you want to get the best value for your money.
If you're looking for a new 40W CO2 laser engraver cutting machine, or if you're thinking about purchasing a refurbished model, this guide will help you find the best deals.
Can a laser engraver cut materials?
A 40W CO2 laser is definitely capable of cutting a variety of materials. However, it is important to note that the power of a laser cutter is not determined by the wattage of the laser itself. Monport 40W CO2 laser machine can be called a 40W CO2 laser engraver cutting machine since it has more than 40W laser power laser tube.
This type of laser is ideal for small-scale businesses that need to cut materials quickly and accurately. They're also great for hobbyists who want to experiment with different types of materials. Some hobbyists even use these machines at home so they can create things like personalized jewelry or decorations for their walls!
Cutting the Thickness of 5mm Plywood
Machine: Monport 40W Lightburn-ready
Speed: 4mm/s
Power: 45%
How To Get A Quality 40W CO2 Laser Engraver Cutting Machine
1. Determine your budget
Determine your budget for the machine, taking into consideration not just the cost of the machine itself, but also any additional costs for accessories, maintenance, and repairs.
As with any type of equipment purchase, it's important to consider whether the investment makes sense for your business and how often you plan on using the machine.
2. Evaluate machine specifications
Look at the specifications of the machine, including its power output, cutting area, precision, and speed. Make sure the machine has the capabilities you need for the type of work you plan to do.
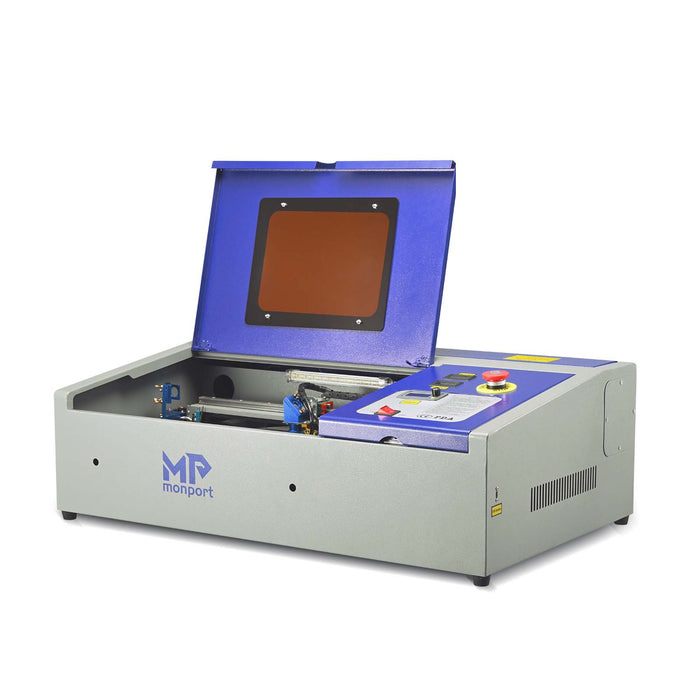
Monport 40W CO2 laser engraver cutting machine provides red dot guidance, an ammeter, a dual work bed, and a safety sensor for you. It comes with a full set of features that will allow you to create professional designs, images, logos, and more. The 40W CO2 Laser Engraver Cutting Machine uses CO2 laser engraving technology to produce high-quality results that are precise and detailed. With this machine, you can create your own products such as jewelry, mugs, and plate.
3. Consider the software
Look at the software that comes with the machine and evaluate its capabilities. Make sure it is easy to use and can handle the types of files you will be working with.
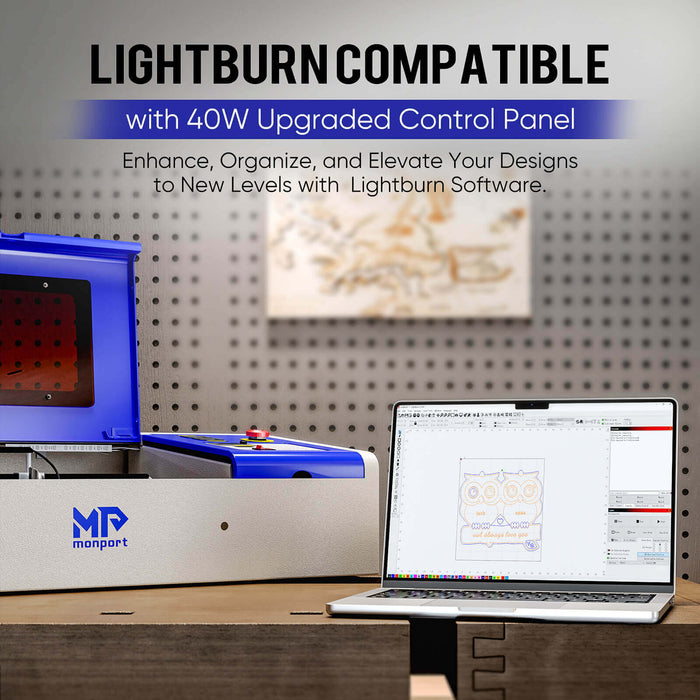
A good quality 40W CO2 laser engraver should also come withlaser engraving software pre-installed so you don't have to worry about installing it yourself or having to buy additional software separately in order for your machine to work properly. As for most 40W CO2 laser engraver cutting machines, you only can use their equipped software, Most affordable 40W lasers can not be connected to Lightburn software.
However, Monport K40 Lightburn laser already has the Lightburn-compatible control panel installed, so you won't need to purchase a new motherboard. Simply connect this K40 to your computer and start playing!
4. Look for customer support and training
Look for customer support and training opportunities. If something goes wrong with your machine while you’re learning how to use it, do they have someone who can help? Or if you need more training after purchase, can they provide that too?
Monport offers a wide range of 40w CO2 laser engraver lowest price. The 40w CO2 Laser Engraver Cutting Machine is perfect for both beginners and professionals. Monport 40w CO2 laser engraver cutting machine is an affordable, compact, and portable device for both hobbyists and professionals.
The 40W CO2 Laser Engraver Cutting Machine also comes with a one-year warranty on parts and hardware, which is just another reason why this unit is such a great value for your money.
Conclusion
There are a lot of options when it comes to a 40W CO2 laser engraving machine. Each model has its own strengths and weaknesses, which is why it's not so easy to pick one or another as the best CO2 laser engraver on the market. If you are looking for a quality 40W CO2 Laser Engraver Cutting Machine that offers plenty of power and functionality then this model should be on top of your list!
]]>
https://monportlaser.com/blogs/40w-lightburn-ready-co2-laser-engraver/a-brief-introduction-to-milliammeter-for-monport-k402023-03-23T09:20:33+08:002024-10-30T15:34:58+08:00A Brief Introduction to Milliammeter for Monport K40Wang wenting
Ammeter is an essential tool used to measure the current flowing through an electrical circuit, including the laser tube in a Monport K40 laser engraver. Measuring the current is important to ensure that the laser tube is functioning optimally and that the engraving results are of high quality.
Special Offer | Monport 40W Pro Lightburn-Supported (12" X 8") CO2 Laser Engraver & Cutter with Air Assist - 40W Pro
In the Monport K40 laser engraver, the ammeter is typically installed on the laser power supply. The power supply is responsible for regulating the power output to the laser tube, which affects the engraving quality.
To use the ammeter, you first need to locate it on the power supply. It may be a separate component or part of a control panel. Once located, you can connect the meter to the circuit by using test leads.
When the machine is powered on, the meter will display the current flowing through the circuit. This reading can be used to adjust the power output of the laser tube to achieve the desired engraving results. Generally, a higher current reading indicates a stronger laser output, which can result in deeper or darker engraving.
The figures displayed on the digital panel of the ordinary k40 laser engraver are not true, which leads to the fact that the digital panel is useless in actual operation. Many engravers will buy a milliammeter to install it by themselves so that they can clearly know the size of the power setting. Fortunately, the Monport k40 itself is equipped with a milliammeter to help you better understand your set power, except for the milliammeter, It also has another laser tube temperature display to let you know your laser tube temperature so that you can carry out water cooling in time.
Why Need to Use Ammeter for Your K40 Laser Engraver?
A Milliammeter is an essential tool for monitoring the current flow in a CO2 laser machine. The current flowing through the laser tube in a CO2 laser machine is typically measured in milliamperes (mA), which is why a Milliammeter is required.
Here are some reasons why a Milliammeter is necessary for a CO2 laser engraver:
Optimal power output: The power output of the CO2 laser tube is directly related to the current flowing through it. A Milliammeter allows you to monitor the current and adjust it to the optimal level for the desired engraving results.
Safety: Monitoring the current flow with a Milliammeter helps ensure that the laser tube is not being overdriven, which can cause damage to the tube or other components. Additionally, it can help prevent overheating or other safety issues.
Maintenance: A Milliammeter can be used to diagnose problems with the laser engraver. For example, if the current is lower than expected, it could indicate a problem with the power supply or other components.
Efficiency: Monitoring the current with a Milliammeter can help optimize the energy efficiency of the CO2 laser machine, reducing energy costs and improving productivity.
Types of Ammeters for K40 Lasers
There are several types of Milliammeters available in the market that can be used with K40 lasers. Some of the common types of Milliammeters that are compatible with K40 lasers include:
Analog Ammeter: Analog meters are the traditional type of Milliammeter that use a needle gauge to display the current flowing through the circuit. These meters are simple and affordable, but may not be as precise as digital meters.
Digital Ammeter: Digital meters use an LCD display to show the current flowing through the circuit. These meters are more precise and accurate than analog meters, and may also have additional features like data logging and USB connectivity.
Inline Ammeter: Inline meters are designed to be installed directly in the circuit between the power supply and the laser tube. These meters provide real-time measurement of the current flowing through the laser tube and can help prevent damage to the tube due to over-current or under-current conditions.
External Ammeter: External meters are standalone devices that can be connected to the laser power supply to measure the current flowing through the circuit. These meters are portable and can be used with multiple lasers, but may be less convenient to use than inline meters.
Ultimately, the specific type of ammeter that is best for your K40 laser engraver will depend on your budget, preferences, and the features you need. It is important to choose a meter that is compatible with your laser's specifications and can provide accurate and reliable measurement of the current flowing through the circuit.
Conclusion
Using an ammeter is crucial for achieving optimal performance, maintaining safety, diagnosing problems, and improving efficiency in a k40 laser engraver. The Milliammeter is a critical tool for monitoring and adjusting the laser tube's power output in the Monport 40w CO2 laser. By using the meter, you can ensure that the engraving results are consistent and of high quality.
]]>
https://monportlaser.com/blogs/40w-lightburn-ready-co2-laser-engraver/beginners-guide-to-the-k40-laser-engraver-monport2023-03-02T16:07:11+08:002024-09-11T12:38:52+08:00Beginners Guide To The K40 Laser Engraver - MonportWang wenting
Master your K40 laser engraving & cutting! This guide explores components, specs & advantages. Discover upgrade options for precision, speed & customization. Find the ideal tool for small projects & unleash your creativity. Monport - Your partner in laser innovation.
The K40 laser cutter, a ubiquitous name in the hobbyist and small-scale manufacturing world, offers a powerful and precise engraving and cutting solution at an attractive price point. But what exactly is a K40 laser cutter, and how to make selection thicked in lightburn? This comprehensive guide dives deep into the world of the Monport K40 laser, exploring its structure, specifications, advantages over OmTech k40 laser, and upgrade options.
These machines typically use a CO2 laser, which is a type of laser that is commonly used in cutting and engraving applications because it can cut or engrave a wide variety of materials, including wood, acrylic, leather, and some types of metal. They are usually equipped with a 40W laser tube, that's why the name K40, allows them to cut or engrave materials up to around 6 mm thick.
They are also usually quite compact, making them suitable for use in small workshops or home studios. Some of the most common applications for K40 laser cutters include creating custom signs and nameplates, customizing gift items, and prototyping for small-scale manufacturing.
It is important to note that K40 is not a commercial CO2 laser cutter, and should not be used for heavy usage or production. They are a better fit for hobbyists and small projects. Let's delve deeper on how to make selection thicked in lightburn using your K40 Laser engraver.
1. The Structure of K40 Laser
The specific design of the K40 laser cutter may vary depending on the manufacturer and the specific model, but these are the main components that make up the structure of the machine. The structure of Monport K40 laser cutter compared with OmTech k40 generally consists of several key components, which include:
Moving gantry: The moving gantry is the component of the laser cutter that holds the laser tube, reflective optics, and other components, and moves the laser beam over the material to be cut or engraved. It is usually attached to a set of guide rails that allow it to move smoothly and accurately.
Digital Panel: The figures displayed on the digital panel of the ordinary k40 machine are not true, which leads to the fact that the digital panel is useless in actual operation. Many engravers will buy a milliammeter to install it by themselves so that they can clearly know the size of the power setting. Fortunately, the Monport k40 over the OmTech k40, is equipped with a milliammeter to help you better understand your set power, except for the milliammeter, It also has another laser tube temperature display to let you know your laser tube temperature so that you can carry out water cooling in time.
Working Table: The table is the component of the laser cutter that holds the material to be cut or engraved. It is usually made of a material that is resistant to heat, such as aluminum or ceramics. The table is usually equipped with a grid of holes or slots to help align the material, and may also be equipped with a vacuum system to hold the material securely in place.
Control system: The control system is the component of the laser cutter that allows the operator to control the movement of the gantry and the intensity of the laser beam. It typically consists of a computer, a control board, and software that allows the operator to create and edit cutting or engraving files and also make selection thicked in lightburn.
As we all know, the only device that can connect to LightBurn directly in the K40 category is Monport K40 LightBurn-Ready. As a result, Monport K40 LightBurn's control board is a GRBL controller that can connect LightBurn directly. If you can use LightBurn, you can use almost all computer operating systems to engrave.
Laser tube:This is the component that generates the laser beam that is used for cutting or engraving. In a K40 laser cutter, this is typically a CO2 laser tube with a power output of around 40 watts.
Reflective optics:The laser beam is focused and directed onto the material to be cut or engraved by a set of mirrors and lenses known as reflective optics. The reflective optics are typically made from aluminum and are designed to direct the laser beam onto the material with high precision.
Exhaust system: the laser cutter needs to dissipate the smoke generated during the cutting process, for that reason the exhaust system is a necessary component to exhaust the smoke generated, usually a small fan or ventilator.
In terms of the smoke exhaust system, the k40 smoke exhaust system does not meet the needs of some engraving enthusiasts due to a lack of air assistance. Many engravers will purchase air assistance equipment for installation, but you can also buy the version with air assist directly.
2.The Specification of K40 Laser Cutter
The specifications of a K40 laser can vary depending on the specific model, but in general, they have similar specifications. Here are some of the typical specifications of aK40 laser engraver :
Laser Power: 40 watts
Laser Type: CO2 laser tube
Cutting area: Typically around 400mm x 600mm
Cutting thickness: Depends on the material, but typically around 6mm for wood, acrylic, and leather. It can cut less for harder materials such as metal.
Engraving speed: Typically around 1000mm/min
Cutting speed: Typically around 500mm/min
Resolution: Typically around 1000 DPI
Cooling: Air cooling
Power supply: 110-220V AC, 50/60Hz
Dimensions: Varies depending on the model, but typically around 800mm x 600mm x 500mm
Weight: Varies depending on the model, but typically around 40-50 kg
Control system: usually a simple control board, or a combination of control board and software.
Exhaust system: basic exhaust fan or ventilator
While all K40 laser cutters should have the same main components, such as a laser tube, reflective optics, a moving gantry, a table, and a control system, there can be variations in the specific design and quality of these components from one manufacturer or model to another. Some K40 laser cutters may have more advanced or higher-quality components than others, which can affect the performance and capabilities of the machine.
Monport K40 laser cutters compared with OmTech k40 may have a more powerful laser tube, which would allow them to cut or engrave thicker or harder materials than others. While Monport K40 LightBurn-Ready can realize 1500 DPI. Some may have a more accurate or faster-moving gantry, which would make the cutting or engraving process more efficient. Some may have more advanced control systems with more features and capabilities, while others may have simpler, more basic control system.
3. The Benefit of the K40 Laser Cutter
It's worth noting that while the benefits of a K40 laser cutter are significant, they should not be overstated. The machine's power and precision are limited, thus it's suitable for small-scale and hobbyist use, not for heavy usage or production. With proper upgrades and maintenance, a K40 laser cutter can still be a valuable tool for a wide range of projects and prototypes.
Precision: K40 laser cutters can produce precise cuts and engravings, with high resolution, which allows for detailed and intricate designs.
Efficiency: The laser beam used in K40 laser cutters can cut or engrave materials quickly and efficiently. This can save a lot of time and effort compared to traditional cutting methods.
Customization: K40 laser cutters can be used to create customized signs, name plates, gifts, and other products, which can help you stand out from competitors and give you a unique selling point.
Space-saving: A k40 laser cutter is typically a compact machine and it won't take much space in your workshop or studio.
DIY Friendly: K40 laser cutters are usually easy to use and have a simple control systems, making them accessible for hobbyist and makers, who can learn and use them without needing a lot of technical knowledge
How to Upgrade Your K40 Laser Engraver
It's worth noting that the cost and difficulty of these upgrades can vary widely, and it's important to take into account the trade-offs between cost, difficulty, and the performance increase each upgrade will give. Additionally, before doing any upgrade, it's important to make sure the machine is in good working condition and properly grounded, and that any replacement parts are properly rated and compatible with the machine.
There are several upgrades that can be done to a 40W machine to improve its performance and capabilities. Some popular K40 laser upgrades include:
1. Replacing a honeycomb
Some K40 models may come with other types of beds, such as slatted beds or solid beds. That being said, a honeycomb bed is a popular option for K40 laser engravers because it provides a stable surface for engraving and cutting materials, while also allowing for proper air flow to help prevent fires.
2. Upgrading the control system
Replacing the stock control board with a more advanced board that has more features and capabilities can improve the precision and speed of the cutting or engraving process and help you make selection thicked in lightburn easier. If you have a Monport basic 40w laser, you can upgrade your control board to a GRBL controller compatible with LightBurn.
3. Adding a water cooling system
K40 laser cutters often use an air cooling system which is not very efficient, adding a water cooling system can help dissipate the heat generated by the laser tube more effectively, which can prolong the life of the tube and improve the overall performance of the machine. You can get a CW 3000 water chillerfor your 40w CO2 laser machine for improving its cooling system.
4. Adding a K40 air assist
As mentioned previously the laser exhaust system of K40 is not always very efficient, adding a better fan or creating better ventilation for the machine can help dissipate the smoke and fumes generated by the cutting process. Upgrading an air assist to your laser is a good choice for a clean environment.
Final Thoughts
It is also important to note that there are many cheap knock-offs and low-quality 40 machines in the market that could be a disappointment. Not only that their components may not be as high quality as a real K40, but also the manufacturer does provide good support or documentation. It is important to do good research before buying a K40 laser cutter to ensure that you get a machine that meets your needs and expectations.
]]>
https://monportlaser.com/blogs/40w-lightburn-ready-co2-laser-engraver/monport-k40-laser-cutter-questions-and-answers-guidance-for-novice2022-12-13T19:11:26+08:002024-08-02T22:54:36+08:00Monport K40 Laser Cutter Questions and Answers: Guidance for NoviceWenting Wang
Ready to take your engraving projects to the next level? We'll show you how to use the Monport K40 laser cutter LightBurn, a perfect tool for novices! With a step-by-step guide, you'll be up and running in no time. We'll also answer some common questions, provide specific function instructions, and direct you to helpful videos. Get ready to take your K40 experience to the next level!
Before you can start engraving with your laser, you must install a cooling system to prevent the glass tube from overheating. To install the pump, fill the special water tank with distilled water—never use deionized water or tap water, as this could damage your engraving machine. Connect the two hoses attached to the machine to the water inlet and outlet on the back, and then connect the other end of the inlet pipe directly to the pump and immerse it in the water tank. Put the outlet pipe into the water tank and connect the pump to its power supply. After you switch on the pump, the water should start to flow through the machine and back to the tank. Don't forget to visually confirm that there is water in the laser tube before you start! Then, be sure to check the water temperature on the built-in digital display regularly to ensure that the cooling system is running properly.
To ensure optimal performance of your laser, make sure to monitor the water temperature with the built-in digital display. A temperature of 60-70°F (15.21°C) is the ideal range. If the temperature starts to rise above 75°F (24°C), it's time to switch out the water for a new supply. Be sure to gradually reduce the laser power or turn it off completely before making the switch. To keep the water cool, you can also add a sealed chilled water bottle to the water tank. But don't rely on the water to keep the CO2 tube cool as this could damage it.
Installation of CW-3000 water chiller
If you're looking for a reliable way to keep your K40 machine supplied with temperature controlled water, we suggest going for the CW-3000 9L industrial water cooling system. This industrial chiller is a great choice and can meet all the cold water requirements of your K40 laser.
Exhaust system
It's easy to install the exhaust pipe on the fan. Connect one end to the purifier or place it outside the window for optimum ventilation. For best results, hook up the ventilation hose to the filtration system. If you can't connect it, no problem! Simply place the hose outside the building. Just remember, don't operate the machine in an enclosed space. The smoke can cause irritation to your eyes, nose, mouth, and lungs.
Grounding and power connection
It's important to note that this type of laser has high voltage and potential hazards, so you must firmly ground it during use to prevent electrostatic accumulation. The grounded 3-core power socket will provide sufficient grounding connection. If you cannot use a grounded 3-core power socket, you must set up a separate grounding wire and make sure the ground resistance of the safety wire is less than 5 Ω. To help you out, check out Figure 3-4 and Figure 3-5 below - they show the location of the grounding cable on the back of the engraving machine and the necessary settings.
Ⅱ. Initial Laser Testing
Let's test out your machine using the following steps: First, turn on the machine and click the test button to check for laser output. Next, start the water cooling system and place a piece of laser treatable waste on the workbench. Close the lid and press PULSE to start the laser. Now, press the emergency stop button and observe whether the laser immediately stops. If not, the emergency stop device needs to be replaced before using the engraving machine.
Ⅲ.Installing Lightburn Software
The prerequisite for this step is that you have purchased lightburn software and installed it on your computer.
• Step 1
Download the file called 40w-lb.zip from the Monport technical support website.
Browse to the folder where you downloaded the zip file and extract all files.
• Step 2
If you have never had a Grbl laser setup on your computer, double click the CH340
Driver file and follows the installation instructions. If you already had a Grbl laser
installed, you can skip this step.
• Step 3
In Lightburn software, go to the Laser tab and click the Devices button. Click on Import and browse to the file you just extracted. Click on the file, click Open and then OK.
The laser will now be installed on your computer. Turn on the laser and wait for it to home. If it does not home, right click on the devices button.
Although our factory calibrated your entire system during assembly, the laser tubes, focusing lenses, and/or one or more mirrors may be misaligned during shipment. Therefore, it is recommended that you perform an optical alignment test when setting up the machine.
Ⅳ. Conclusion
When you're shopping for a CO2 desktop laser engraver, you want it to offer more than just the basics. After all, you could be a budding professional laser engraver, so why not pick a machine with more features and power? That's whereMonportcomes in. Our laser engravers offer a complete range of professional capabilities that will give you the performance and results you need. We develop new products at our R&D facilities in the US and overseas, so you can be sure you're always on the cutting edge. So, what are you waiting for? Reach out to Monport laser team today for more information and to get started on your laser cutting and engraving journey. You won't regret it!
]]>
https://monportlaser.com/blogs/40w-lightburn-ready-co2-laser-engraver/10-laser-engraving-ideas-with-monport-k40-laser-cutter2022-11-18T18:47:24+08:002023-02-07T11:31:03+08:0010 Laser Engraving Ideas with Monport K40 Laser CutterWenting Wang
Since the release of Monport 40W LightBurn, Monport has been amazed by the sculpture works carved by customers every day. No matter what materials are used for carving or the parameter settings for engraving, with this equipment, countless other small handicraft projects can be made easier. You can engrave letters or patterns you want on many small objects. All this is possible without the need for technical skills, artistic skills or expensive equipment. In addition, buying our K40 laser cutter will introduce you to the world of laser engraving. Therefore, many new users soon became enthusiastic about engraving these DIY projects and upgraded their hobby to a business. This very novice friendly low-cost co2 laser engraving machine can easily engrave various contents.
Millennium Falcon lasercut
This beautiful object is made by cutting 2mm plywood plywood and splicing layer by layer. Monport 40W LightBurn uses its own excellent cutting power to achieve some hardwood cutting. There are many kinds of wood that can be engraved, and testing your specific material is critical to getting the best results. Generally, wood with the same texture and color is engraverd more evenly. Others like fibers made of uneven fibers. Whatever you do, it usually produces poor results. Artificial wood products vary from brand to brand, mainly depending on their glue composition and content. MDF works well, but it will produce dark edges when cutting. In addition to the fire risk of any wood products, special attention must be paid to the smoke generated by glue used in plywood and other man-made wood. However, careful ventilation is required in the process of cutting such works. Monport 40W lightburn is generally equipped with a purifier for use, which can purify some smoke and toxic substances generated during the cutting process. Because the dust in some natural woods can cause nausea and heart problems, its content is high enough.
Custom Cutting Board
In addition to wood, the 40W laser engraving machine can also carve some other things, including bamboo and other engraving works. Because the Monport 40W lightburn has higher power than other diodes, it can give play to its excellent engraving ability when carving hard materials that are not easy to carve and works that need carving depth, Many engravers will use Monport 40W lightburn to engraver common household products such as cutting boards.
Wall Decor
Carving on the wall can be done with many materials. Wood is just one of the common wall decorations. There are many kinds of wood that can be engraved in Monport 40W lightburn. Testing your specific materials is crucial for obtaining the best results. Generally, wood with the same texture and color is engraved more evenly. Knot wood will produce uneven effect, while resin wood will produce greater edge contrast. Some softwoods, such as balsa, cork, and pine, work well at low or low contrast, medium power settings, and high speeds.
Cutting wallet
Leather engraving works are very common. K40 usually uses low to medium speed power when engraving such leather wallets. Pay special attention to the possibility of dust and fluorine generated in repeated application. Monport 40W lightburn will produce these leather works efficiently.
Final Thoughts
Are you ready to start production? After seeing all these laser cutting projects, your creativity must be endless! Whenever you need some inspiration to get rid of the stereotype of creation, you can use this article. Therefore, write down these works on bookmarks and often quote them! Start using your Monport to make carving more successful!
]]>
https://monportlaser.com/blogs/40w-lightburn-ready-co2-laser-engraver/setting-up-your-laser-with-lightburn-software2022-09-17T14:26:25+08:002024-07-04T14:50:53+08:00Setting Up Your Laser with Lightburn SoftwareWenting Wang
Over the years, various software companies have developed several laser software applications that can drive CO2 laser engraving machines. These useful programs convert the images in your computer into a format that the laser can understand, and finally send the data to the laser for carving. However, lightburn, such a laser software tool, has been developed and become the de facto standard, which is heard by all professionals and recommended by most people. After years of development, Lightburn software is not only a laser control system, but also an advanced design and editing tool, which can be used to create designs from scratch or transform and manipulate existing designs. Therefore, it is worthwhile to spend time learning all the functions of Lightburn software and understanding its working principle.
Monport 40W Lightburn-ready (12" X 8") CO2 Laser Engraver & Cutter with FDA Approval - 40W Basic
Introduction to LightBurn laser software
LightBurn is a laser cutting machine software that integrates layout, editing and control. With LightBurn, you can not only import drawings in a variety of common vector graphics and image formats (including AI, PDF, SVG, DXF, PLT, PNG, JPG, GIF, BMP), but also arrange, edit, and even create new vector shapes in the editor. The software has powerful functions such as offset, Boolean computation, welding and node editing; In terms of application settings, there are other functions such as power, speed, pass times, cut order, brightness and contrast, jitter mode, etc. The software can send the results directly to the laser cutter. Written as a native application for Windows, Mac OS, and Linux, LightBurn's interface is intuitive and easy to use for sculptors using different applications.
LightBurn talks directly to your laser without the use of other software. The software currently supports most controllers based on Ruida, Trocen, TopWisdom and GCode. Supported GCode controllers include Grbl, Smoothieware, GRBL-LPC, and Marlin. Available Ruida controllers include RDC6442G/S, RDC6445G, RDC6332G, RDLC-320A and R5-DSP, and it also supports Trocen controllers including AWC708C, AWC608 and TL-3120 models.
Designed specifically for lasers, this software can talk directly to your lasers without the use of other software. If your controller is based on GCode, Ruida, Trocen, or TopWisdom, it may already be supported even if it's not listed -- download the free trial and try it yourself. If that doesn't work, sometimes it only takes a day or two to make the changes needed to support a new board in these existing families. Note that it does not support the stock M2-Nano board in the popular K40 laser. The motherboard does not provide the ability to control power through software - we recommend that you upgrade the motherboard to take full advantage of LightBurn, Monport 40W LightBurn works directly with LightBurn, no motherboard upgrade is required, But if you have previously purchased another K40 laser cutter that does not work with Lightburn, upgrading the motherboard to better fit Lightburn may be necessary.
Before entering the world of design capabilities of Lightburn software, you need to connect the Monport CO2 laser engraver to a computer and make sure it can communicate with the software. Connect the Monport laser to your computer using a USB cable. The laser, though, can be plugged into a USB drive to transfer the file to the machine's control system. In addition, other advanced users can use Ethernet and IP connections. The software cannot control every laser, but it can communicate with many different types of laser controllers, all of which use different communication modes and have different functions and settings.
If you have no device configured in the software, running the software will automatically bring you here. Choosing something is important because the interface in the software will change depending on the functionality of the laser you choose. If you have done this previously but want to change the laser or add a new laser, click the Devices button in the Laser Window to display the list of devices. The software can also be configured to control multiple lasers, and Settings are stored for each device. If you do not select any of them, we will have nowhere to place these Settings, and many features in the software will not be available until they are set. On the software Devices page, you can see a list of all laser devices that have been added to the software, or a blank list at first startup. The easiest way is to click "Find my Laser" and let the software try to figure out what you have. If this does not work, your laser is connected to Ethernet or you have a Marlin device and you need to use Manual Creation.
Find my laser
On the Devices page, click the Find My Laser button and you will see this screen. Make sure your laser is powered on, is connected to your computer via a USB cable, and has completed any boot sequence (such as homing) it needs. When the laser is ready, click Next. After a brief scan, the software will list the devices it can identify.Select your laser and click Add Device.
Is your laser GCode or DSP device?
GCode equipment:
If you have a GCode controller, you will be asked if your computer is X-carve or Shapeoko, since there are specific Settings that need to be configured for these computers. If you have one, click the appropriate button, if not, click Other. You may be asked where your computer came from and if you want to go home at startup. Almost all GCode systems start from the front left.
If your machine has a homing or limit switch, enable homing at startup, otherwise turn it off. If you later see "Error: 9" in the console, you have enabled this feature but have not configured your computer to be homecatable. For some GCode devices, additional configuration of the software or controller may be required.
DSP devices:
If you have a DSP controller, the next screen will ask you for the origin of the machine. This is the corner where the machine is turned on to find the return switch. Click in the home corner. Get it wrong and things could go backwards or upside down, but rest assured that you can easily make changes later. After the laser is added, click OK on the Device page to exit.
What if you can't find the laser?
If the software cannot find your laser, it may be due to a number of reasons:
Missing driver - If your laser comes with its own software, install it. Even if you don't intend to use it, sometimes they contain the necessary drivers that the software doesn't ship with.
Unable to connect - only one application can talk to your laser at a time. If you are running other software, such as RDWorks, Easel, Carbide Create, AutoLaser, LaserCAD, make sure it is not running.
Networked devices -LightBurn cannot automatically configure networked lasers. To do this, you must click 'Create Manually' and follow the steps.
Marlin Controllers - If you are using Marlin controllers, they have a variety of baud rates and configuration options, and they take much longer to reset compared to most other controllers, so it is not practical to search for them automatically - click "Create Manually" and follow the steps.
Add the laser manually
If the software cannot automatically add a laser because it is not connected to a computer or connected through a network, you can click "Create Manually" on the Devices page. The software will open the "New Device Wizard". First, you will see the list of controllers supported by your LightBurn version: select the entries matching the controller or firmware type in your laser, and then click "Next". Then you can select manual connection.